


If explainer videos are really effective, why do so few businesses make them? You would expect more businesses to record them, wouldn’t you?
The reason businesses shy away from creating them is because they drain all your time. It can take a week to create an explainer video, but you only lose a couple of hours when you make a text version with a Google Doc or Notion board.
So, most people prefer the latter.
But what if you could create your explainer video in about as much time as it takes to create an explainer text resource?
Yes, that’s possible now thanks to AI.
While your competitors waste time scheduling the filming date, setting up the equipment, recording, and editing, your video will be ready while they are still trying to get the lighting right.
When you follow our step-by-step process below, it should take you less than 90 minutes to create your explainer video…
We compared 15 top AI explainer video tools in this article, but for this tutorial, we will use invideo to create this video, as it has workflows, AI actors, voice cloning, sound effects, and robust editing tools.
This lets you create your entire video from one place instead of switching between multiple tools. You can get an account for free here. It lets you generate full-length videos with a 1080p resolution.
After you create or log in to your account, you can follow the process below…
Choose the best explainer video workflow
There’s already a built-in explainer video workflow to make generating an AI video as easy as possible. When you log in to your account, you will see a “Make Explainer video” button below the prompt box.
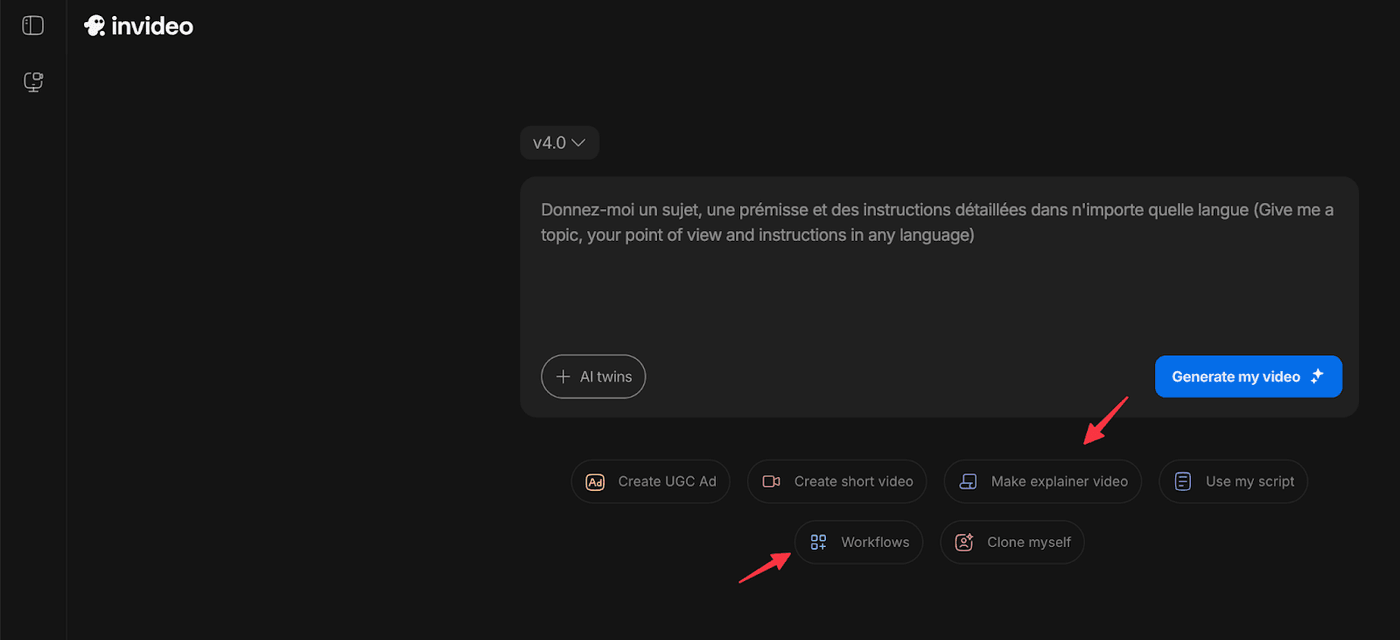
You can either click on that directly or click on Workflows and then choose Explainer video.

After you choose this workflow, you can choose the settings for your output.
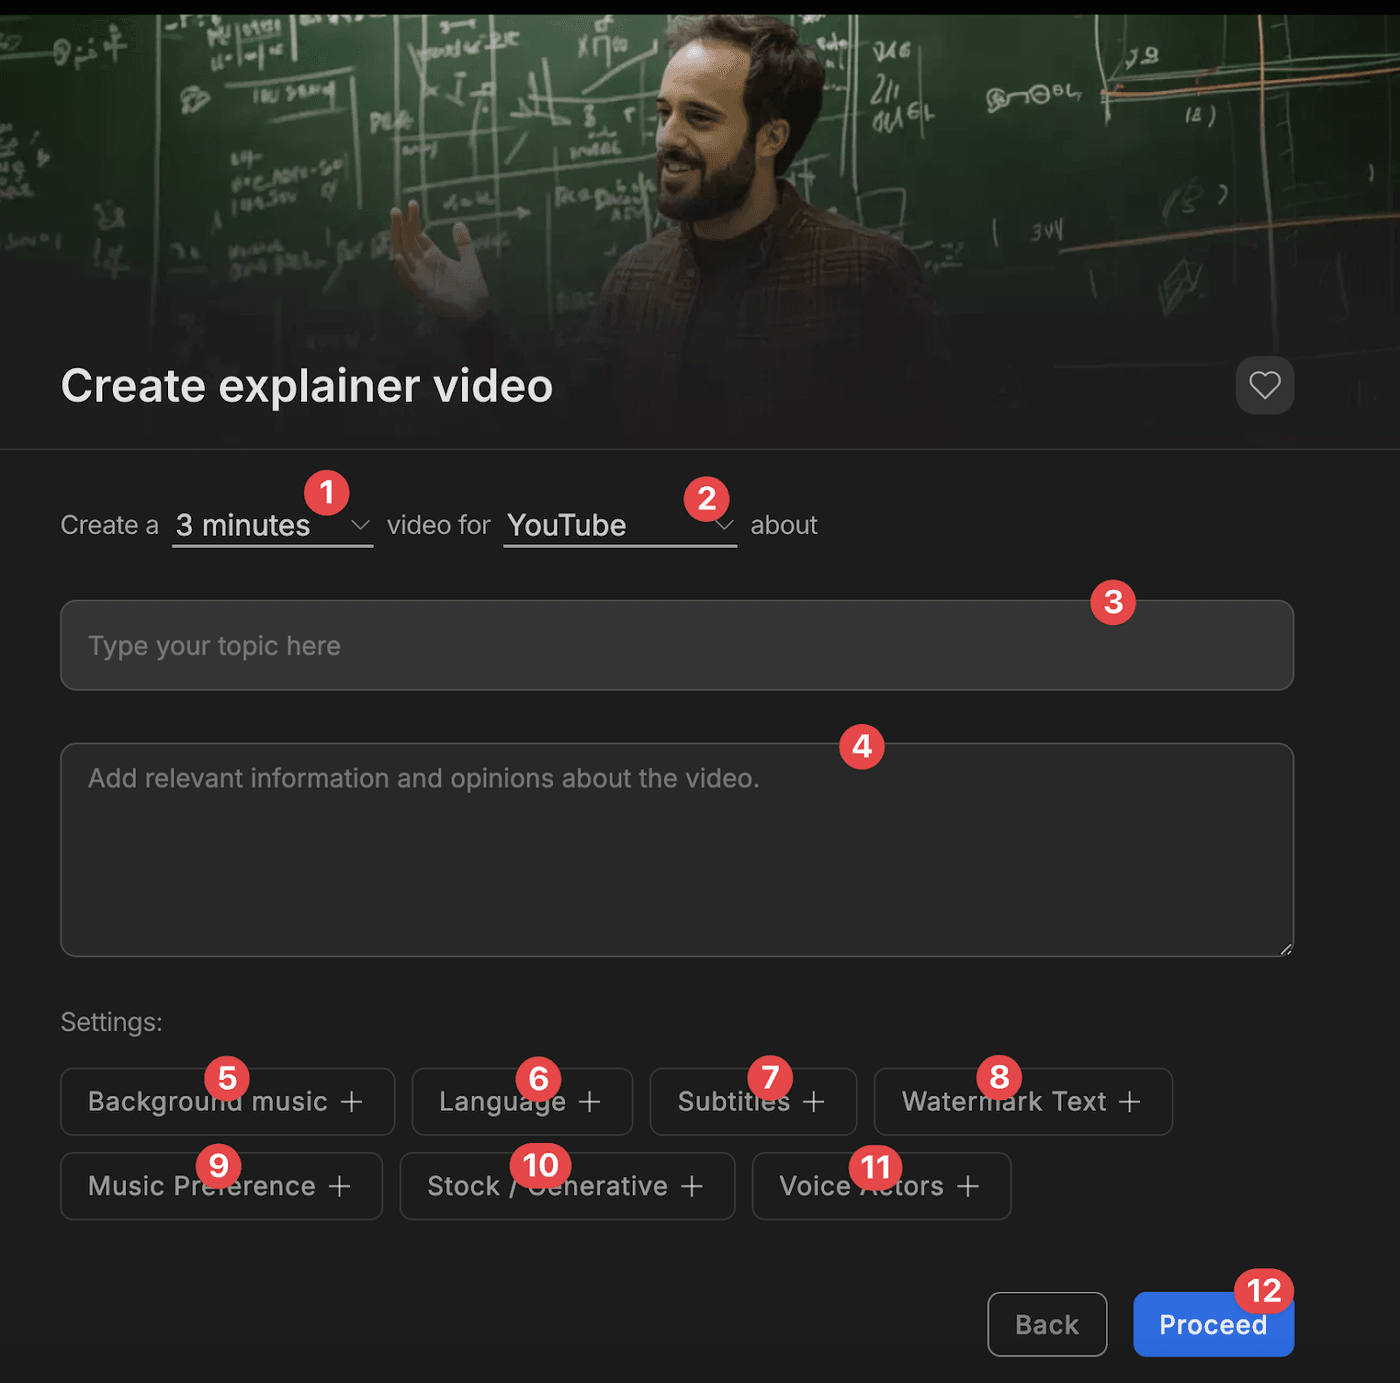
Here’s everything you can choose
-
Length: This can range from 3 to 10 minutes
-
Platform: Choose the platform you are making the video for
-
Topic: Type the topic you are making the video for in the topic field
-
Description: Add more information about the video in the description field. This will be added to the video prompt. So, describe things in as much detail as possible
-
Background music: Describe the background music you want invideo to generate
-
Language: Choose from over 50 languages
-
Subtitles: Choose whether you don’t want any subtitles or want one. You can also choose a style
-
Watermark Text: Add watermark text if you want to protect your video
-
Music Preference: Select a music preference
-
Stock/Generative: For this, choose “Only generated clips”
-
Voice Actors: For Voice actors, you can set gender, accent, and speaker number if you have multiple speakers
-
Then click Proceed
How to Prompt AI to Get the Professional Explainer Videos?
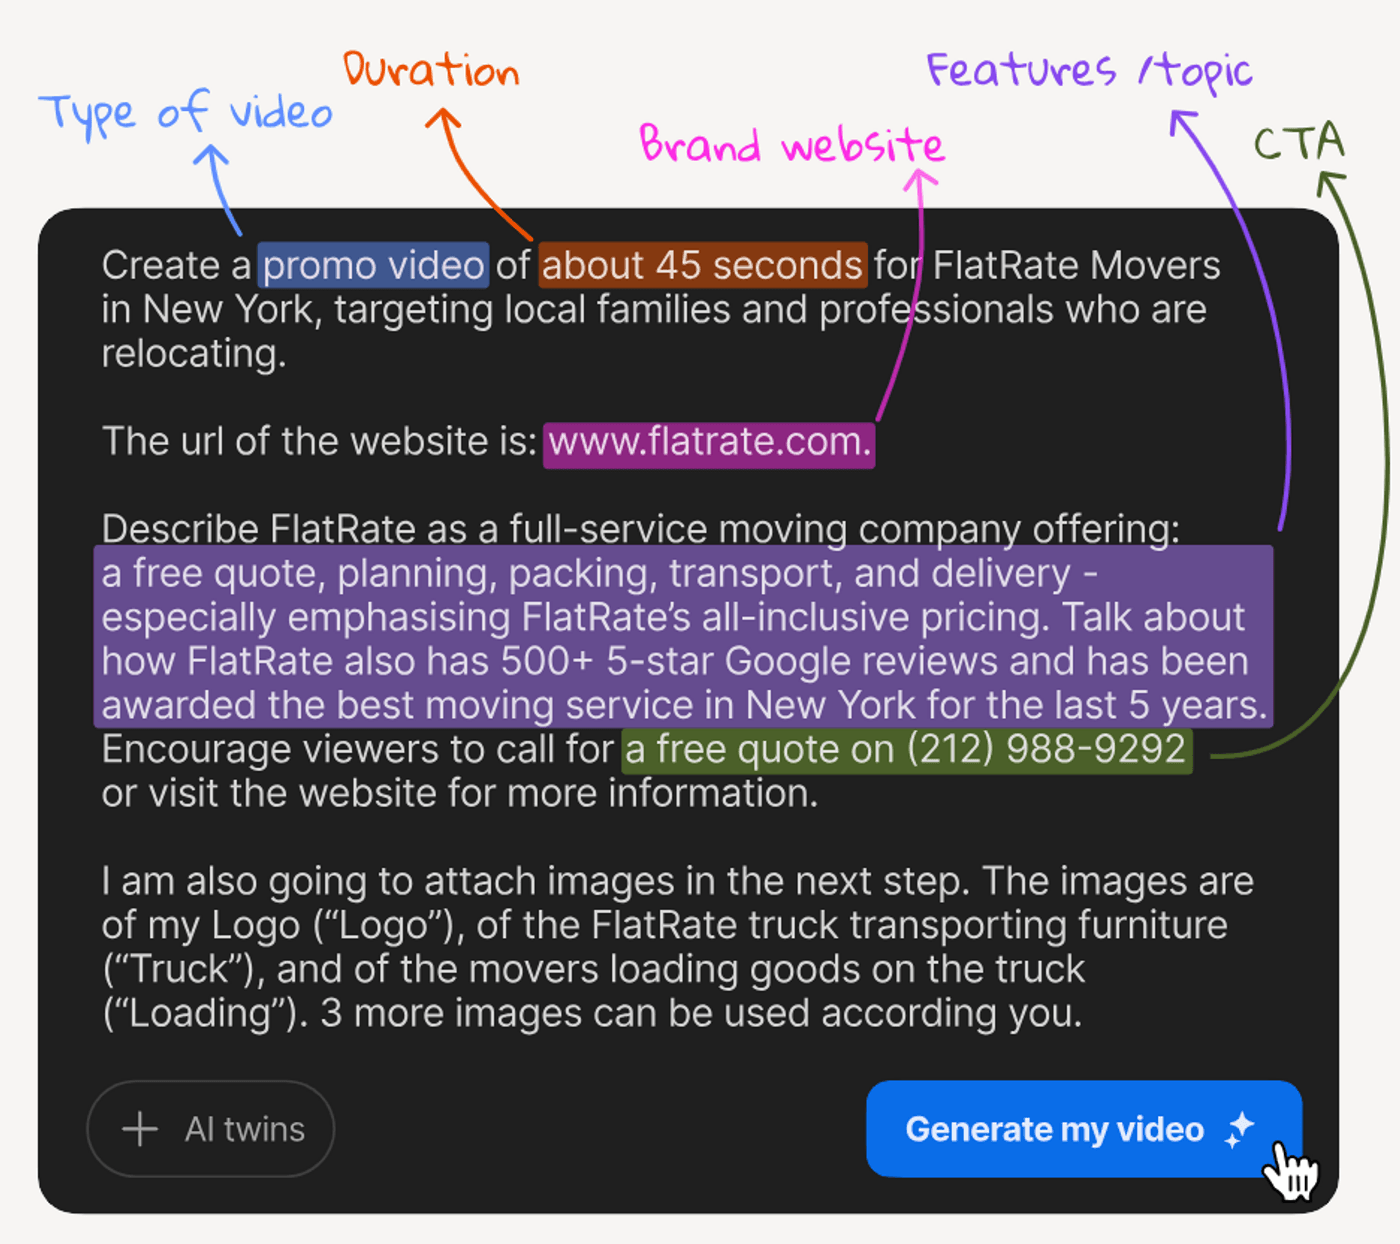
Invideo will use all the details you provided to write the prompt automatically, but we recommend that you take it a step further. The more detailed and unique your prompt is, the more unique your video will be.
Your prompt should include these basic details at least…
-
Video type: Let it know if you are creating a promo video, music video, ad, or another video type.
-
Video length: How many seconds or minutes long should the video be?
-
Website URL: Add your website URL so it can use it to learn more about your company.
-
Features and topics: If you want the video to include any product features, you should add them here.
-
Call to action: Describe the call to action you want to include in the video and give it the information it needs to get people to follow through with this call to action. For example, if you want people to call you, add your phone number.
You can also go a step further and include these extra details…
-
The Why: Why are you making this video?
-
The What: What objectives and outcomes do you want from this video? Do you just want to go viral and get brand impressions, or do you want to generate more leads?
-
The Context: Here, you give it more background information about the niche and industry.
-
The Who: What AI expert will it roleplay as? Is it a YouTube strategist, an Instagram strategist, or a video expert?
-
The For: Describe the target audience you are creating the video for.
-
The Constraints: Are there any things it needs to avoid?
Explain it in as much detail as possible using natural language. Imagine you were speaking to a video marketing expert, and you were telling them what you want the video to look like. Then type it down in the prompt box.
It’s best to do it this way rather than copying and pasting a prompt that ChatGPT or another AI gives you.
Create an AI actor (optional)
You can just publish a faceless AI-generated video, but if your content needs a face, you can easily clone your face & voice to create an AI twin.
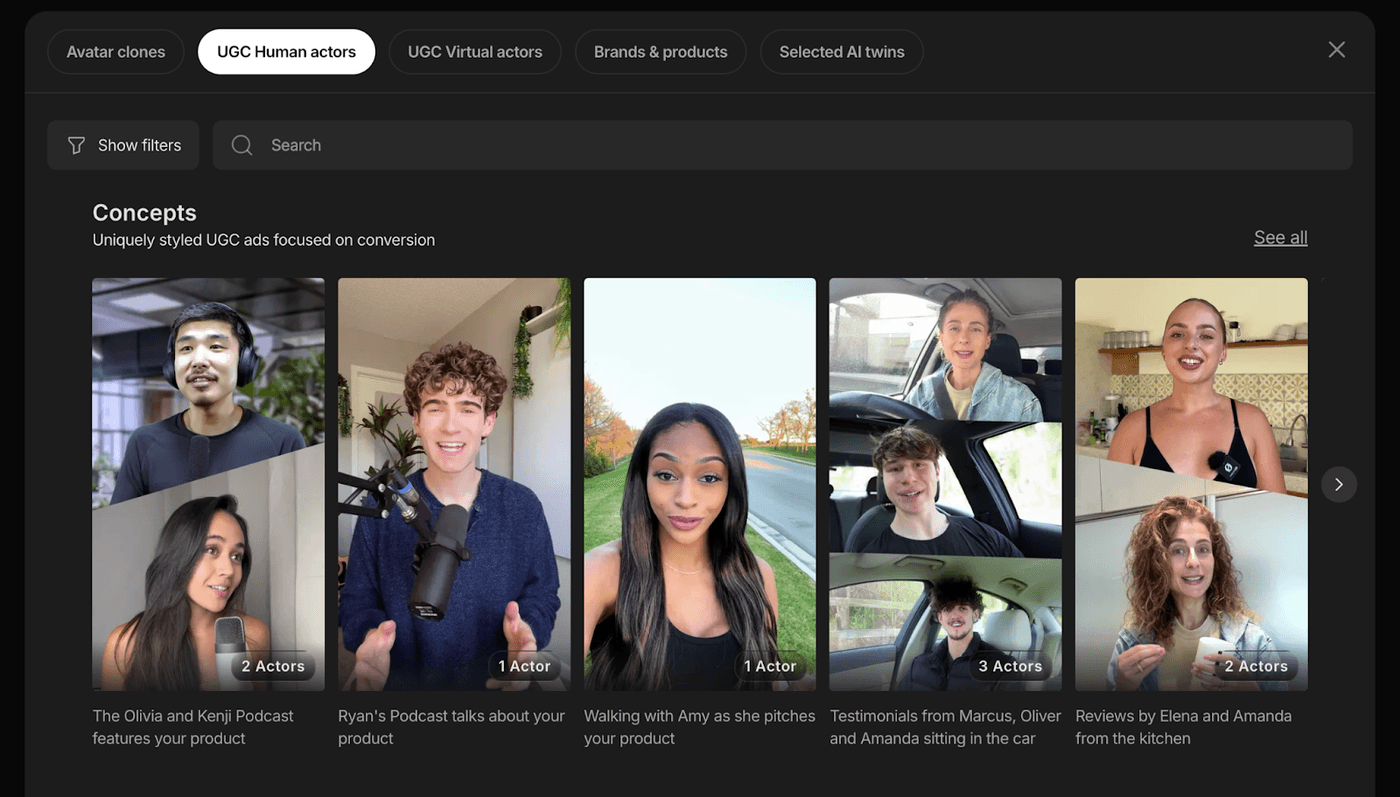
If you want to use an external person’s face & voice, you can always use one of the AI actors from the diverse library of licensed human actors.
So, how to create your AI Twin?
To create a full clone of yourself, click on “Recording to avatar” and upload a 60-second clip of you talking to a camera. Invideo will then create a clone of you that looks and speaks just like you.
If you already have some YouTube videos online, you can choose “YouTube to Avatar” and copy and paste your YouTube video to create your video.
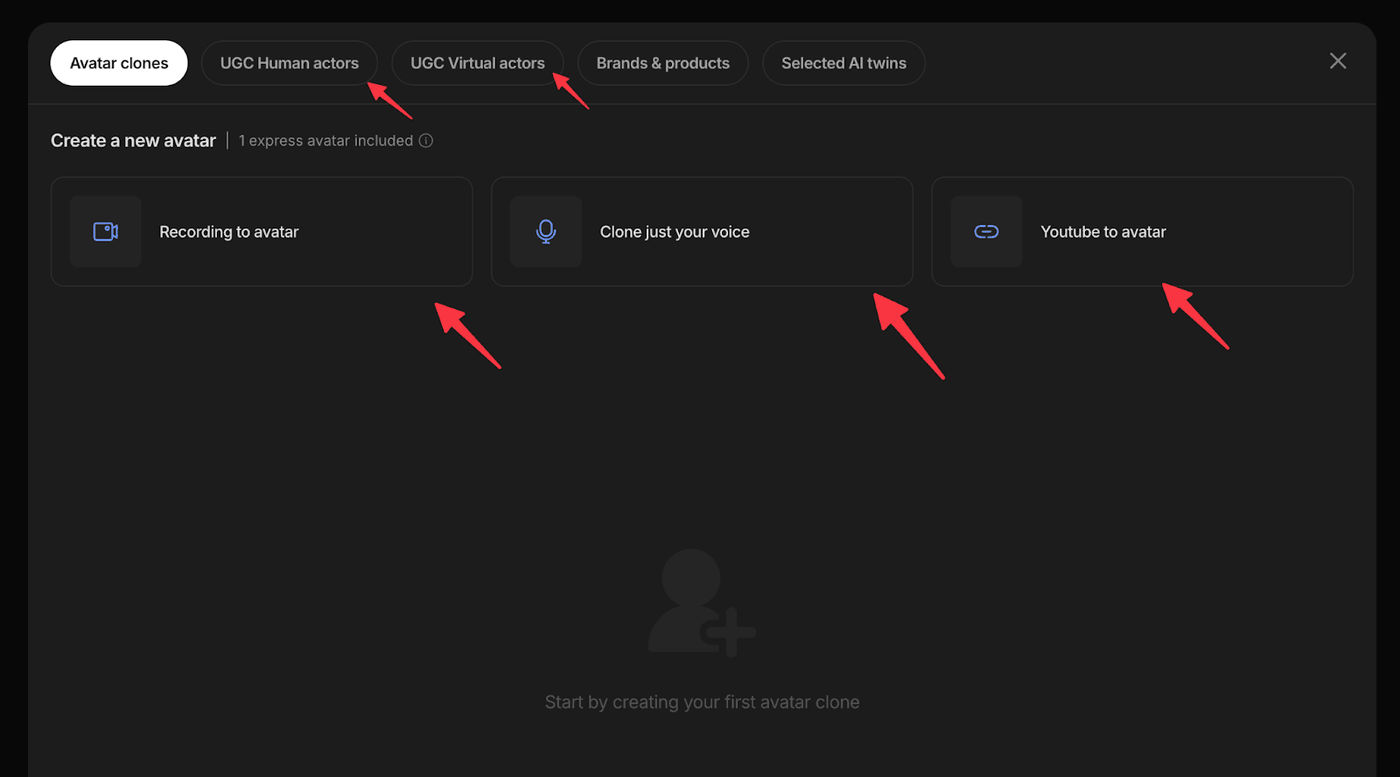
There’s also an option to just clone your voice instead of your entire self.
After you select your AI actor, enter your prompt and click “Generate my video”.
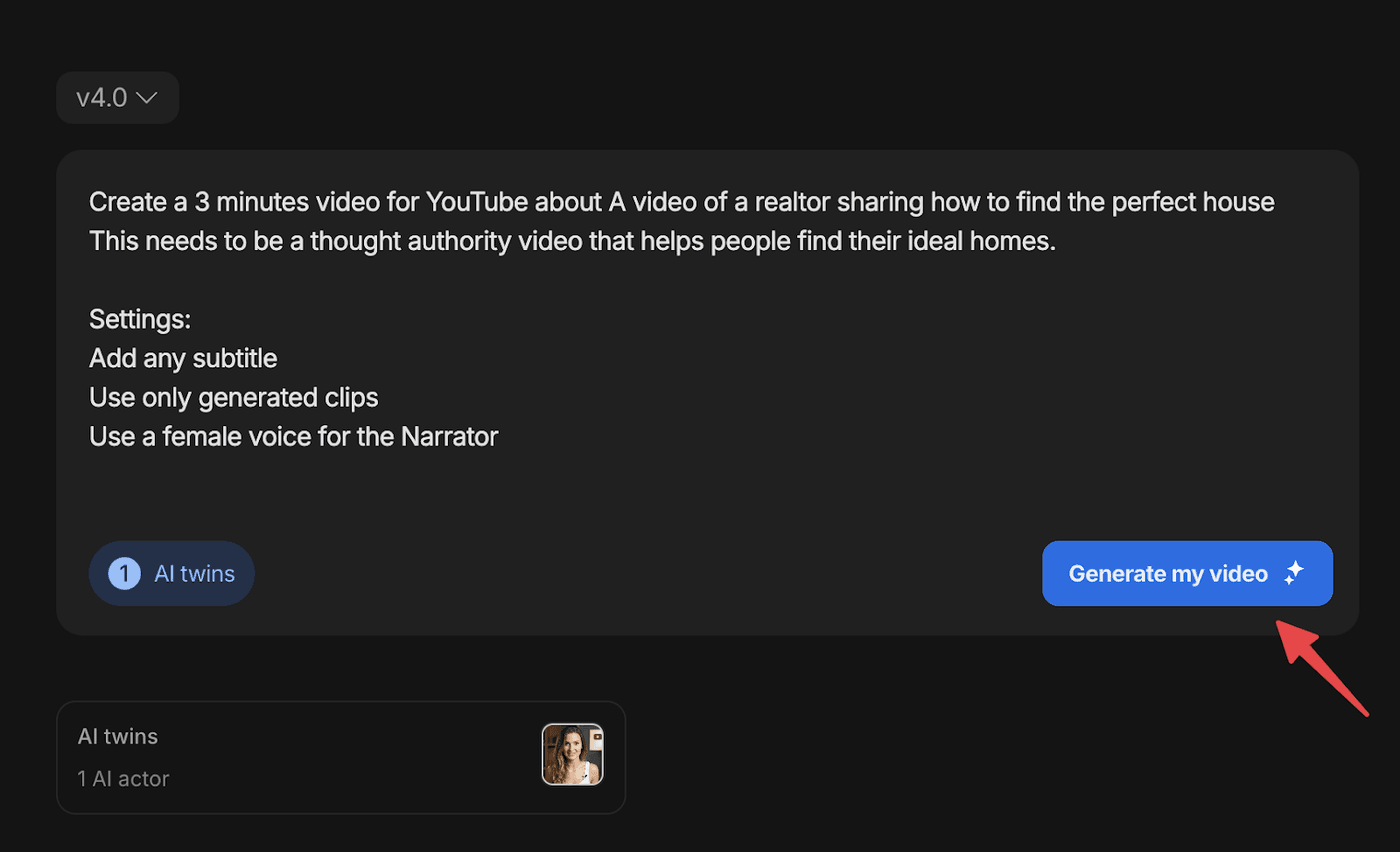
Invideo will analyze your prompt and attachments and take you to a new page where you can add additional details.
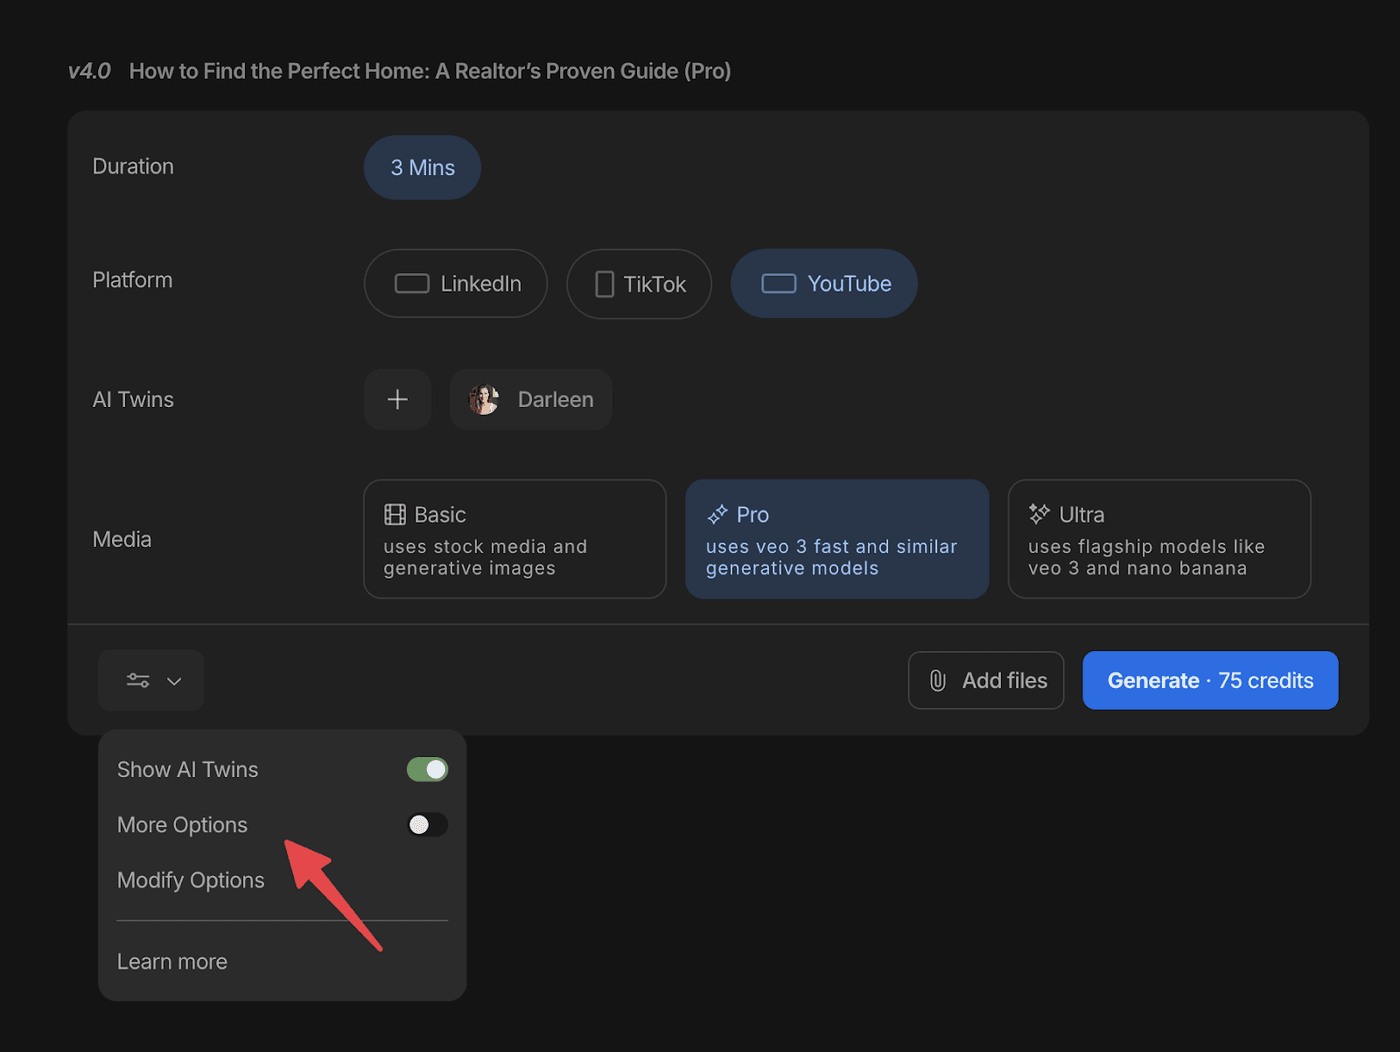
Choose the appropriate creative strategy for your top explainer video
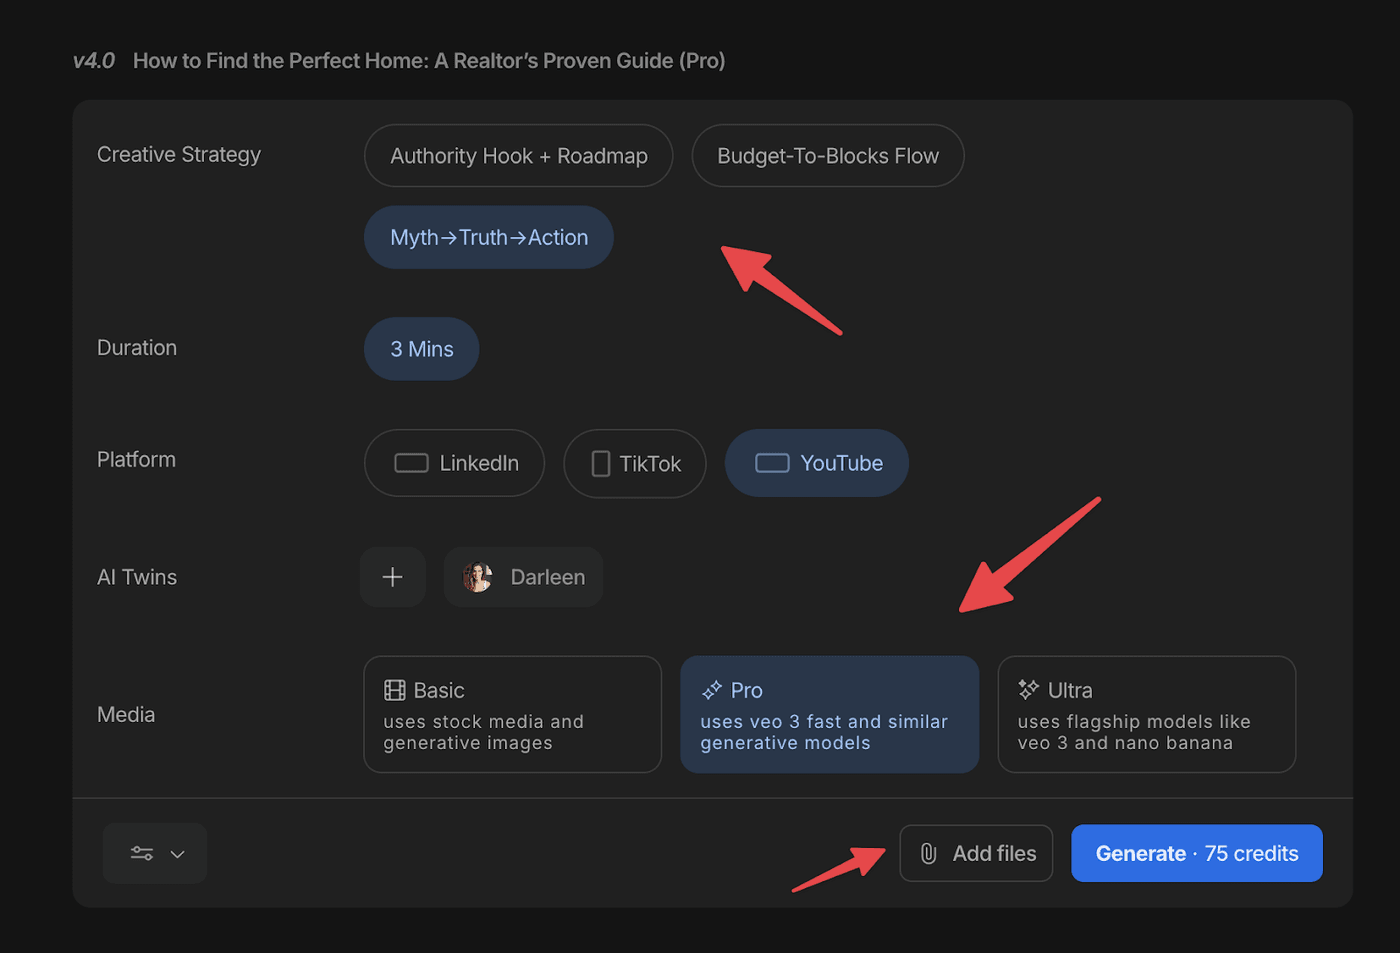
Choose the one that best suits your video. Then under “Media”, continue with “Pro” or choose “Ultra”.
You can also click on “Add files” and upload your headshot or logo. This will be used to brand your video.
Pro Tip: Ultra generates the most realistic videos with the least amount of hallucinations.
Check some viral examples:
After that, click on “Generate” and invideo will generate the video for you.
You can then play the video to make sure everything looks good.
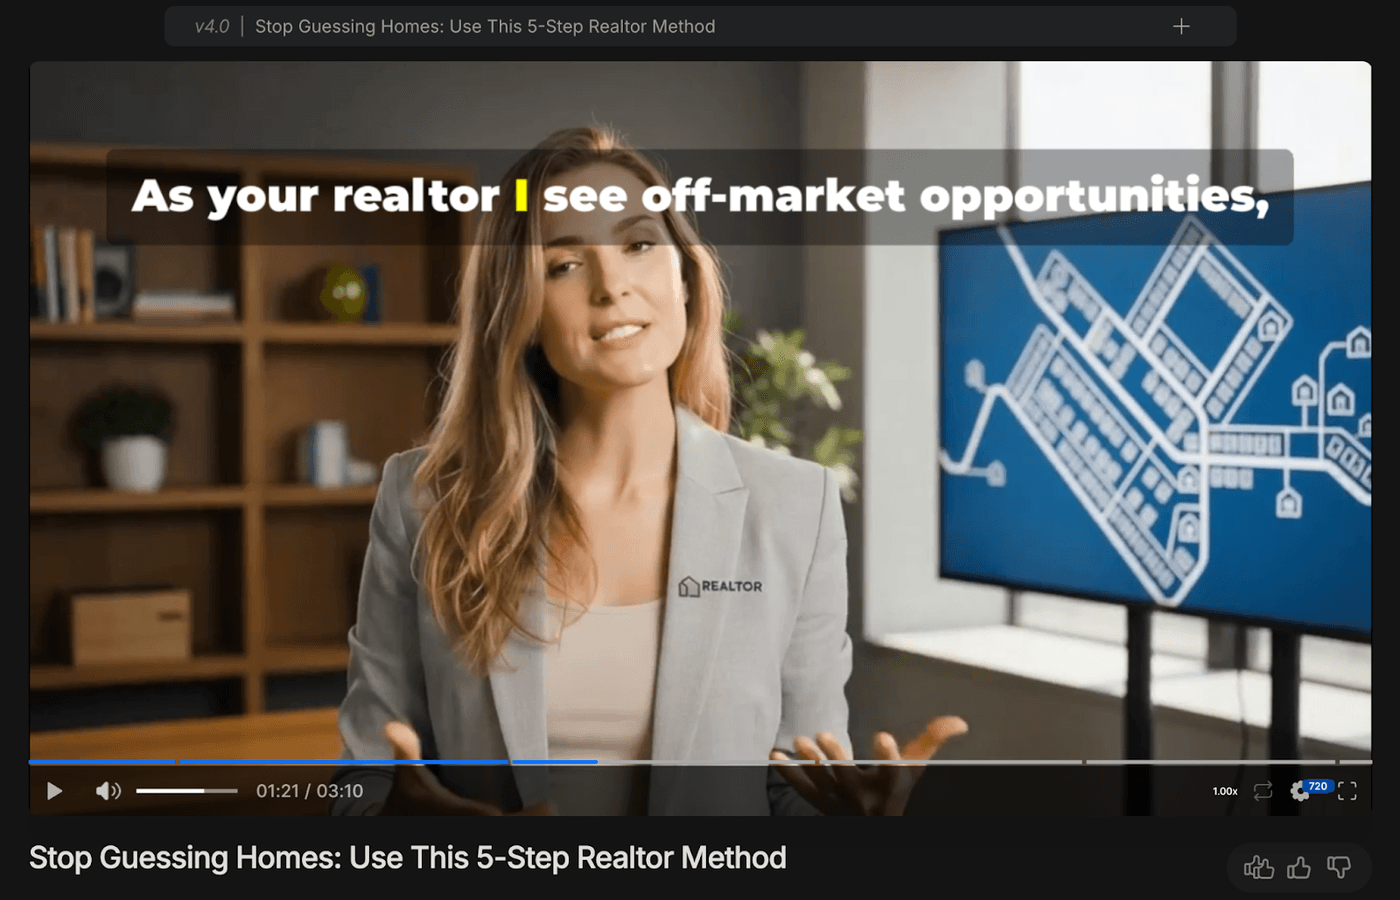
Here’s another example of a realtor showing a house created using a human actor
How to edit the AI generated explainer video?
If you’re unsatisfied with any part of the video, you can simply click on the Edit button, type the commands in the text box that appears below the video, and edit it with text.
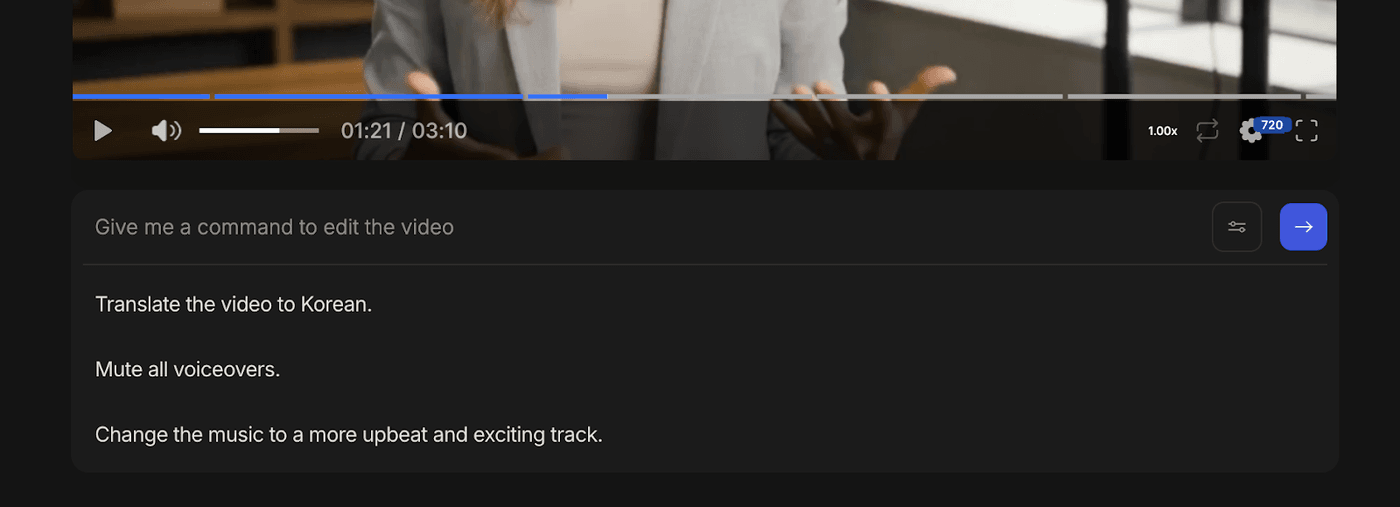
You can use commands to translate the video, mute voiceovers, change music, subtitles, and so many other things. Invideo will also keep an Edit history, so you can switch back to an earlier version if you want to.
Can we swap the media, music, and text manually?
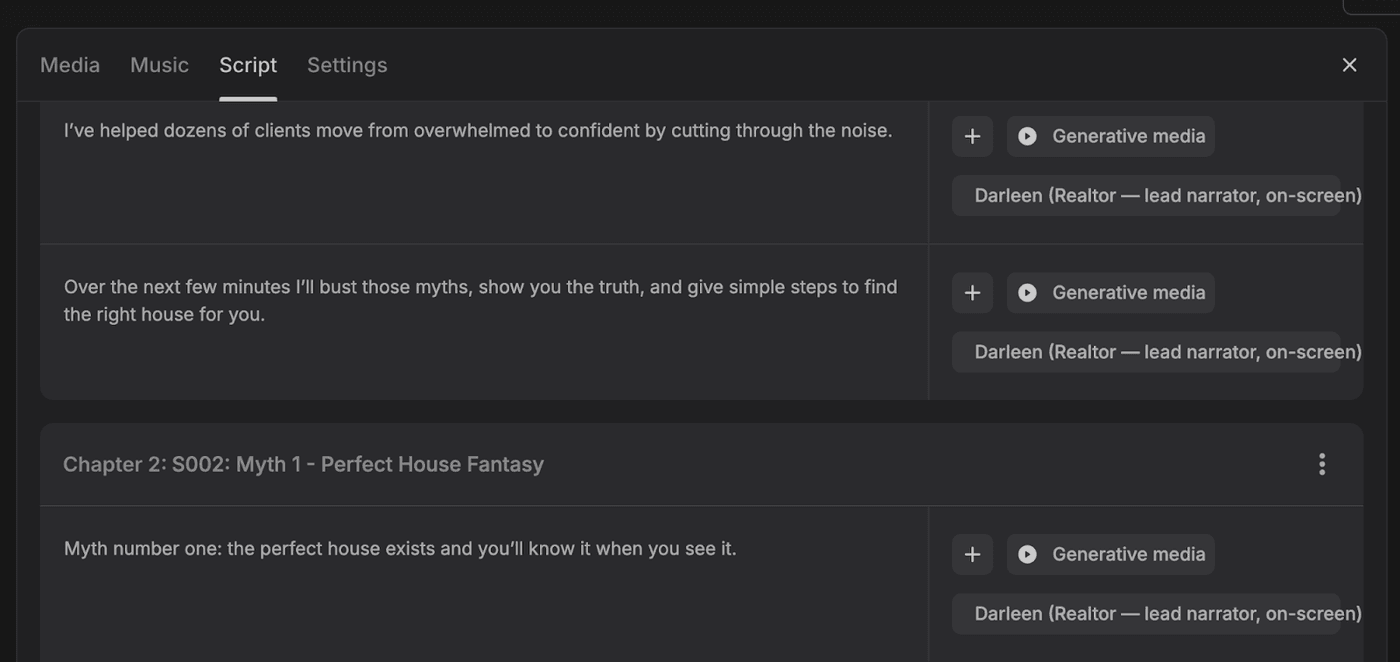
Yes, you can also manually edit the video by clicking the new “Edit” button that appears below the video.

Under the Media section, you can modify each second of the video. You can switch it with generative media, stock footage from the library, or upload your own media.
Similarly, you can generate new music, use stock music, or upload music.
And in the script section, you can edit the script by just typing. Here you can also change the character that is speaking.
Download
After you finish all your edits, you can download the video with up to 1080p resolution.

Conclusion
Explainer videos are one of the simplest ways to grow your business without breaking the bank or spending an unreal amount of effort. It's a low-hanging fruit that finds its applicability in almost all types of businesses.