


Have you ever struggled with attaching video files to emails or sending them to your friends and colleagues? You don’t have to be a pro to reduce the size of your videos, and in this article we’ll show you 5 tried and tested ways that you can use to compress your videos for free.
You can directly jump to the method that you find the easiest, or you can read along to first understand all the factors that’ll affect your video file size. Let’s get started.
- Factors affecting video file size
- Method 1: Reduce resolution
- Method 2: Download the file in lower quality
- Method 3: Compress into zip file
- Method 4: Send as a link instead of uploading
- Method 5: Trim the video
Factors affecting video sizes
1. Resolution
Resolution refers to the number of pixels in your video. It’s usually represented as a horizontal x vertical measurement. For example 1080p or native HD resolution is referred to as 1920 x 1080. If you want to shrink your video file size for email, you can just change your video resolution. High resolution videos have greater pixel density, and therefore better quality.
However, this also means higher file sizes. By bringing the resolution a notch lower, you can reduce the file size significantly without affecting the quality of the video drastically. When reducing video file size for email, you can compress your videos to a 720p 0r a 480p. But if you are uploading your video to Google Drive or any other cloud service, you can go with the 1080p or higher resolution!

2. Bitrates & FPS
Another important factor in deciding video size happens to be the bitrate. Bitrates measure how much information is transmitted every second in Mbps or Kbps. Video bitrate depends on the frames per second that are coded into a video. FPS or frames per second refer to the frequency at which independent still images appear on the screen per second. For example, if your video is 24 FPS, it means there are 24 images in 1 second of footage to produce an animated material.
Higher frame rates will cause slightly larger videos. 24-30 is the standard frame rate that is used across files of different sizes. Higher frame rates exist as well, but it’s advisable to use the standard (24-30) when compressing videos for emails or social media. You can reduce the FPS and bitrate while rendering a video in order to make the file size smaller. You can even change the FPS when compressing your video on ShotCut in order to get a smaller file size.
Usually, it’s smarter to use a variable bitrate so that your video can be viewed in higher or lower resolutions by the viewers, especially if you are uploading it to YouTube or any cloud sharing service. Check out how to set a variable bitrate while downloading your video here.
3. Encoding
Video encoding converts a given video input into a digital format that is compatible with most types of Web players and mobile devices. In the most basic sense of the term, video encoding is compressing video files so that they are not saved as individual images but as a fluid video. Video encoding utilizes 2 different parts – the codec and the container. Below are some basics about codecs and how they compress files.
- The codec refers to the code used to compress or export the video (MPEG, ProRes), etc.
- The container here refers to the file type that the video is transmitted to or saved as (MP4, FLV, etc.).
- Several types of video codecs exist including MPEG4, Quicktime, ProRes, or WMV. These codecs compress data automatically when a file is saved as a certain format or file container (such as AVI or MP4).
- Most of these perform “lossy” compression – meaning they remove some data to make the video smaller (thus affecting its quality).
- We also have “lossless” codecs that are said to compress videos with minimum loss of data and quality.
When it comes to compressing videos for email or social media, using the MP4 format is the most recommended. You can directly choose this format while rendering your video or even convert your video to MP4 while trimming it in order to reduce the file size.
Now that we know the science, let’s check out the different methods to compress your video files for email or social media.
Method 1: Reduce Resolution
Usually speaking, higher the resolution, sharper the video quality. Inversely, lower the video resolution, smaller your file size. Which is why this is one of the most effective ways to compress a video. Generally speaking, HD videos are 1920 x 1080 pixels. If you’re wondering how to compress a video for email or for sharing online, you can compress your video to 1280 x 720p or 854 x 480p. Also note that making a video smaller – that is going down from 1080p to 720p will not make a big difference to the viewer. In fact, you can even go down to 640 x 360p if needed. If your video is heavy on graphics and animation, it is advisable to not go below 480p. Here are some common tools you can use to reduce video resolution:
(1) VLC
1. Download VLC Player if you do not already have it. Once downloaded, install and open the VLC player.
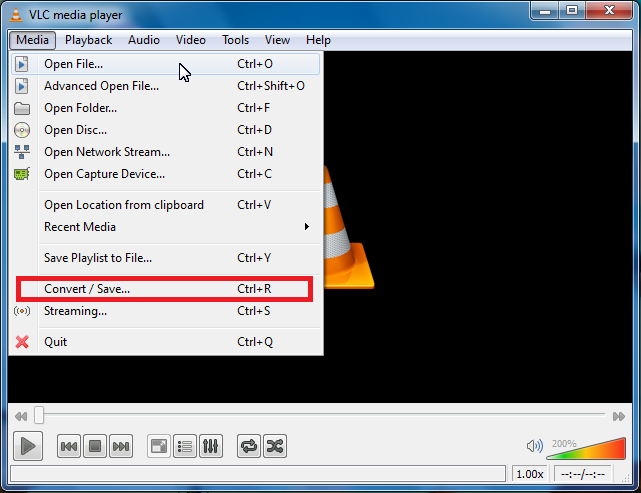
2. Click Media > Convert/Save
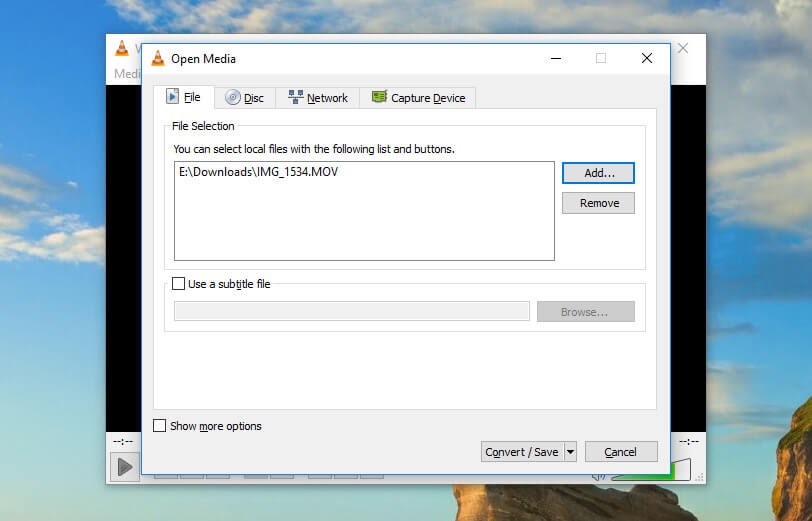
3. Click Add to select your video file (or multiple files)
4. Click Convert/Save to bring up a list of conversion options. You can select your preferred type in the profile dropdown
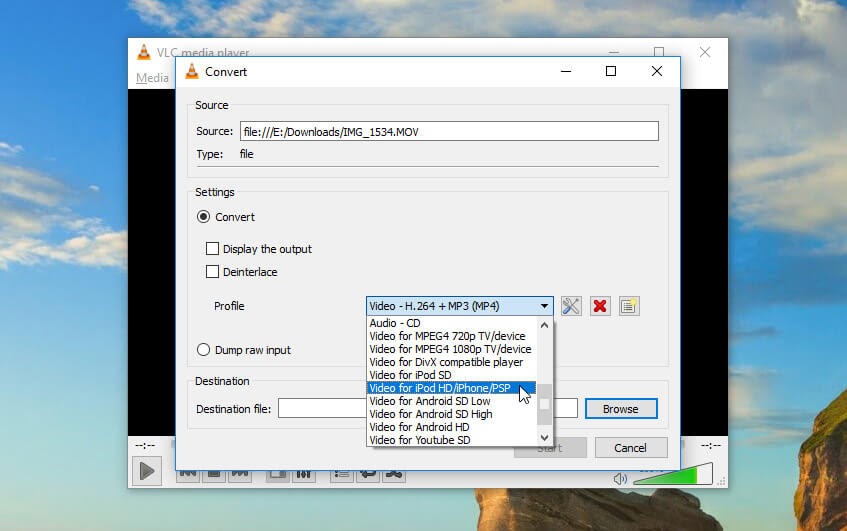
5. Select your conversion option (the software offers useful suggestions such as YouTube HD or Video for MPEG4 1080p TV/device)
6. Once you’re satisfied with your selections, simply hit Save, select your destination location (on your hard drive or cloud storage), and then click Start.
(2) Shotcut
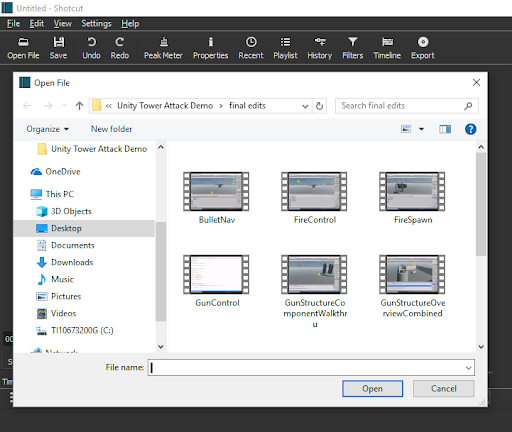
1. Download Shotcut and install it. Once done, open Shotcut and click Open File to open your video
2. Click Export

3. You’ll next see a large list of compression options – select your preferred option
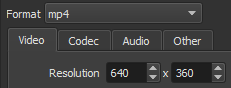
4. You can use the Resolution and Aspect ratio fields from this screen to further reduce video size and proportions (it won’t automatically adjust your video’s aspect ratio for you)
5. Click export video
(3) QuickTime (Especially for Mac users)
1. Click File to open
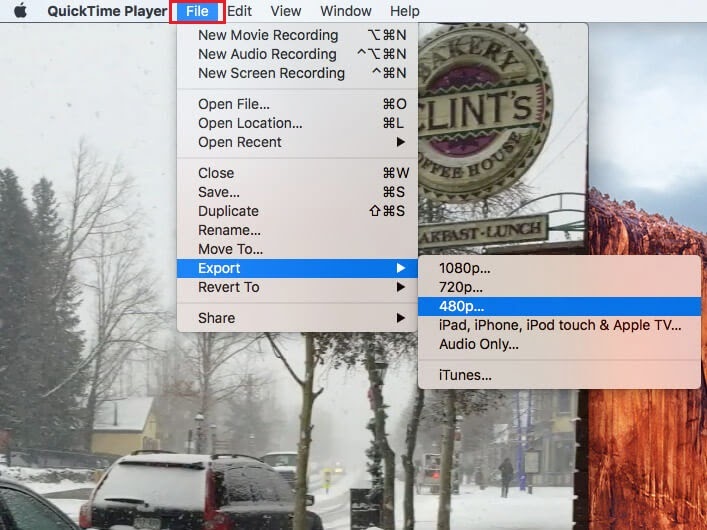
2. Click Export As
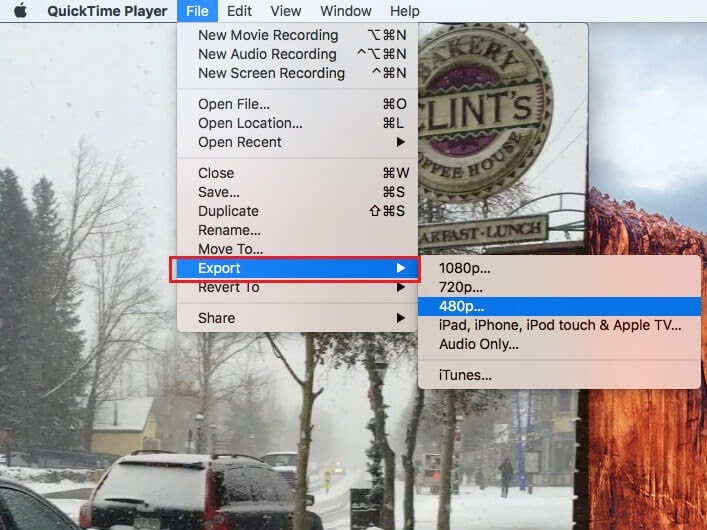
3. You’ll next get a list of options, but you’re limited to just four: 4k, 1080p, 720p, and 480. To compress your file, select a smaller file format than the original file.

Method 2: Download the file in lower quality
When you want to share a video via email, one of the simplest things to do is downloading the video file in lower quality, or low resolution. You can do so right from the editing software.
If you’re using Adobe Premiere Pro to edit your video, here’s a tutorial to help you figure out how to reduce file size right before render/ export.
If you’re using Final Cut Pro to edit your video, here’s a tutorial to help you figure out how to reduce file size right before render/ export.
There are a few key pointers you can keep in mind while doing this:
- Downloading/ exporting your videos in the MP4 file type usually helps keep quality and reduce file size.
- Exporting at 720p or 1080p resolution will work for most people. But mostly, export at a suitable resolution for your project – depending on the viewer’s screen (again a 720p or a 1080p are good resolutions for most screens).
- Adding a lot of movement or even transitions will cause your video file to be larger.
- Compress your audio on export. It’s rare to need uncompressed audio in most video projects. Find out how you can compress an audio file.
- As mentioned before, higher frame rates will cause slightly larger videos. This is why it is smart to use the frame rate that is right for your project. The standard frame rate that is used across files of different sizes is 24-30fps. Higher frame rates exist as well, but it’s advisable to use the standard (24-30) when compressing videos too.
Method 3: Compress into a .zip file
One of the most used and quick ways to reduce video file size for emails is to .zip it! This ensures that the file size is reduced while the quality largely remains the same. Many have observed that the file size is not reduced significantly. Nevertheless, this is one of the most efficient methods to share a video file, especially combined with Method 4 that we’ll talk about shortly.
How to zip a file on Windows
1. Right click on the video file.
2. Choose Send to>Compressed>Zipped Folder
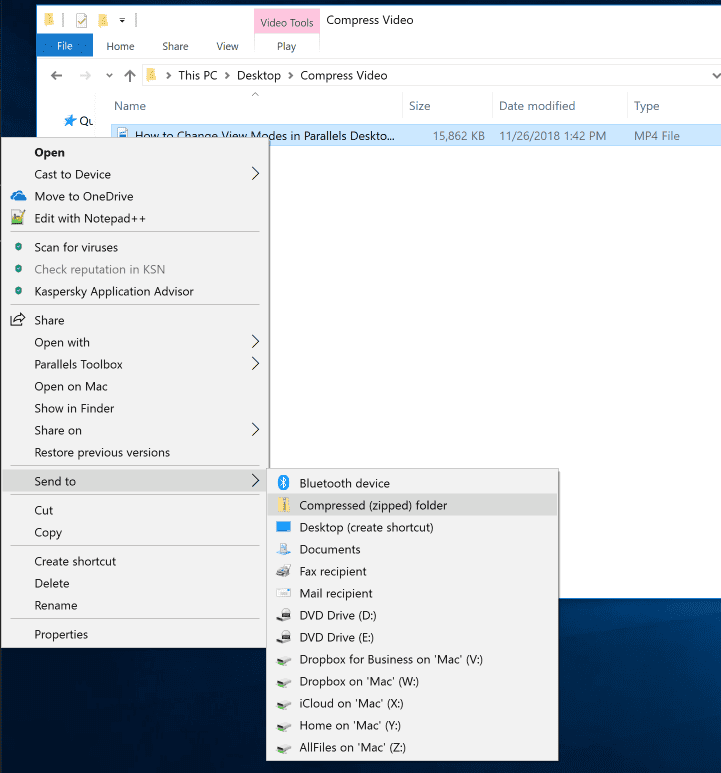
3. Follow the steps and the file will get compressed
How to .zip a file for Mac?
1. Right click on the video file.
2. Choose>Compress (file name)
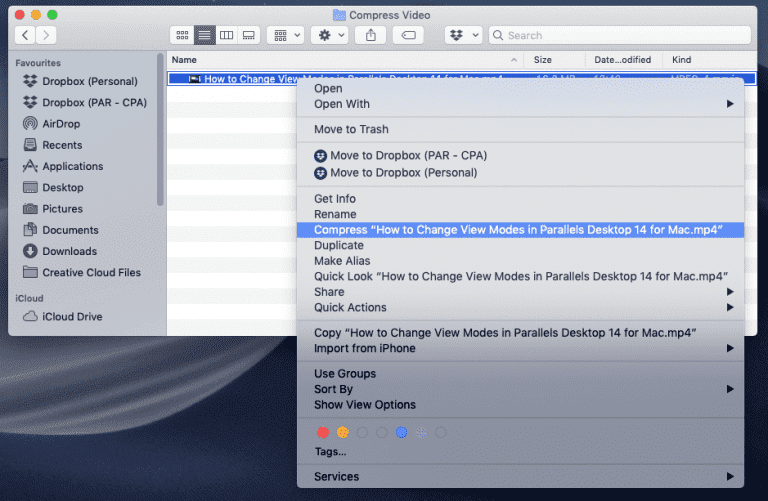
3. Follow the steps and the file will get compressed
Method 4: Send as a link instead of uploading
Despite compressing your file or creating a .zip folder, you will find that some video files can still be too heavy to attach to emails. Here are two workarounds that you can use to be able to send your video files via emails. If you want to reduce your video file size and share it without losing quality, a great option available to you is hosting or uploading your video online. Here are a few places where you can host your video and share it seamlessly:
1. One of the most effective ways to send these files then is to upload them to a cloud service. You just need to drag and drop your file to Google Drive, Dropbox, or OneDrive.
2. You can also upload your compressed file to a file sharing service like WeTransfer or an Android App like ShareIt.
3. Finally, you can upload your video to YouTube and tag it as ‘unlisted’ or ‘private’ and share the link with your collaborators.
Method 5: Trim your video
Sometimes, you may just want to share a small clip from your video with collaborators or clients. Perhaps you have a really large video and you just need to share a small portion of it via email. In this case, you have the option to trim your video. You can cut out only the relevant part of your video that needs to be shared and send it off to your collaborators or clients.
You can trim your video using built-in editors such as iMovie or QuickTime on your Macbooks or Windows Movie Maker on Windows OS. But a much more convenient way to do this completely free online is via InVideo’s free trimming tool. What’s more, you can upload your trimmed video to social media or start editing it right away from the InVideo editor.
How to trim & compress your video using the InVideo Free Editor
Step 1: Open InVideo’s trimming tool and click Upload your video to start. The trimmer will now ask you to upload your video.( You can upload videos up to 800 MB.)

Step 2: Now, the trimmer opens and all you’ve got to do to trim your video is to drag the sliders on both ends to the desired timestamps. You can also enter the in-time and out-time to trim the video to the desired length.
Step 3: Once you’re satisfied with the trimmed portion of your video, choose the output format and click Done.
Step 4: Next, you’ll be prompted to sign up or sign in to InVideo (if you haven’t) to download the video. To sign up, simply add your credentials and you can download the video in a few seconds.
Step 5: Once you’ve signed up, you can either download your clip or take it to the editor by clicking Open in Editor to add text, filters, and other cool edits to your videos.

Summing up
So these were the 5 ways you can use to compress your videos and reduce your video file size for emails and social media platforms.
If you found this article helpful, please share it with your friends and team members, and if you’re looking to create thumb-stopping videos in minutes (even if you’re not a PRO)- sign-up for a free account on InVideo.io.
This post was written by Upasna and edited by Abhilash from Team InVideo