
Let's say you've shot a great video and now want to trim it or cut a part out of it and combine the rest of the footage into one seamless video.
If you've never edited a video before, learning how to trim a video on a complex editing software such as Adobe Premiere Pro takes effort and can be time consuming.
Hence, we've put together this guide, where we'll show you the easiest ways for you to trim videos in minutes, even if you've never edited a video before.
Here's what we'll cover:
1. The easiest way to cut and trim a video online
2. How to cut and trim a video on Mac?
3. How to cut and trim a video on Windows?
4. How to cut and trim a video on an iPhone?
5. How to cut and trim a video on Android?
1. How to trim a video online in minutes
You don’t need pro editing skills to know how to trim a video, nor do you need to spend a lot of time looking for the perfect tool. You can use an online video editor like InVideo to cut parts out of videos and trim your videos. Here’s how:
Step 1: Open the InVideo trimming tool and simply click on Upload your video to start. A prompt window will open for you to choose the video you want to upload.

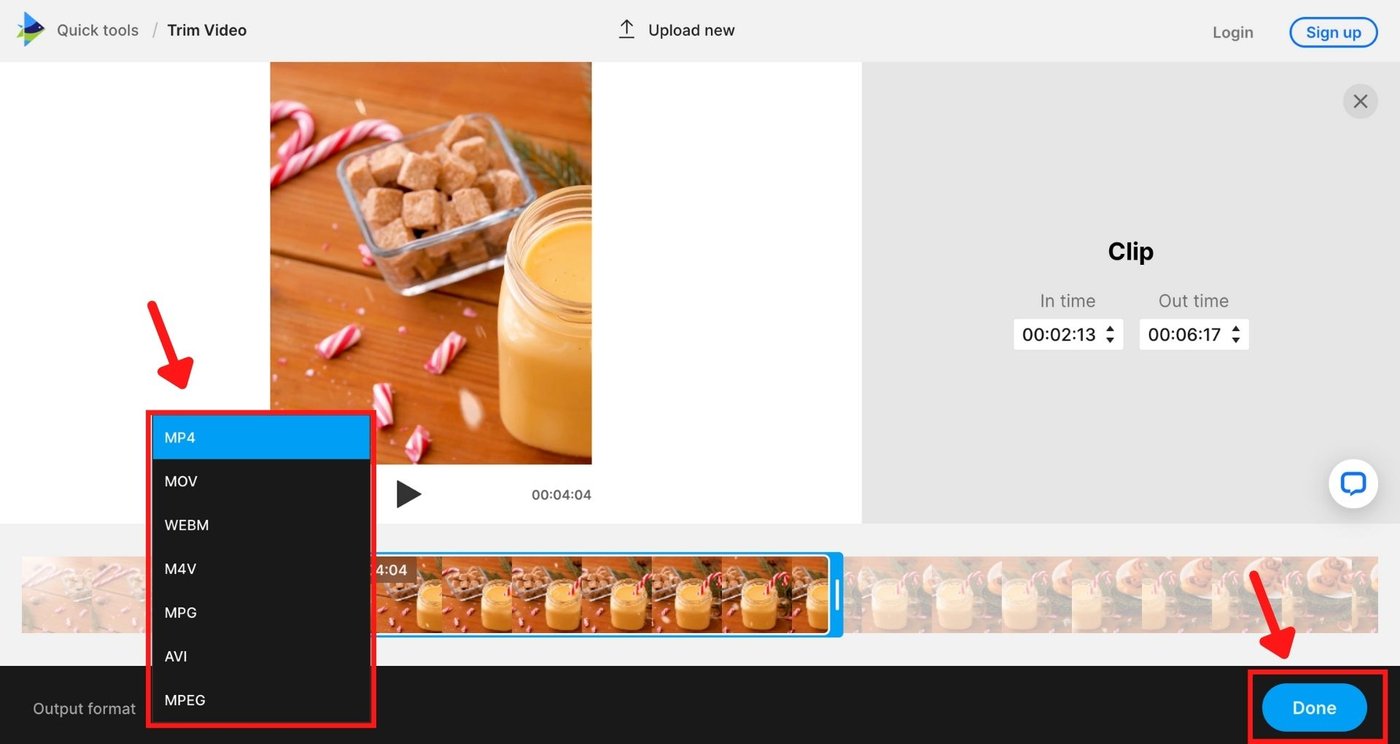
Step 2: Once you choose the video, you will be taken to the trimming area and all you need to do to trim your video is to drag the sliders on both ends to your desired timestamp.

Step 3: Once you’re happy with your trimmed selection, choose your output format. We have mp4 for this video and just click done.
Step 4: In order to download your video, you will have to Sign Up to InVideo or sign in using your existing account. Simply fill in your credentials and your video will be ready to download in a few seconds.

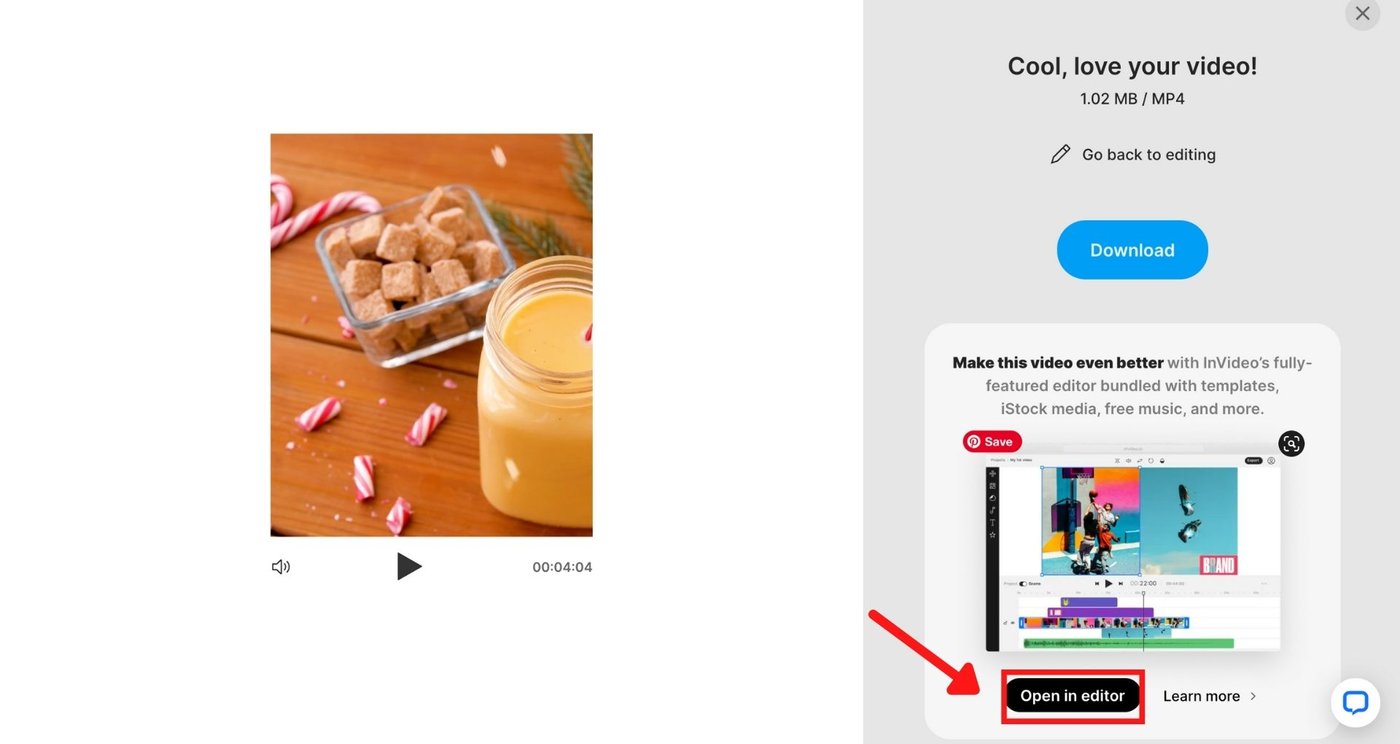
Step 5: After you sign up, you can choose to download or you can take it to the editor by clicking Open in Editor to add text, filters, and to make other cool edits to your videos.

2. How to cut and trim a video on Mac?
iMovie on Mac is one of the most compatible and efficient ways to cut parts out of videos and trim your videos without compromising quality. The software is mostly pre-installed in Mac, but if not, you can always download it from the App store.
Here’s how to trim a video on your Macbook:
Step 1: Open the iMovie app. Click on “New Project” then “Movie,” and upload the video you want to trim.

Step 2: Drag the video to the project timeline at the bottom.

Step 3: Use the slider to trim the beginning or end of your video.

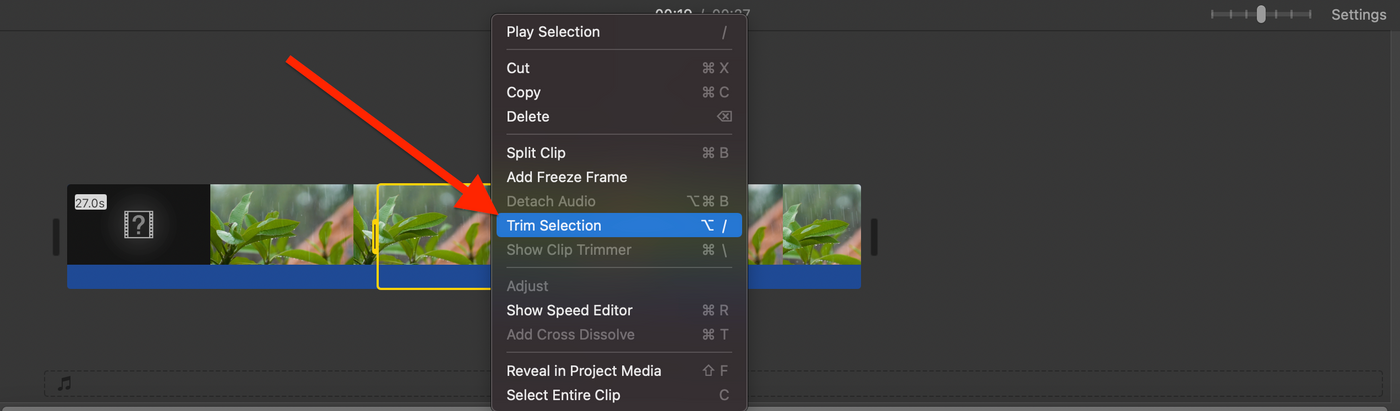
Step 4: If you want to cut a part of a video right in the middle, navigate the playhead to the point from where you want the clip to begin. Press the “R” key and drag it to the endpoint.
Step 5: Right click on the selected part and click on “Trim Selection”
Step 6: If you want to split your video into two parts, take the playhead to the point from where you want to split the video. Right click and select “Split Clip.”
Step 7: Now your video is in two parts. Repeat the process till you have the clips you need, and press “Delete” for the clips you don’t want. Here, you can also re-arrange the sequence of these clips through drag-and-drop.
Step 8: Once you’re done trimming the video, click on the export icon on the top right corner and download the file to your Mac or share it through email or on YouTube and Facebook. The trimmed file will get saved to your default location.

3. How to trim a video on Windows
You don’t need any special software to trim a video on your Windows laptop. The in-built Photo app editor can do the trick for you.
Follow this step-by-step process for trimming your video on Windows 10:
Step 1: Find the video you want to trim, right-click and select Open > Photos app.
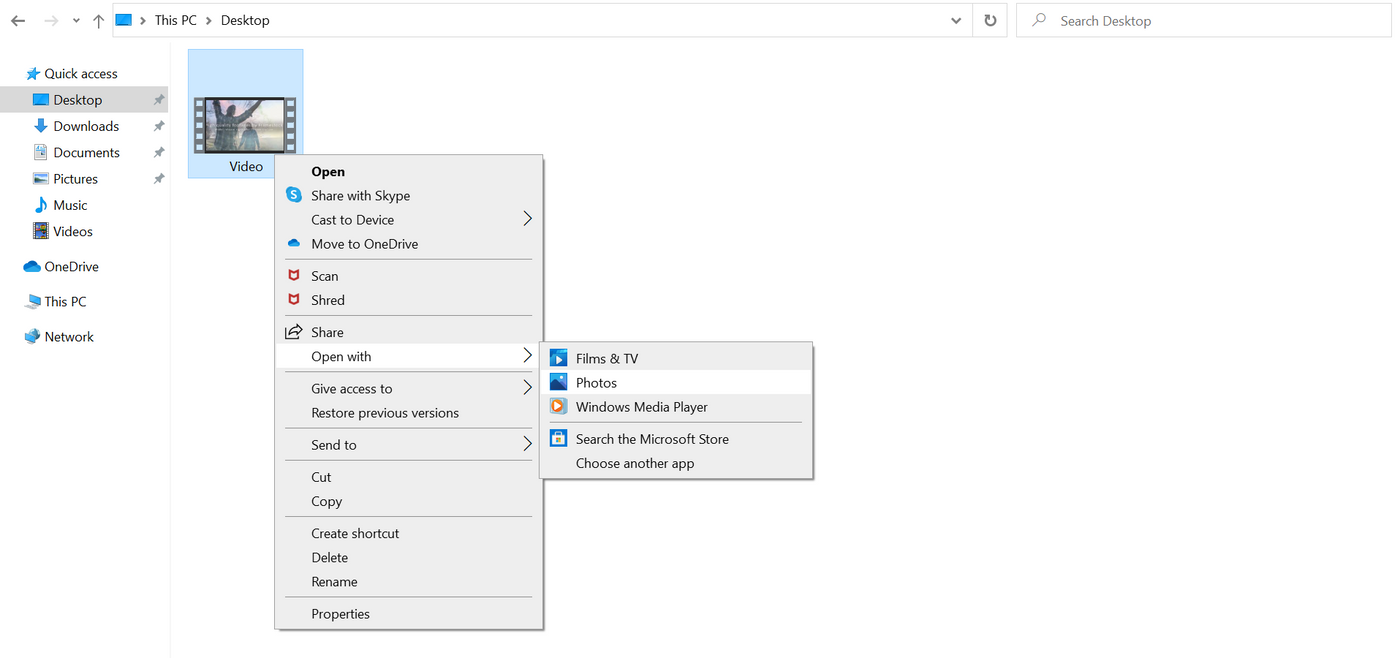
Step 2: Once the video opens, click on Edit & Create > Trim.
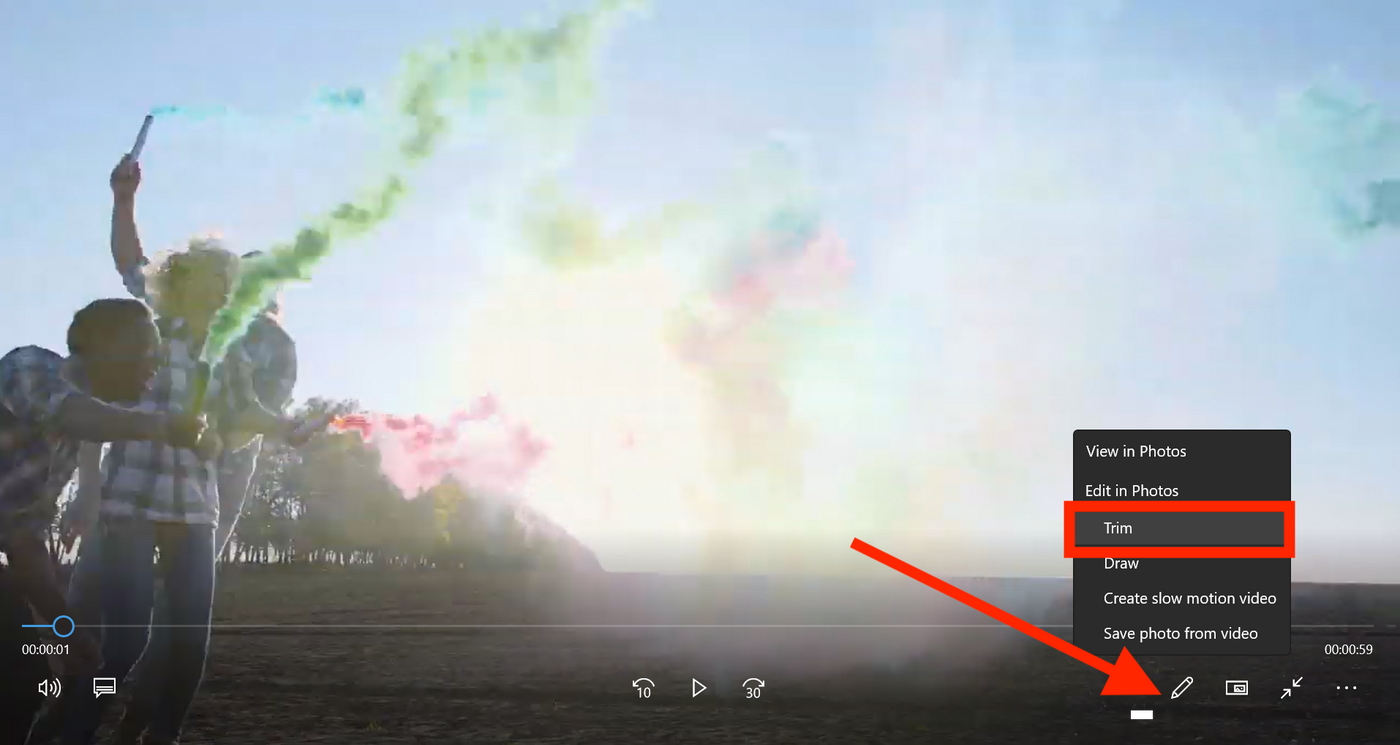
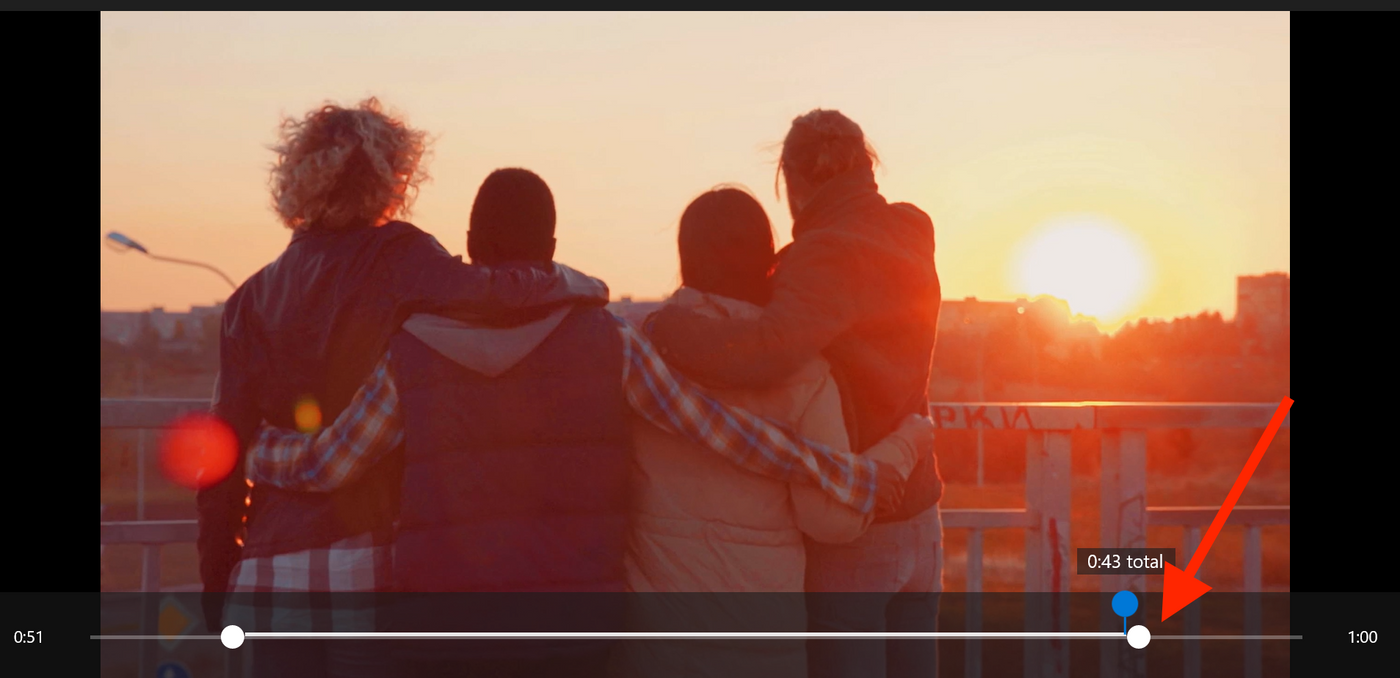
Step 3: Trim the beginning or end parts of your video using the white slider at the bottom to make your video shorter and remove unnecessary start and endpoints. The blue slider will show you timestamps if you want to cut a part out of a video from a specific section.
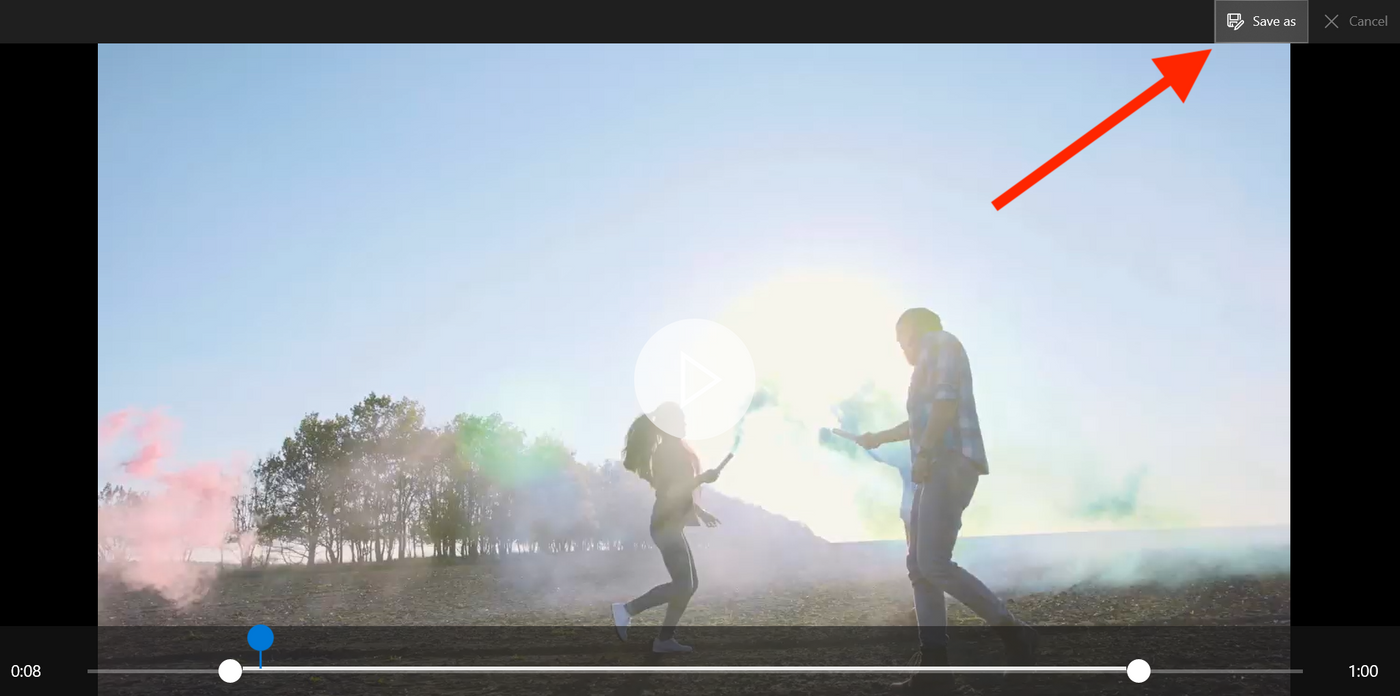
Step 4: Once you’re satisfied with the edit, click on “Save a copy” in the upper right corner of the window.
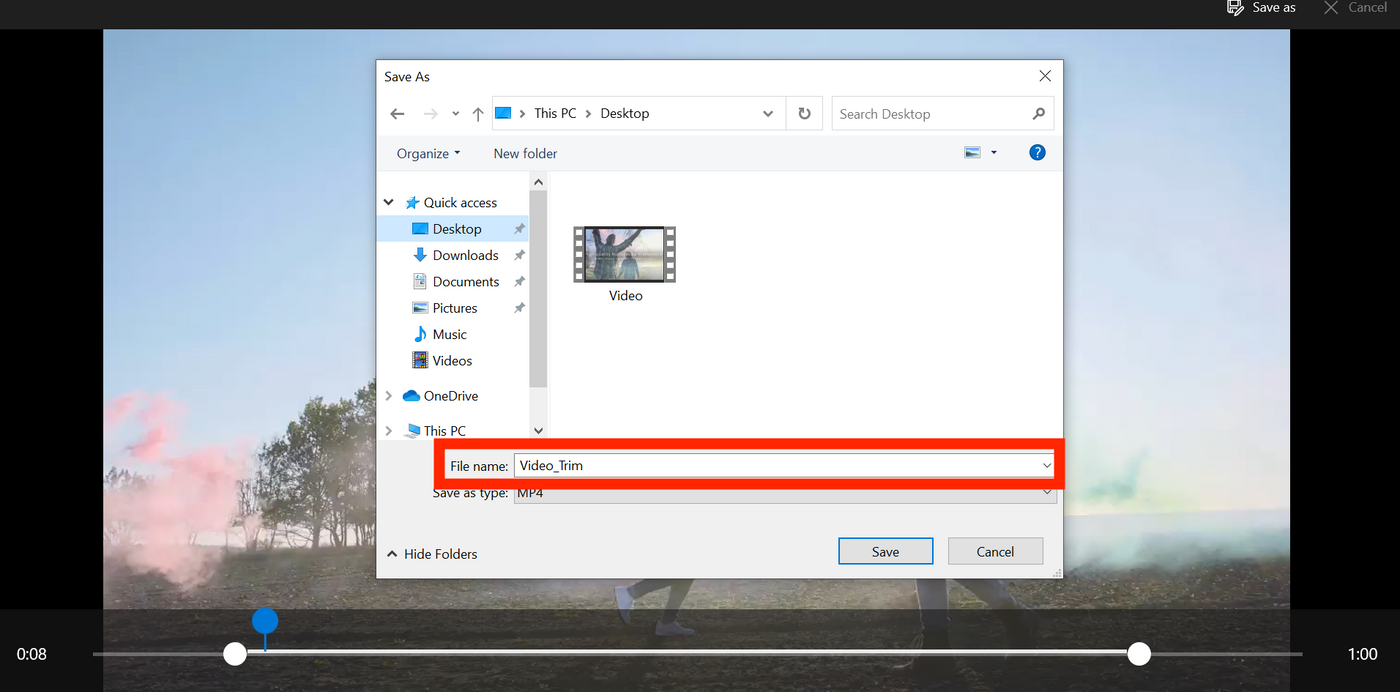
Step 5: Your edited video will be saved with the new start and endpoints to the filename “video title_trim.”
Follow this step-by-step process to cut parts out of videos and combine different parts of your video on Windows 10:
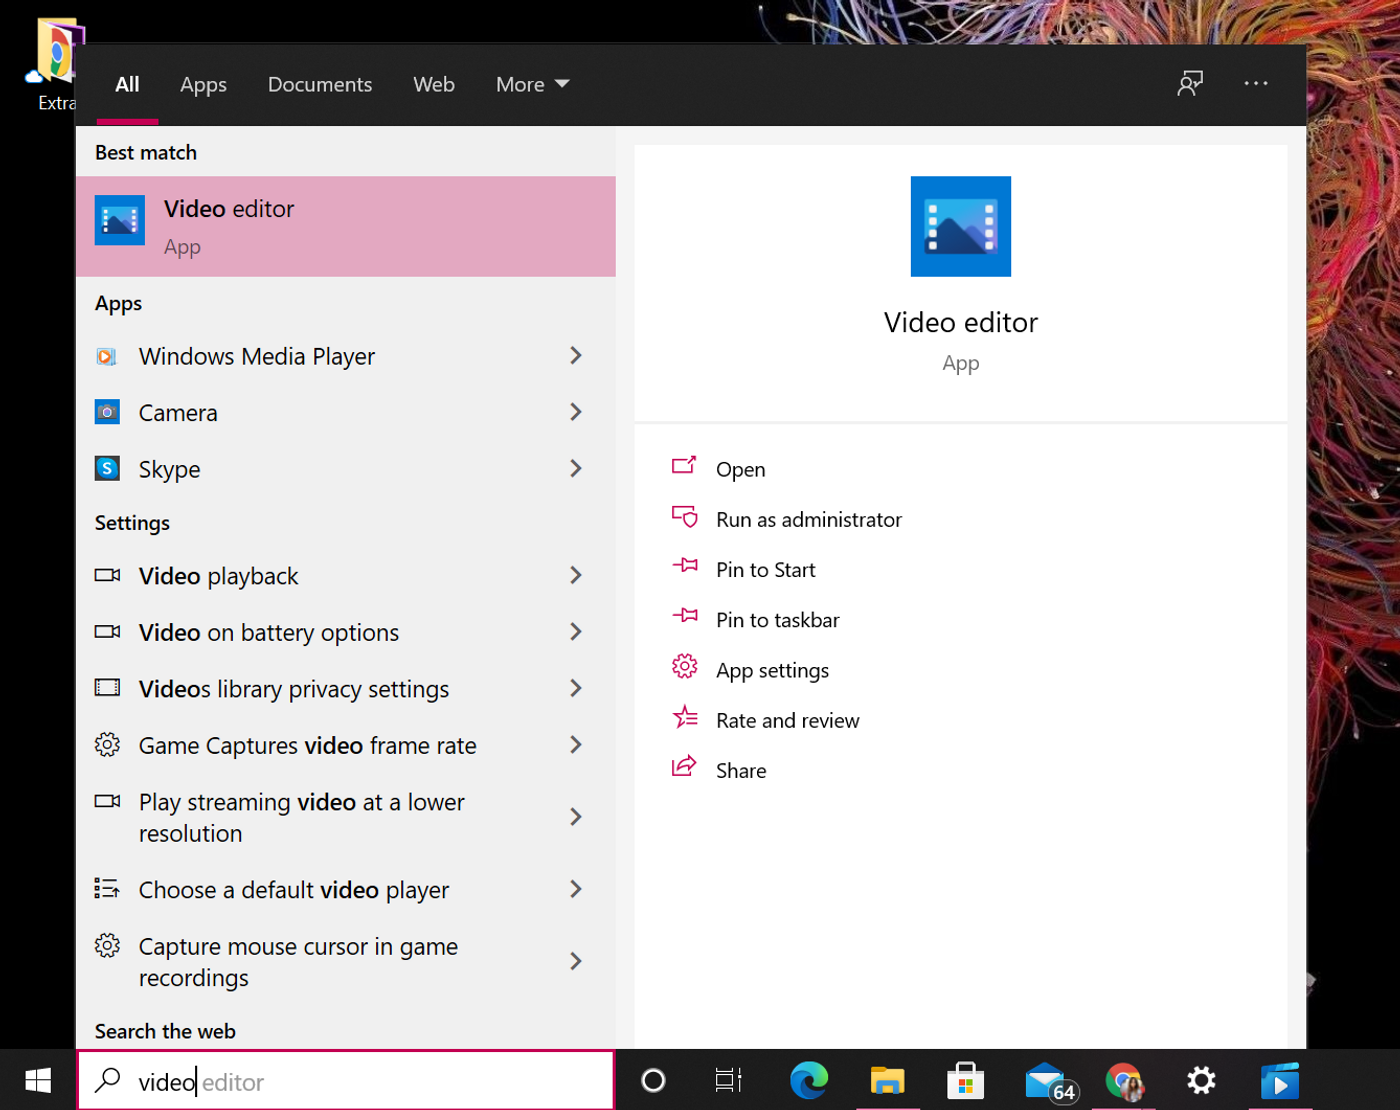
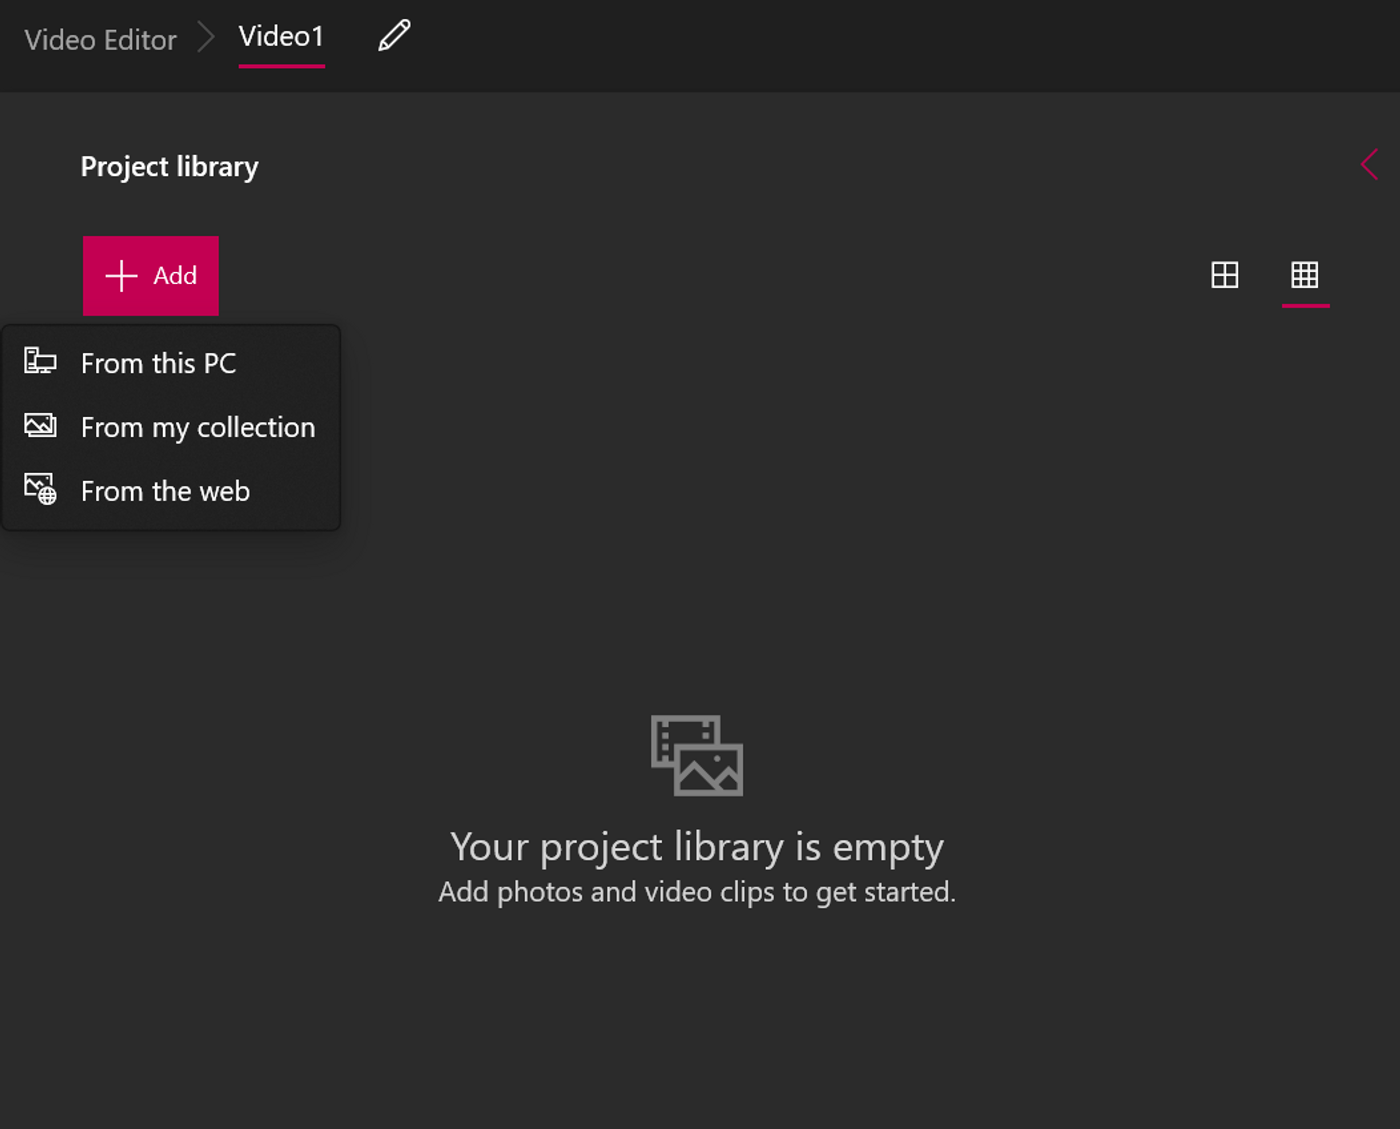
Step 1: On the lower left corner of your desktop, type “Photos” or “Video Editor” in the search bar.
Step 2: Click on “New Video Project” and name your video.

Step 3: Hit the “Add” button to upload your video.
Step 4: Once your video is imported, you’ll see it on the left side of your screen. Click on “Place in the storyboard” or drag-and-drop the video file from the “Project Library” to the “Storyboard.”
Step 5: Click on “Trim.”
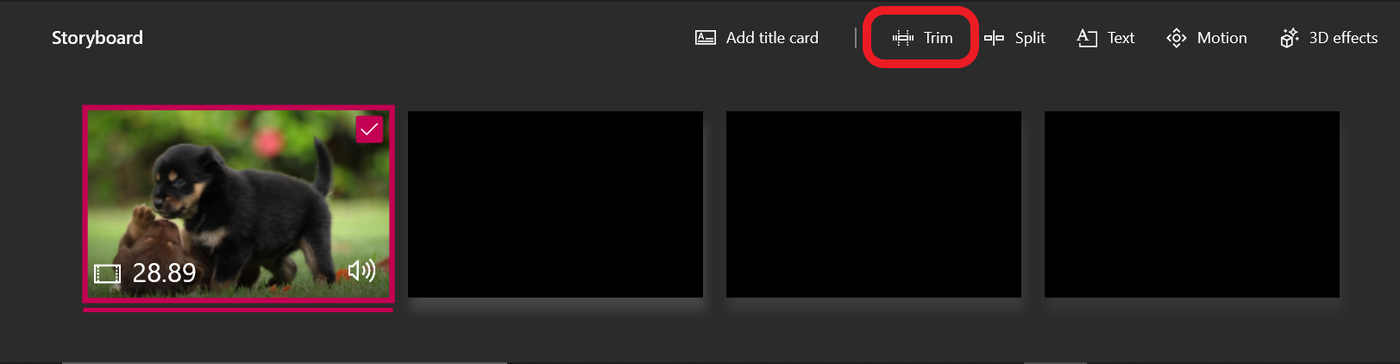
Step 6: Use the slider to trim your preferred part of the video. To add another trimmed section, drag-and-drop the video to the storyboard again and repeat the process till you have multiple short clips that can be combined into one single video in the end.

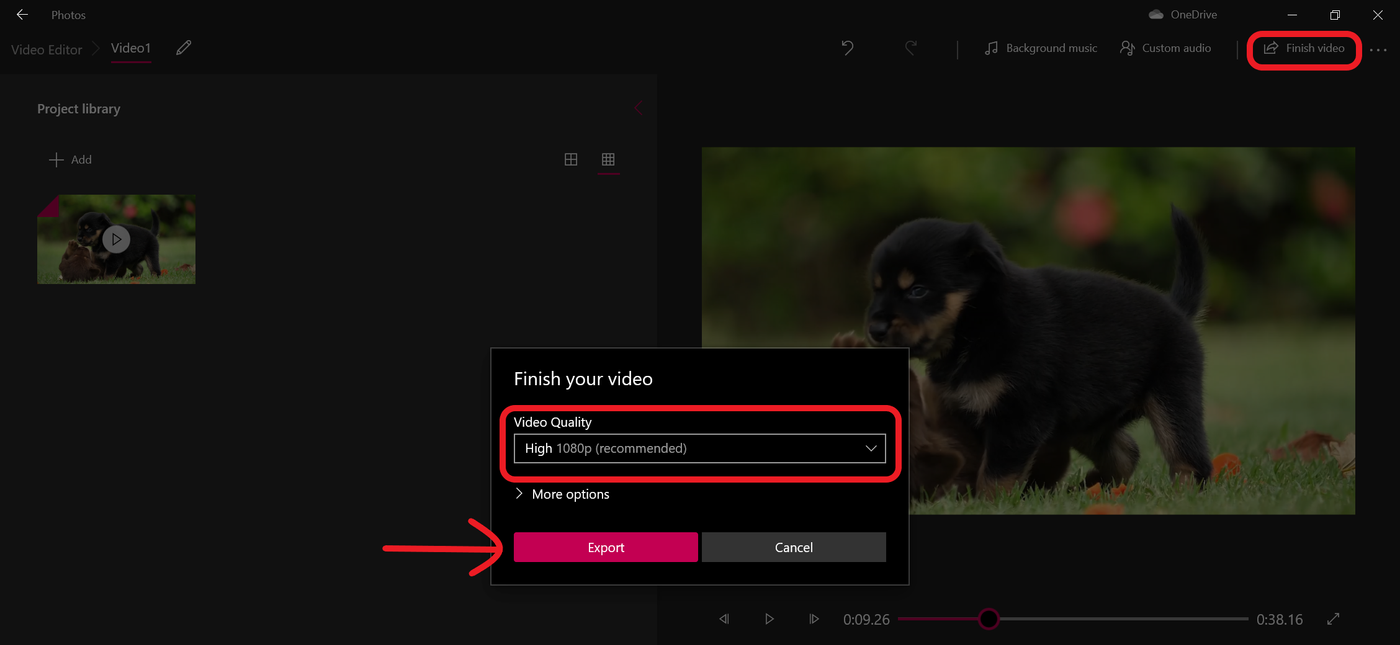
Step 7: Click on the “Finish Video” button in the top right corner of the editor.
Choose the quality of your video, then hit “Export,” to save the edited video to your computer,
4. How to trim a video using iMovie on iPhone
Talk about it a few years back, and you would hear how difficult it was to perform simple tasks like cutting and trimming videos with Apple devices. But, now you can easily do this through Apple-approved applications. You can use the in-built Photos app for simple video trimming and the iMovie app for cutting, trimming, and combining different clips to get a crisp video.
How to trim a video on iPhone using the Photos app
Before you learn how to trim a video on iPhone, it is important to know that Photos is not an advanced editing tool, so it won’t allow you to cut a part out of a video and combine different clips. However, you can use it for a quick trim-and-fix before posting it on social media or sharing it with your client. Here’s how:
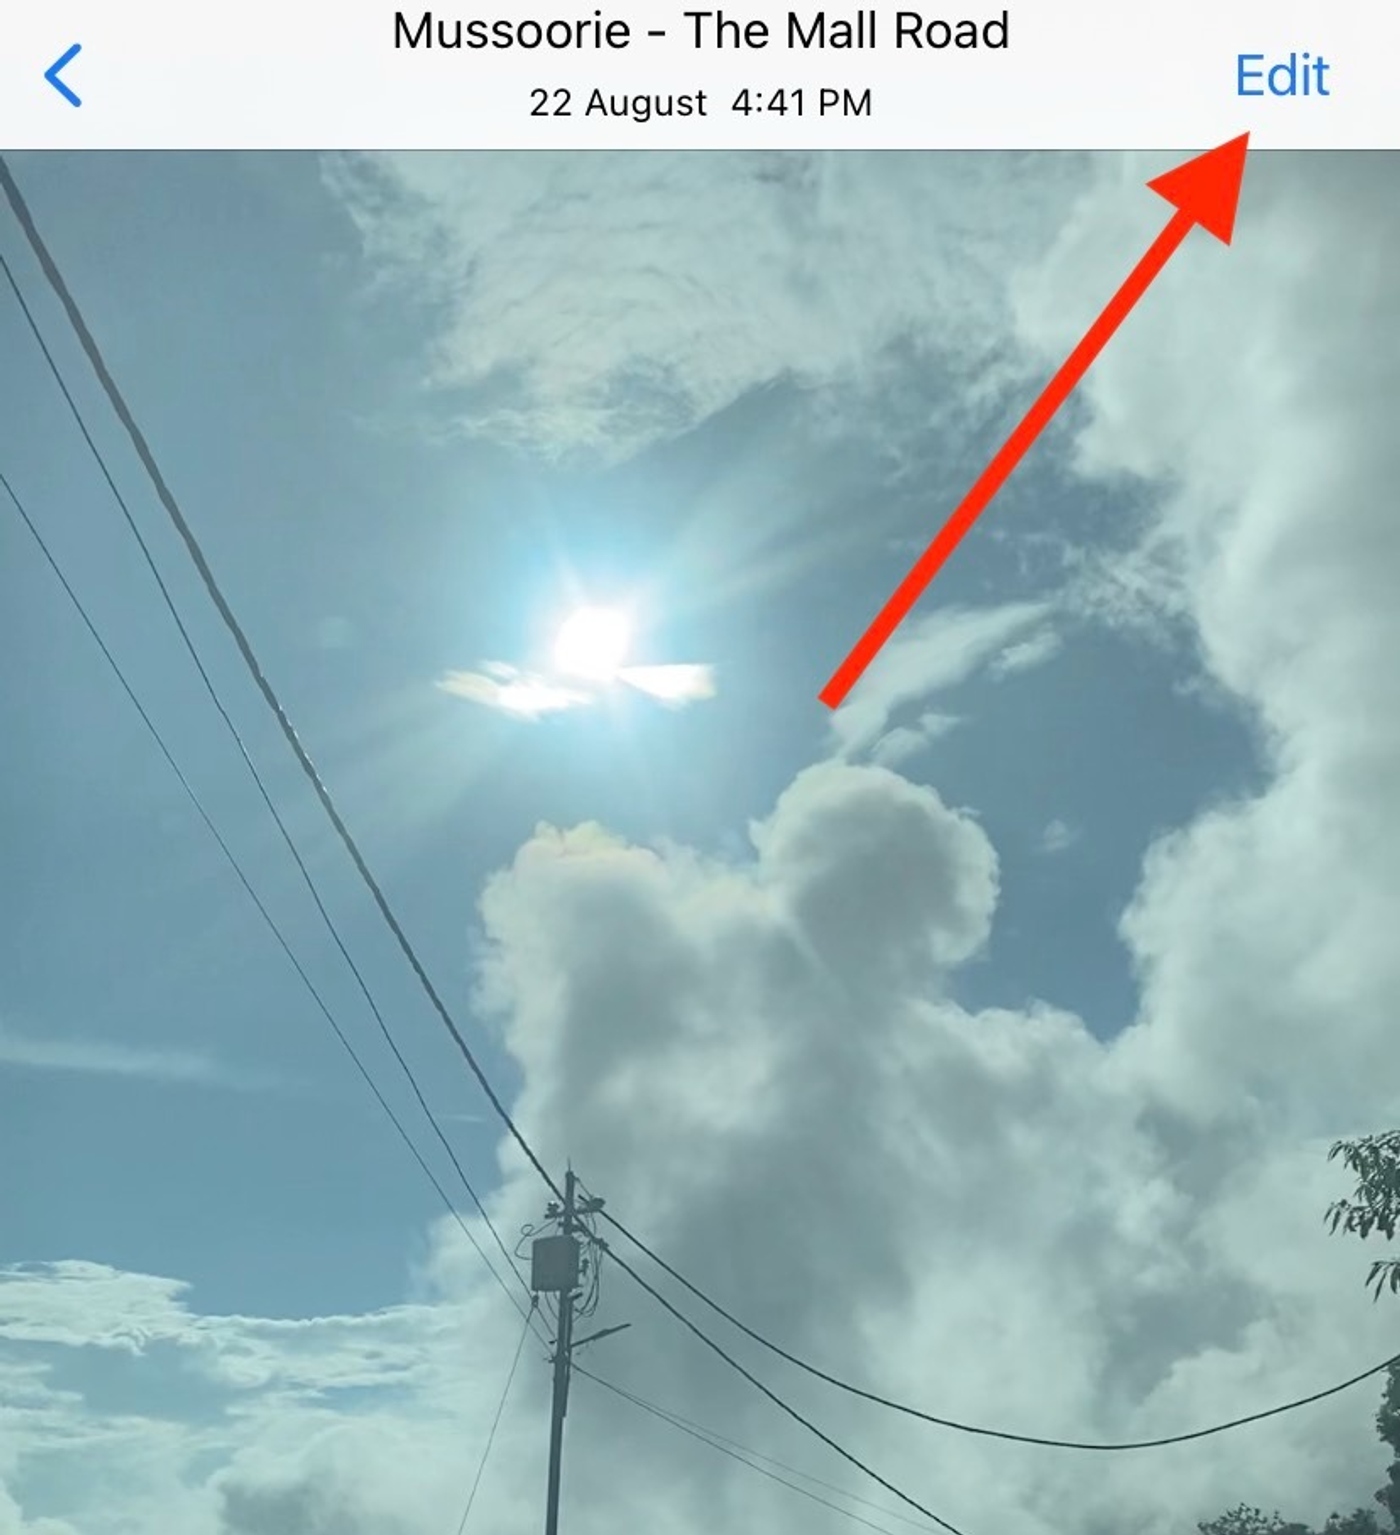
Step 1: Open the Photos app, and select the video you want to trim. Click on “Edit” in the top right corner of the screen.
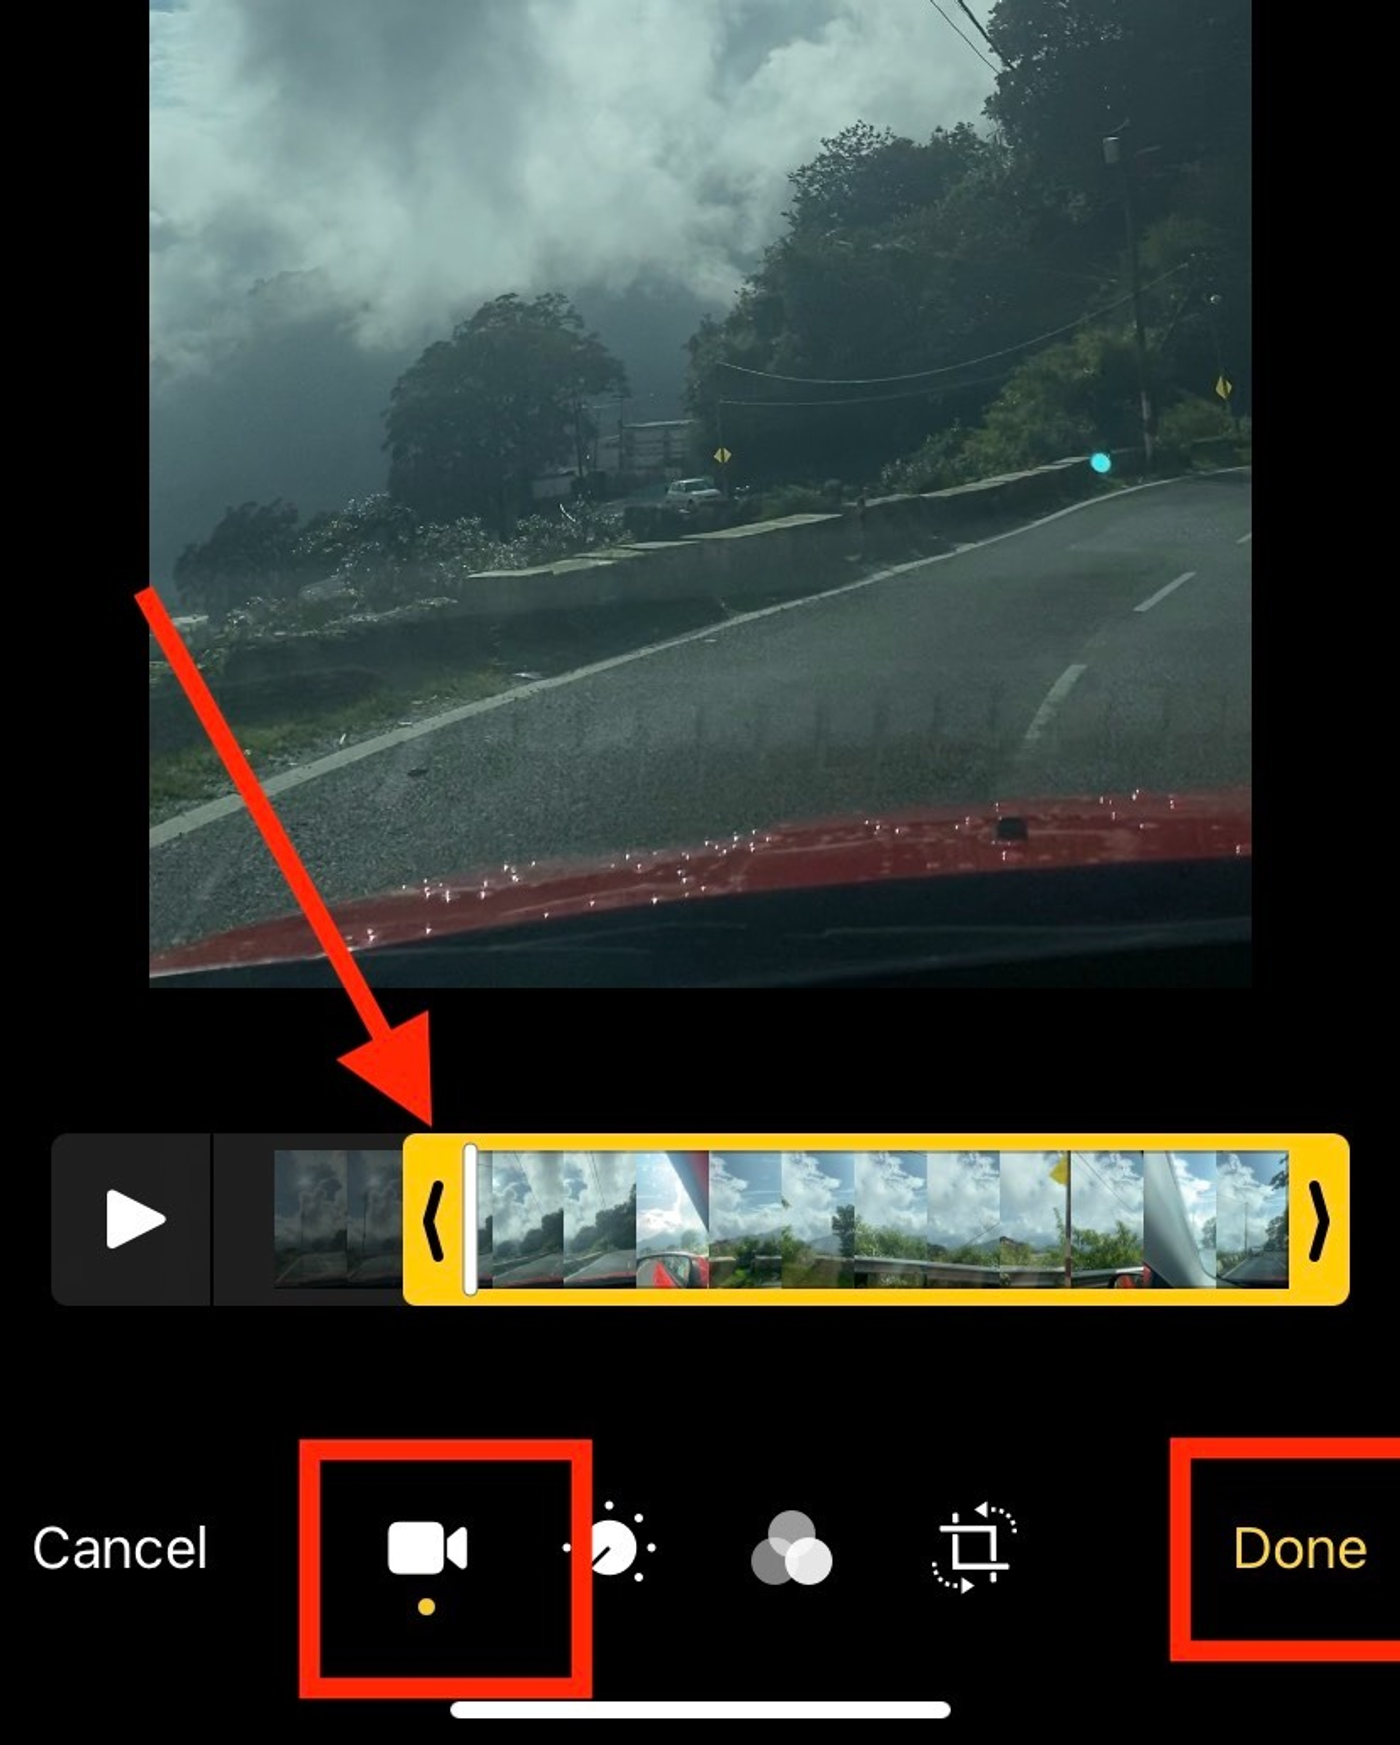
Step 2: Choose the video camera icon from the menu bar at the bottom. Use the slider below the video to trim it from the start and end. Once you’re satisfied, hit “Done.”
Step 3: Click on “Save Video” to save this as the only clip on your phone or “Save Video as New Clip” to make two copies of the video—original and trimmed.

How to cut and trim a video using iMovie on iPhone
The iPhone Photos app is good for last minute trimming but doesn’t really let users edit clips. Wondering how to cut a video on iPhone? Well, it’s the iMovie app that can help you split, rearrange and combine video clips together. It’ll either be pre-downloaded on your iPhone, or you can download it from the App store. Here’s how to proceed:
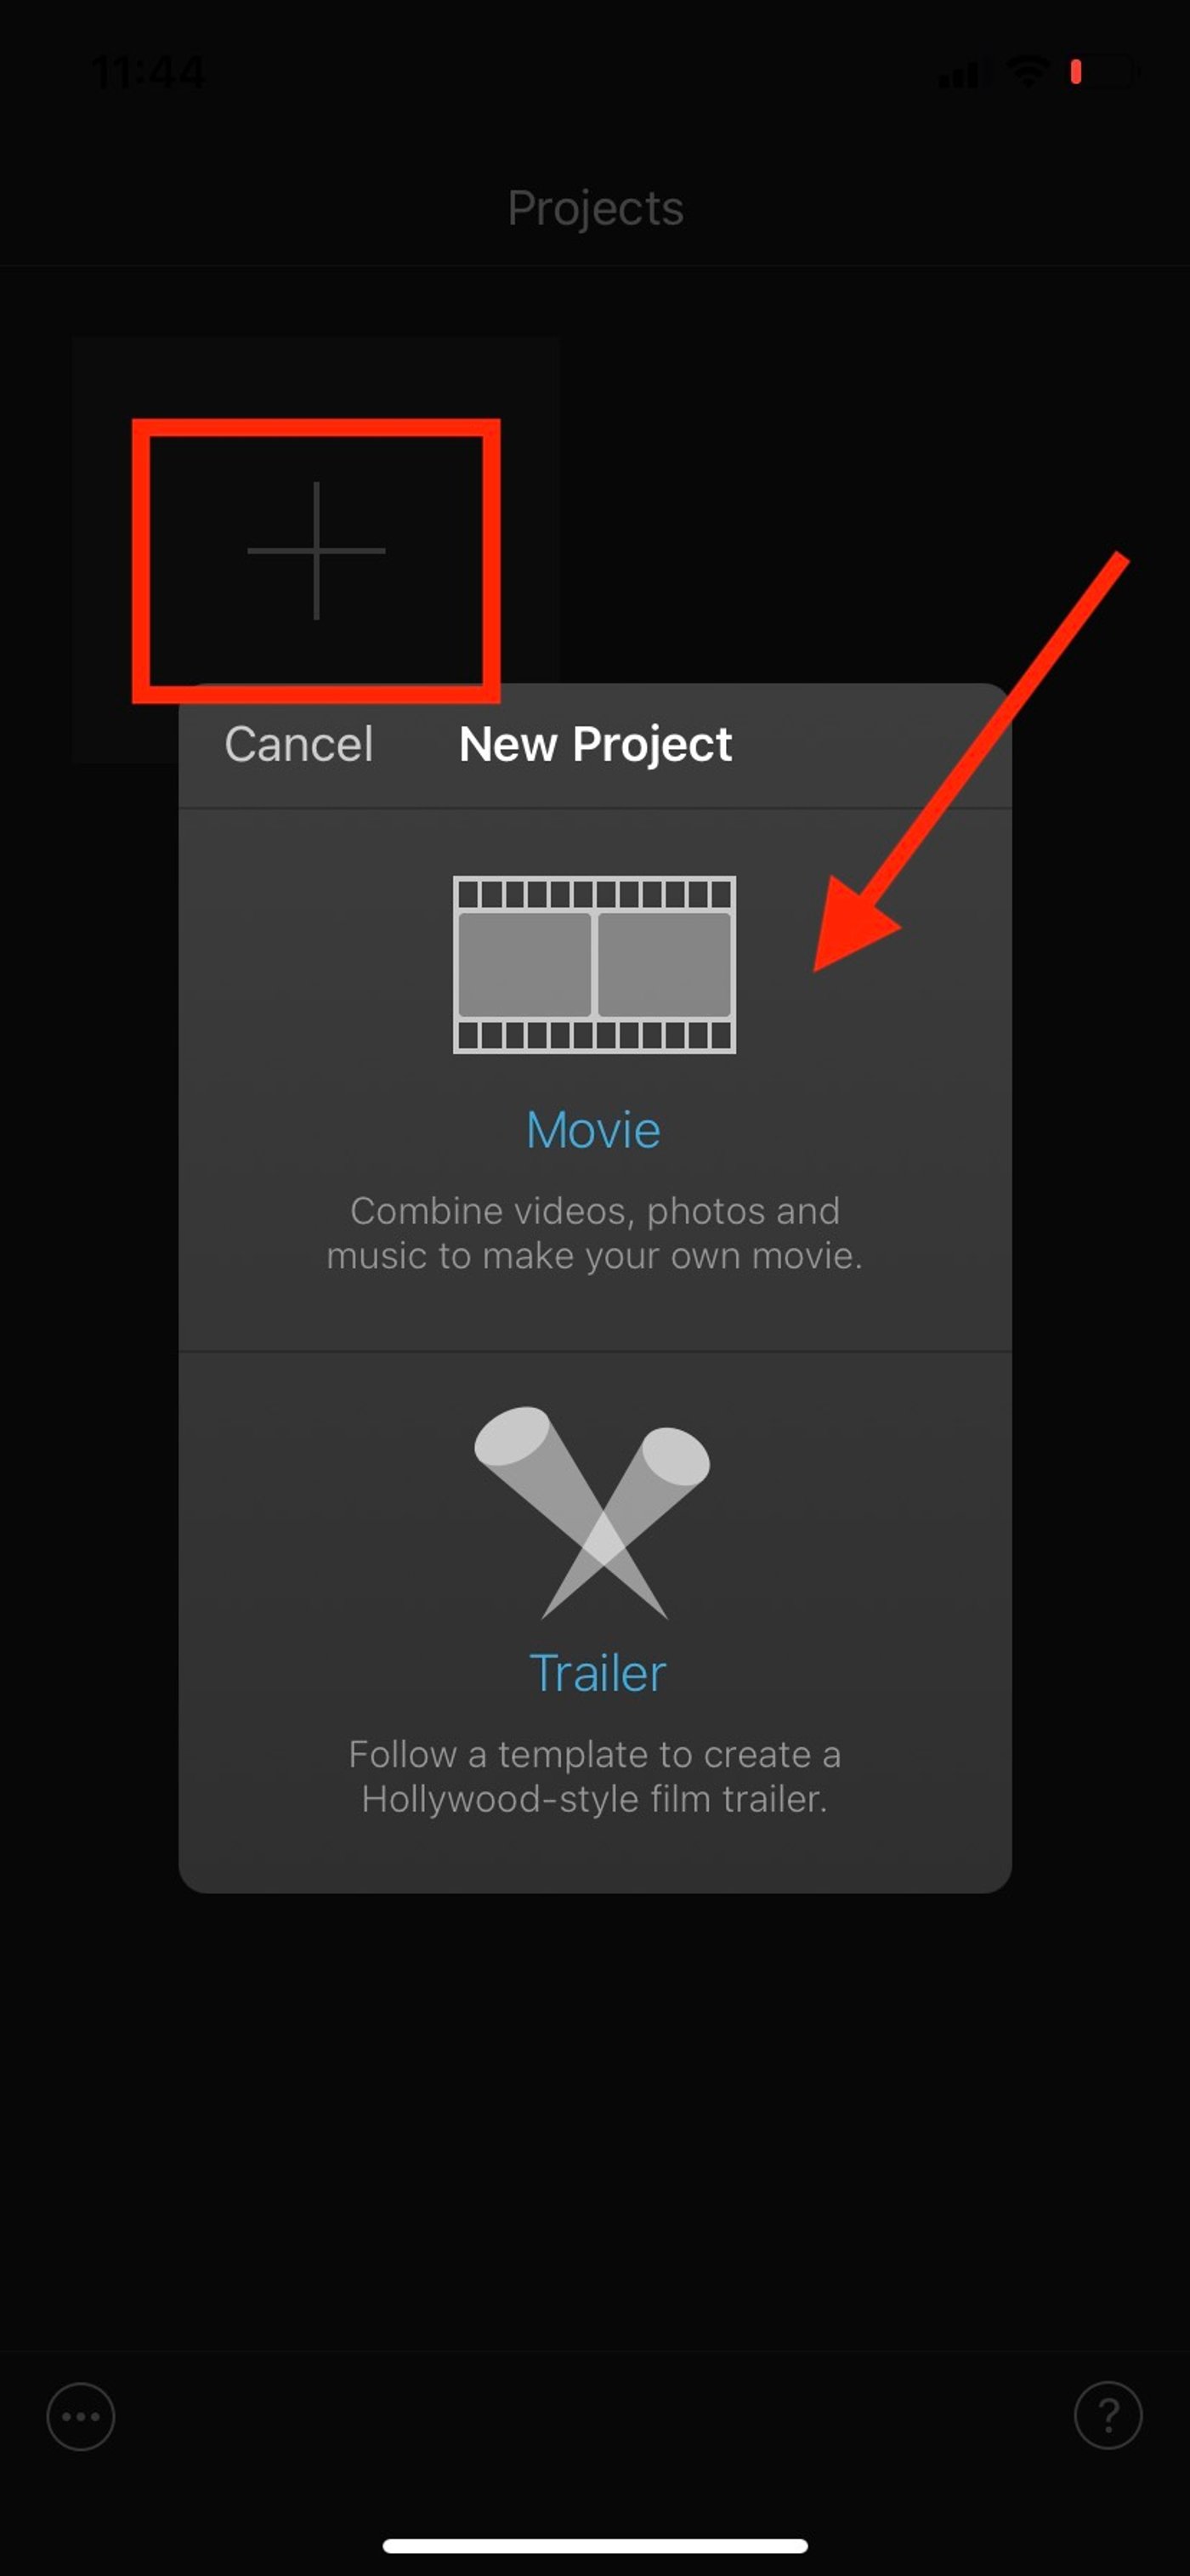
Step 1: Open iMovie, add the video you want to edit by clicking on the big “+” icon, then select “Movie.”
Step 2: In the timeline below the video, you’ll see a vertical white line (known as the playhead). Slide this playhead to the point from where you want to cut a part out of a video.
Step 3: Click on the playhead after positioning it, and tap on “Split” in the menu bar below the timeline. If you want to cut a specific portion out of the video, navigate to the endpoint and tap on “Split” again. Delete parts of the clips you don’t want on either side.
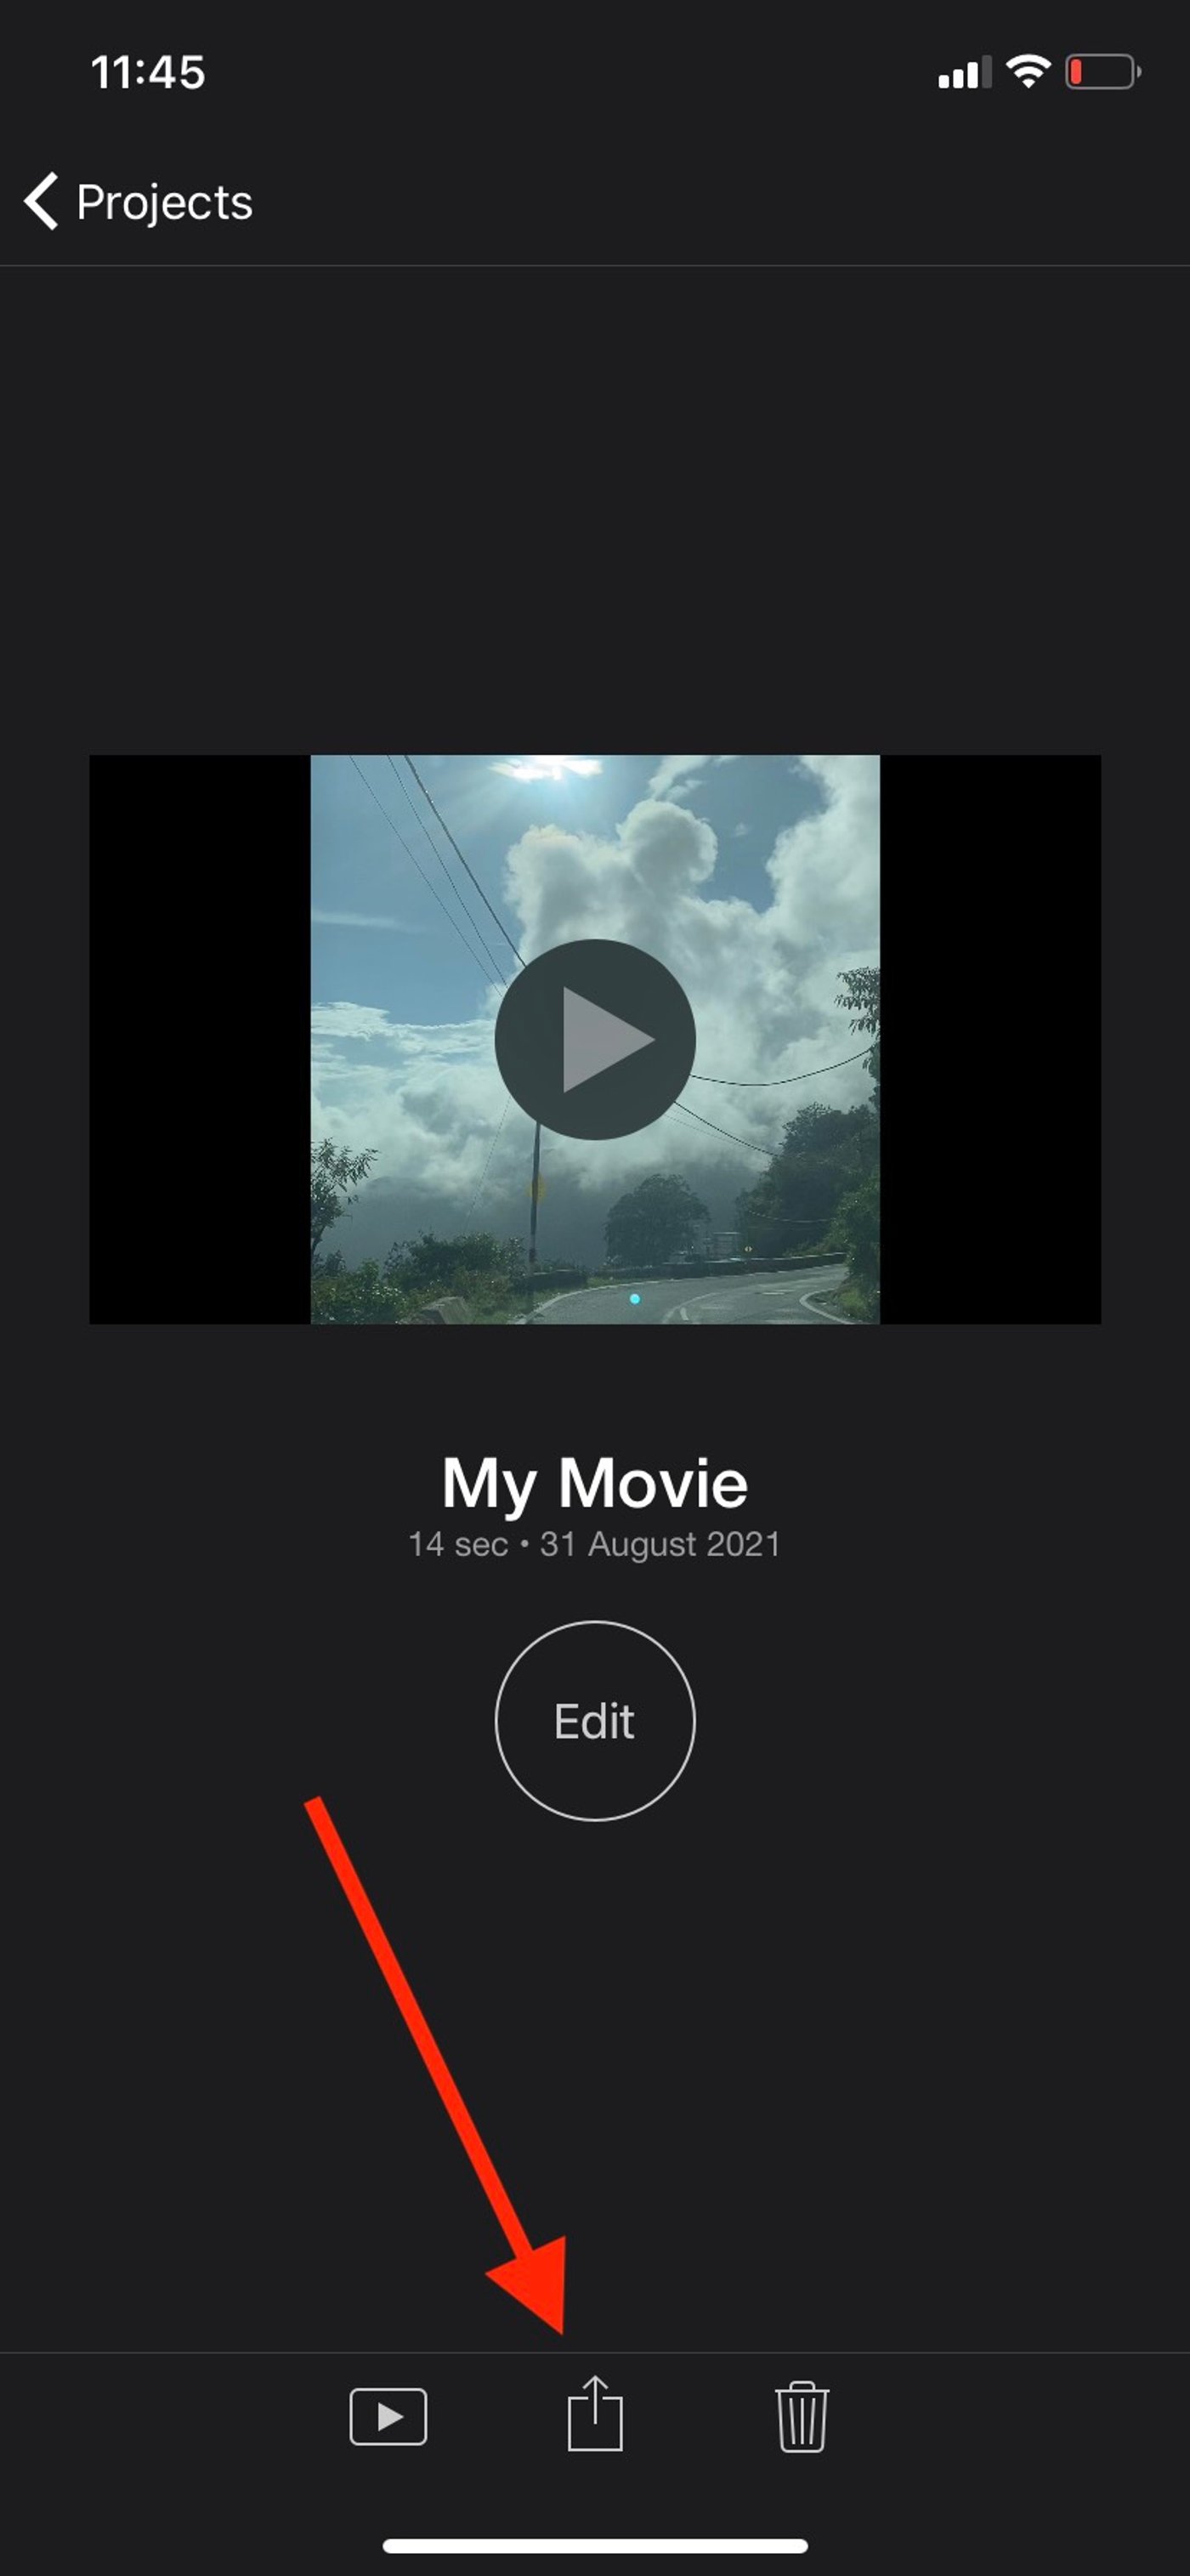
Step 4: Now that you know how to cut a video on iPhone, click on “Done” in the top left corner once you’re satisfied with the output. Click on the share icon, and choose your option—save to camera roll or share to social media.
5. How to cut and trim a video on Android?
Just like on an iPhone, you can do basic editing, especially trimming, in the built-in Gallery app of your Android phone. For advanced editing or trimming and cutting of videos, you can use a Free app like Inshot.
How to trim a video on Android using the Gallery app
Step 1: Open the video you want to trim in the Gallery app. Click on the scissor icon to get to the trimming editor.

Step 2: Use the slider below the video to remove unnecessary footage at the beginning or end of the video.
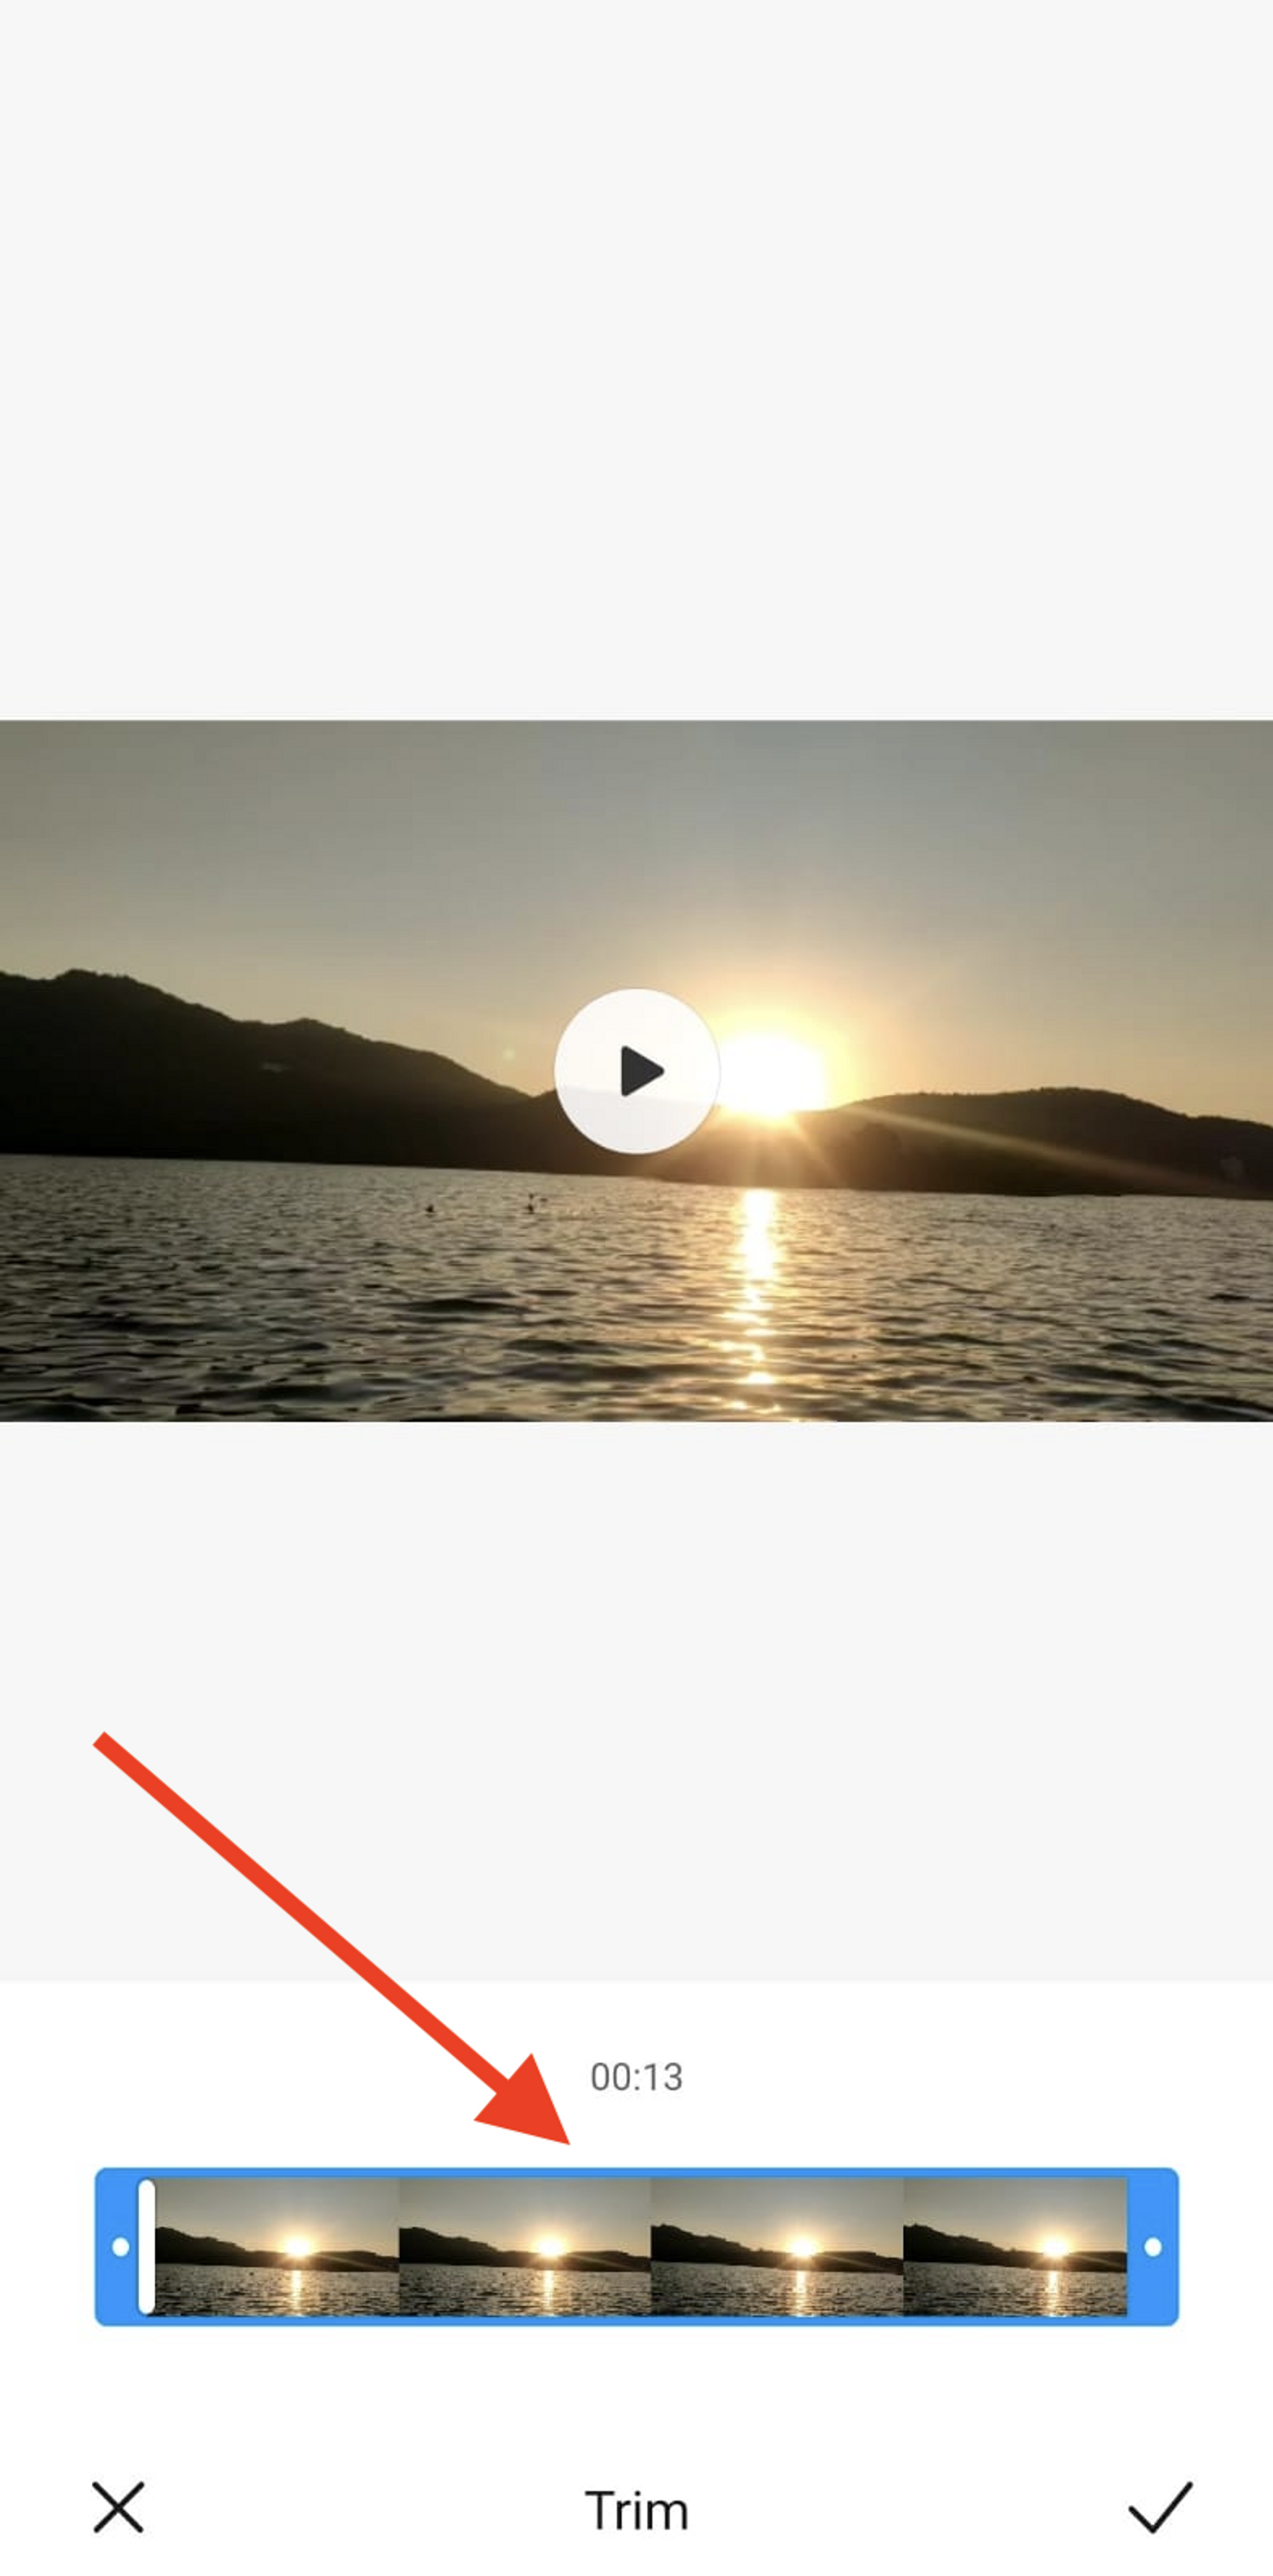
Step 3: Once you have understood how to trim a video on Android and have your preferred section, click on the tick icon in the bottom right corner. The trimmed video will be saved to your gallery.
How to cut a video on Android using the Inshot app
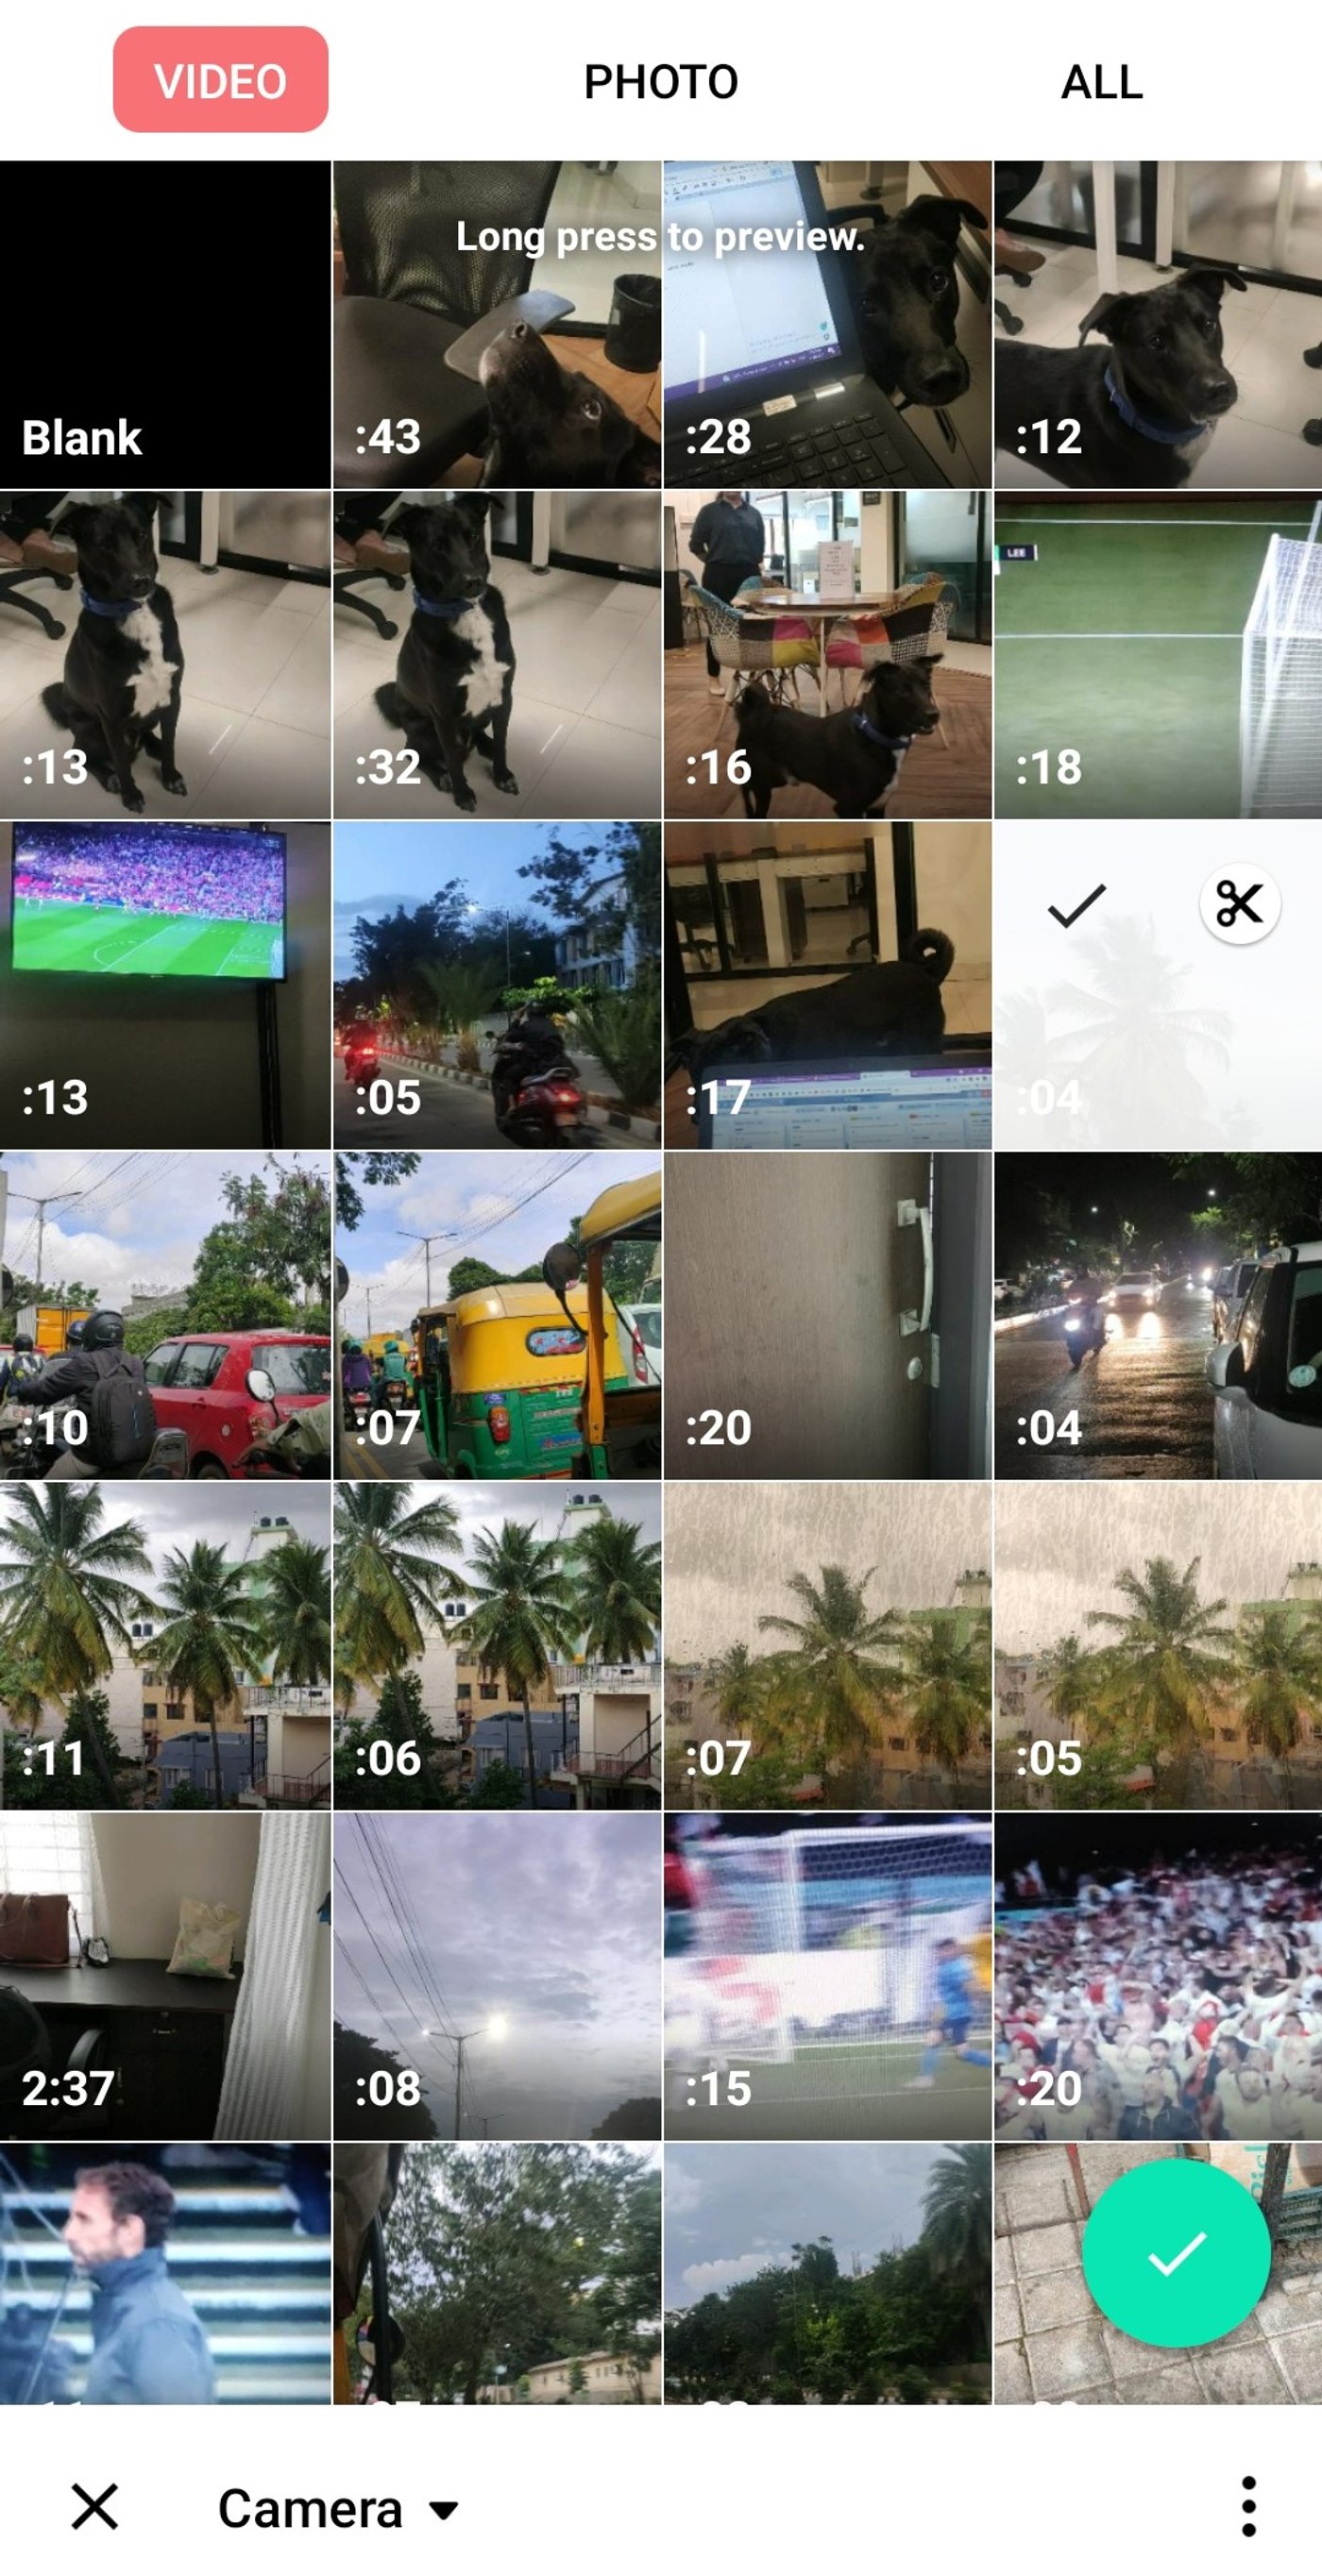
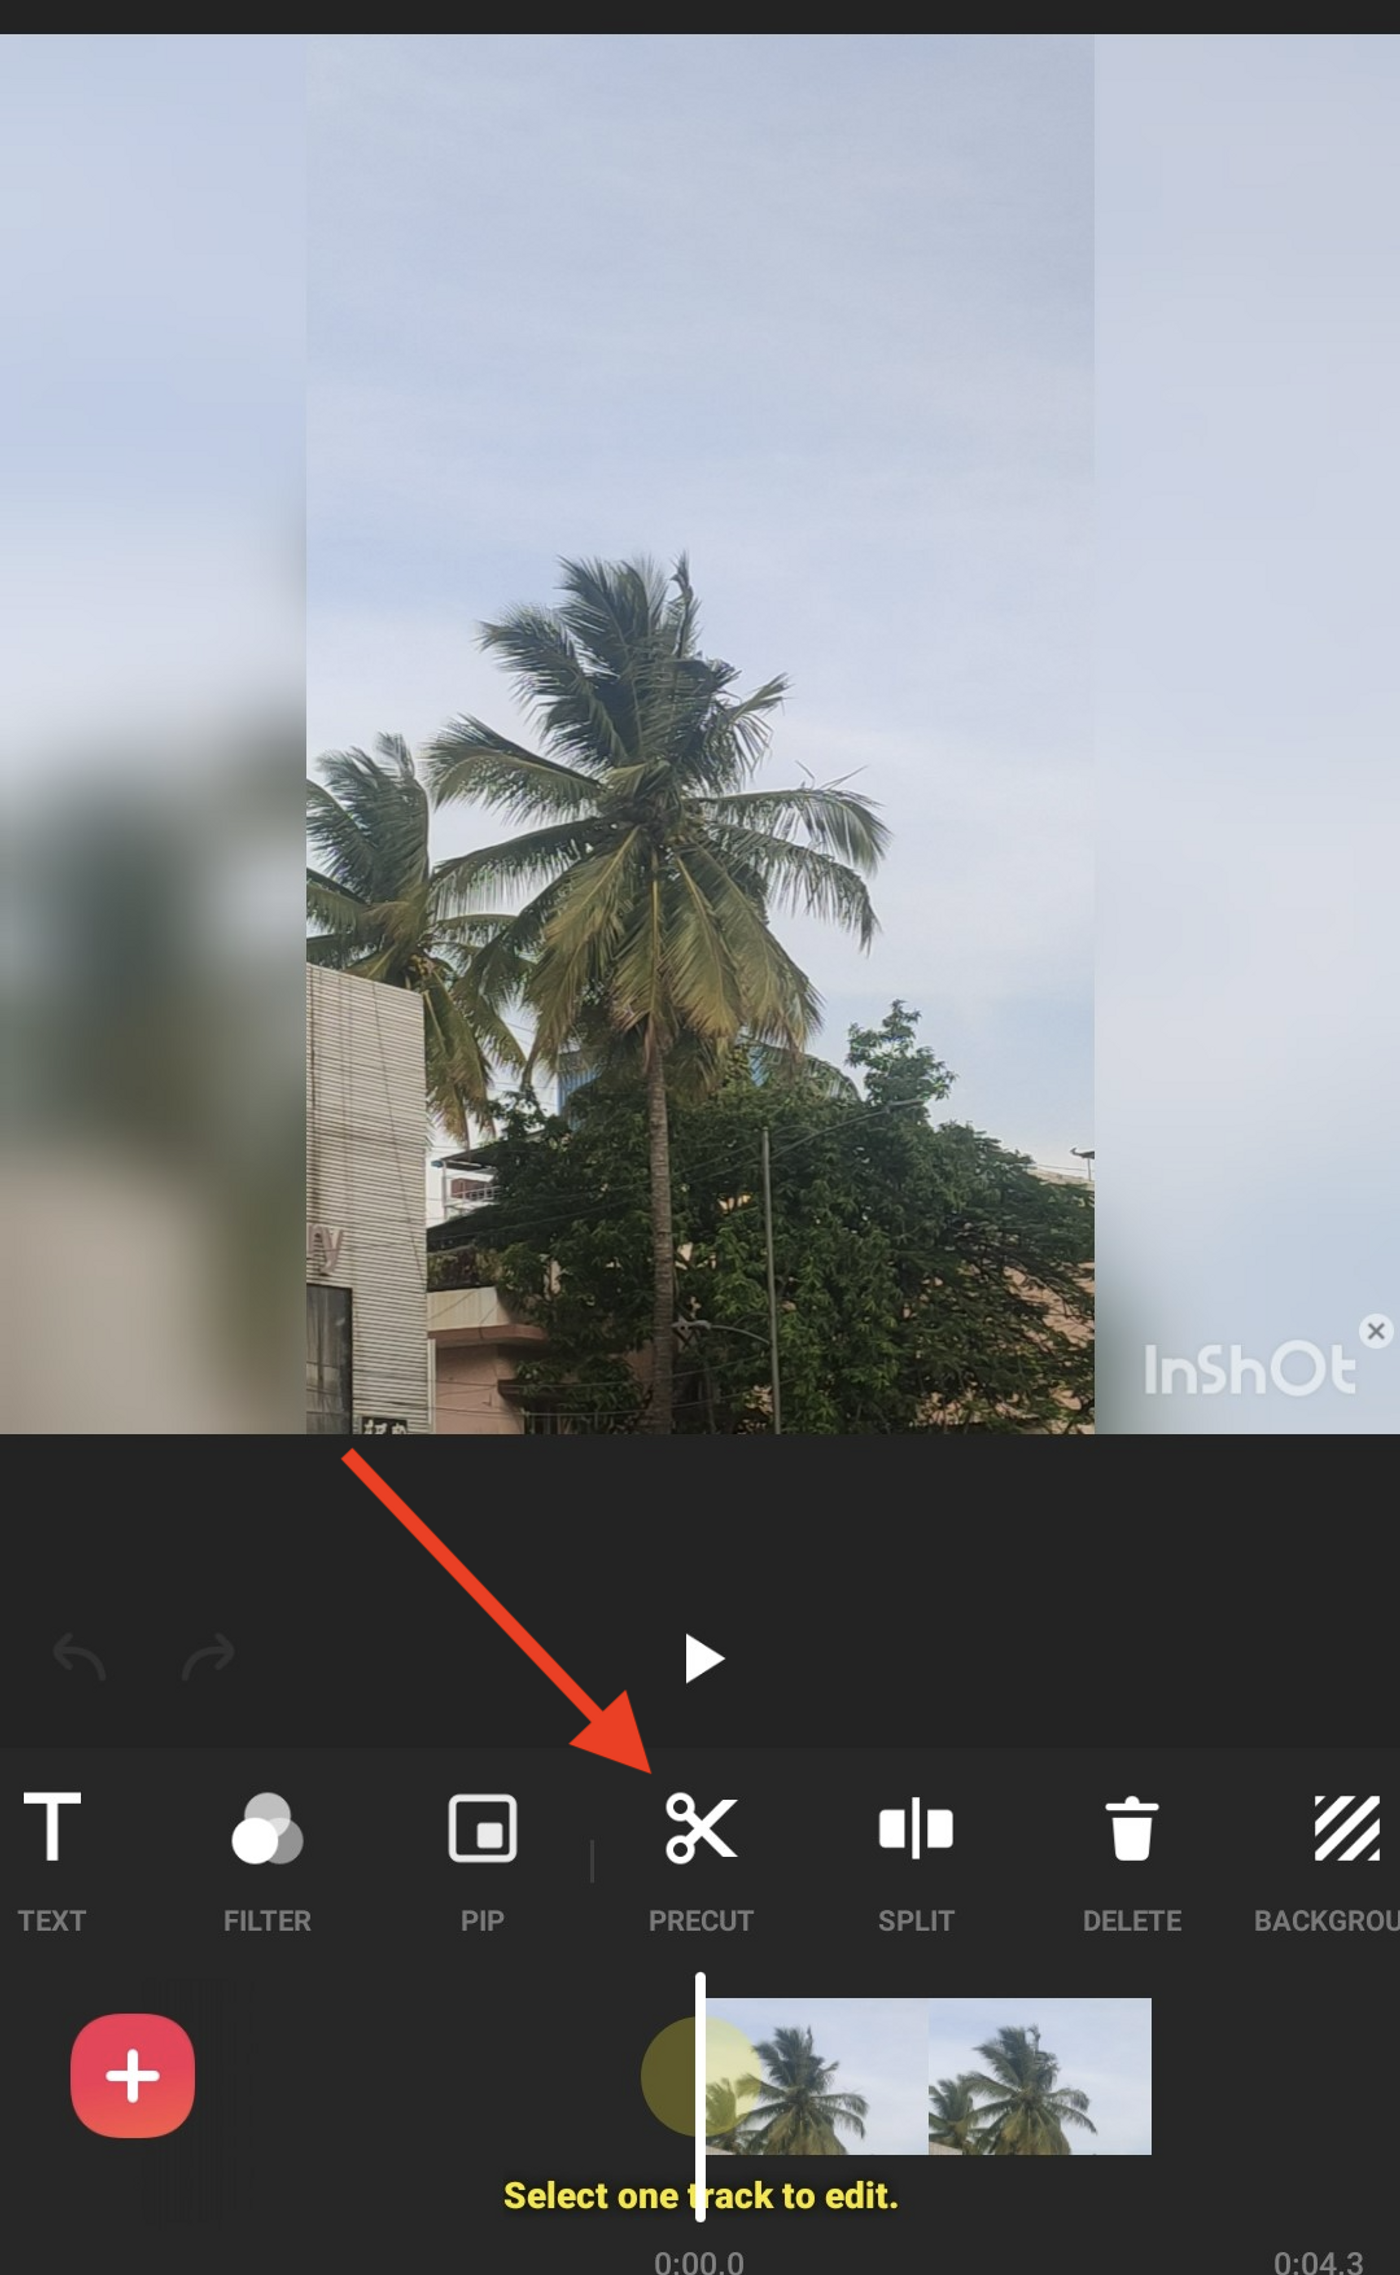
Step 1: To start learning how to cut a video on Android, download the Inshot app from the play store. Open the app and choose the video you want to edit from your camera roll.
Step 2: In the menu bar below your video, click on “Precut,” the scissor icon.
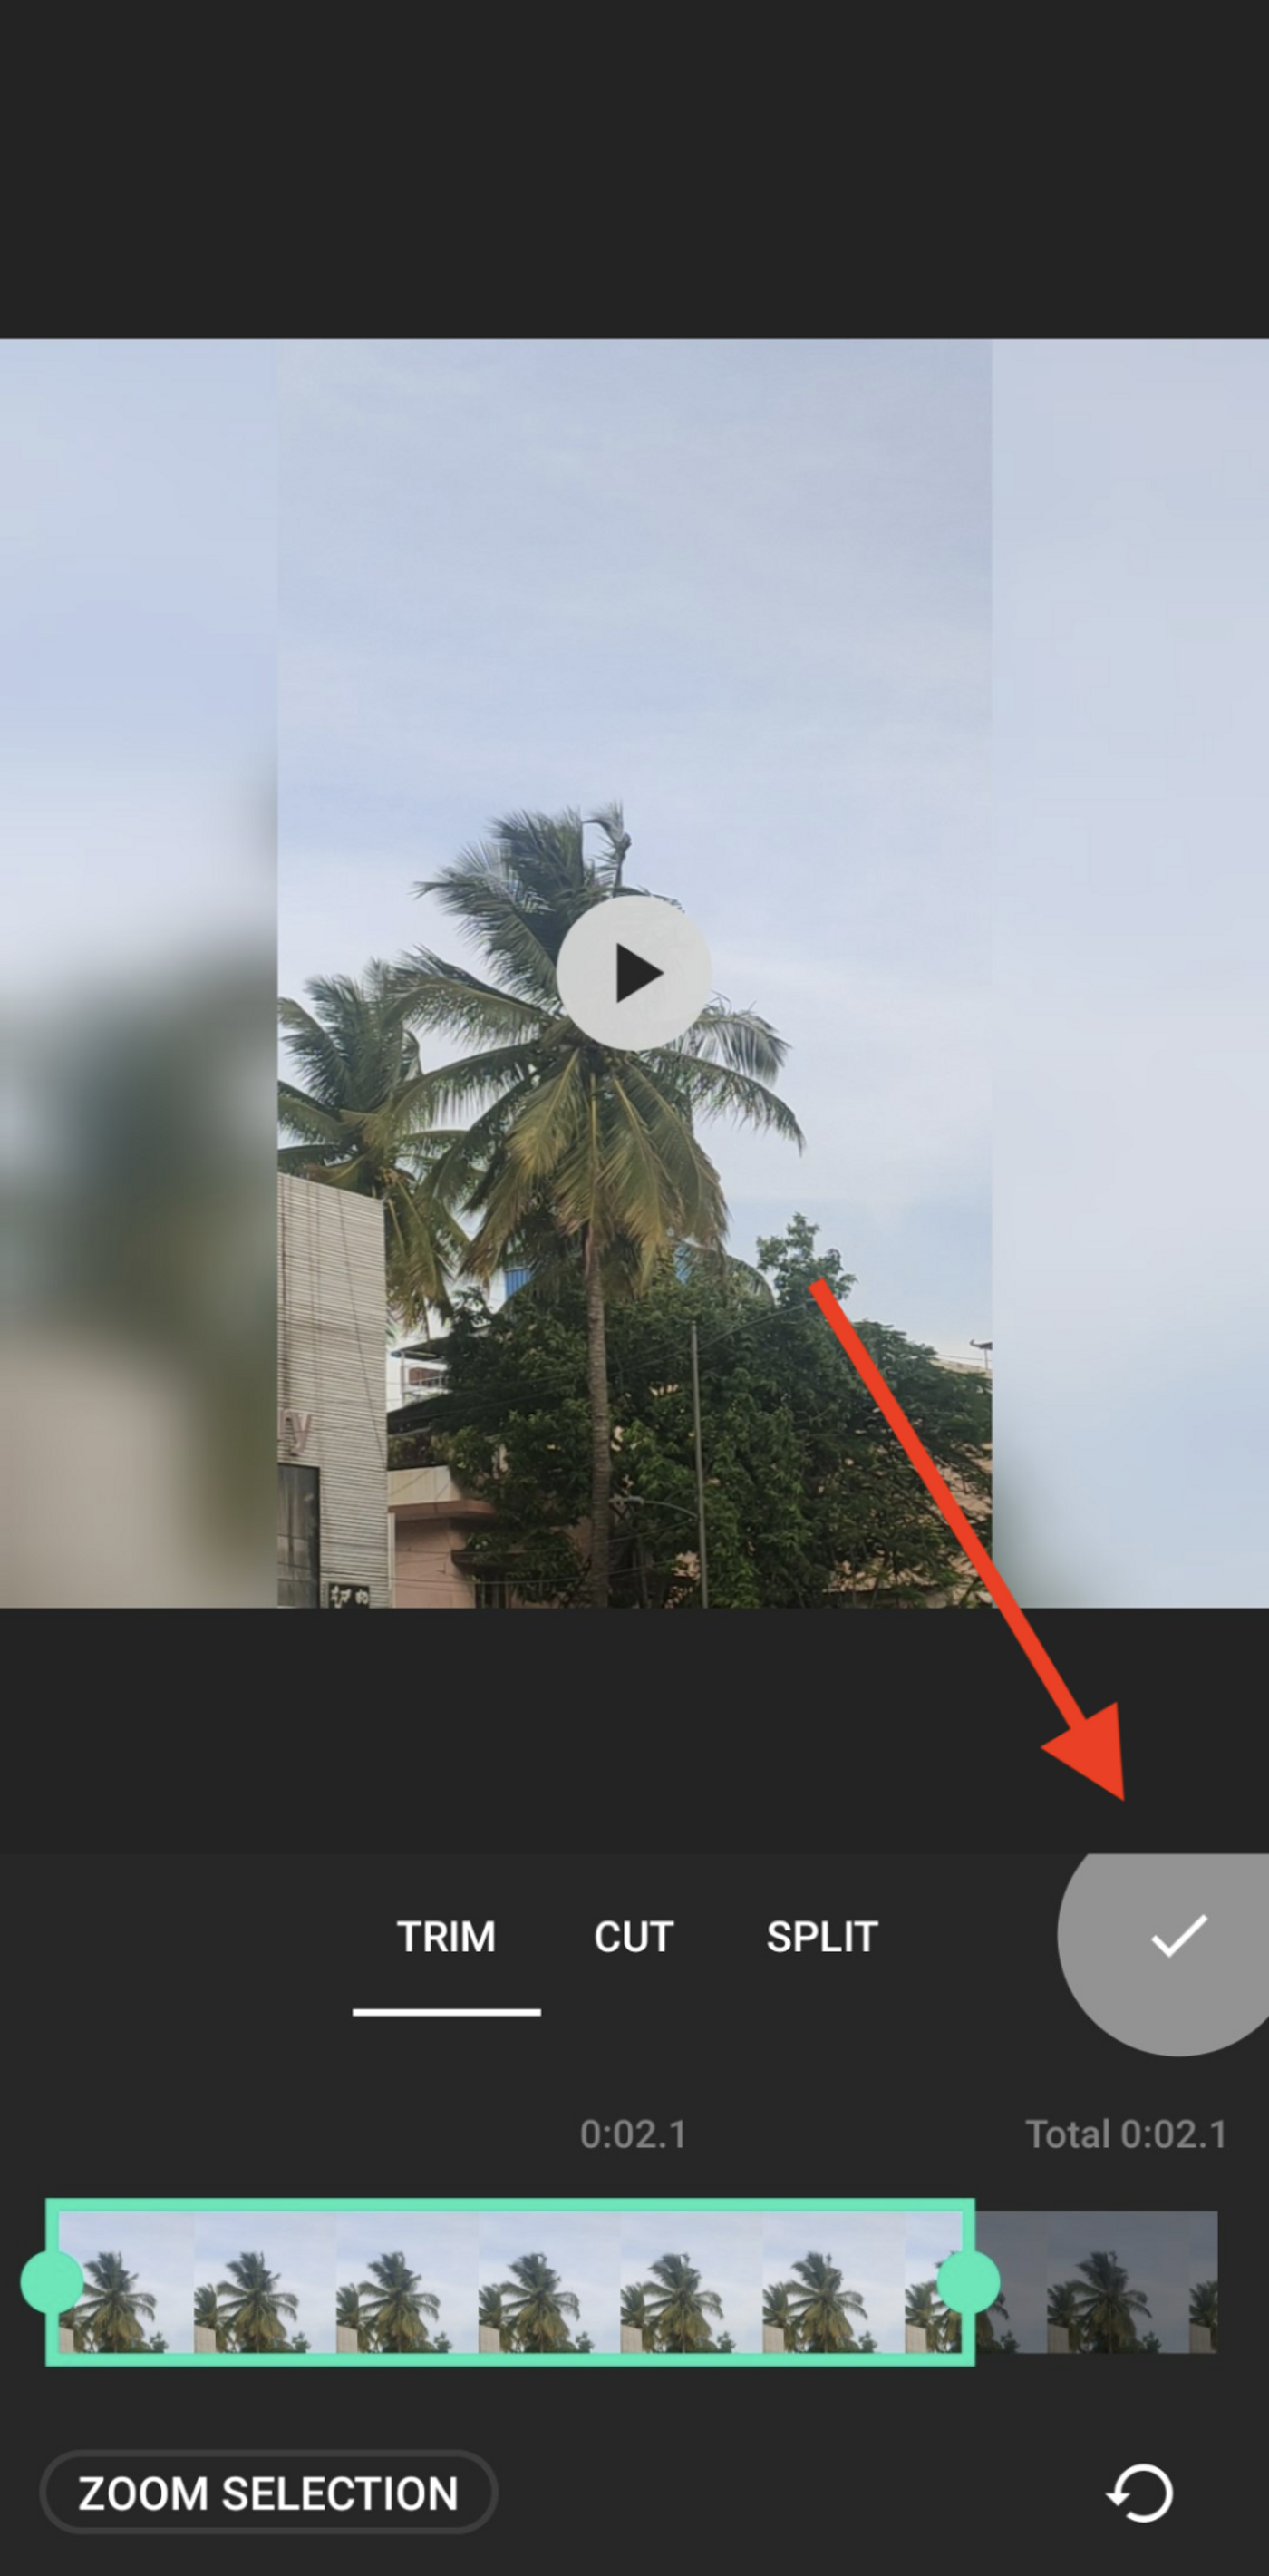
Step 3: Choose the “Trim” option to shorten your video from the start or end using the slider.
Choose the “Cut” option to pick different parts of the video using the slider and combine them.
Choose the “Split” option to cut your video into two parts by moving the white playhead to the point from where you want to split them.
Step 4: Once you’re satisfied with the cut, press the ‘Done’ icon near the slider.
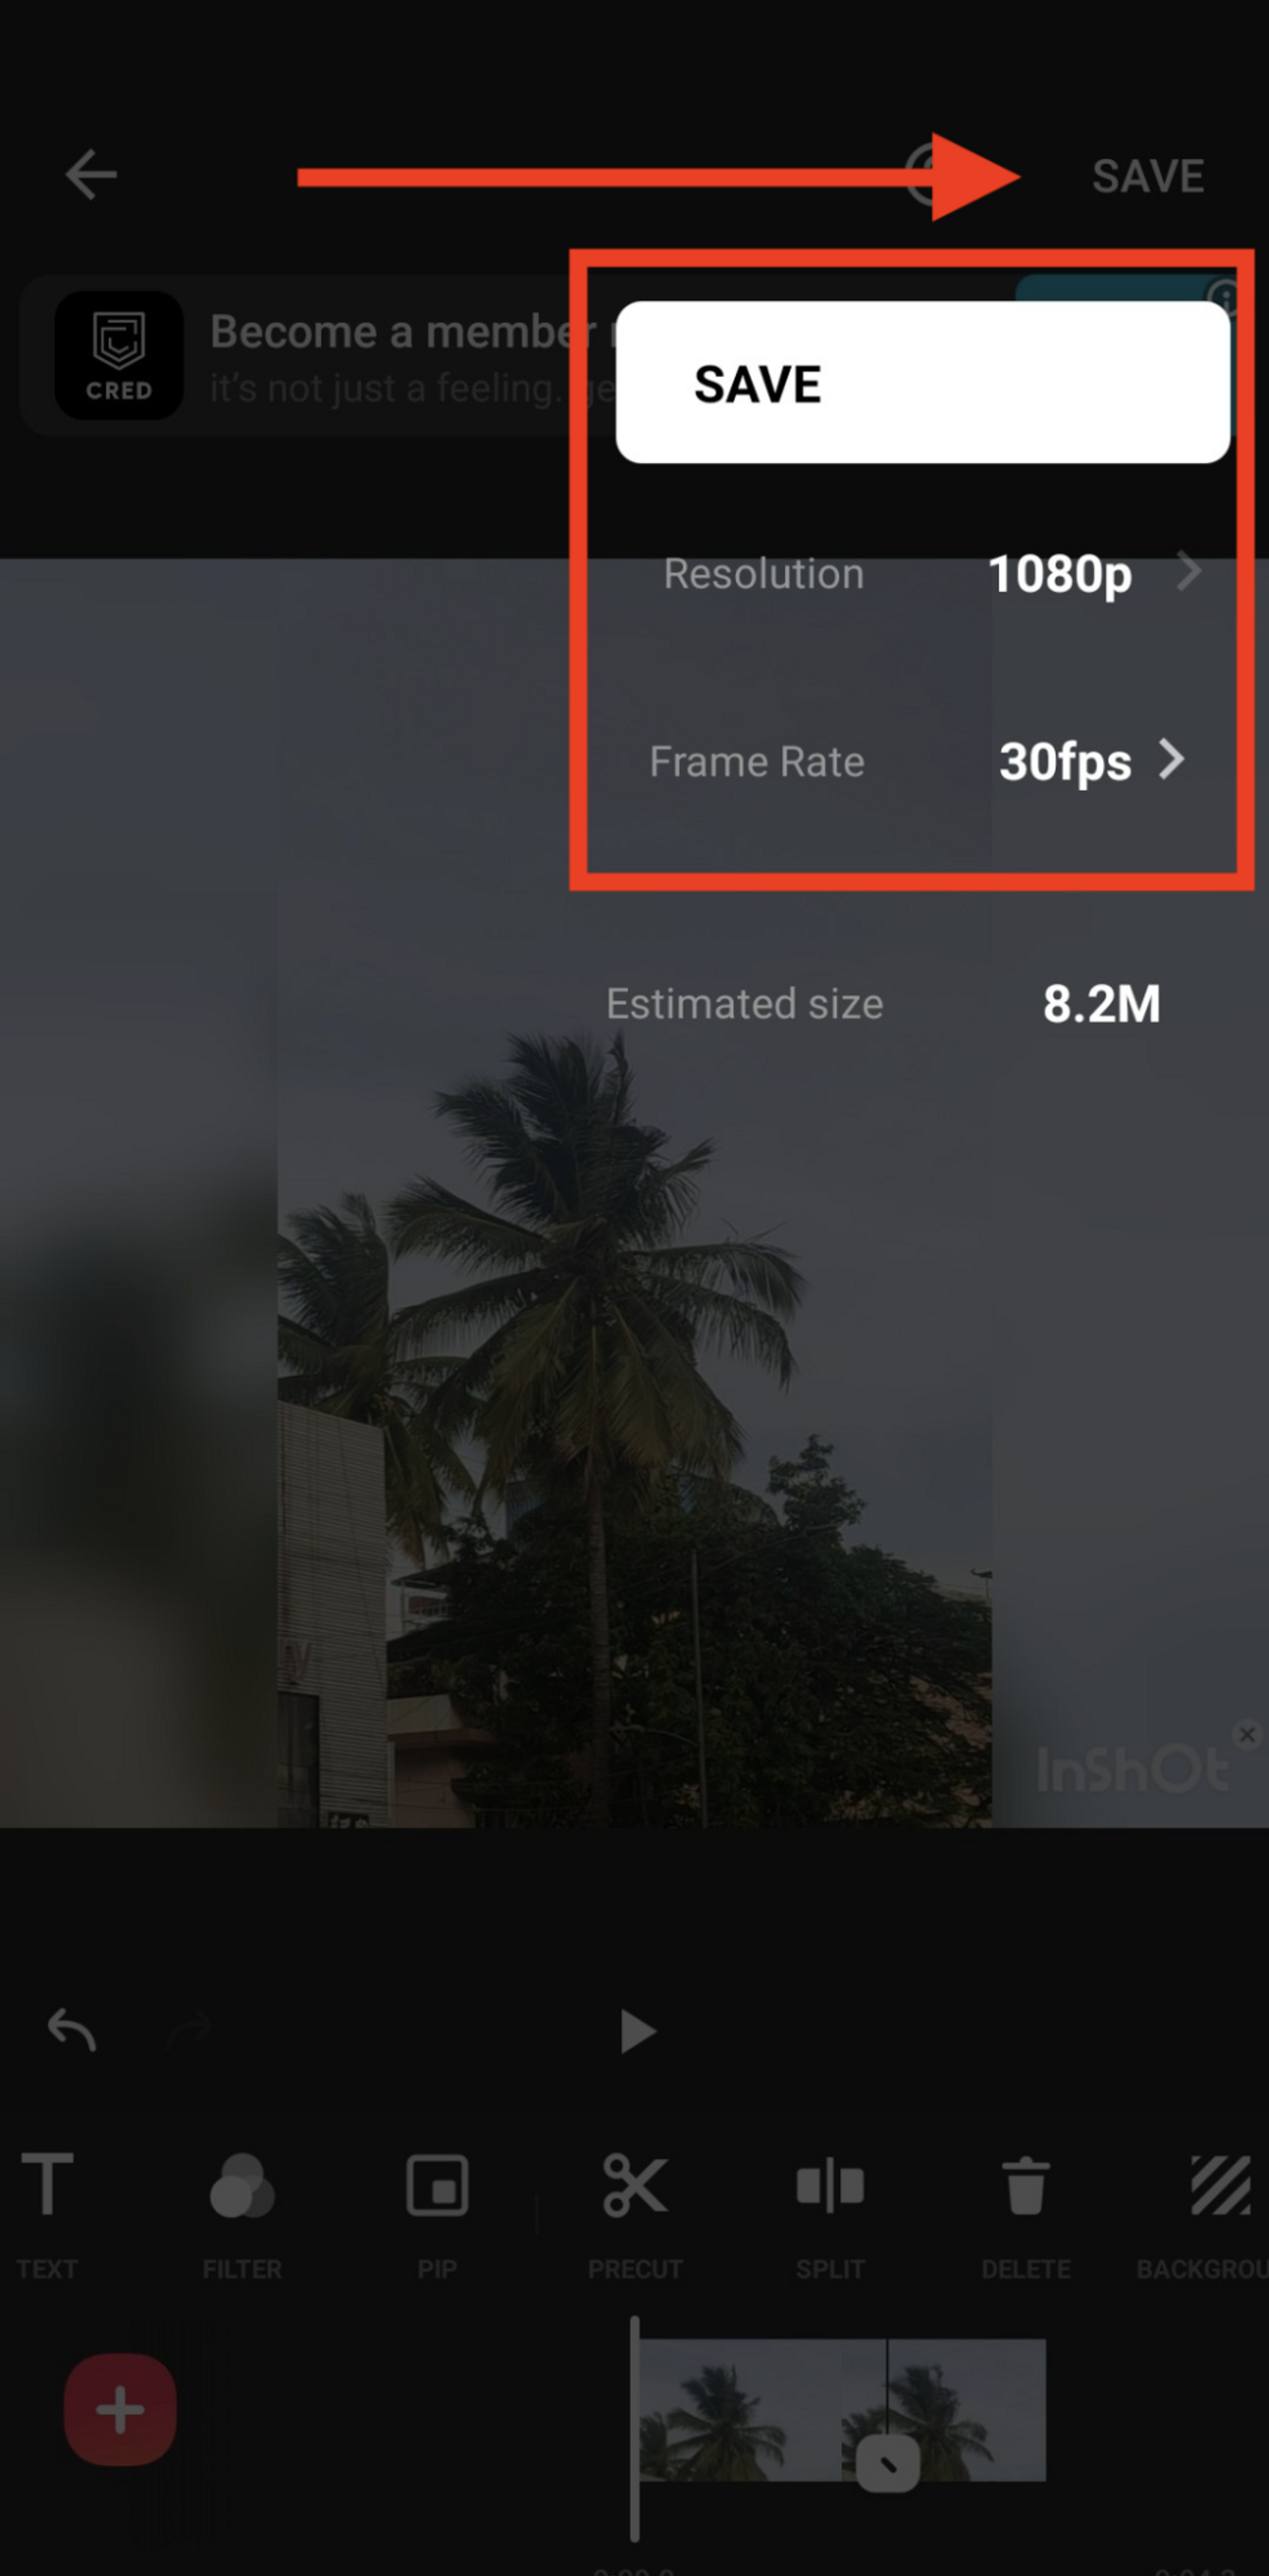
Step 5: Click “Save”, choose your resolution and frame rate then hit “Save” to download the video to your gallery.
Wrapping up
If you want to retain your audience’s attention and show them only parts of your video that matter the most and add value to them- knowing how to trim a video and how to cut a video are super essential skills that you need to master. With this guide, you now know the exact steps you can take to achieve this across any platform- mobile or desktop.
If you enjoyed this article and want to dive deeper into how you can best edit your videos, you should definitely check out our guide on how to edit your videos more efficiently. If you have any questions or want to continue the conversation, hop over to the InVideo community and learn from 25K other marketers and video creators just like you!
And if you’re looking to create thumb-stopping videos in minutes (even if you’re not a PRO), don’t forget to sign-up for an account on InVideo.io today.