


Wondering how to make cool video edits without having to master complicated and expensive video editing softwares?
With InVideo’s intuitive online editor, you can create high-quality videos that impress, no matter your experience level with editing. Whether you’re creating a promotional video or wondering how to edit YouTube videos, this guide will help you hit the ground running even if you’ve never edited before.
Here’s what we’ll cover:
(1) How to Make Basic Edits to your Video
(2) How to Add Text to your Video
(3) How to Add Royalty-Free Music to your Video
(4) How to Add Stickers, Shapes, Masks and Overlays to your Video
(5) How to Add your Brand Logo to your Video
(6) How to Access and Use 5000+ Templates to Create Videos in Under 5 Minutes
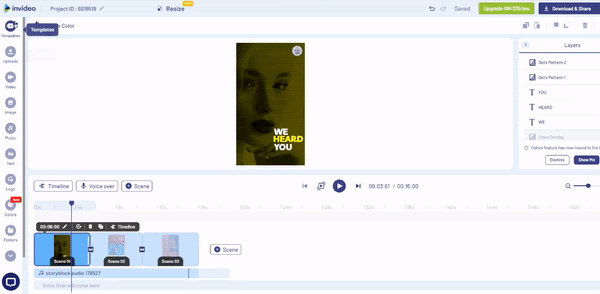
(1) How to Make Basic Edits to your Video
To begin with, we’ll walk you through basic edits such as how to crop, trim, change the speed and the aspect ratio of your video.
But first — if you haven’t already — make sure you’ve signed up for your free InVideo account.
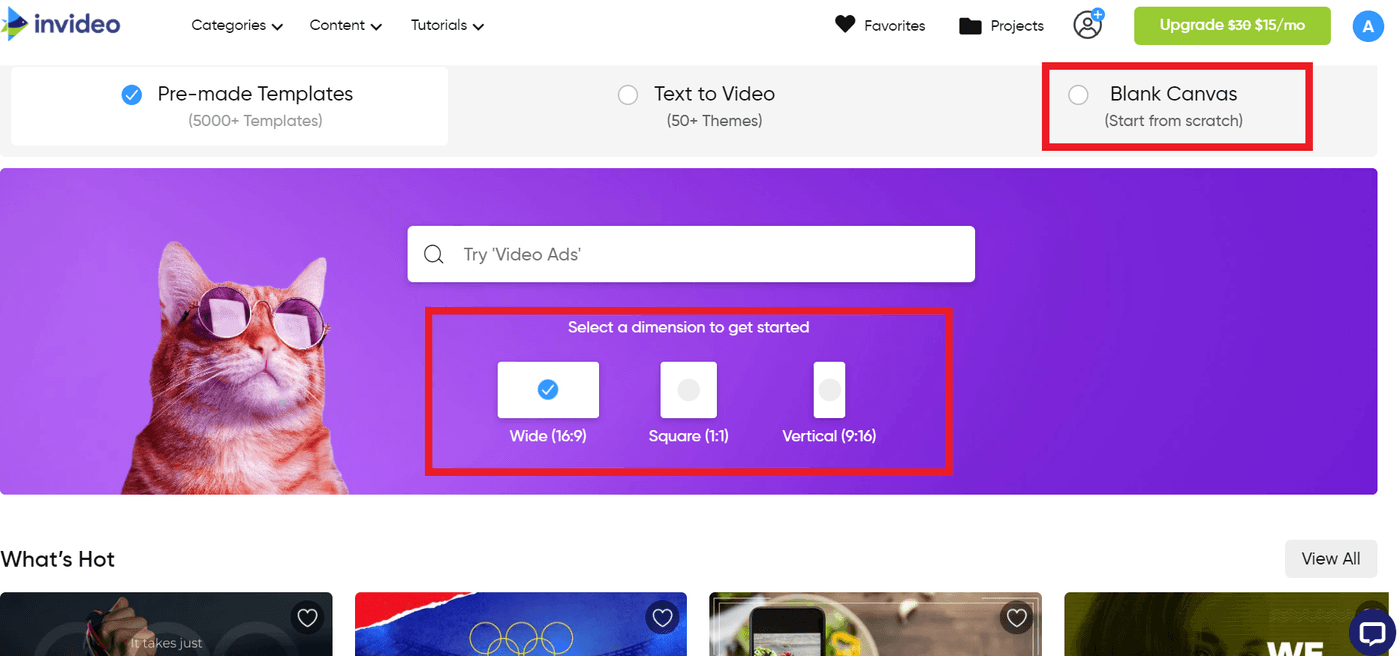
If you’re starting from scratch with a stock video or media from your library, select ‘Blank Canvas’ and choose the aspect ratio you want your video to be in.
Wide (16:9) is generally a safe bet for YouTube videos and looks great on monitors, Square (1:1) is handy to use for your Instagram feed, and Vertical is best for mobile videos on platforms like Instagram reels, Instagram stories, IGTV and TikTok.
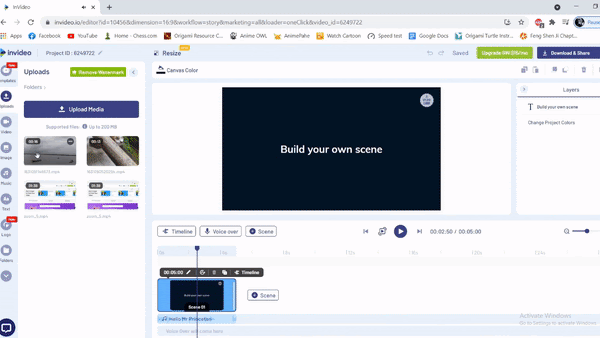
Step 1: Upload and Organize your Media
It’s time to upload your media.
To optimize your workflow, it’s best to organize your content into separate folders so it’s easy to find and add to the timeline. To do this, click on the ‘Folders’ option and select ‘Create New Folder’. Name your folder and then hit ‘Create Folder’.

Now you’ll be able to drag and drop content right into the respective folders.
You can organize your footage into folders according to the date of the shoot, the filming location, different speakers (if it’s an interview), point of view (if you shot with multiple cameras), B-Rolls, etc. These will make adding your clips to the timeline even easier because you won’t be hunting around for content.
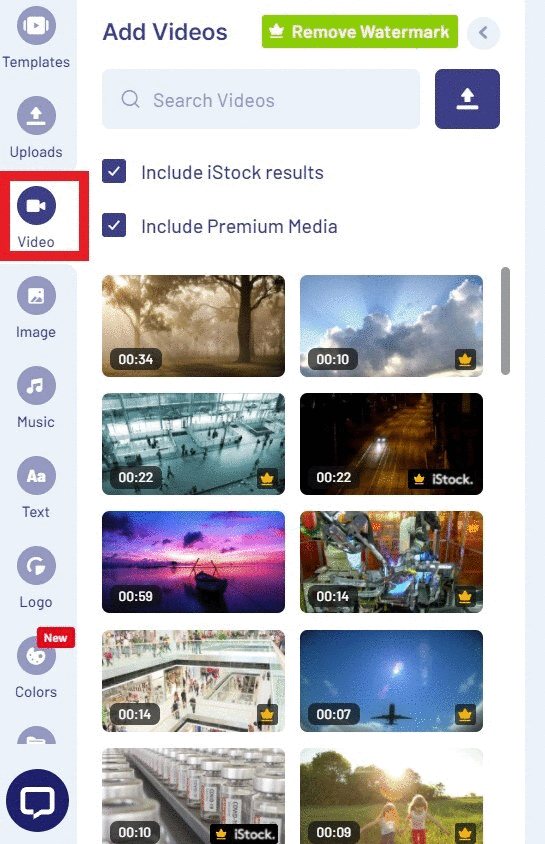
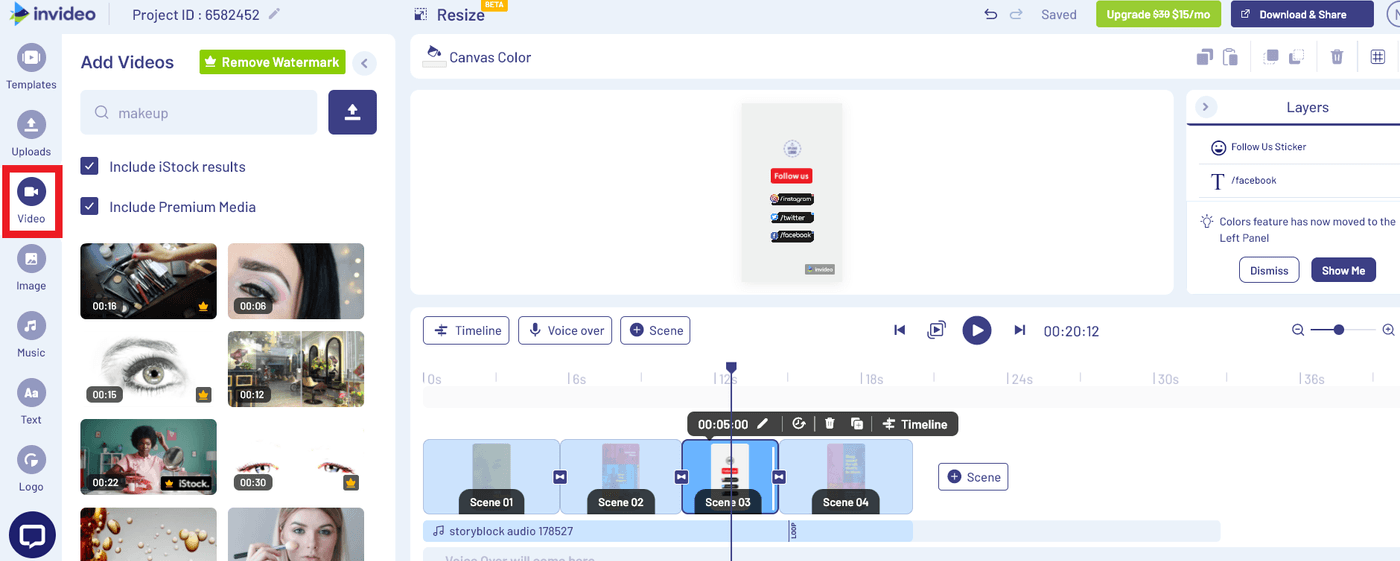
Step 2: Add your Video or Stock Media to the Timeline
You can now select from the correct folder and drag and drop the clips into the timeline. If your media file is larger than the InVideo limit of 200 MB, you can compress it to reduce the file size.
Using the ‘Video’ option on the left, you can also add stock media from our in-built media library of more than 8M royalty-free images and video clips.
Step 3: Trim your Video
When you’re dropping your clip onto the timeline, you’ll get a pop-up where you can manually adjust the slider to only select and add the part of your footage that you want to include in your video.
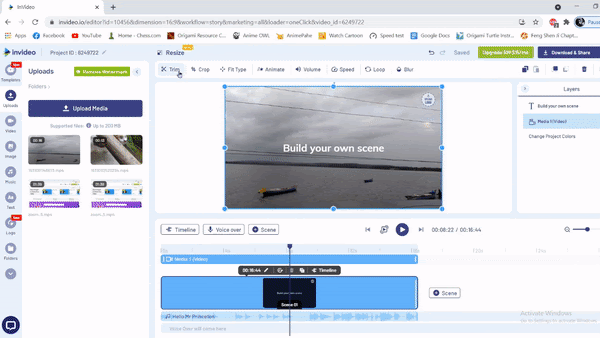
If your clip is already the desired length, click on ‘Use Full Video’.
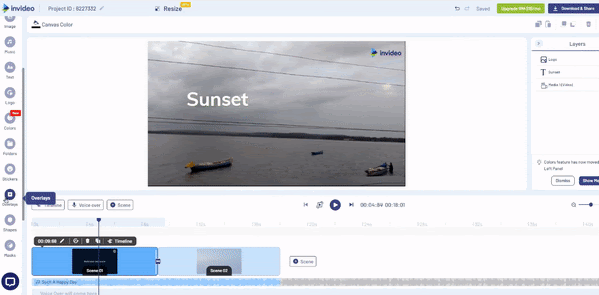
Now that our clips are uploaded, we can customize them using the toolbar of basic edits available at the top of the screen.

You can hit the ‘Trim’ button if you want to make further changes to do with the duration of the clip.
Let’s move on to how to crop your video next.
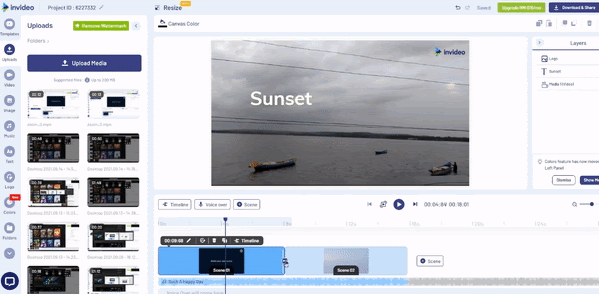
Step 4: Crop your Video
If you decide you want only a specific portion of the frame in your final output or want to change the aspect ratio of your footage, resize it by adjusting the four square corners till the darkened areas cover the unwanted bits.

You could also make edits by cropping it to standard aspect ratios like 1:1, 16:9 and 9:16 using the buttons below the preview, which we’ve highlighted in red. And using the play button (leftmost icon), you can play the video to see a preview of the changes you’ve made.
If the changes are good to go, select done to lock them.
Step 5: Create and Manage Transitions
Nailing your transitions is a must if you want to master how to make good video edits. Transitions can really help with the pacing of your video, taking it from short and snappy to more breezy and artistic — or vice versa. They’re an essential tool for immersive and effective storytelling. Besides the default or standard cut, we have a whole bunch of other transitions to choose from too!
All you have to do to put in a transition between two clips is to click on the button between two scenes and access the transitions library; now, just pick one you like!
If you’d like to explore more transitions you can use, and what they’re best suited for — check out this video:
Let’s move on to adjusting the speed of your video.
Step 6: Adjust the Speed of your Video
In case you’d like to slow down or speed up your content, select the ‘Speed’ option and slide to your desired speed.
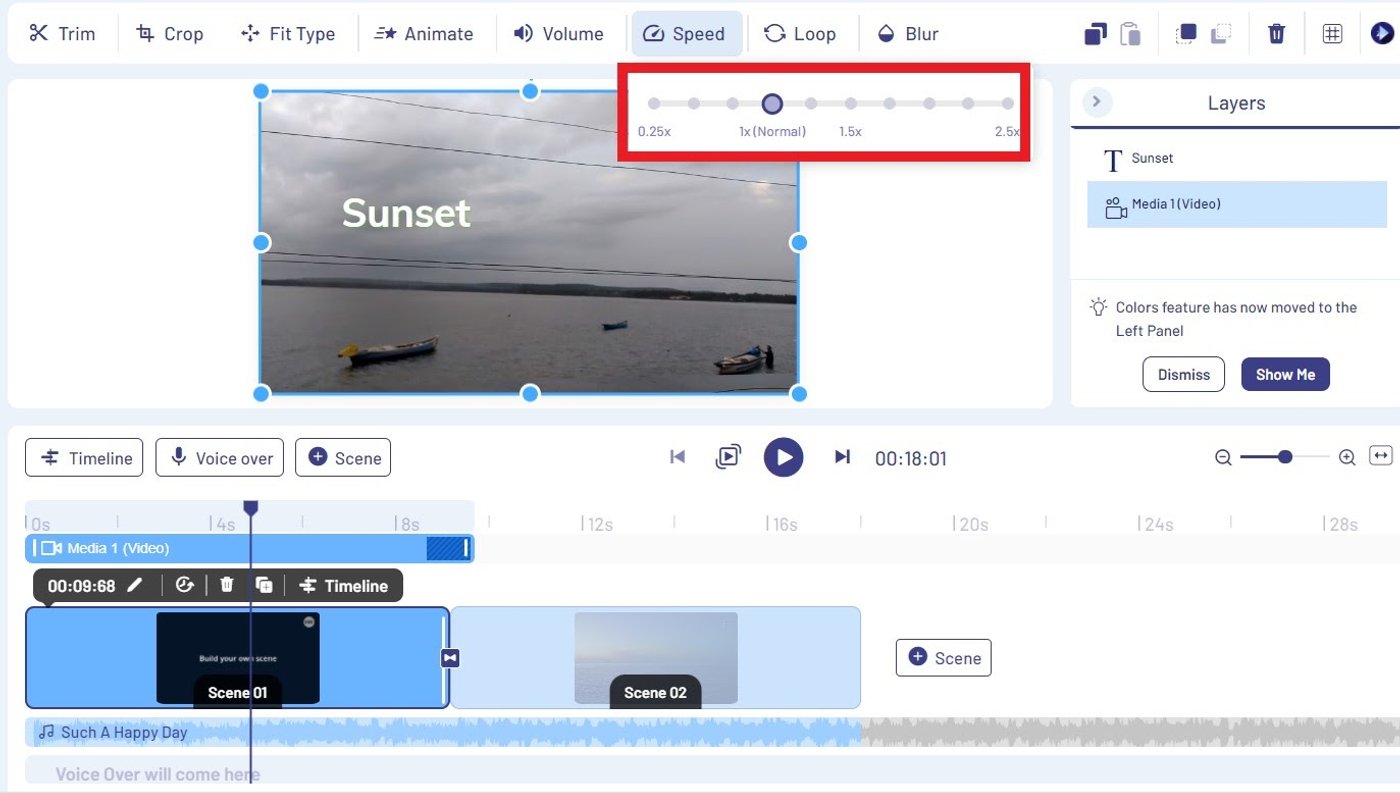
The available options allow you to change the speed anywhere from 0.25x to 2.5x.
Step 7: Blur Your Video
You can do this by clicking on the ‘Blur’ option and using the slider to apply the level of blur you’d like.

If you're placing text on the video, blurring that portion of the visuals can help make the words stand out and appear more legible.
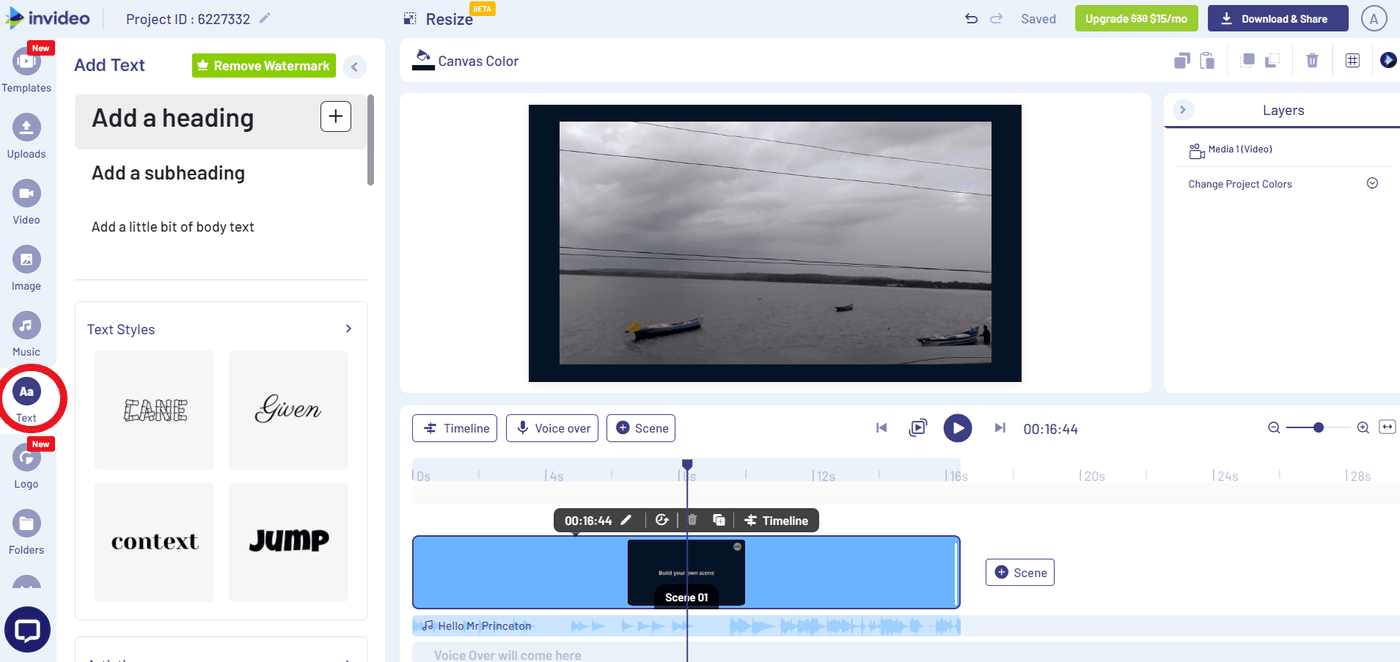
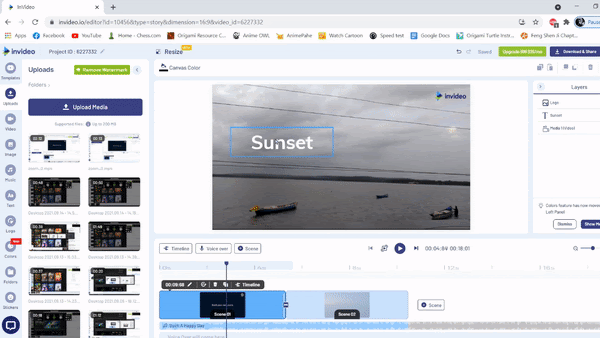
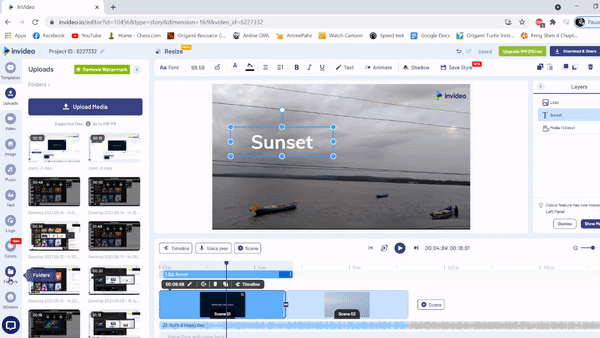
(2) How to Add Text to your Video
Adding text to your video can help you emphasize important parts of your script. It can also convey key info like CTAs, instructions, locations, social media handles, exclusive offers, brand slogans, etc.

You can choose from static headings, subheadings, or body text which will appear on the video as a standard text box.
From the menu on top of the editor, you can tweak the text, and customize everything from the orientation, font, fill colors, size and alignment.

On the left column, there are also animated text elements that have been sorted into themes like Classic, Modern, Artistic, etc.
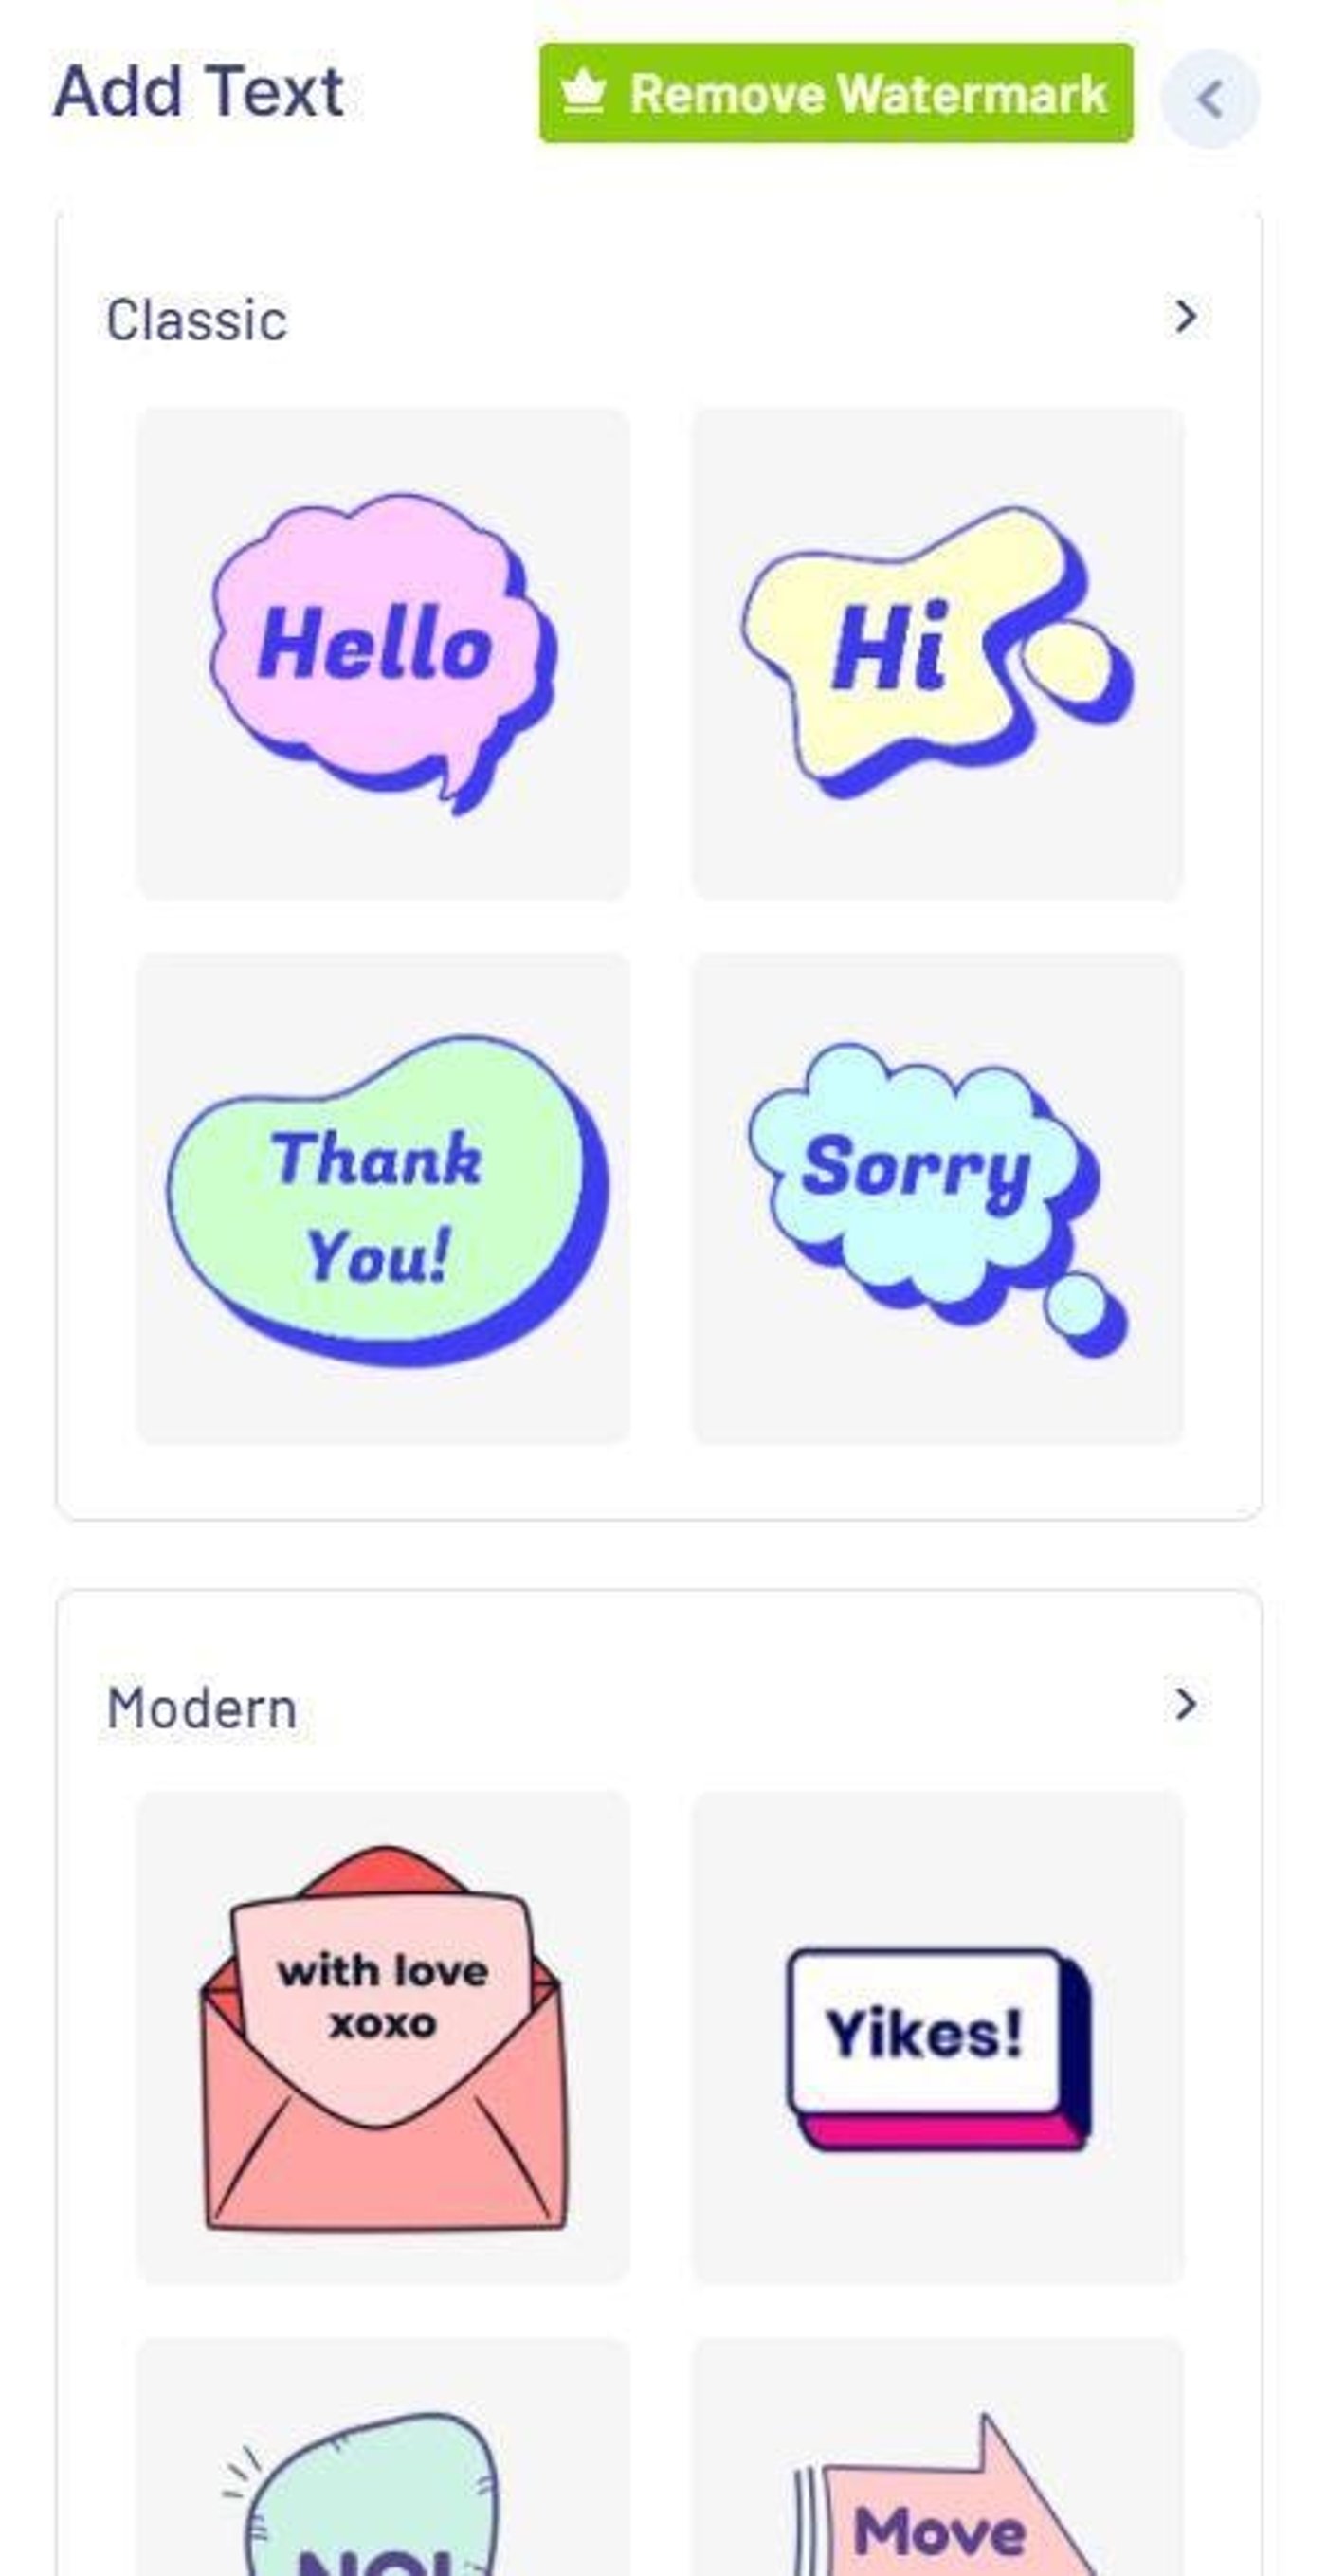
Here, you can also find animated text styles catering to the needs of specific elements like Social Media Credits, Location Boxes, and more.

To add text, just select the ‘Text’ option on the left toolbar and you’ll see the below screen.
You can further change the font type, font size or even the color of your text.

You can dress it up further by adding shadows and animating the text.
Let’s talk about music next!

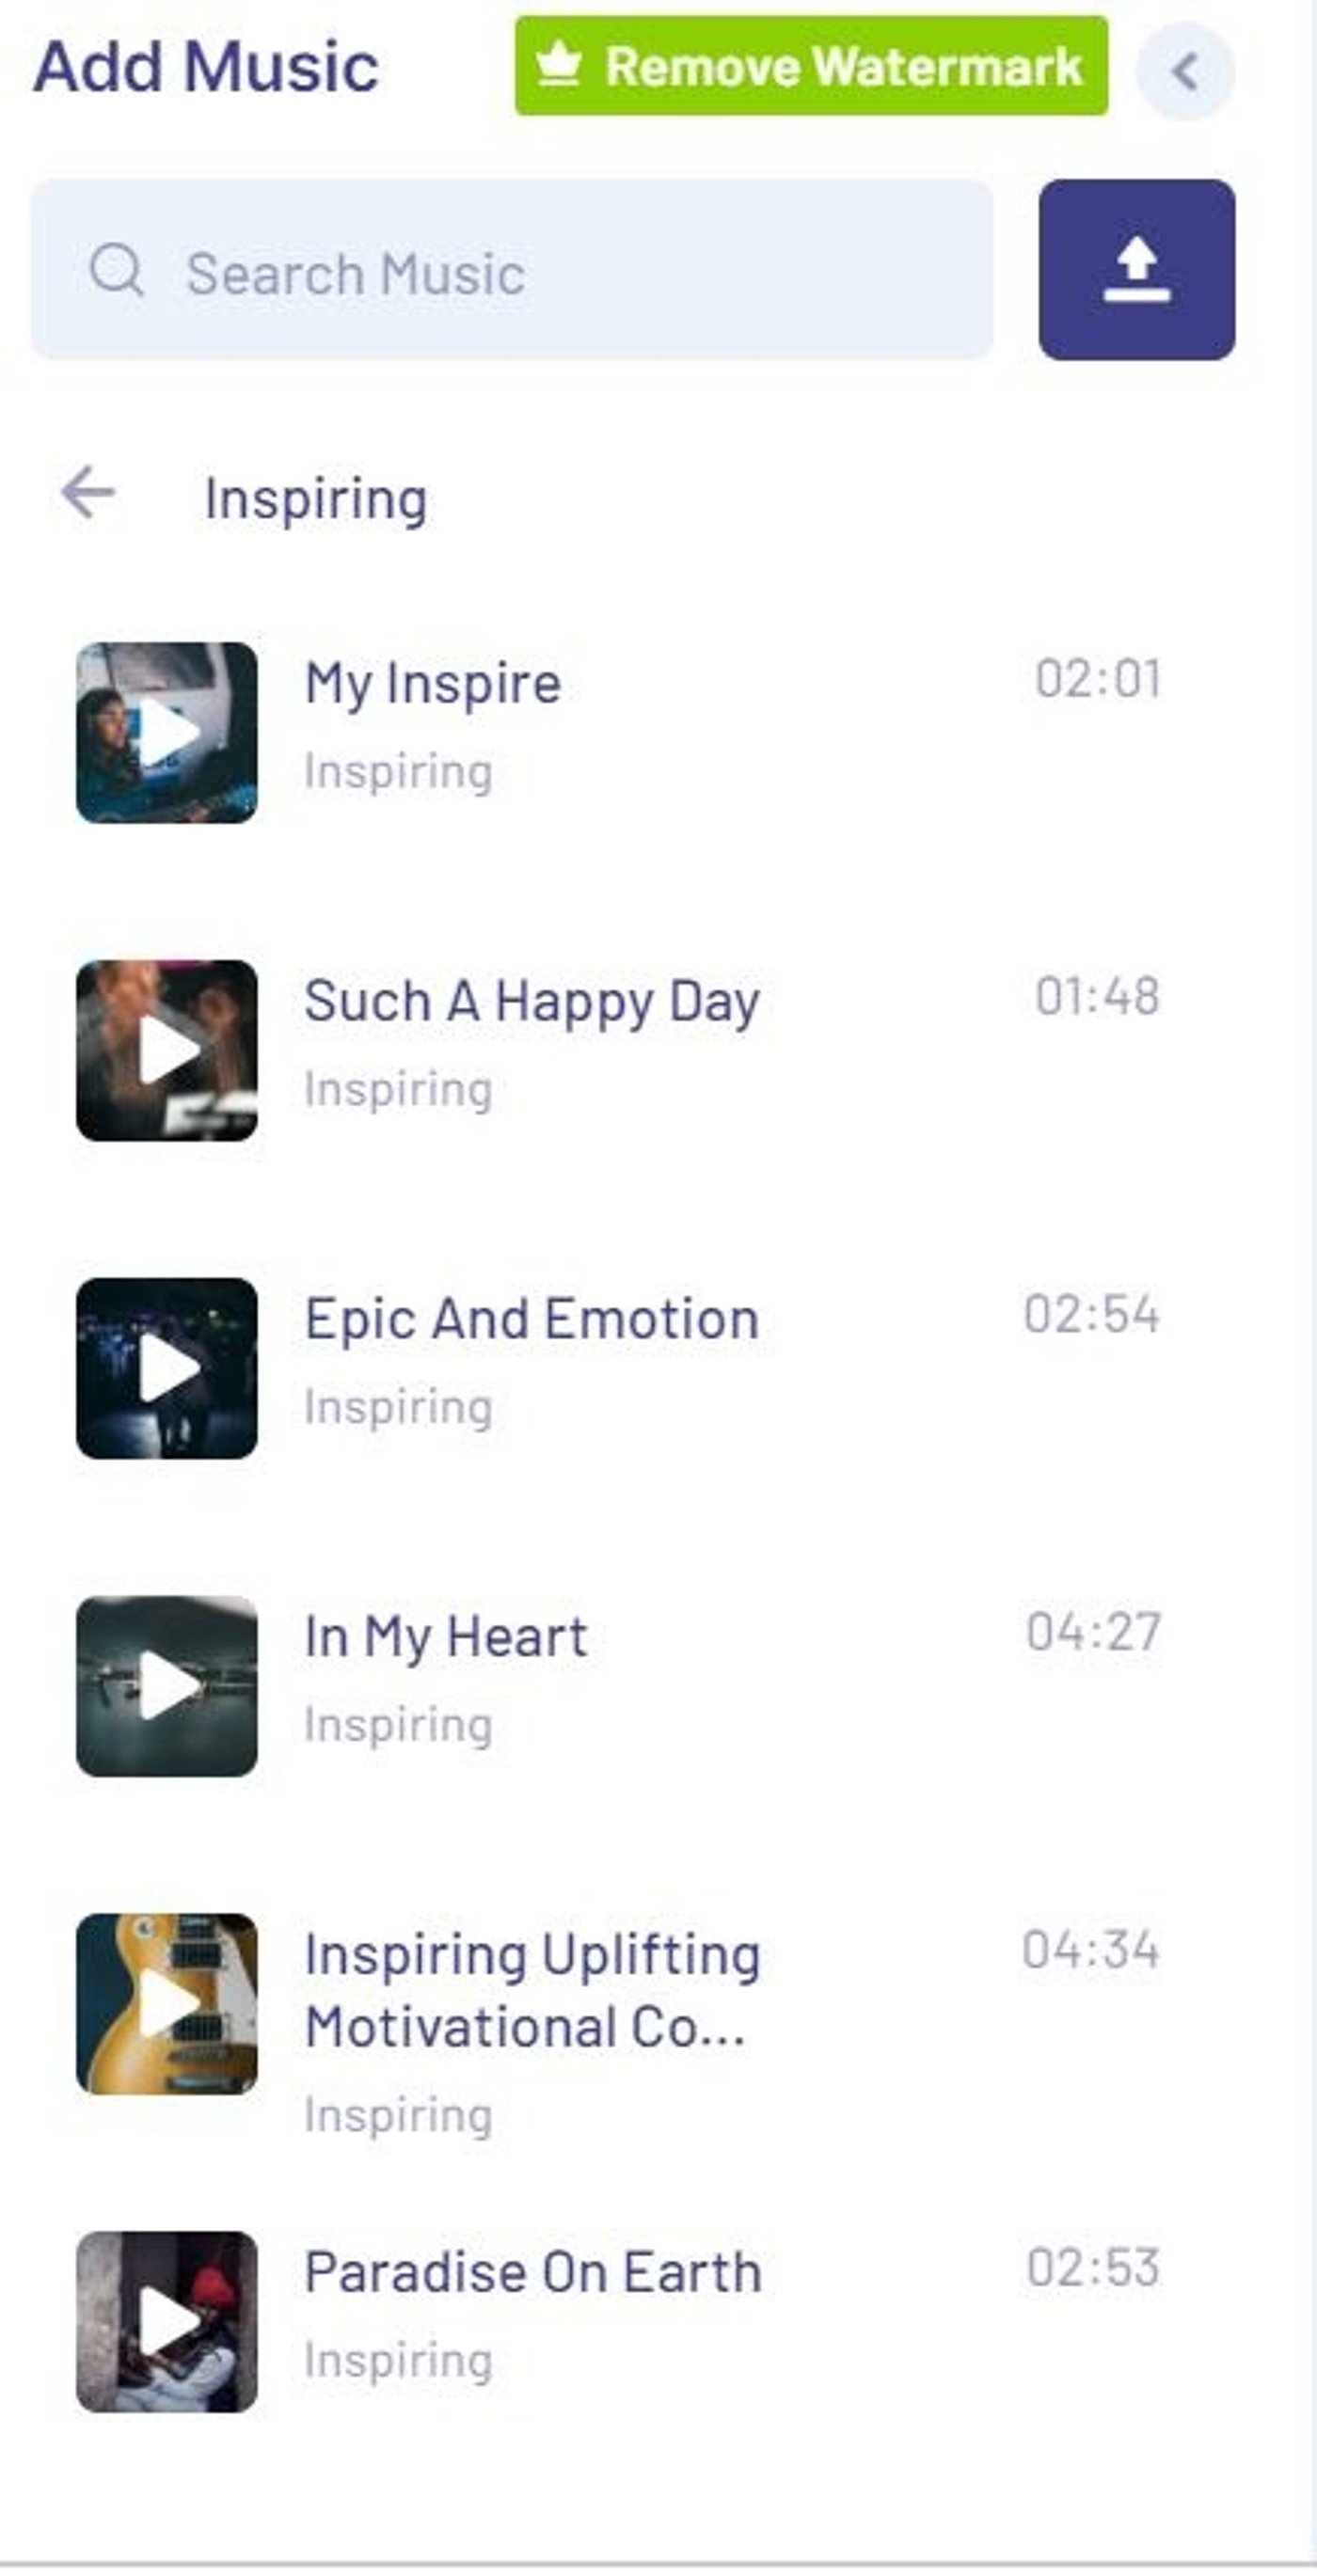
(3) How to Add Royalty-Free Music to your Video
When it comes to adding royalty-free music, InVideo has thousands of audio tracks that span ambient music as well as sound effects for all your audio needs. These have been conveniently sorted by mood, genre, and sound effects to make it super easy for you to find the kind of audio you need.
You can use the search bar to narrow the results further.

Browse through the collection and find a track you like.
Then click on the three dots next to the track — you can now either replace all music, or add the track you have selected before or after the existing one.
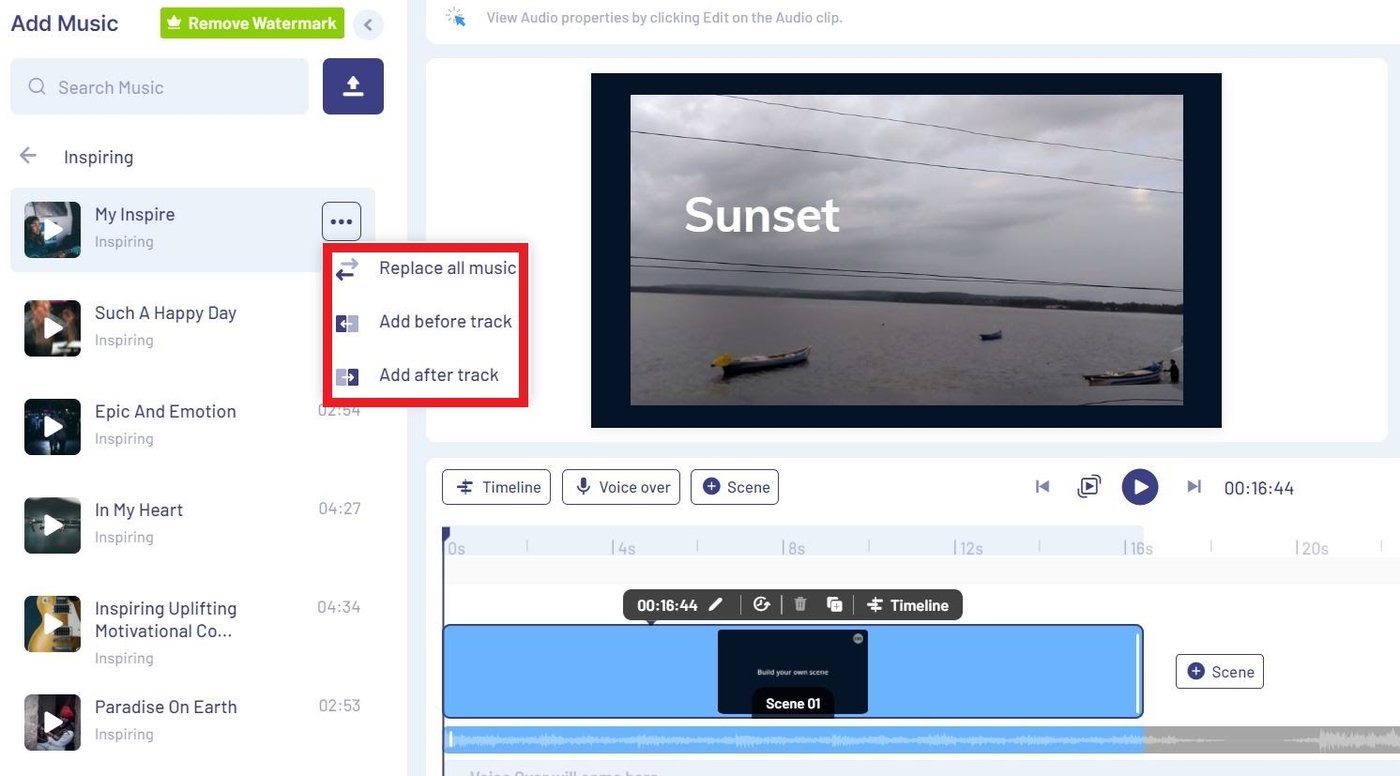
You’ll notice that the track audio conveniently gets added to a separate editing timeline altogether. From there, you can click on the ‘Edit’ option and customize it further by trimming the track, adjusting the volume, looping the audio, fading in or out etc.

Now that we’ve got the basic structure down, it’s time to accessorize!
(4) How to Add Stickers, Shapes, Masks and Overlays to your Video
Stickers, shapes, masks, and overlays are other great additions to add to the mood you’re trying to create with your content. They can help your video feel just right and convey all the important information without overloading your content with text.
Let’s kick it off with stickers.
(A) Stickers
On the toolbar on the left, scroll down until you see the ‘Stickers’ option.

Here, you can search for all types of stickers, both animated and static. With stickers, the possibilities are really quite endless depending on what your video’s about.
In this example, we’re going to apply a ‘Places’ stamp sticker to indicate where the video was taken.
Similarly, you can pick from Call to Action stickers, emoji stickers, social media stickers and more.
From the top, you can also add a separate in/out animation for your sticker, loop it, and even tweak the opacity.

Next up — let’s talk Overlays.
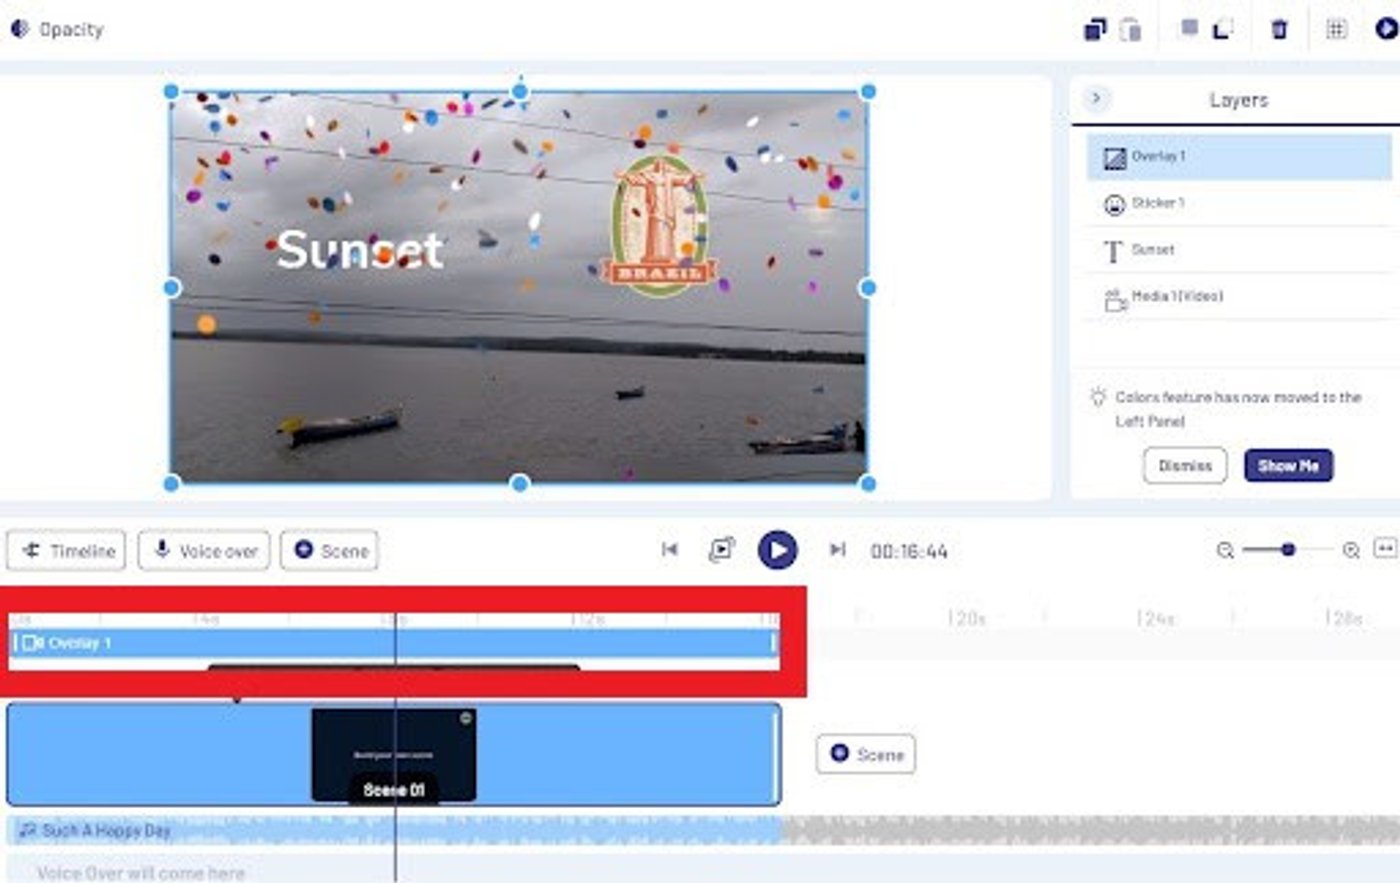
(B) Overlays
Overlays are one of the easiest and most effective ways to completely transform the mood of the video.
InVideo has a collection of overlay effects that includes everything from glitchy effects, vintage overlays, confetti, different animated shape borders, lens flares, etc.

To get a preview of the overlay, you simply need to hover your cursor over it and you will be shown what the overlay looks like on top of a black screen, which is a total time saver.
You can also change the opacity of the overlay which comes in super handy, especially if you’re looking to layer a few overlays to achieve your desired look.
And, of course, you can use the timeline on the bottom of the screen to trim the duration and move it to a select portion in case you only want it to appear for a certain amount of time.
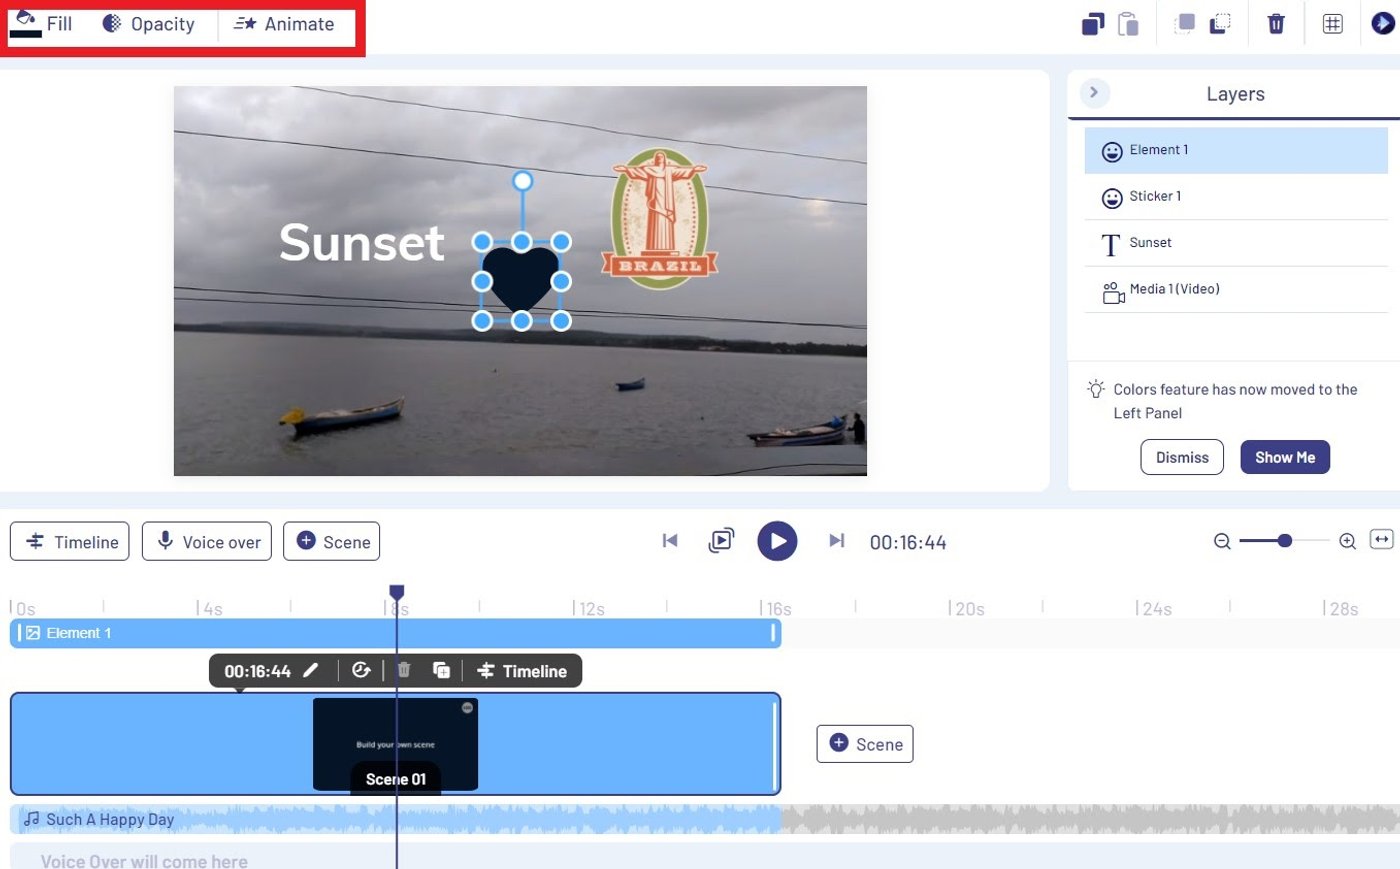
(C) Shapes
Next up, we have the Shapes panel further down on the left toolbar.

This is a great place to get static shapes to add to your content, like arrows, geometric shapes, quotation marks, etc. You can search for a specific shape using the search bar.
You can adjust the fill color and opacity and animate this shape as well.
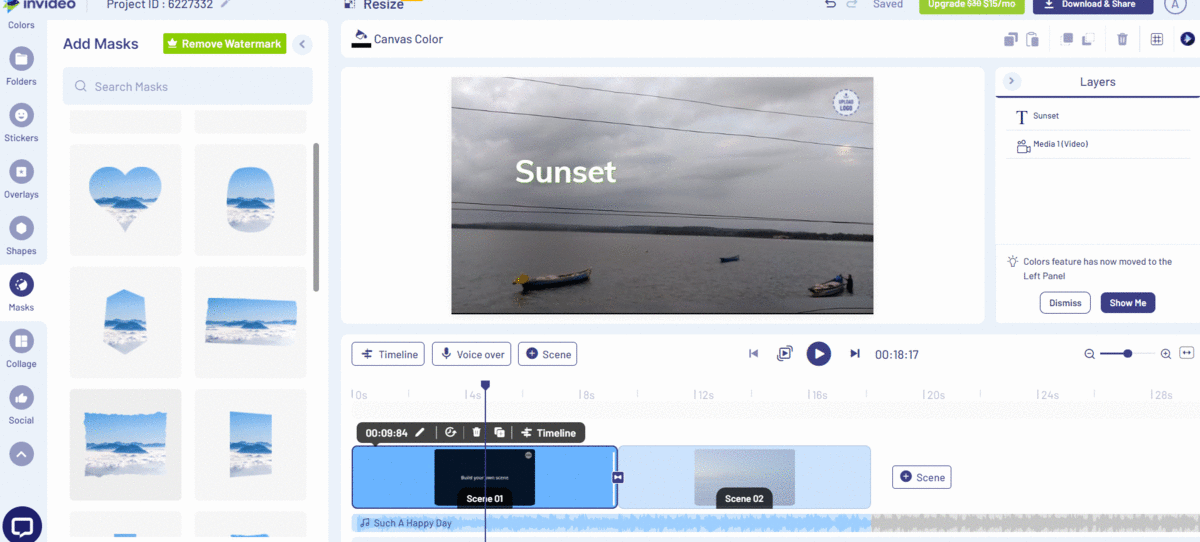
(D) Masks
Finally, we have the Masks option.
This feature allows you to work with different layers to conceal the image or video below. These masks come in customizable and fun shapes that will take your content to the next level.
A video with a clipping mask could look something like this.

So, if you want to leave viewers amazed by using masks, here’s how to do it:
Step 1: On the left panel, go to Masks.

Step 2: Click on the mask that you like onto the screen.
Step 3: And then drag and drop your media onto the highlighted area of the mask.
You can adjust the edges of the mask just like all the other elements we discussed above, and the duration can be tweaked by dragging to lengthen or shorten in the timeline.
Step 4: Edit, trim, animate or loop the mask from the panel on top.
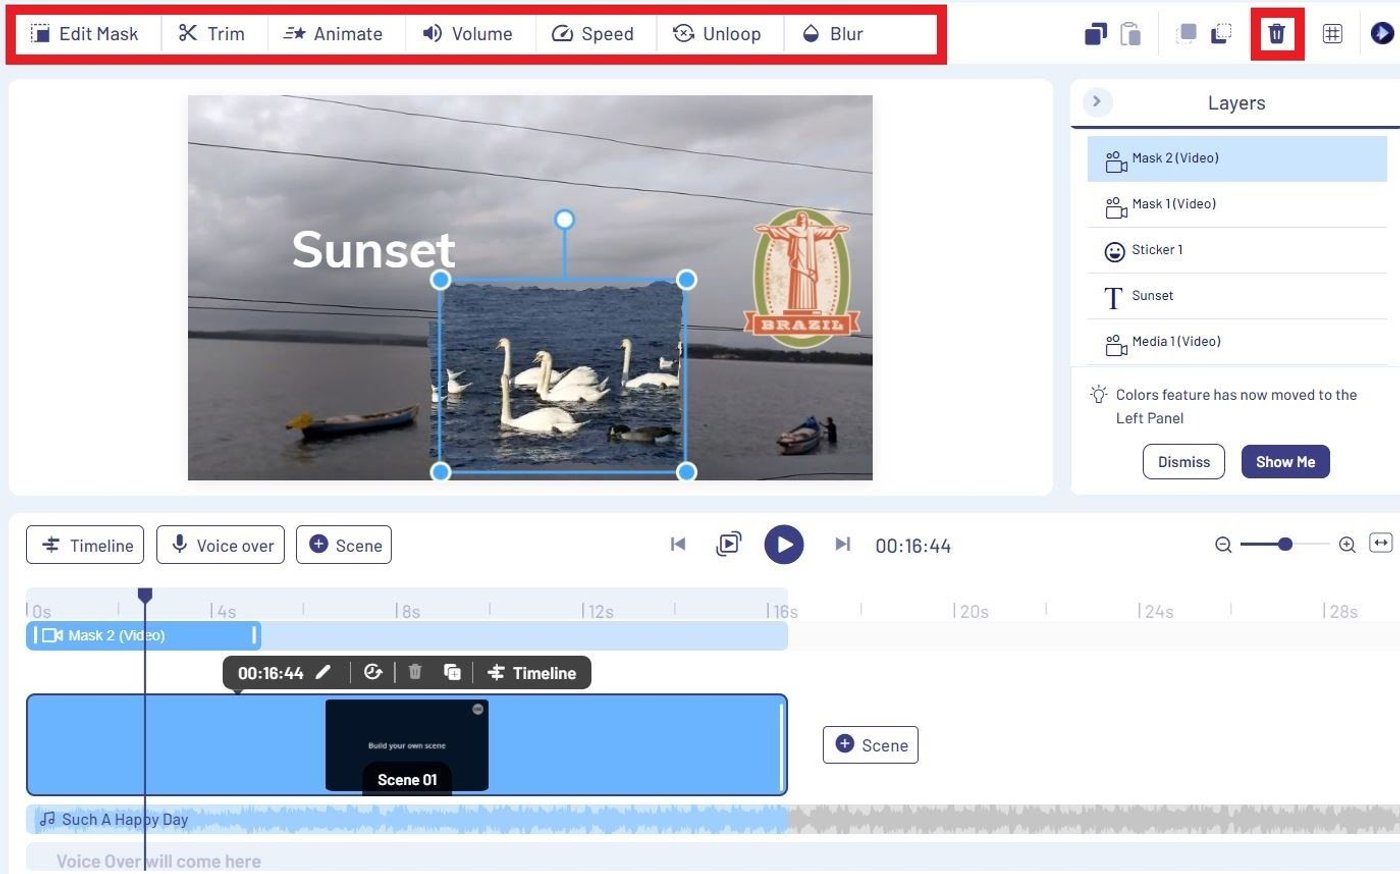
Step 5: To delete the element, either hit 'Delete' on your keyboard or use the trash button on the right panel, which we’ve marked in the above image.
Check out our video below for a more in-depth guide on clipping masks.
Now that your timeline is in place and your content looks visually enticing, let’s ensure that all this hard work we’ve done is on-brand as well.
If you’re creating content for your business, it’s super important to make sure that your brand assets like the logo are prominently featured on your video.
Even if you’re an independent creator, having your logo will help viewers identify who is behind the video.
(5) How to Add your Brand Logo to your Video
InVideo makes doing this super easy as there’s a logo placeholder for you on the top right where you can insert your brand logo.
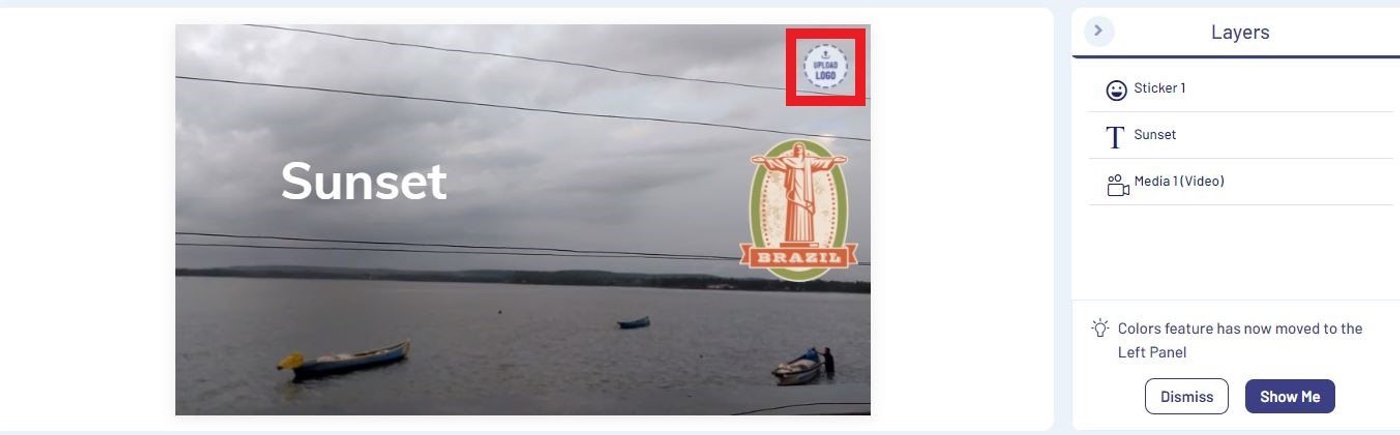
Alternatively, select the brand new ‘Logo’ button from the menu on the left.

Import or drop your logo here, and place it where you’d like it to show up on your video.
You can move the logo or size it up or down using the blue markers.

Looking good!
Now that you know how to add your organization’s logo to your video, let’s take you through how to access and customize over 5000+ pre-made templates from InVideo’s stock library to make your video creation process even simpler.
(6) How to Access and Use 5000+ Templates to Create Videos in Under 5 minutes
If you’re really pressed for time but don’t want to compromise on a professional-looking, high-quality video, InVideo’s templates are the way to go.
The best part is that these templates are 100% customisable, which means that you can go ahead and tweak every little element of the template, if that's what they want to. You have the freedom to pick up an ice cream template in InVideo, and transform it into a shoe ad.
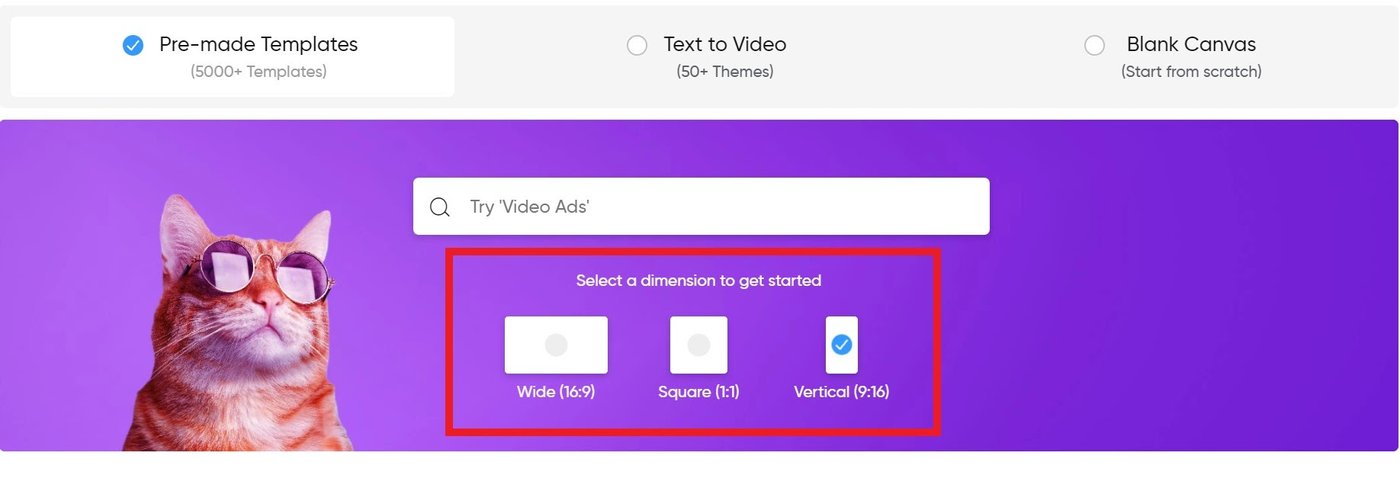
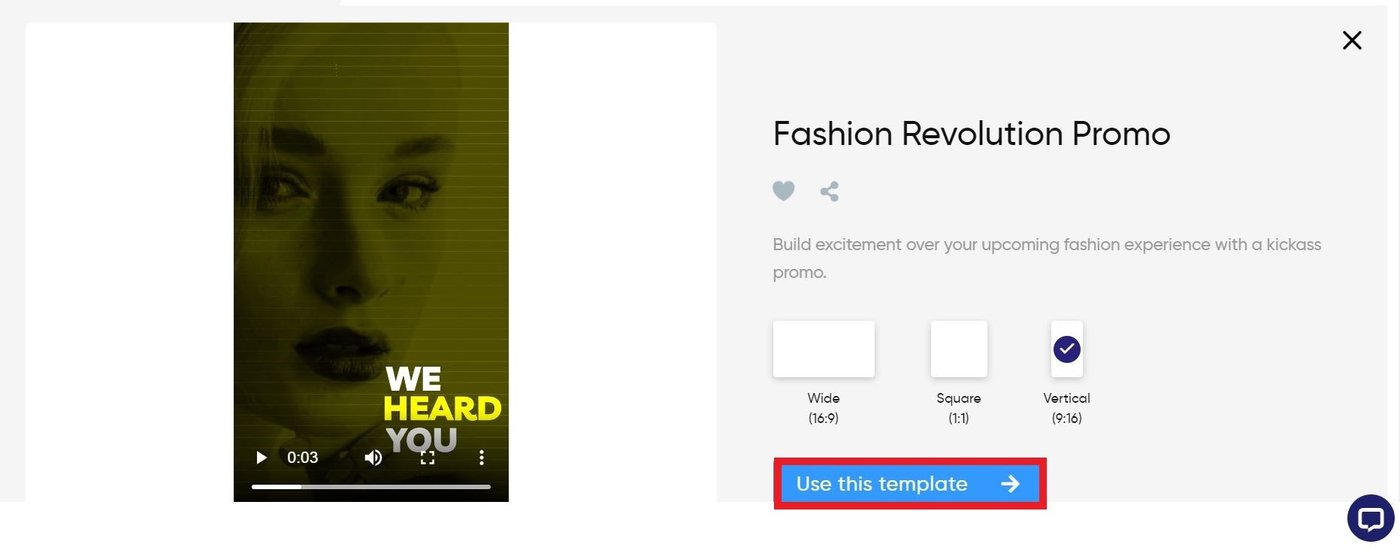
To find a template and make it your own, start by selecting the aspect ratio you want to use.
For this project, we want to make a vertical sneak peek video for a new beauty product launch.
The available templates will show up below.

Select the one you want to use, and it’ll take you to the timeline.
You’ll notice the timeline has the preset clips and music that’s used in the template. Select the Upload Media button to begin importing your footage.
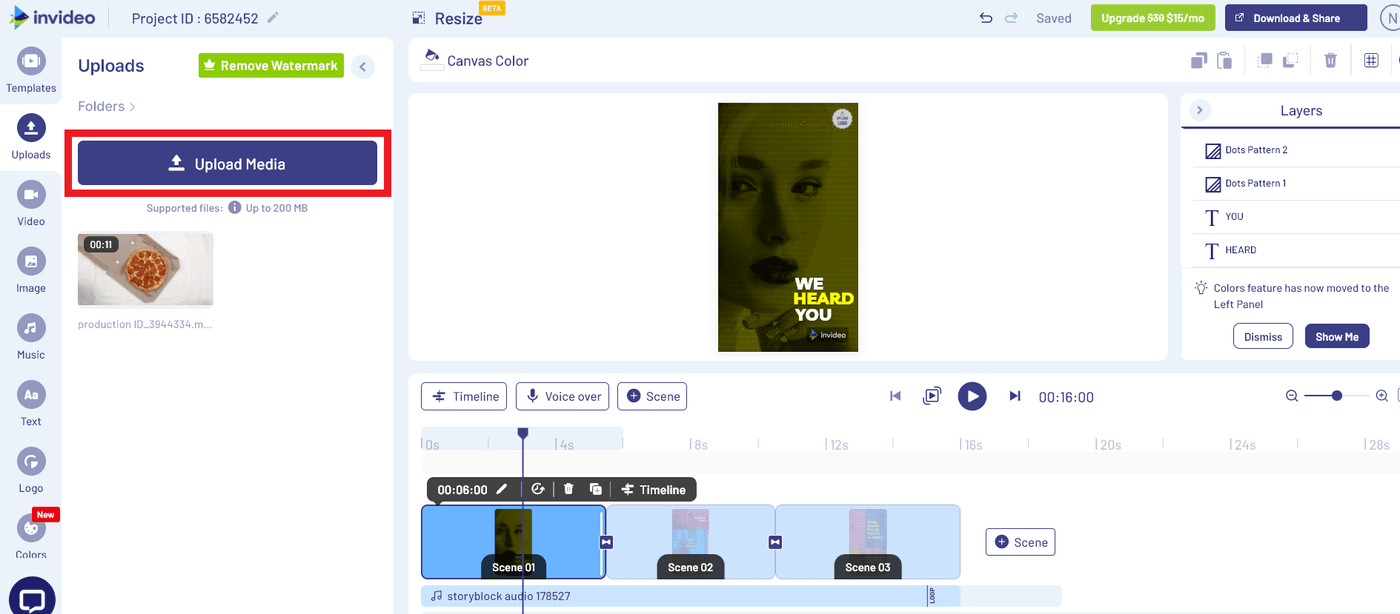
Now that you’ve added your videos, you can drag it right onto the canvas as shown below.

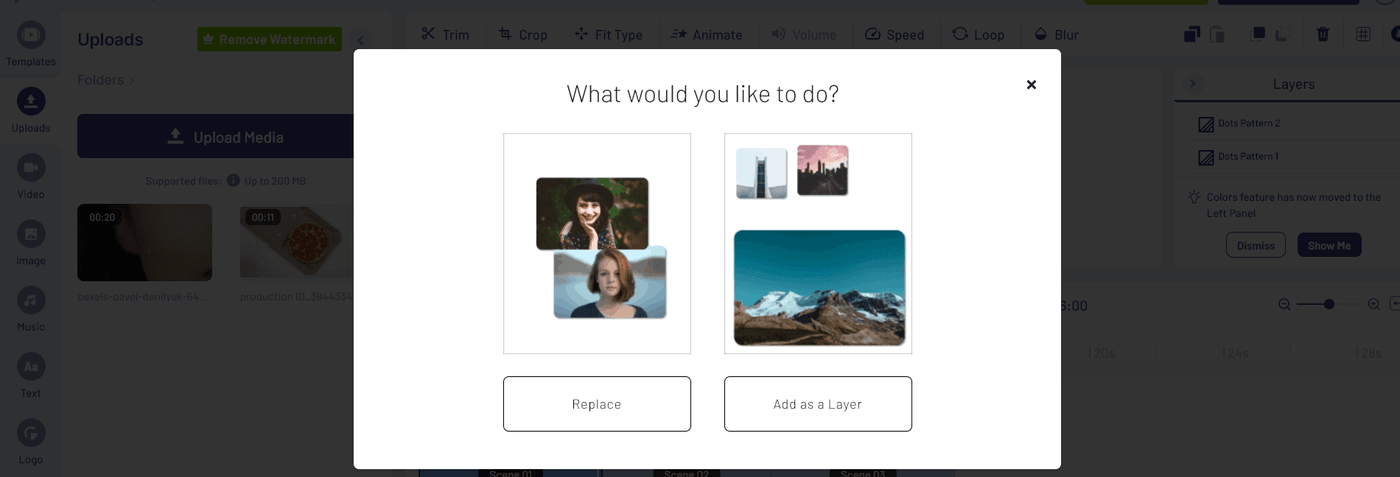
You can either add it on top of the existing preset clip, or select the Replace option as per your requirements.
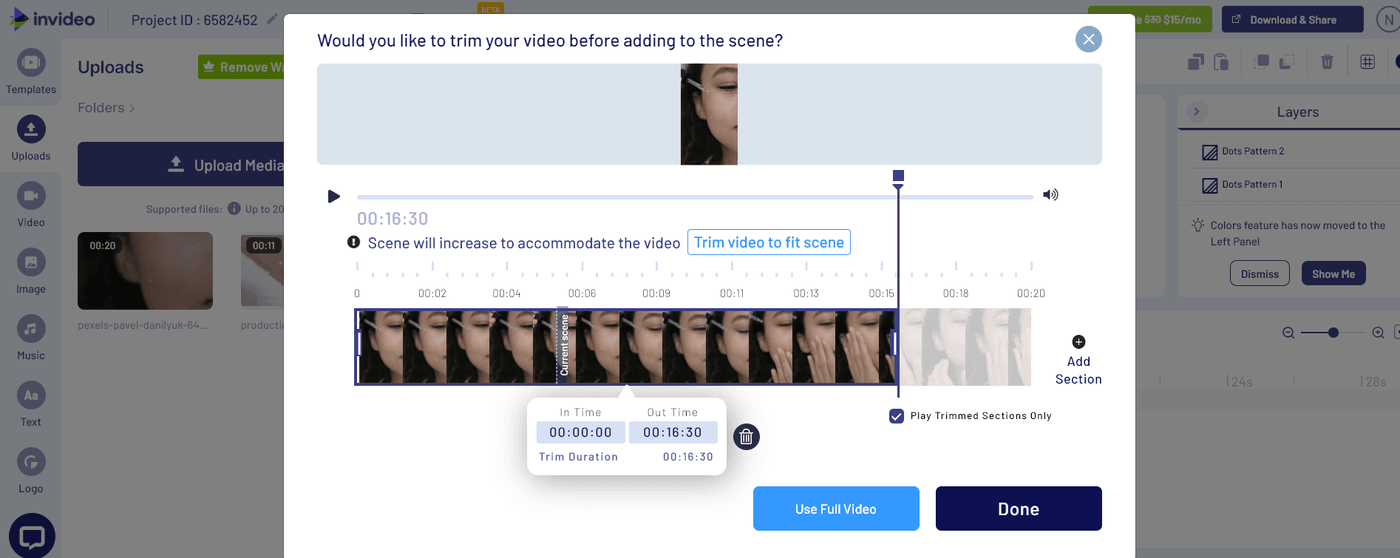
You’ll also see a pop-up here that allows you to trim the video to your desired length, or you can select Use Full Video to use the entire clip.
You can also mix and match scenes from different templates. To do this, select the Templates option on the left toolbar.
Use the Search bar to find specific clips that suit your video type (eg testimonial or sale) or the specific clip you are looking for (social media and endscreen).
Once you’ve selected the scene you want to use, click on the ‘Add Scene’ option.
In case you’re running short on clips, InVideo also has an inbuilt stock library consisting of thousands of videos which you can use.
Simply click on the Video option on the left toolbar and type in your search query. No need to go hunting around on stock footage sites.
You can also edit the existing text inside the template. A toolbar will also pop up above that allows you to change the size, color, font, alignment and animation styles and more.
Add new text boxes for headings, subheadings, or body bext using the Text option on the left toolbar.
Finally, it’s time to export and download your video. Click on the Download & Share option on the top right of the screen.

Now, all you have to do is wait for the video to render and click Download. At this point, you can also edit the name of the file.
If you’d like to see another example of us customizing an InVideo template, check out the video below.
What sets InVideo apart is the versatility it offers by enabling you to completely customise each and every element of your template.

Conclusion
Now that you know how to make cool edits to your videos in under 5 minutes, go forth and exercise your creativity to the fullest. Check out our guide on editing videos if you’re looking for more tips on video creation and making edits.
Plus — if you have any questions or want to take the conversation further, check out the InVideo community where you can learn from 25K other marketers and video creators just like you.