


Ever felt the need to create a how-to tutorial or save a part of a live stream? Did you know that you can do all this super easily on your Mac using the in-built screen recorder without having to install any external apps?
In this guide, we’ll take you through the exact step-by-step process you can use to record your Mac’s screen using the built-in screen recorders. What’s more? Stay with us till the end and we’ll also show you how to edit your screen recordings and turn them into thumb-stopping PRO videos with an easy-to-use online editor like InVideo.
Here’s what you’ll learn:
1. How to screen record on Mac using the Screenshot feature?
2. How to screen record on Mac using QuickTime Player?
3. How to record your video on Mac?

1. How to screen record on Mac using the Screenshot feature?
Apple added the screen record feature in its Mojave operating system from 2018—in the form of an app called Screenshot. So, if your system has any MacOS post - Mojave and Catalina, you can conveniently record your screen by following these steps:
Step 1: Hold shift + cmd + 5 simultaneously to open the Screenshot app.
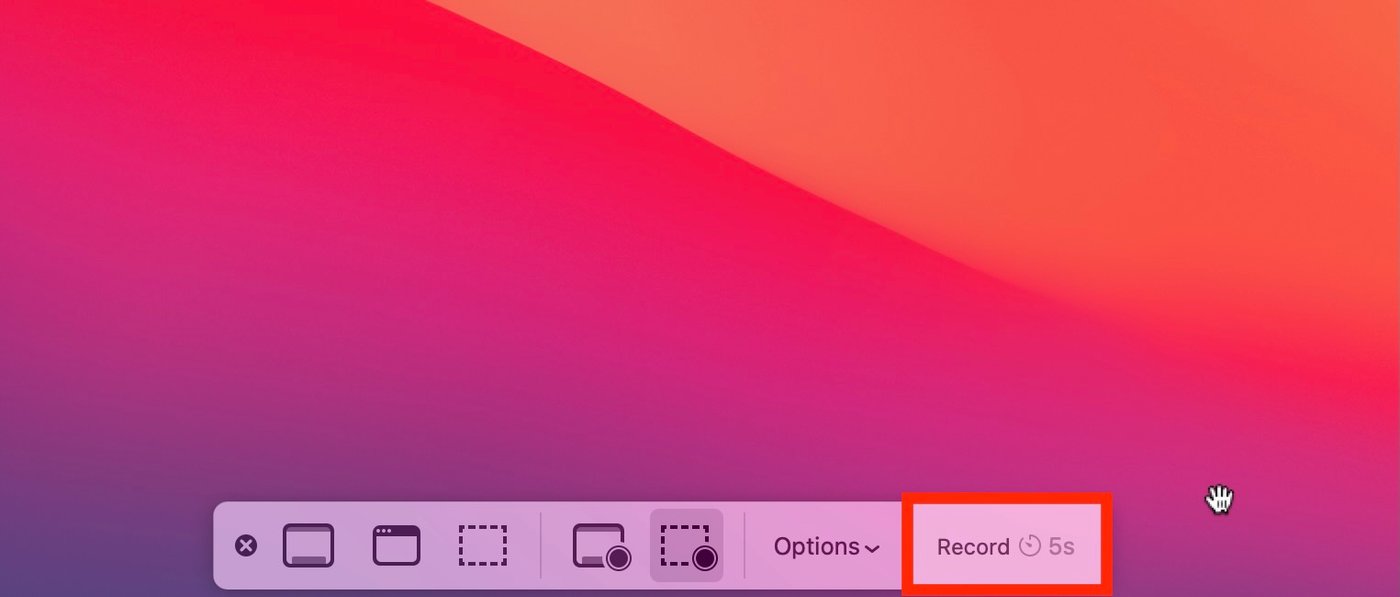
Step 2: At the bottom of your screen, you’ll find a control bar with options to take a screenshot or film a screen recording. The two icons with a little circle on the corner are the screen recording options—to record the whole screen or only a part of it.

Step 3: If you choose the “Record Selected Portion” option, a box will pop up for you to resize the portion you want to record.

Step 4: Click on “Options” again to select other preferences for your video—like the mic for sound, the location for saving it, and timer if required.

Step 5: Once you’re ready, hit the “Record” button. Or click anywhere on the screen if you’re recording the whole window. In case you’ve set a timer, then wait for the countdown before the recording starts.
Step 6: To end your recording, press control + command + esc simultaneously, or click on the stop icon at the top right corner of your screen or hit command + shift + 5 to get the control bar and click the stop button there.

As soon as you stop recording, your video will appear as a thumbnail at the bottom right corner of your screen.
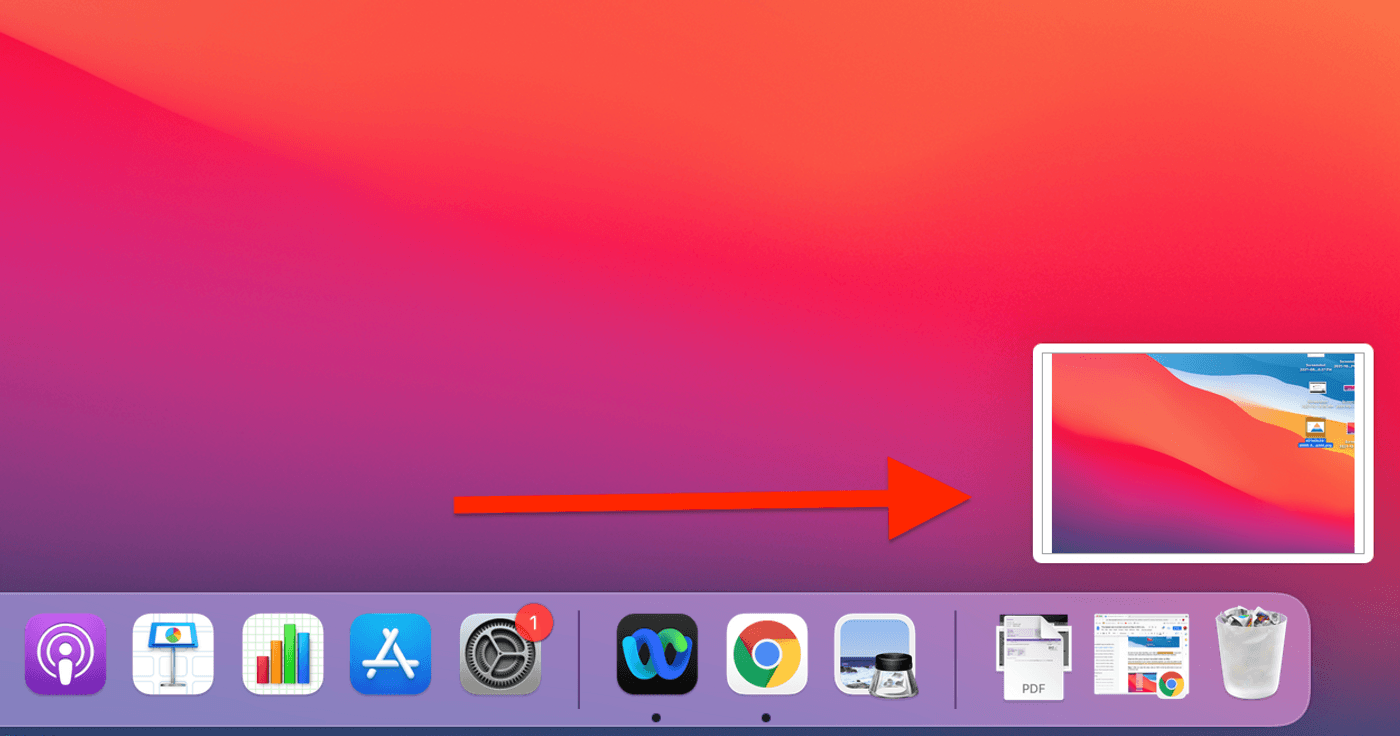
If you don’t click or move it around, your video will be saved as a QuickTime movie on your desktop. If you want to preview the video, hit the spacebar on your keyboard
How to trim your screen recorded video on Mac
Once the thumbnail of your screen recording appears, you have the option to edit the video. If the thumbnail disappears, you can open your recording by double-clicking on the video on your desktop.
Step 1: After you open the video, click on “Edit” on the top left corner of your screen and click on the trim icon.
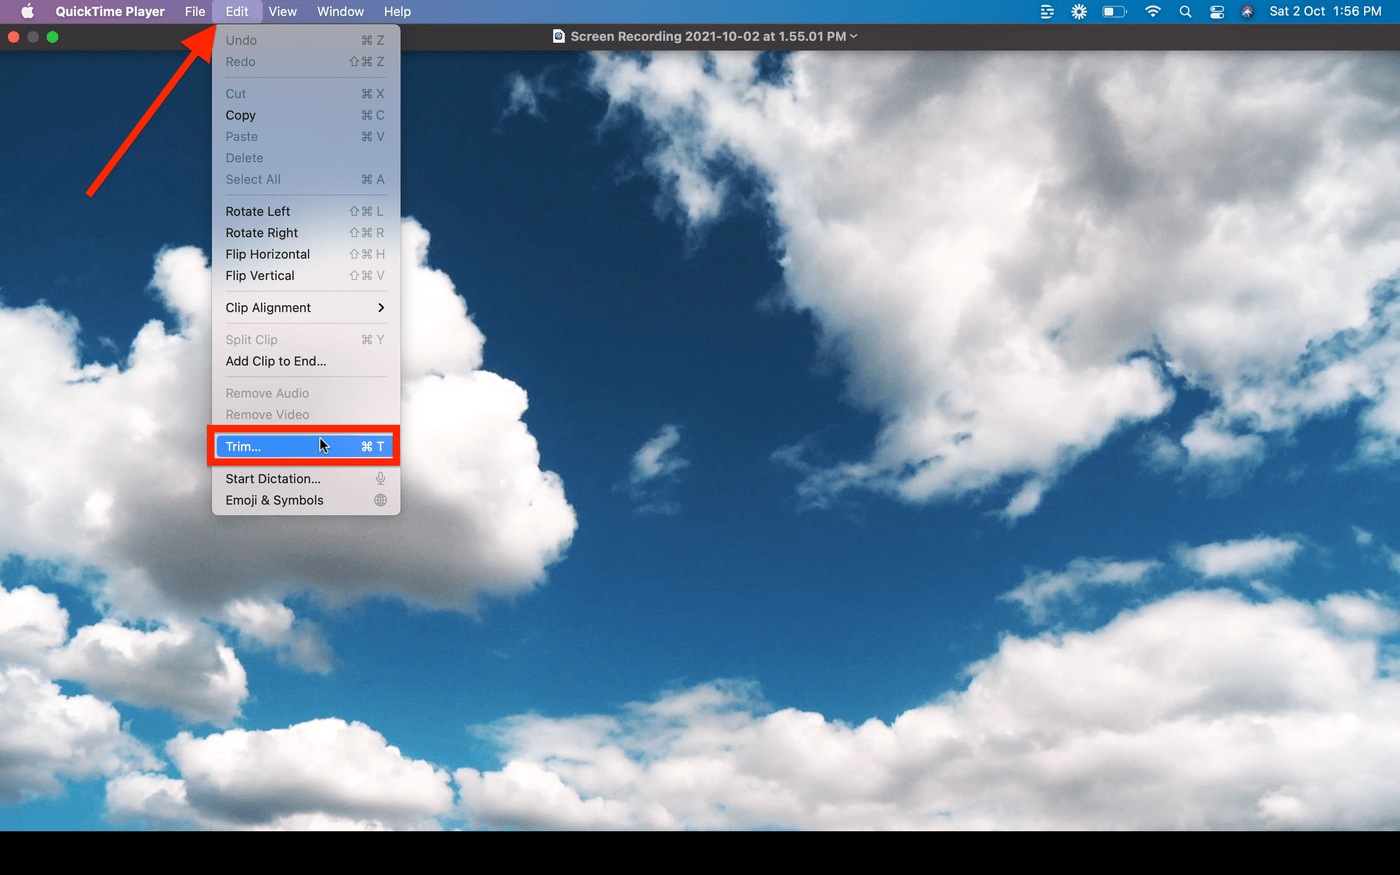
Step 2: Use the slider at the bottom to choose your start and end points and click on “Trim.” The edited video will replace the existing one on your desktop.

2. How to screen record on Mac using QuickTime Player
While most Mac users know QuickTime Player as a video player, it also functions as a great screen recorder. The app comes pre-installed on most Mac devices, however you can always download it online.
Here’s how you can screen record on Mac using QuickTime Player:
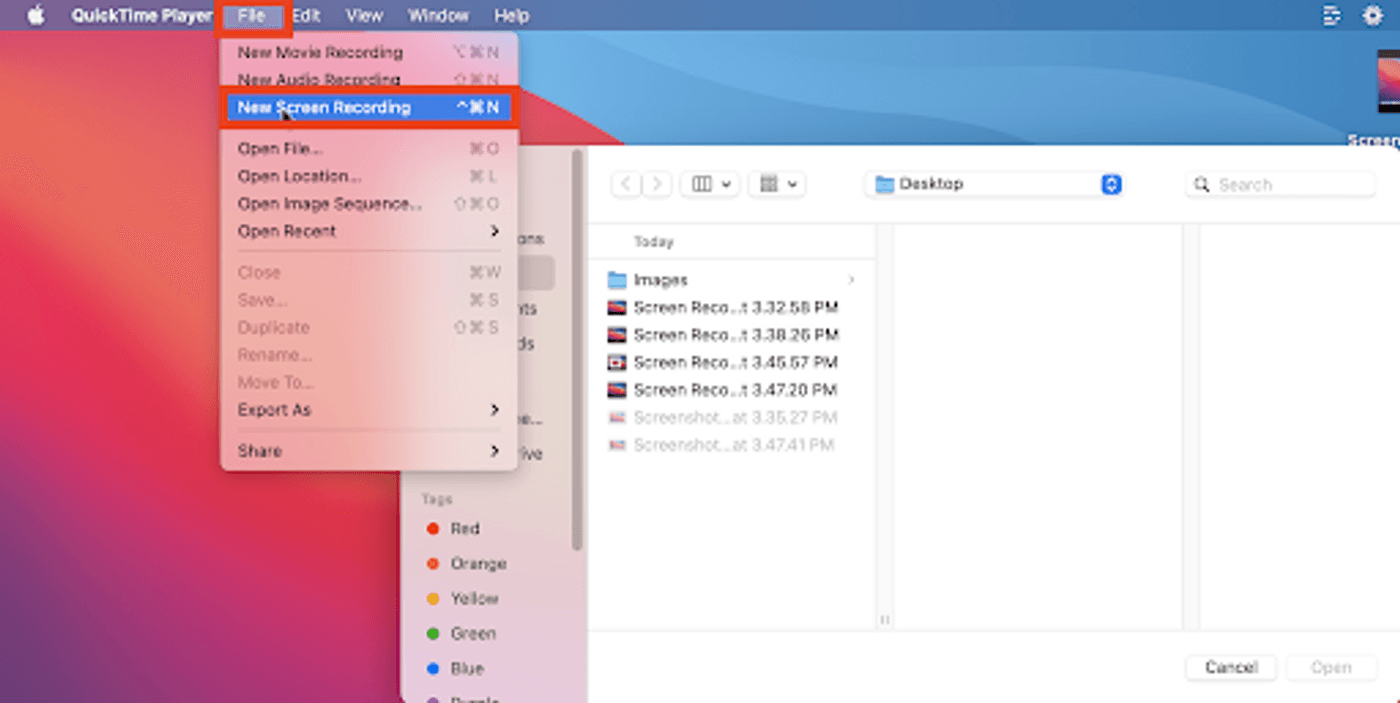
Step 1: Open the QuickTime Player app and go to the “File” option on the top left corner of your screen. Click on “New Screen Recording.”
Step 2: The screen recording bar will appear. Click on “Options” to set your preferences for the microphone, cursor, saving location and timer.
Step 3: Pick your preferred option—record the entire screen or a selected portion, and hit “Record.”
Step 4: Once you’re done with the recording, click on the stop icon on the top menu.
With this, your recorded video will get saved on your desktop. If you want to trim it, use the same method as when you trimmed a video recorded through the Screenshot app.
Pro-tip: Once you’ve recorded your video, you can easily edit it using InVideo’s online video editor. You can check out this blog to see how to easily edit a video using InVideo
3. How to record a video on Mac with your webcam
Recording a video on your Mac with the webcam is just as easy as recording your screen. There are three ways to record a video on Mac—using iMovie, Photo Booth, and QuickTime Player. All these apps come pre-installed on Mac devices, but if not, you can always download them.
A. Record a video using iMovie
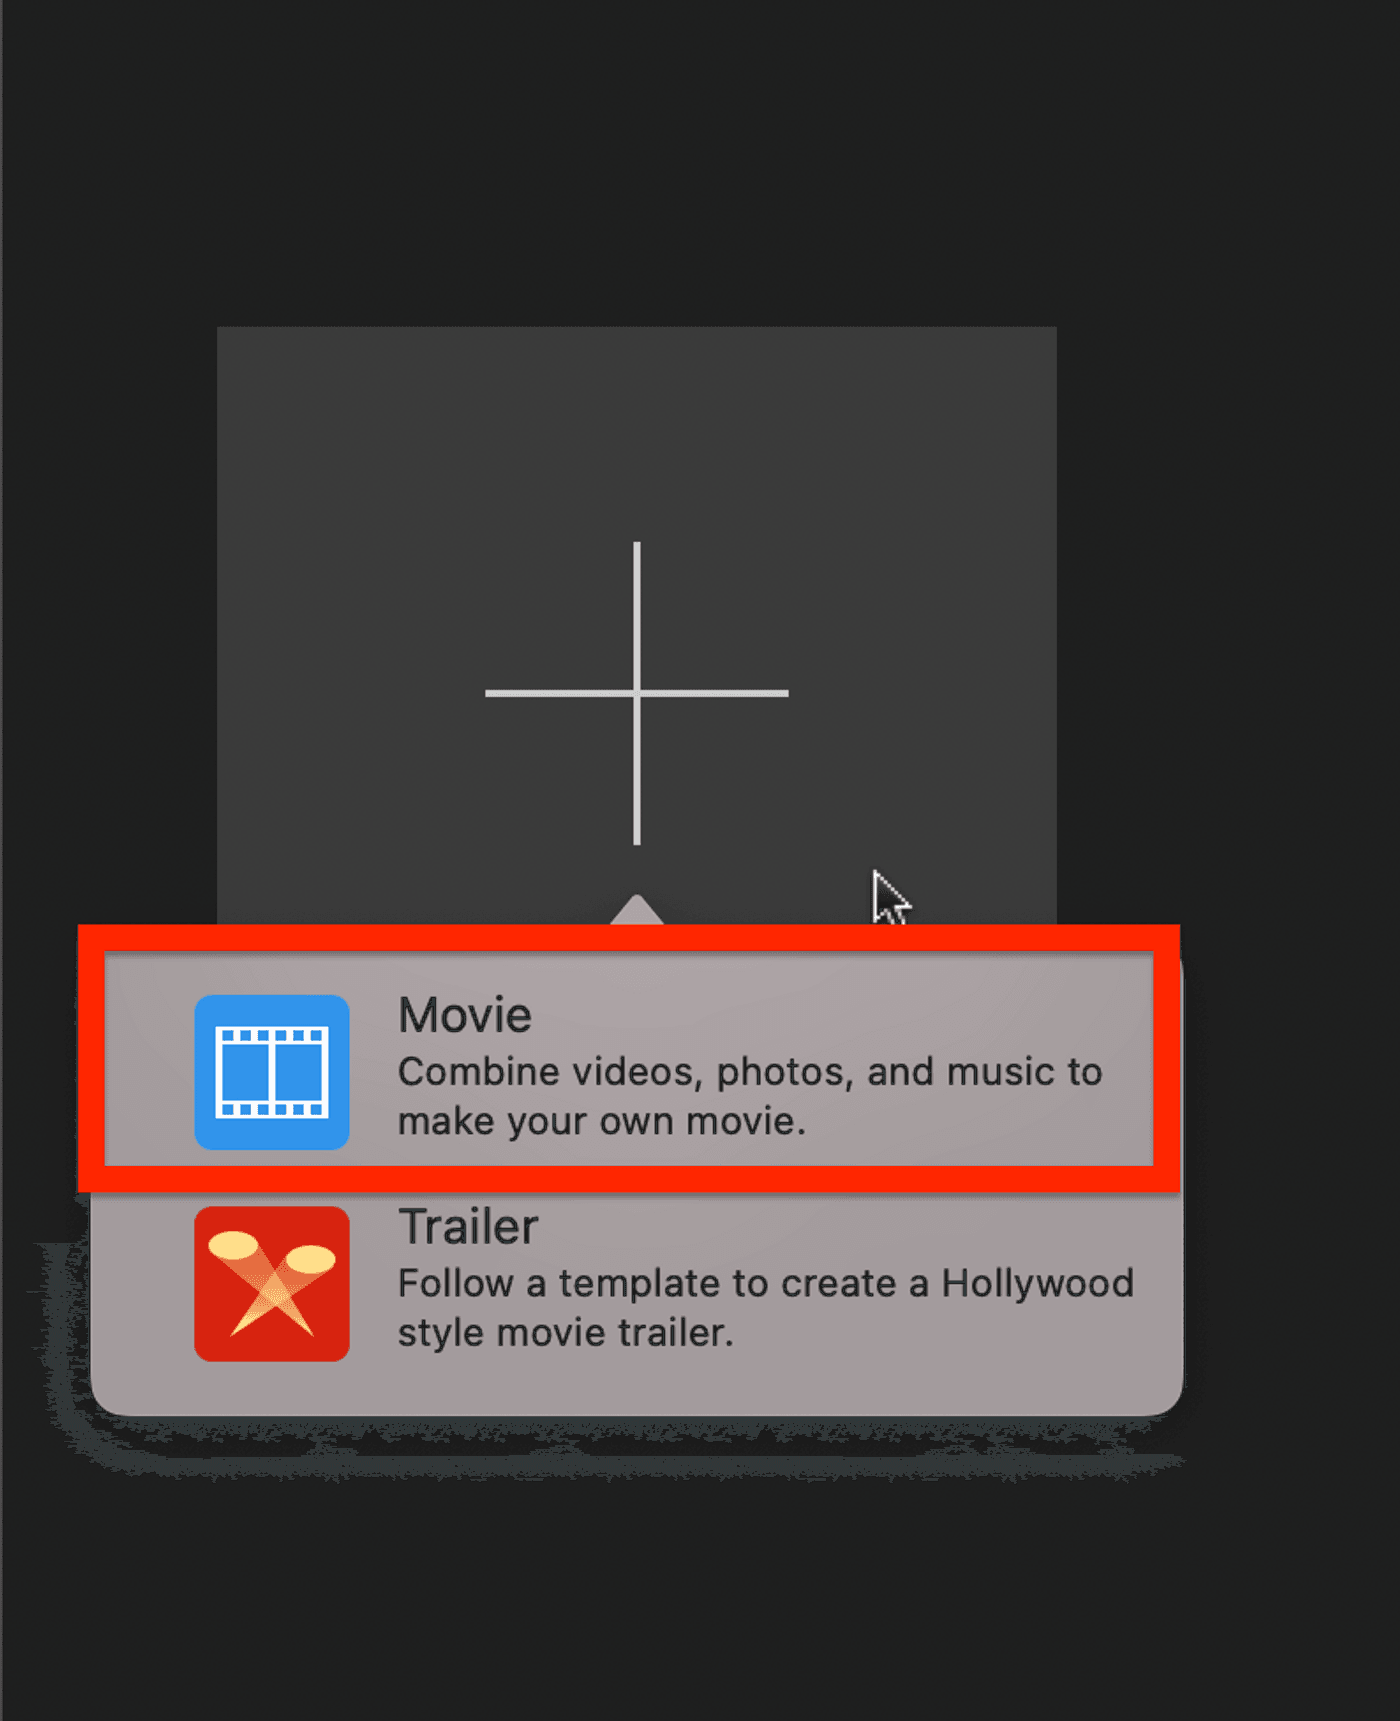
Step 1: Open the iMovie app and click on New Project > Movie to create a new video.
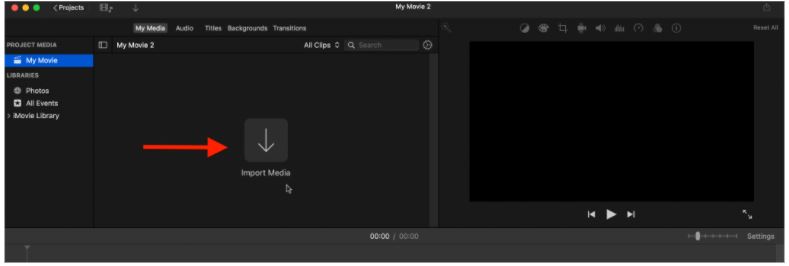
Step 2: Click on the “Import Media” button.
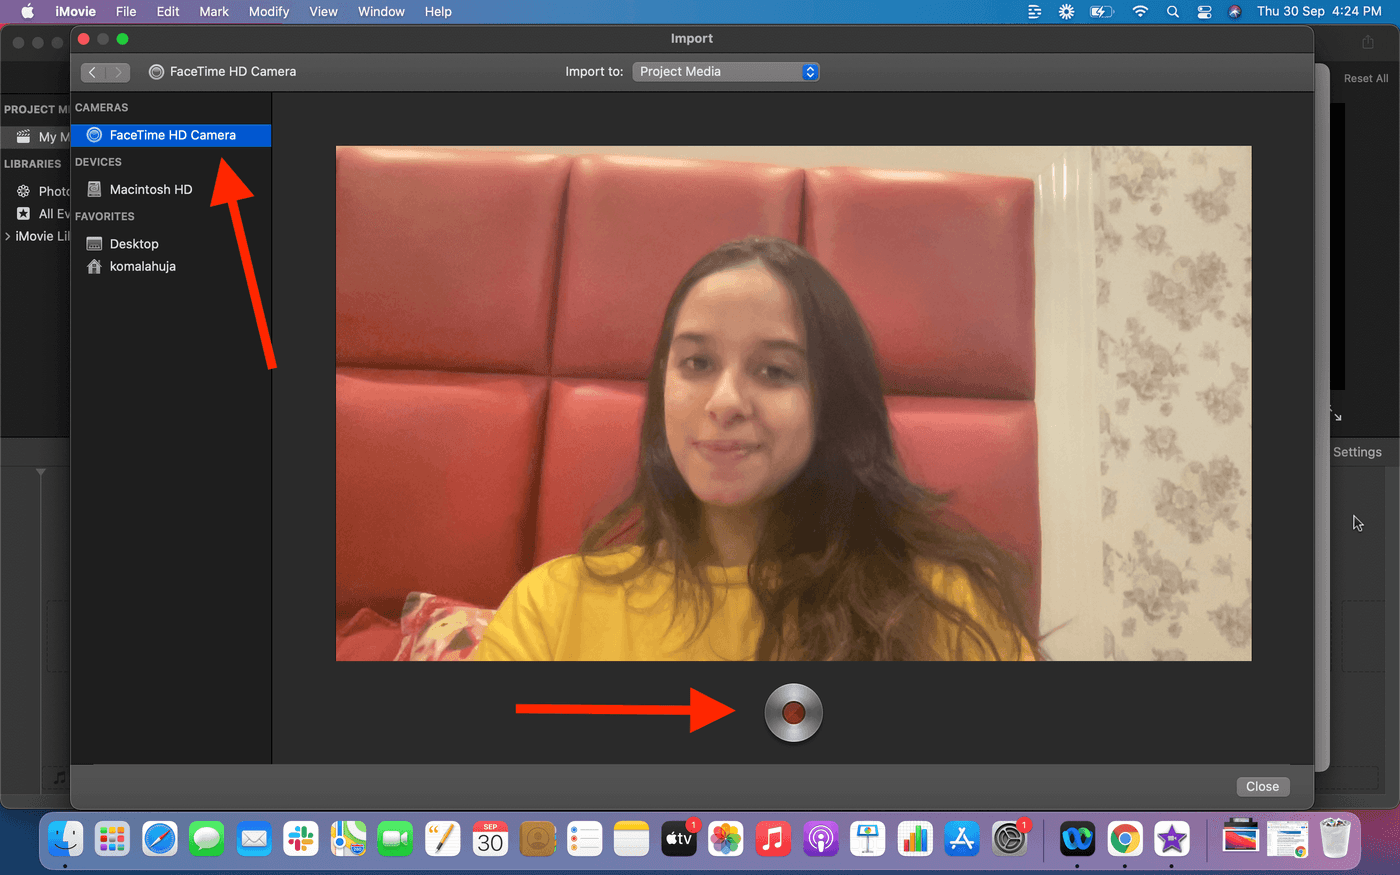
Step 3: On the left panel, choose the “FaceTime HD Camera.” When you’re ready, hit the record button to start. When you’re done, click the same button to end the recording.
Step 4: Your video will automatically appear in the iMovie project library. If you want to edit it, drag it down to the editing panel and use the sliders to trim the start and end points of your video.
Step 5: Once you’re satisfied, click on the share icon on the top right corner of the screen. From here, you can either export and save your file to your computer or share via social media or email.

B. Record a video using Photo Booth
Step 1: Open the Photo Booth app. Click on the video reel icon at the bottom left to record a new clip.
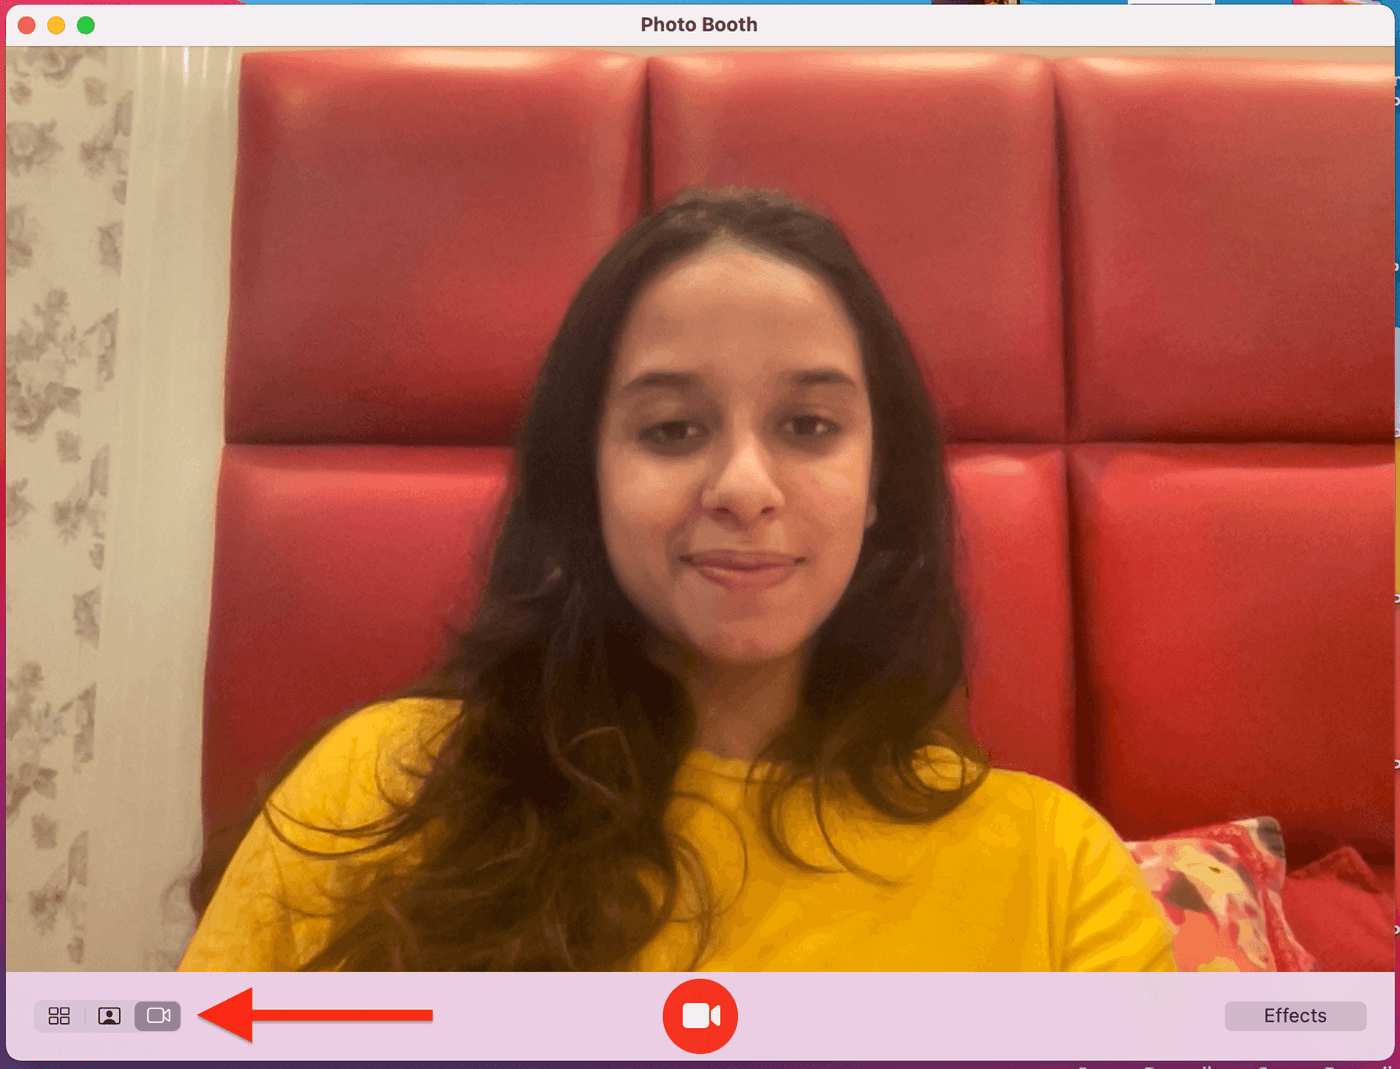
Step 2: Now, set up your camera and hit the record icon at the center to start recording. Click on it again to stop.
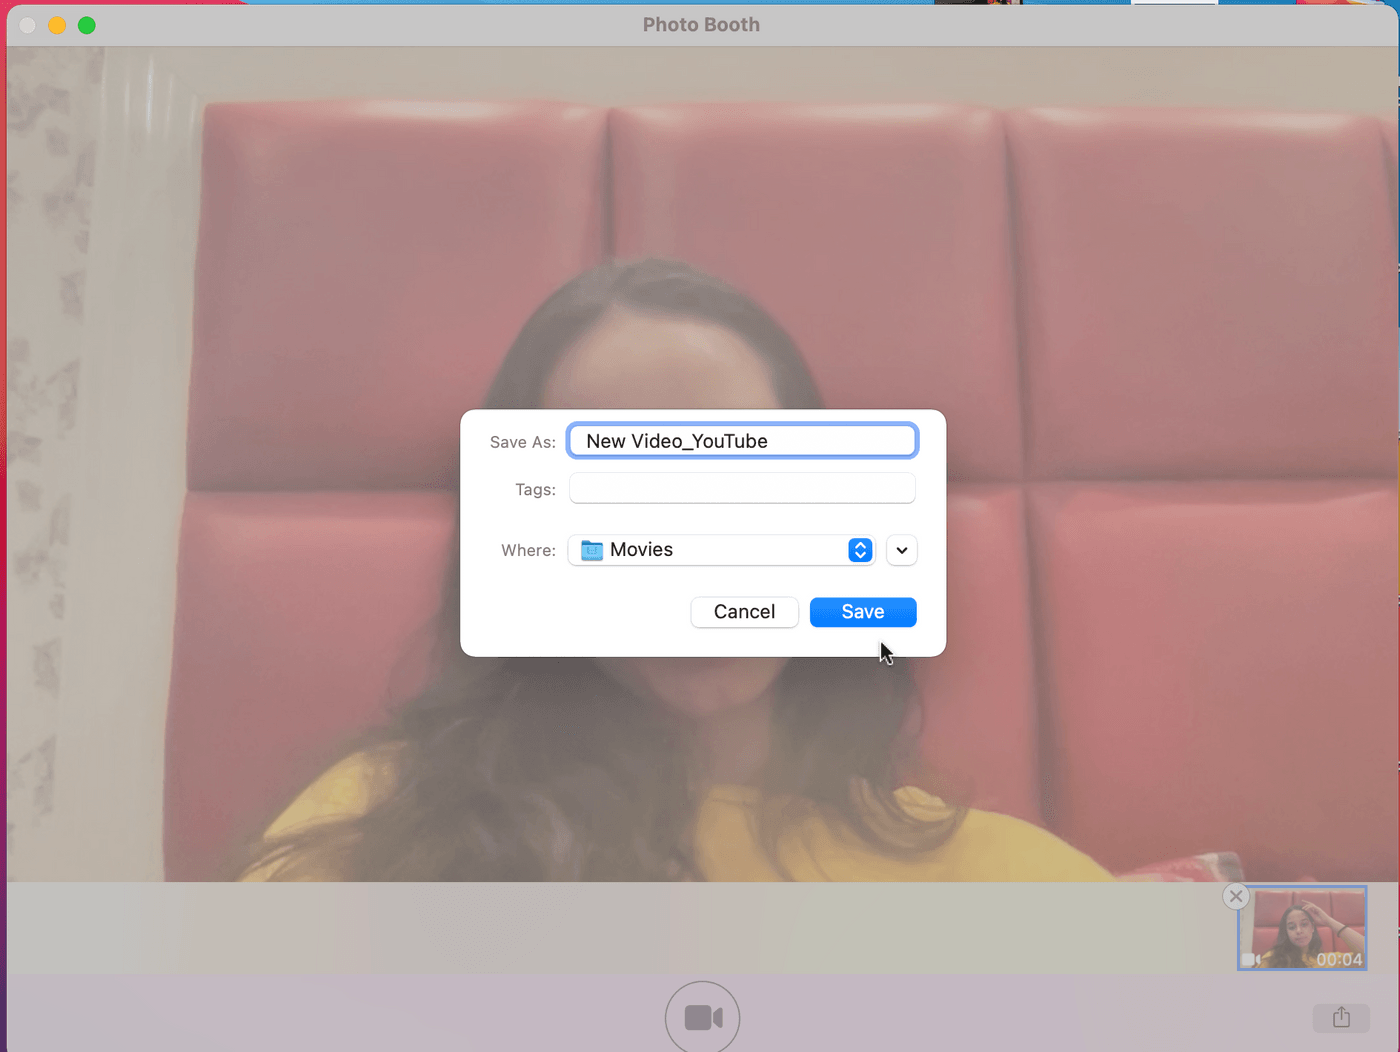
Step 3: Your recording will appear as a thumbnail. Click on “File” at the top left corner of your screen, and hit “Export.”

Step 4: A pop-up will appear. Here, rename your video, choose your video location, and hit “Save.”
C. Record a video using QuickTime Player
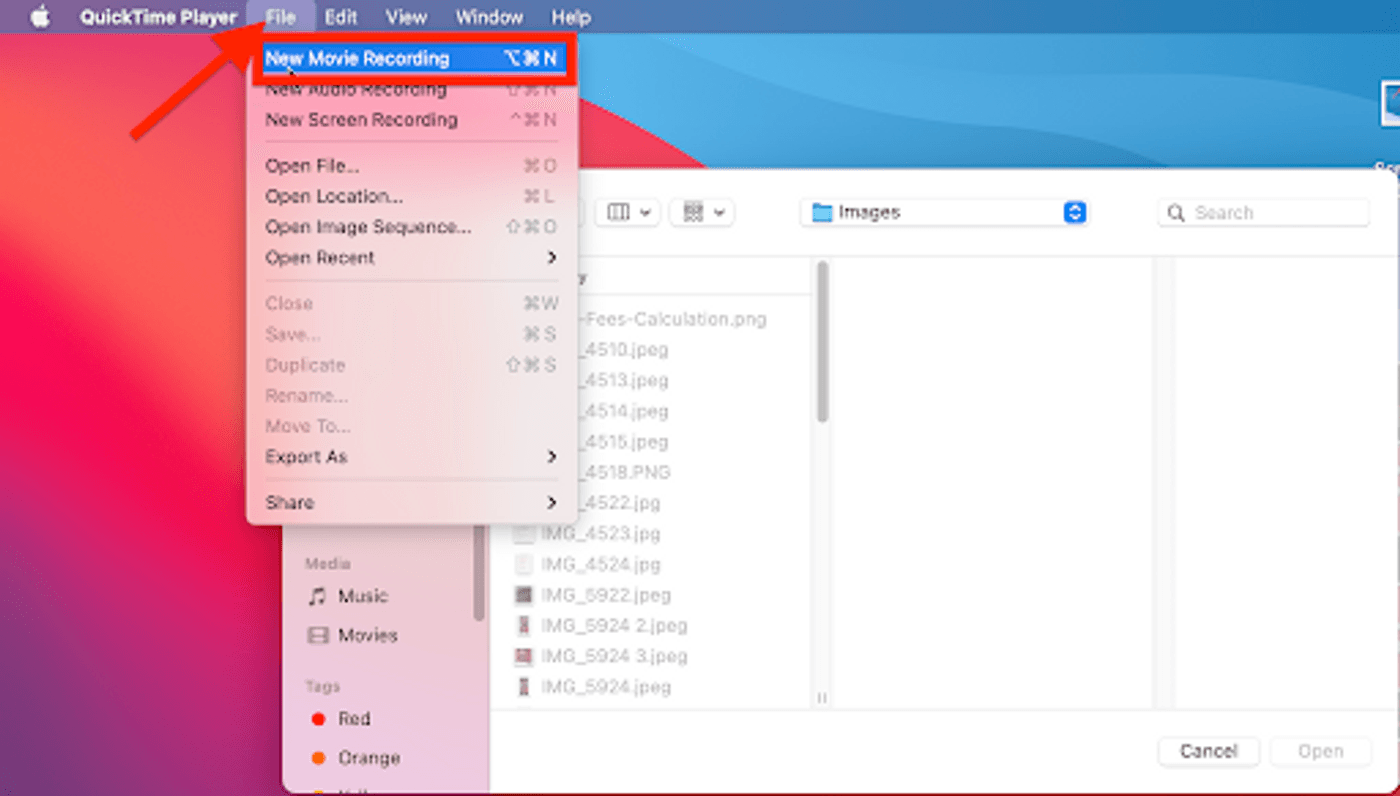
Step 1: Open the QuickTime app. Go to “File” on the top left corner of your scream, and click on “New Movie Recording.”
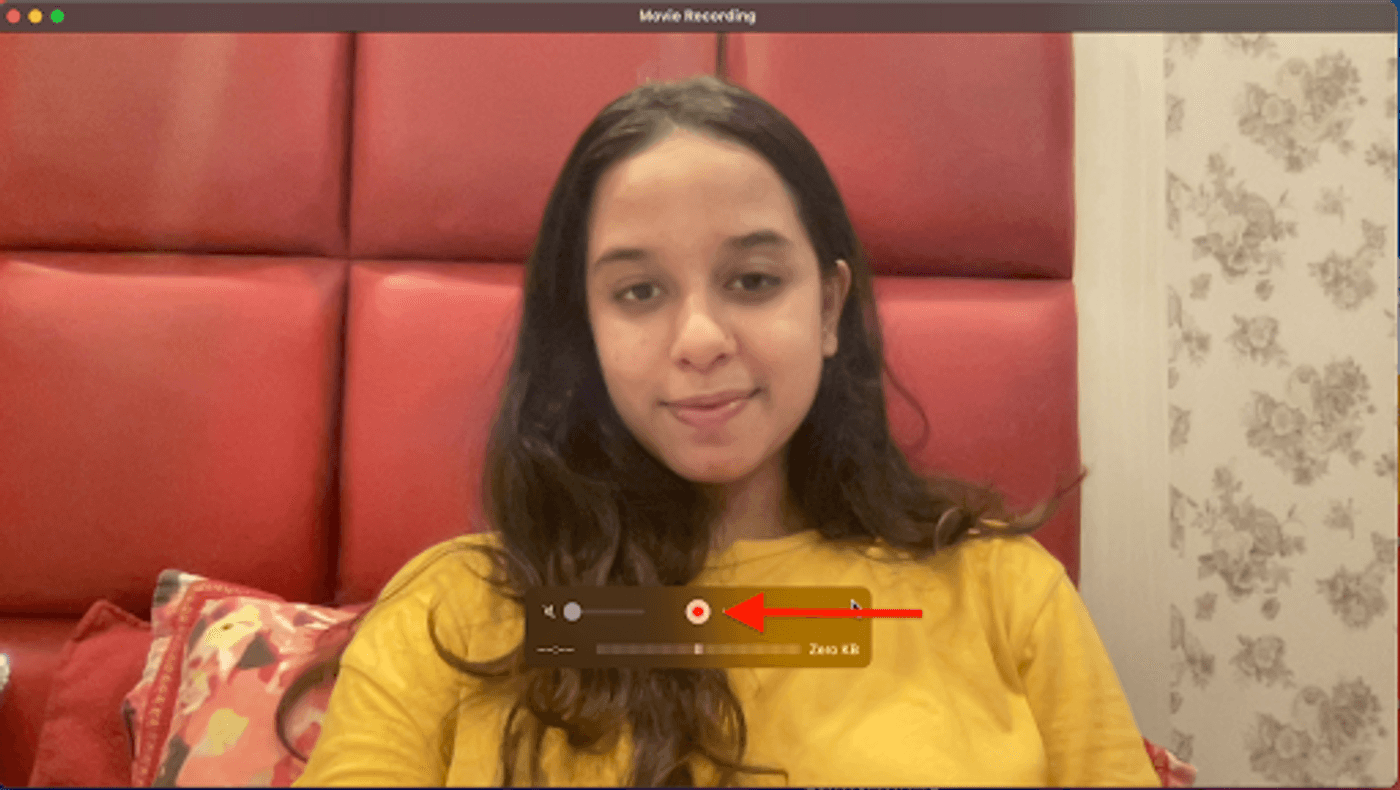
Step 2: The camera screen will pop up and when you’re ready hit the record button at the center to start the recording. Press it again to stop.
Step 3: Go to File > Save, and choose your preferred video location. And you’re done!

Bonus: How to turn your screen recordings into professional videos in minutes
If you want to further edit your screen/camera recordings into professional videos that you can share on social media or include them as videos in your work presentations and business proposal, you can do so in minutes, even if you’ve never edited a video before using an online video editor like InVideo. You can compile different clips, add text, background music and mor with InVideo- just follow these simple steps:
Step 1: Create an InVideo account, or sign in to your existing one. Choose the “Blank Canvas” option, and select 16:9 for your Mac recorded video. Click on the “Make a video” button to get started.

Step 2: Once the InVideo editor opens up, upload your screen recording or camera recorded clip from the “Upload Media” option on the left panel.
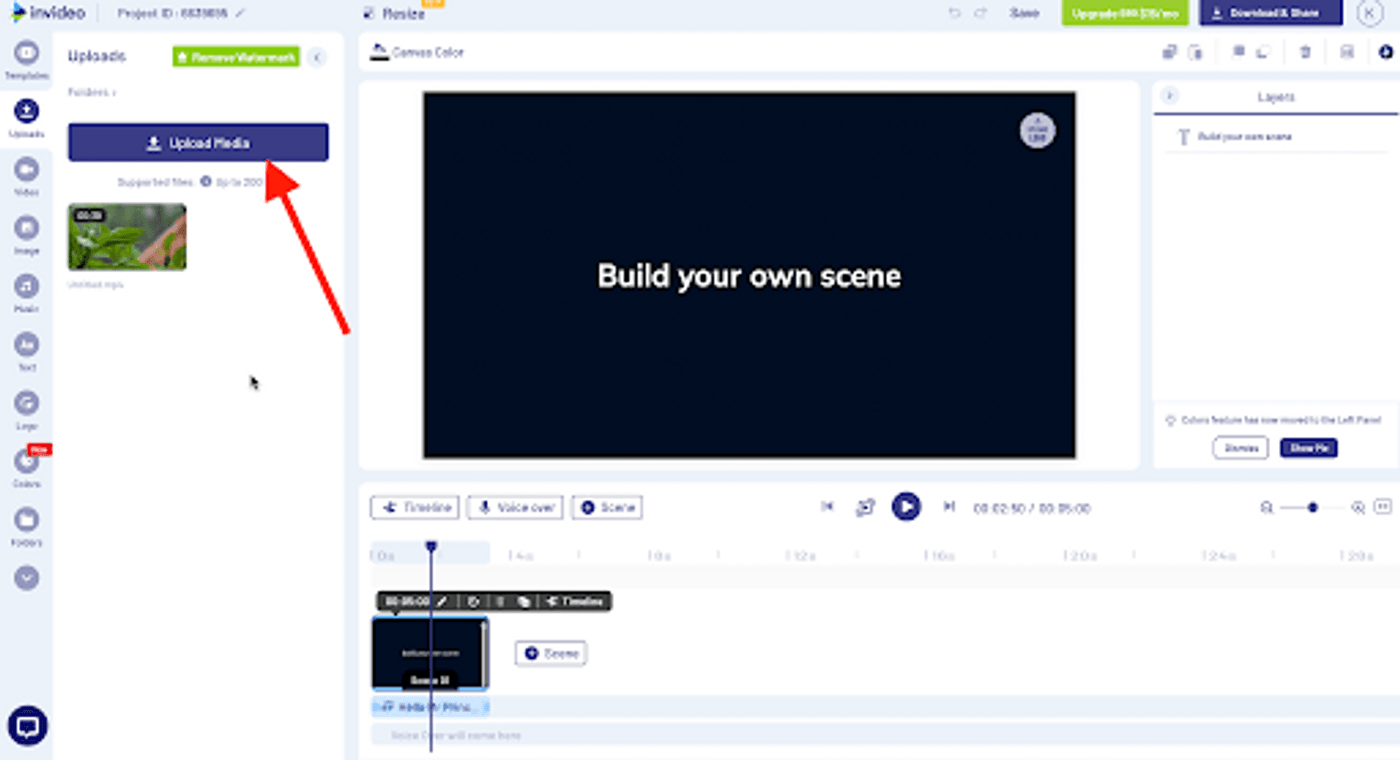
Step 3: Once your video is in the panel, drag it to the editor.
Step 4: You’ll see a prompt to trim your video. Here, use the slider to fix the start and end points of your video.
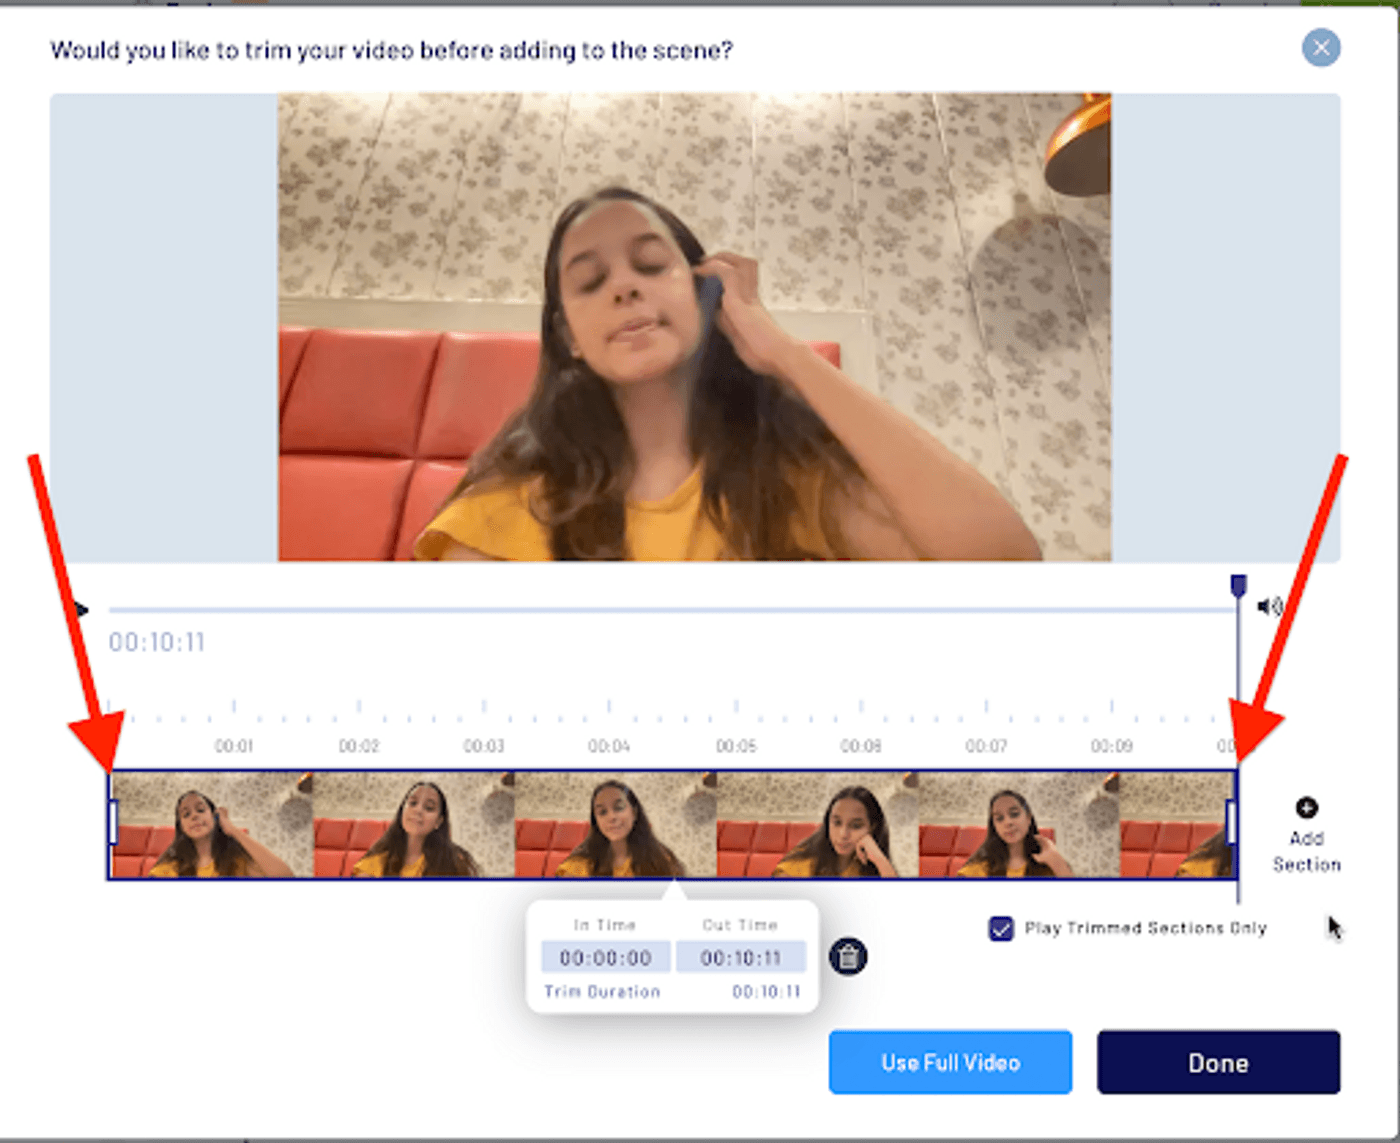
Step 5: If you want to combine different parts of the same video, click on the "Add section" to pick your preferred portion. When you're done, click on "Save," and your trimmed videos will get combined.
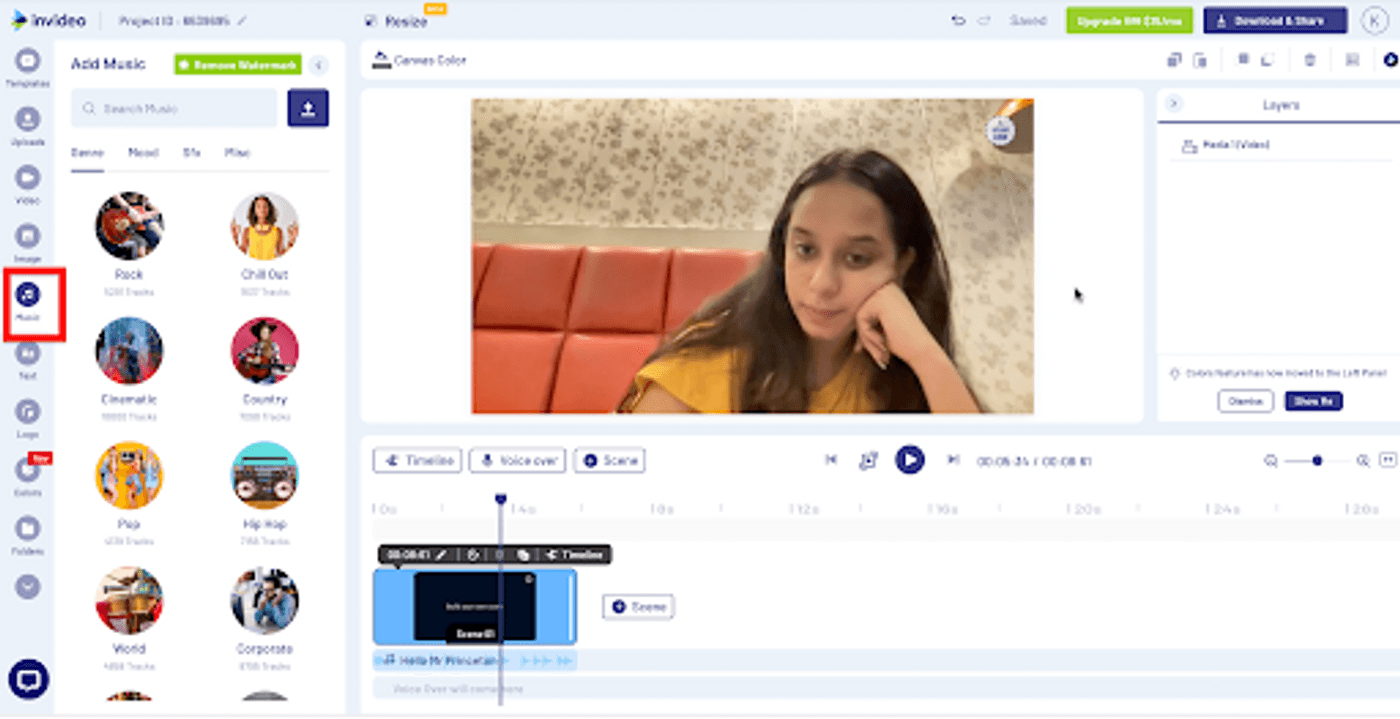
Step 6: In the editor, go to the “Music" option and add music to your video through InVideo’s collection of genre-based sounds or upload your own audio.
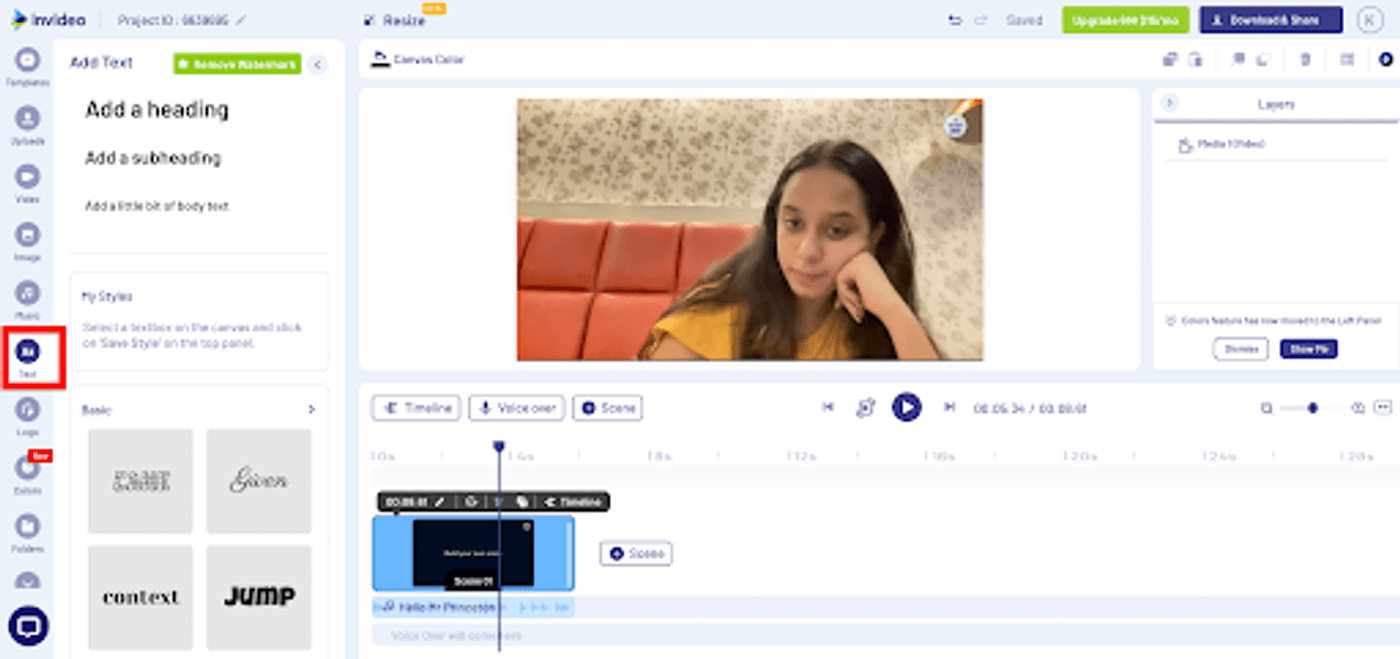
Step 7: You can also add text to your video as heading, subheading or body text with a range of fonts to choose from.
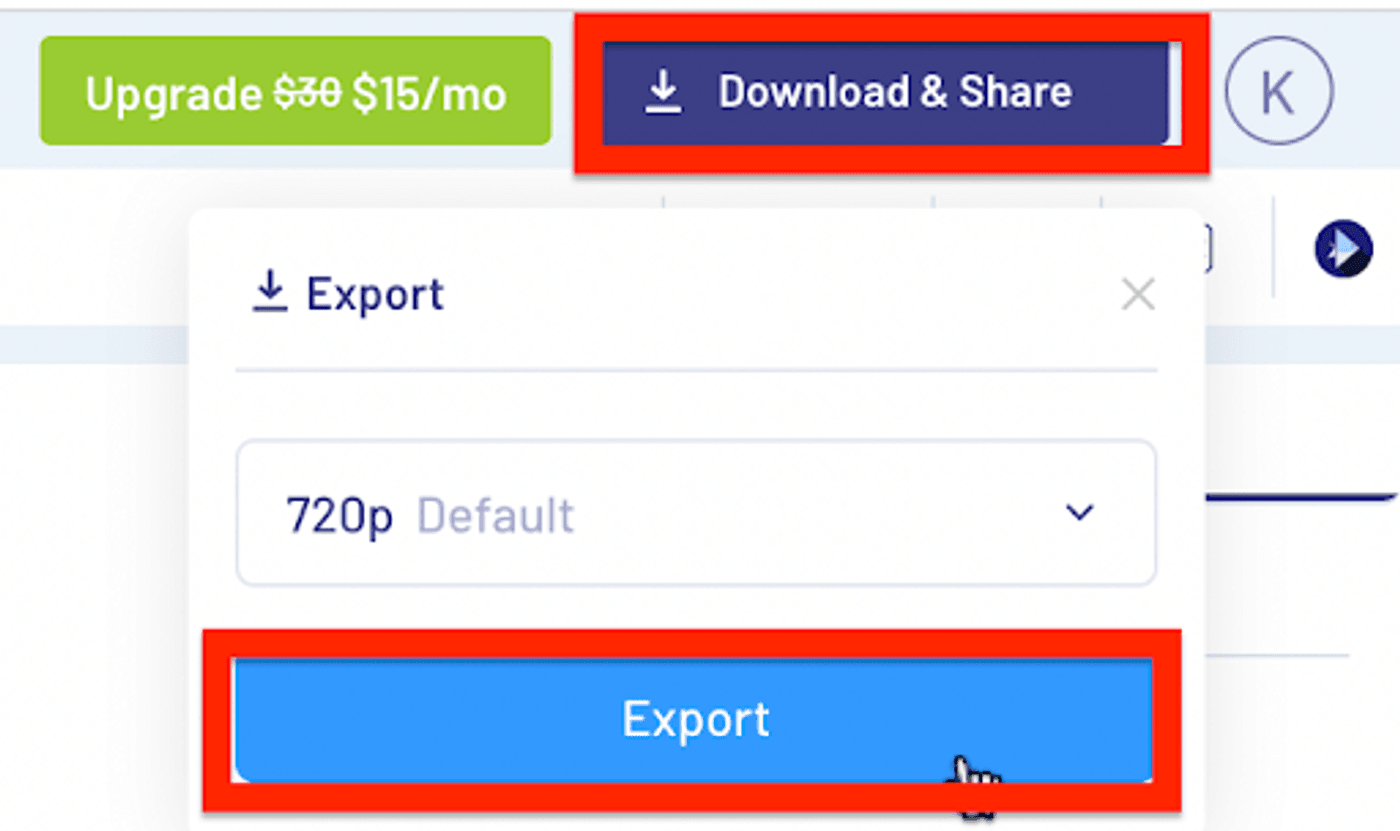
Step 8: When you’re done editing the video, hit the “Download & Share” button on the top right corner and click on “Export.”
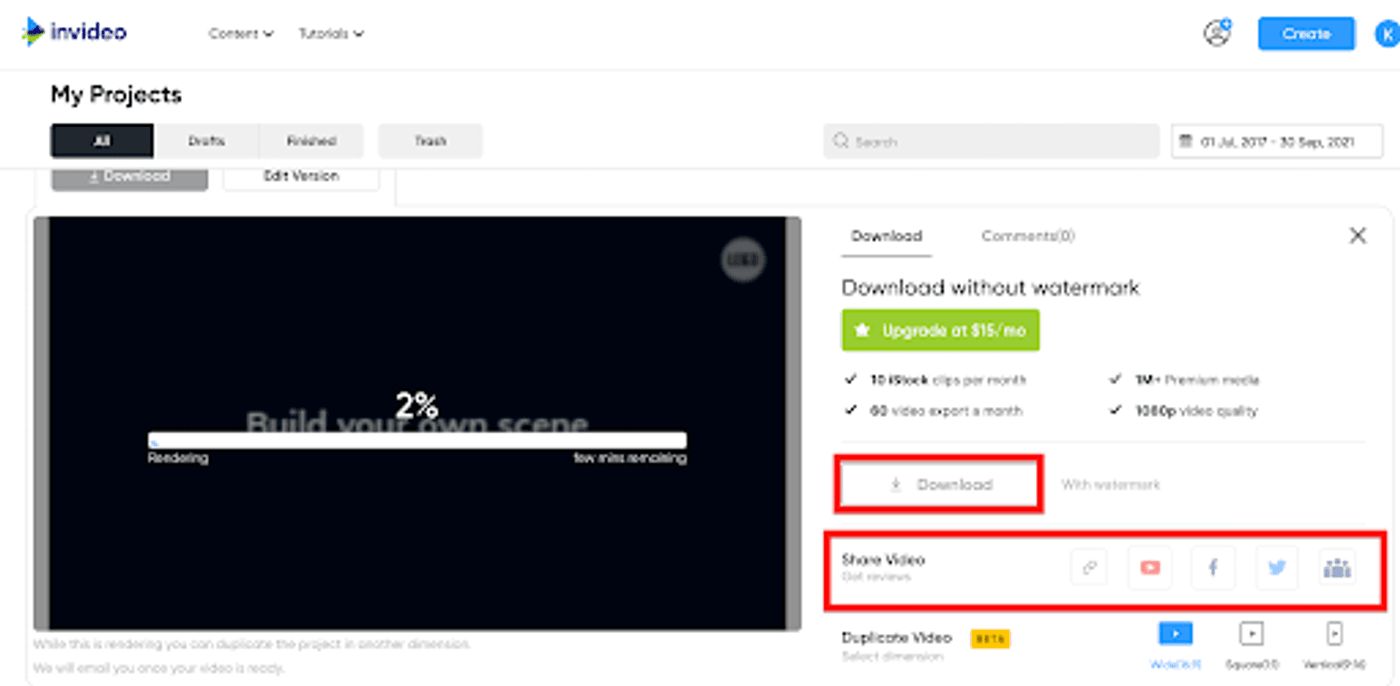
Step 9: Once your export is completed, you can download the video to your device or directly share it to social media.
Wrapping up
So that’s how easy it is to screen record on your Mac. If you want to learn how to do the same on your iPhone, check out our guide on how to record your iPhone’s screen.
And if you are eager to learn more about video editing and creation, the IV community is the place to be. Join the community to interact with over 25k creators and sharpen your skills!
FAQs
1. How do I record my screen on Mac for free?
You can record your Mac screen for free using the in-built Screenshot app. You can also use other apps like QuickTime Player and iMovie for this. There is no time limit for screen recording videos.
2. Where do screen recordings go on Mac?
All your screen recordings are saved on the desktop by default. You can select a different location for your recordings beforehand when recording through the Screenshot app.
3. For how long can you screen record a video on Mac?
There is no limit to recording a video on your Mac. You can make a video as long as you wish until you have the drive space to save it.
4. How do I record video with audio on my Mac?
Use QuickTime Player to record a video with audio. Open the app > File > New Movie Recording. Once the camera opens, you can adjust your sound levels to begin recording your video with audio.