
Ever felt the need to record your game progress, create an iPhone how-to tutorial or save a part of a livestream? Did you know that you can do all this super easily on your iPhone using the in-built screen recorder without having to install any external apps?
In this guide, we’ll show you how you can super easily record your iPhone’s screen using the built-in screen recorder. What’s more, stay with us till the end and we’ll show you how to edit your screen-recordings and turn them into thumb-stopping PRO videos with an easy to use app on your iPhone.
Without further ado, let’s dive in.
1. How to enable/activate screen record on iPhone
2. How to screen record on iPhone X, XR, 11, 12
3. How to screen record on iPhone SE, 6s, 7, 8
4. How to screen record with sound on your iPhone
5. How to find your screen-recordings and trim/crop them
1. How to enable/activate screen record on iPhone
Before you can start screen recording on your iPhone, you need to enable or set up the screen record feature on iPhone. If you’re using any iPhone that belongs to any generation post the iPhone 6 ( viz. SE, iPhone 6/6s, iPhone 7/7 Plus, iPhone 8/8 Plus, iPhone 11, 11 Pro and 11 Pro Max, iPhone 12, 12 Max, 12 Pro and 12 Pro Max, iPhone X, iPhone XR, iPhone XS or XS Max) you need to first make sure that your iOS is updated to iOS 14. Once done, simply follow along the steps below to enable screen recording on your iPhone.
Step 1: Go to “Settings” and open “Control Center”. Next tap “Customize Controls.” If the "Access Within Apps" switch is not enabled (green), tap to enable it.

Step 2: Now scroll and find the “Screen recording” option and tap on the plus sign next to it. You’ll now see the Screen Recording option move to the “Include” section.

Note: If you ever want to disable screen recording again, just return to the “Include” screen and tap the red minus sign next to it.

2. How to screen record on iPhone X, XR, 11, 12
Once you are done enabling the screen record function on your iPhone, it’s really simple to record your screen. Let’s see how you can screen record on all variants of iPhone X, XR, 11 and 12:
Step 1: Swipe down on your phone to open up the iPhone control center and tap the “Screen Record” icon.
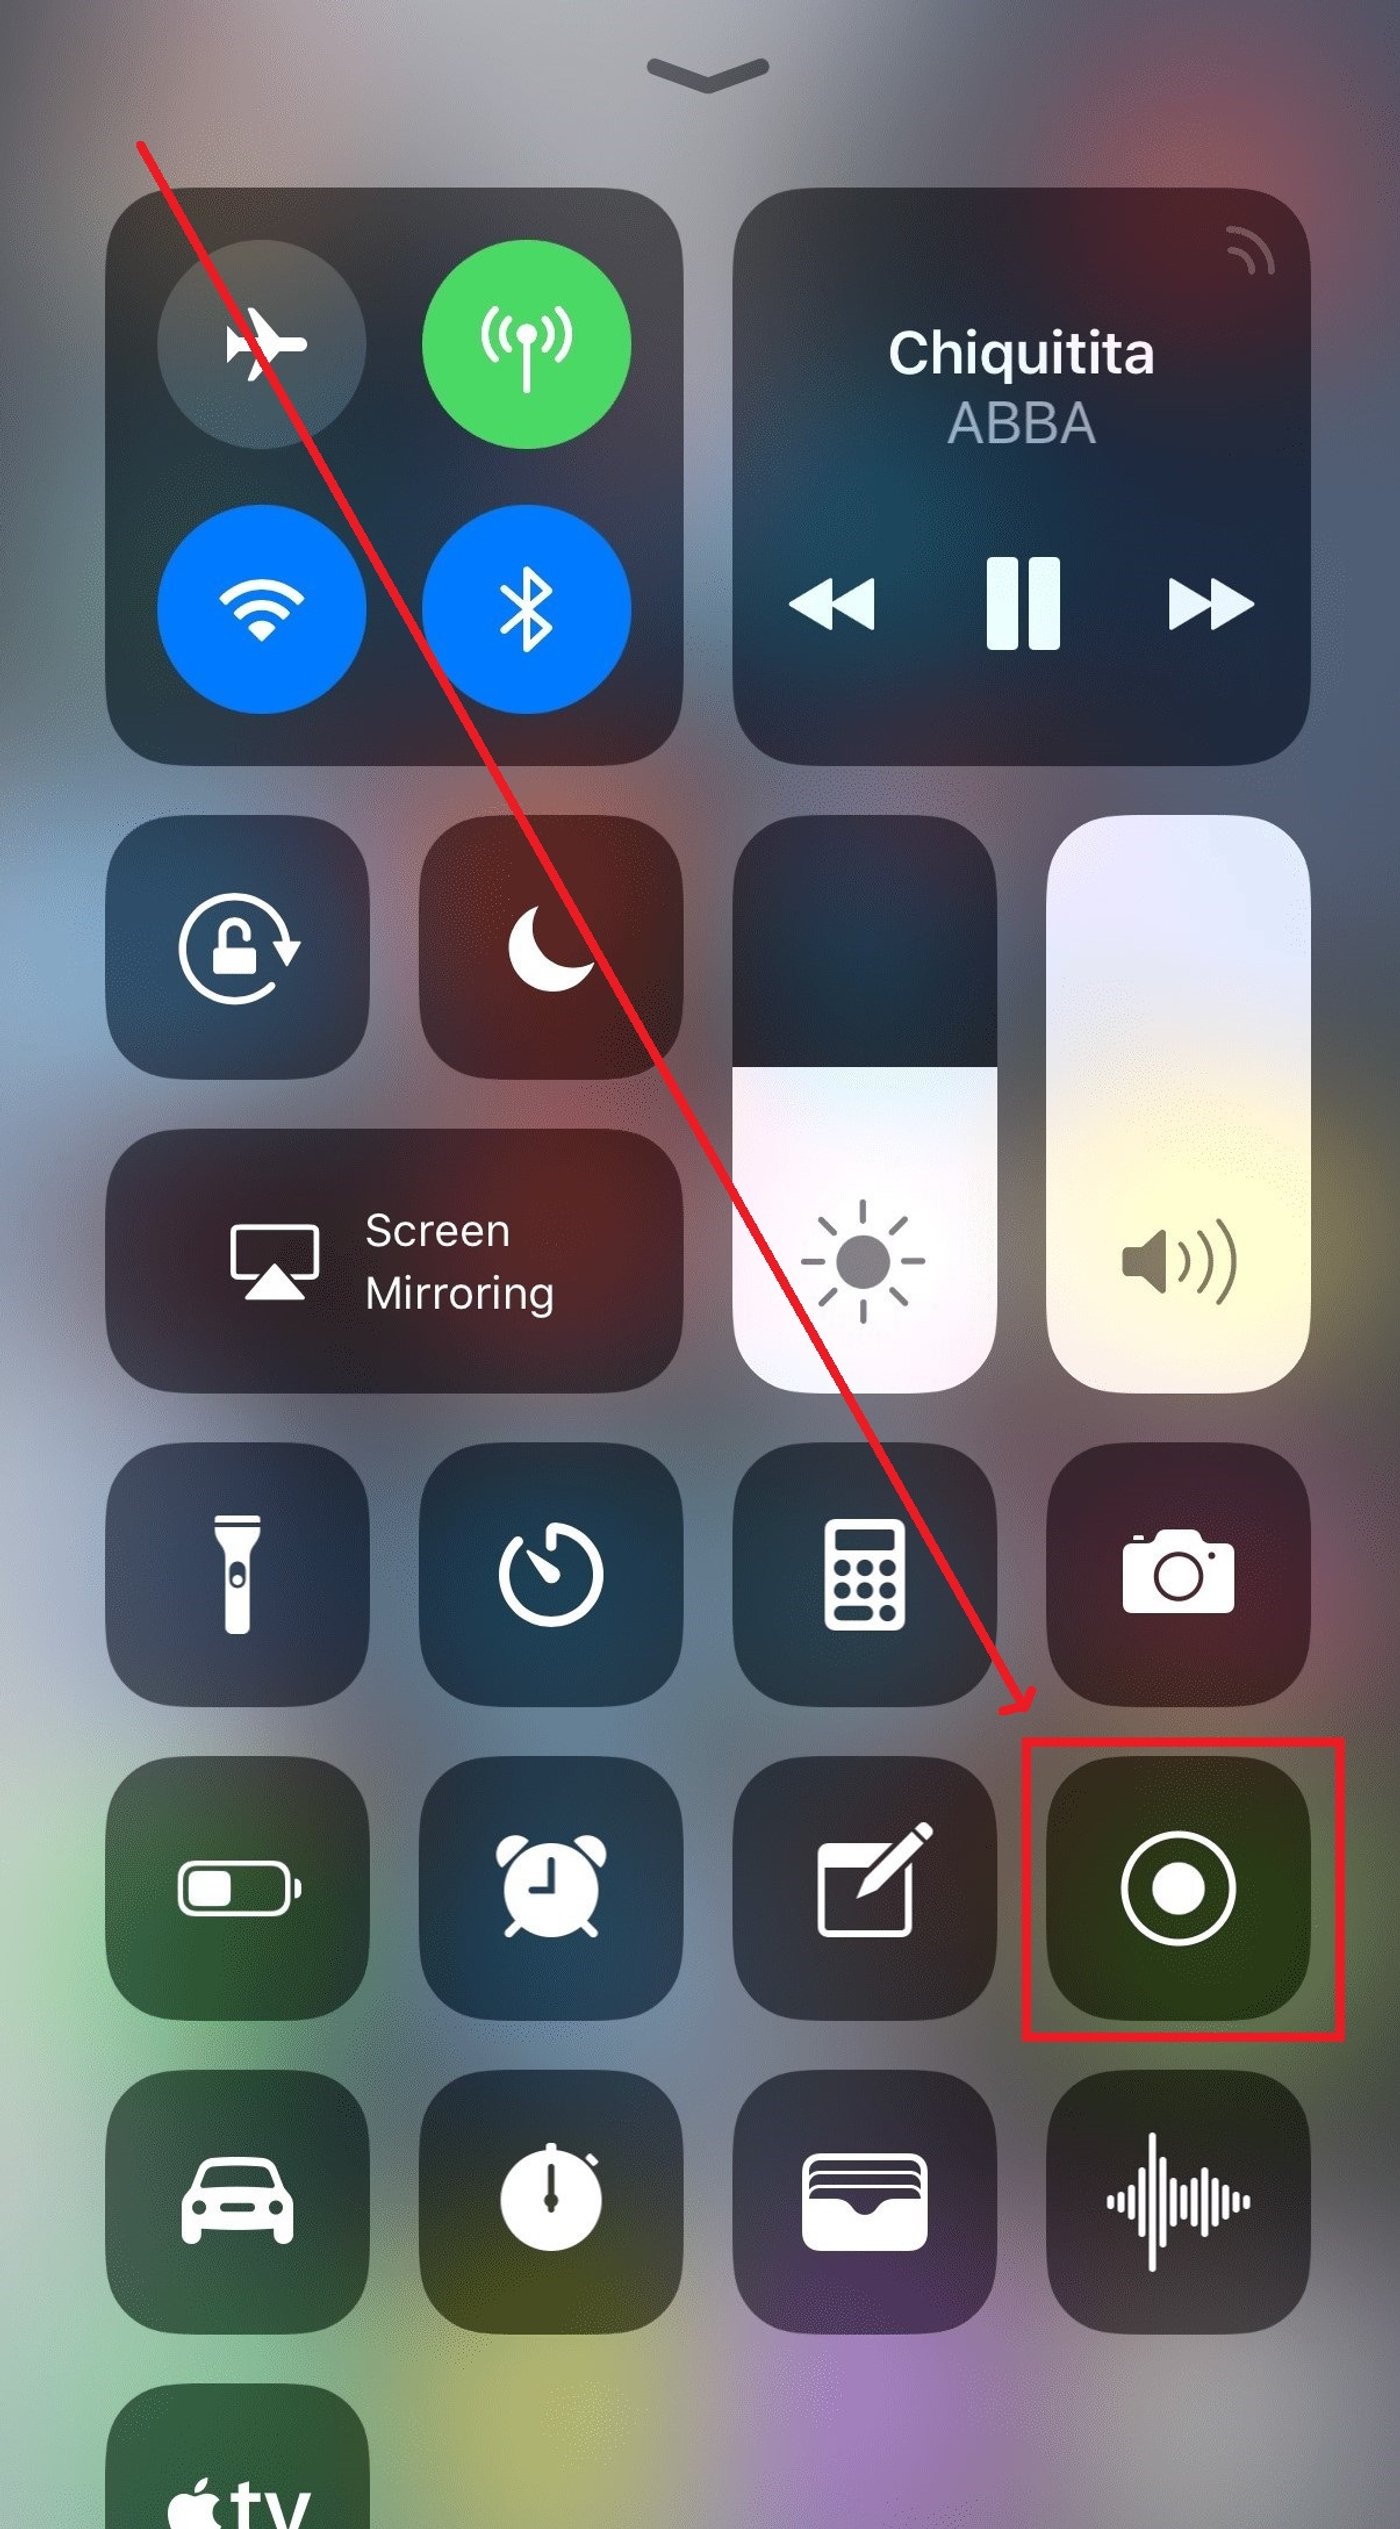
Pro Tip: You can do this from the lock screen or while your iPhone 12 (and other versions of the iPhone 12) is unlocked.
Wait for 3 seconds for the recording to start. That’s it. You will now be recording everything on your screen.
Step 2: To stop recording, tap the red status bar at the top left of your screen. Then hit “Stop.” Your recorded video is automatically saved to your photos. You can also swipe down to open the Control Center and tap the record button again to stop recording your screen.

Pro Tip: Notifications and phone calls are also recorded so you may wish to switch Do Not Disturb mode on whenever you make a screen recording. You can do this by going to your iPhone control center and tapping the half moon icon.

By default, all sounds on your iPhone will be recorded in this process. But don’t worry, we have put together this guide that shows you how you can remove unwanted sounds from your videos.
3. How to screen record on iPhone SE, 6s, 7, 8
If you want to screen record on an older generation iPhone, chances are you might have an older version of iOS. In case you have iOS 11 or 12 and are using iPhone SE, iPhone 6 or 6s, iPhone 7 or iPhone 8, here’s how you can record your screen.
Step 1: Swipe up on your phone to open up the iPhone control center and tap the “Screen Record” icon.

Wait for 3 seconds for the recording to start. That’s it. You will now be recording everything on your screen.
Step 2: To stop recording, tap the red status bar at the top of your screen. Tap “Stop.” You’ll see a notification that says your recorded video is saved to your photos. Tap this notification to quickly view your video. You can also open the Control Center and tap the record button again to stop recording your screen.

Note: Make sure you have the latest iOS version to be able to use screen recording and other features with better capabilities.
4. How to screen record with sound on your iPhone
By default, audio from your iPhone will be recorded when you record your screen. If you want to include a voice over or narration in your recording, you can do so with one simple setting. Let’s see how to screen record with sound on your iPhone.
Step 1: Slide down (or swipe up depending on your iOS) from the top-right corner of your iPhone to open up the control center and long press the “Screen Record” icon.

Step 2: Now tap the microphone icon. It’ll turn red. Next, tap the “Start Recording” button.

You are now recording your screen along with audio. Start talking alongside it to record a how-to video or any other type of video you desire.
Note: You can’t record streaming apps like Netflix, Disney+ or Amazon Prime Video using this function on your iPhone as that goes against the terms and conditions of these services.
Step 3: To stop recording, tap the red status bar at the top left of your screen. Tap “Stop.” Your recorded video is automatically saved to your photos. You can also open the Control Center and tap the record button again to stop recording your screen.
5. How to find your screen-recordings and trim/crop them
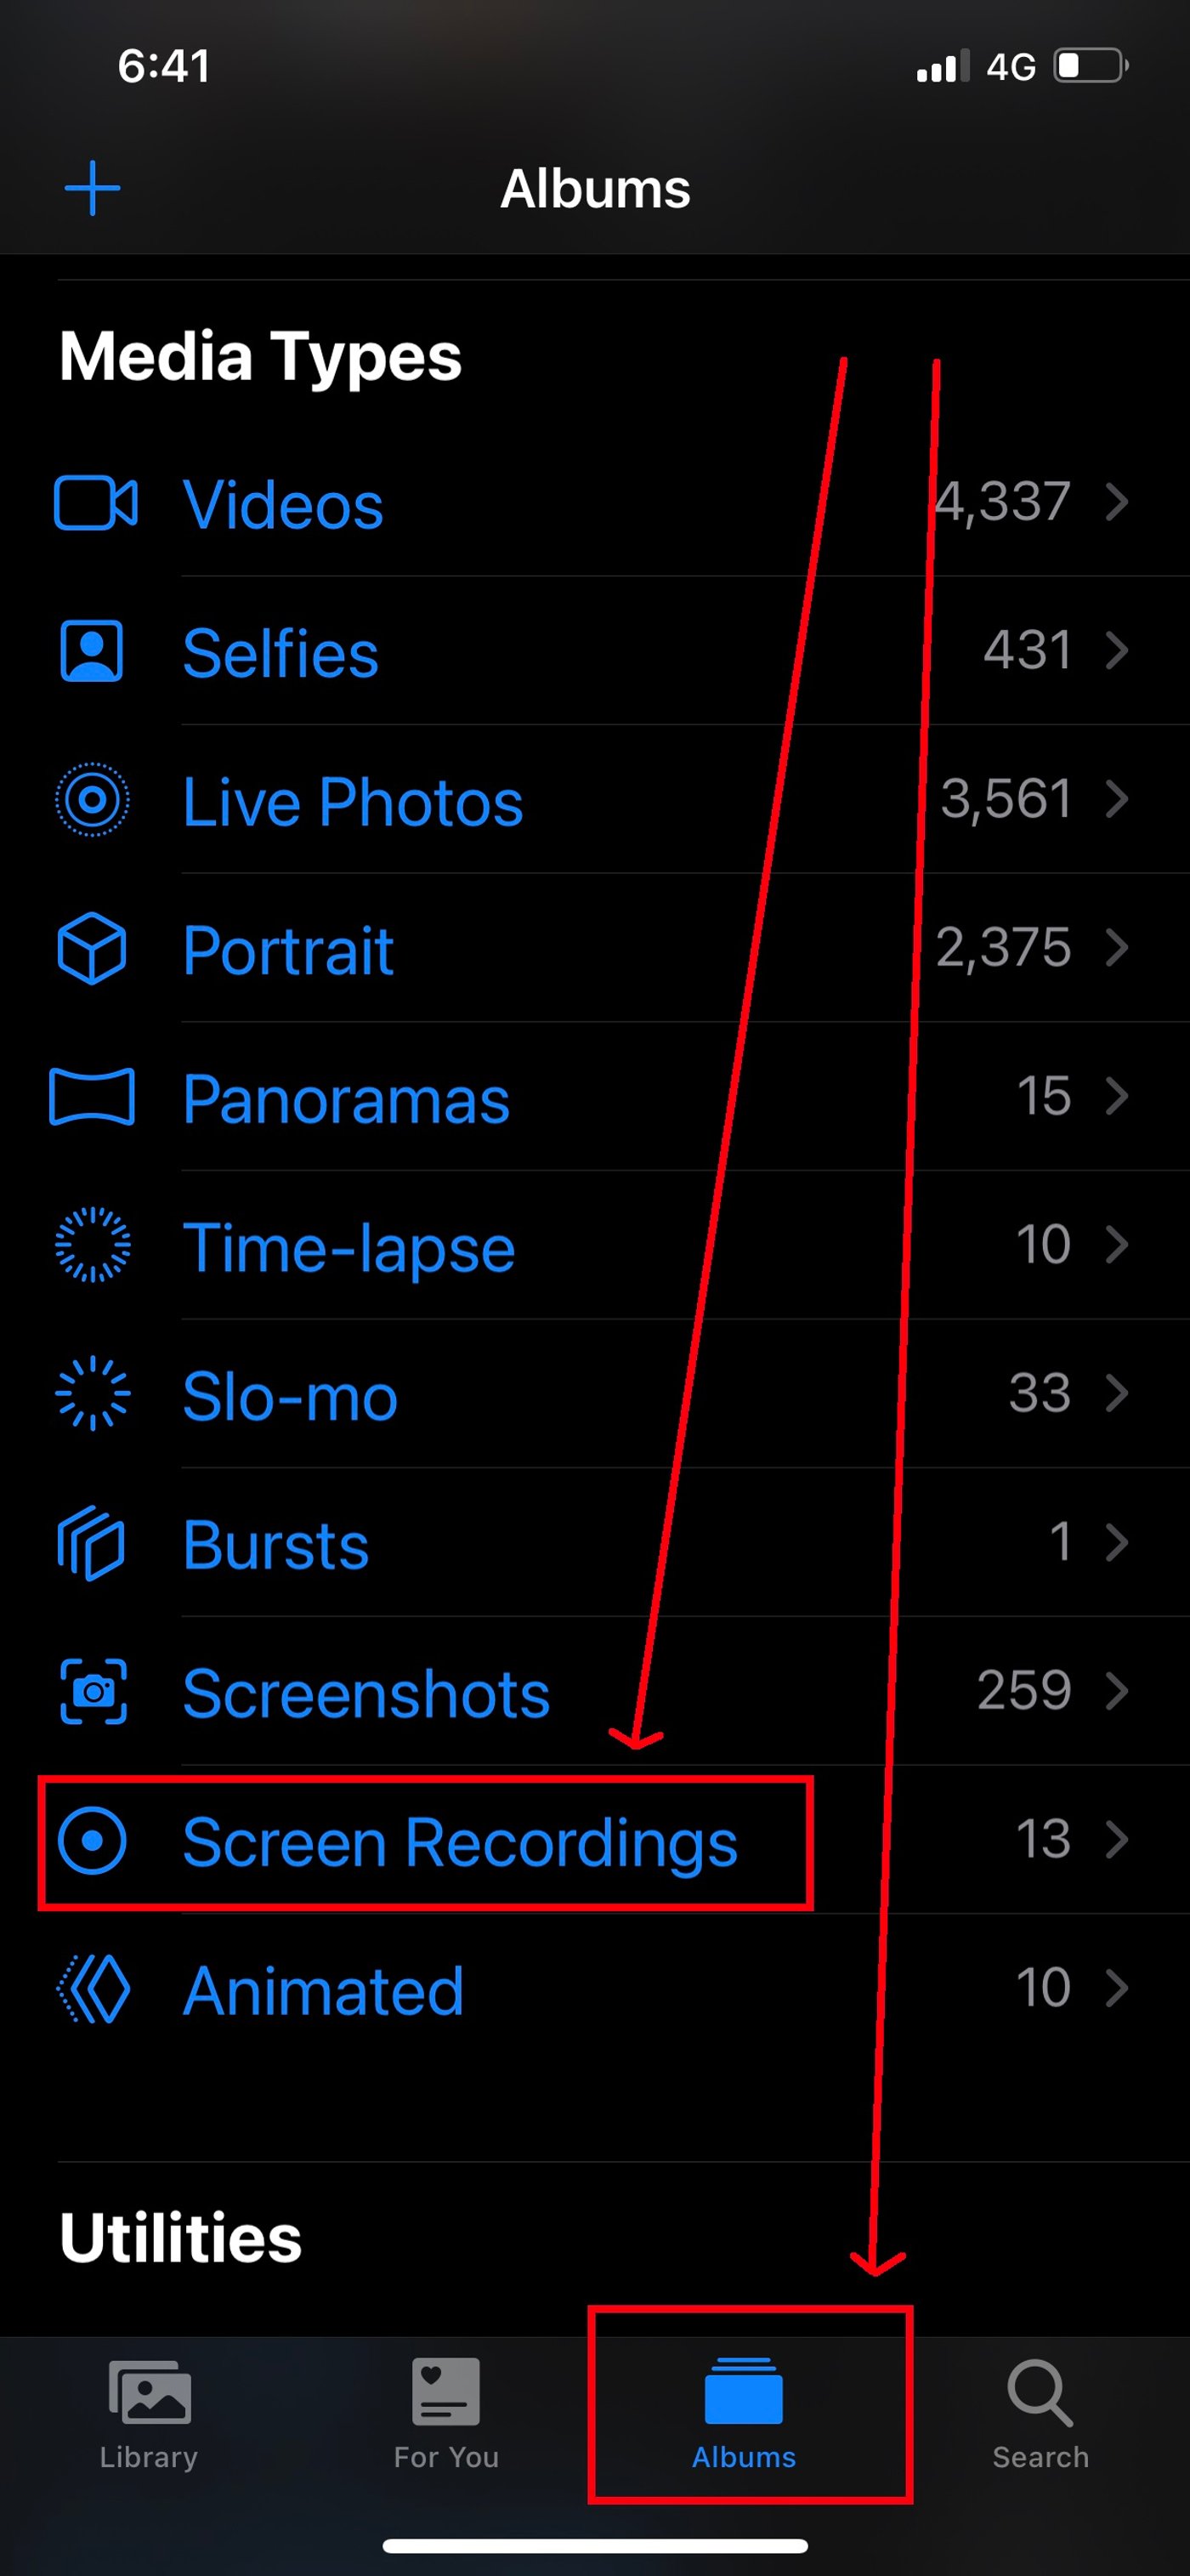
You can find your screen recordings in your photo gallery in an album called “Screen recordings.” To view it, open your album and look at the latest or newest item.
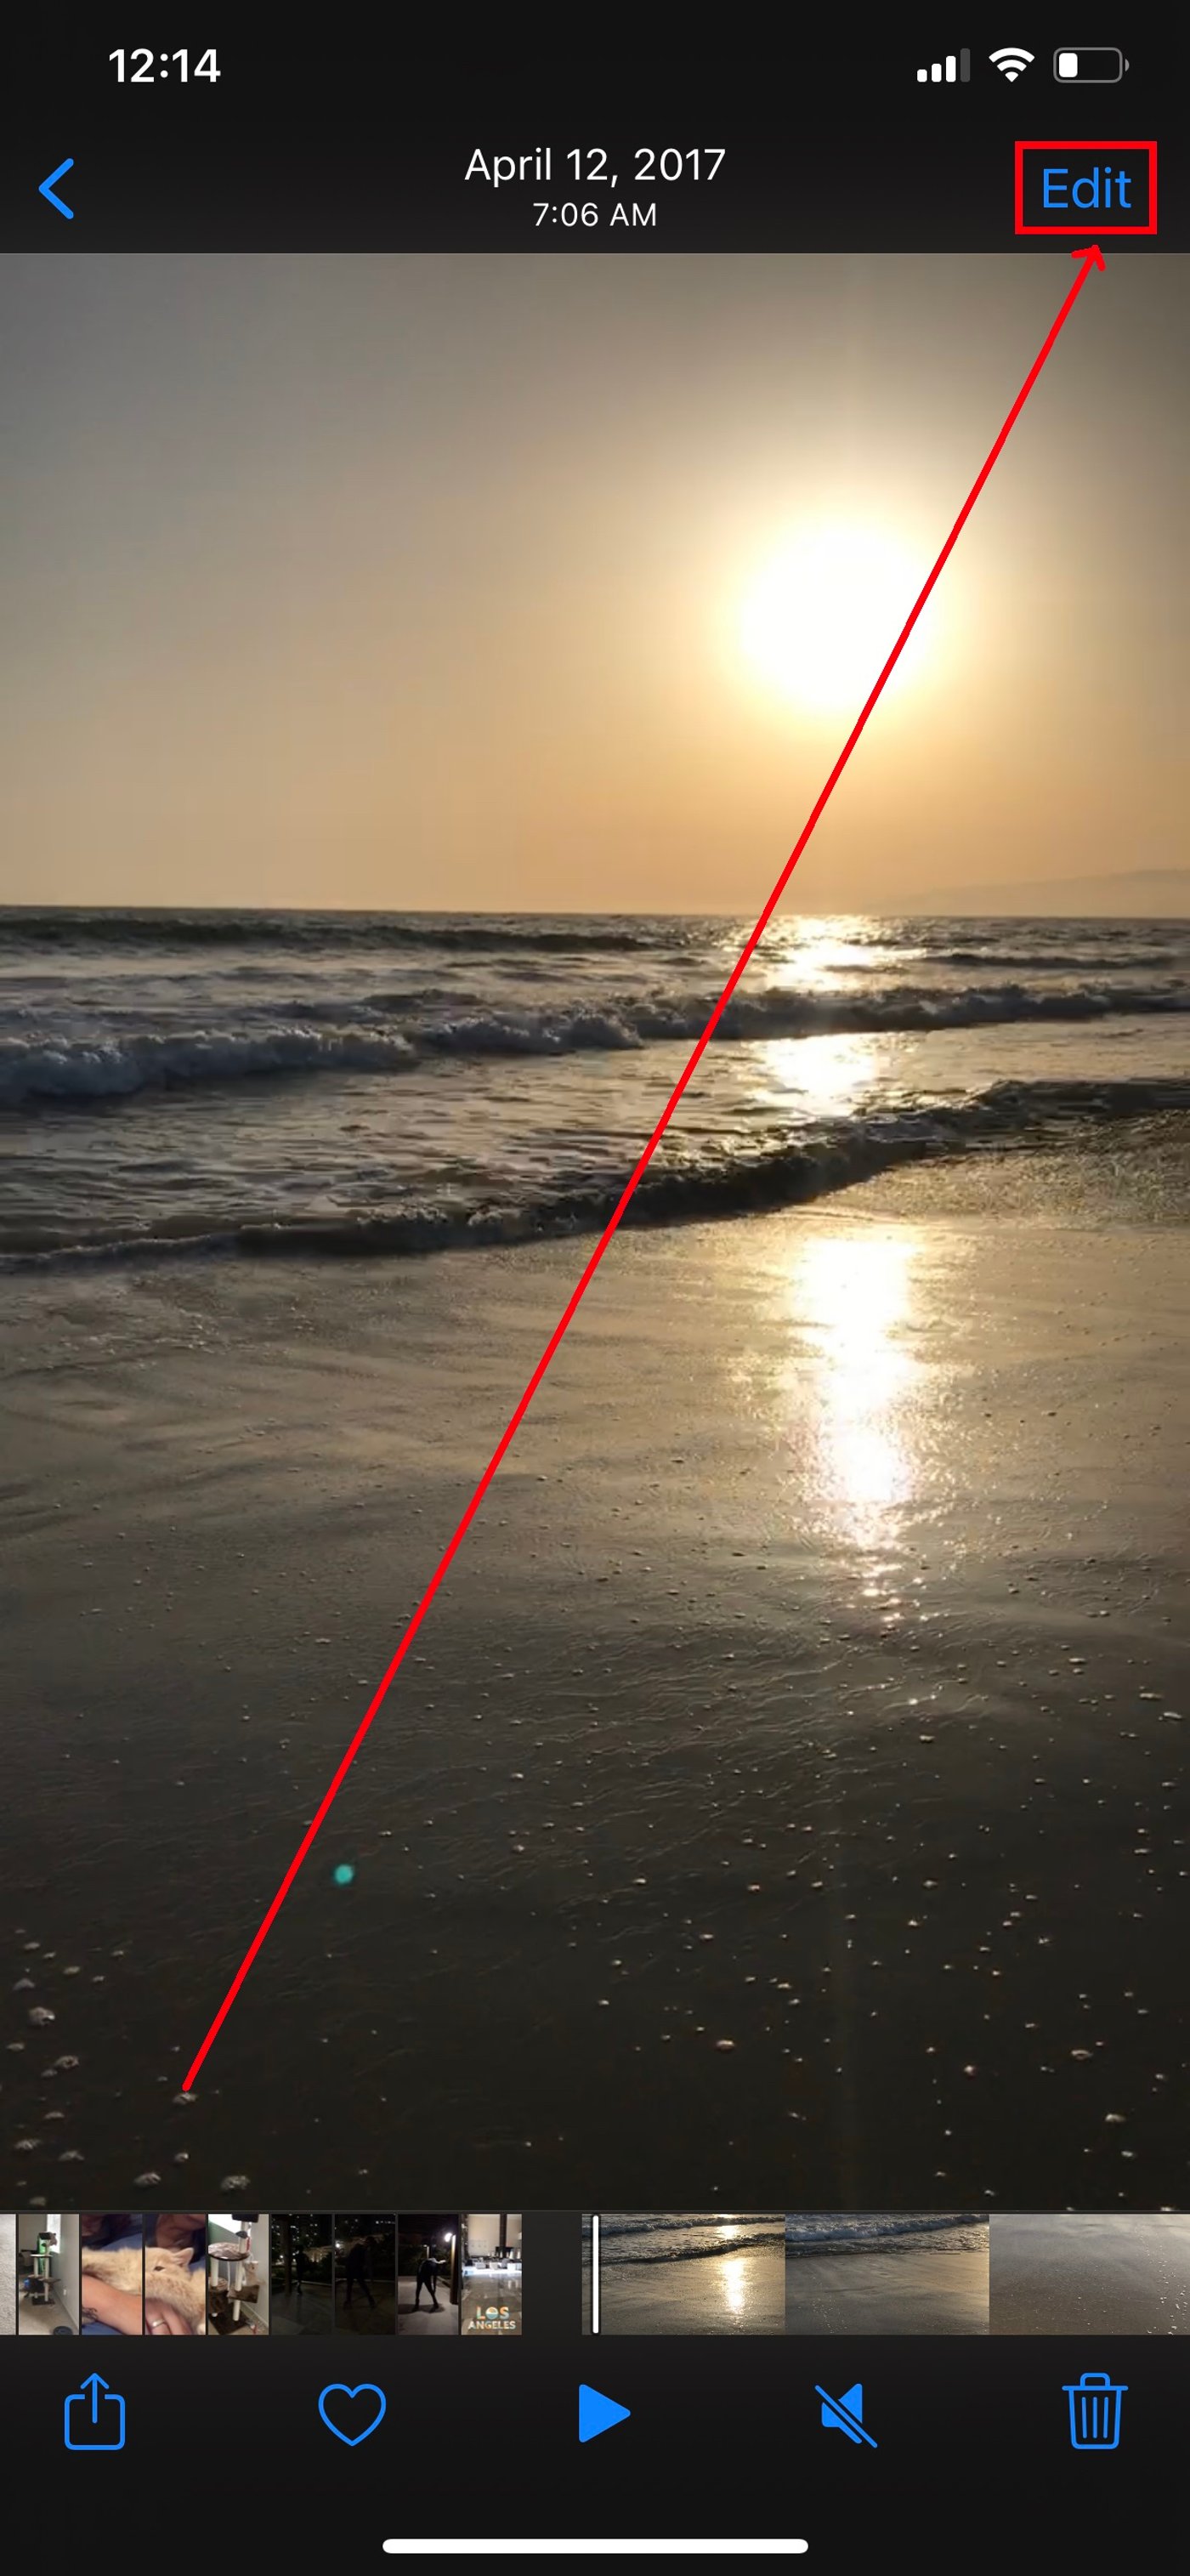
If you want to make basic edits (such as crop, trim, rotate) to your screen recording, you can do so from within this app itself. Here’s how:
Step 1: Open the video you wish to crop and click on the Edit option.
Step 2: If you wish to crop your video, you can tap the “Crop” button. You can manually crop your video or change the aspect ratio.
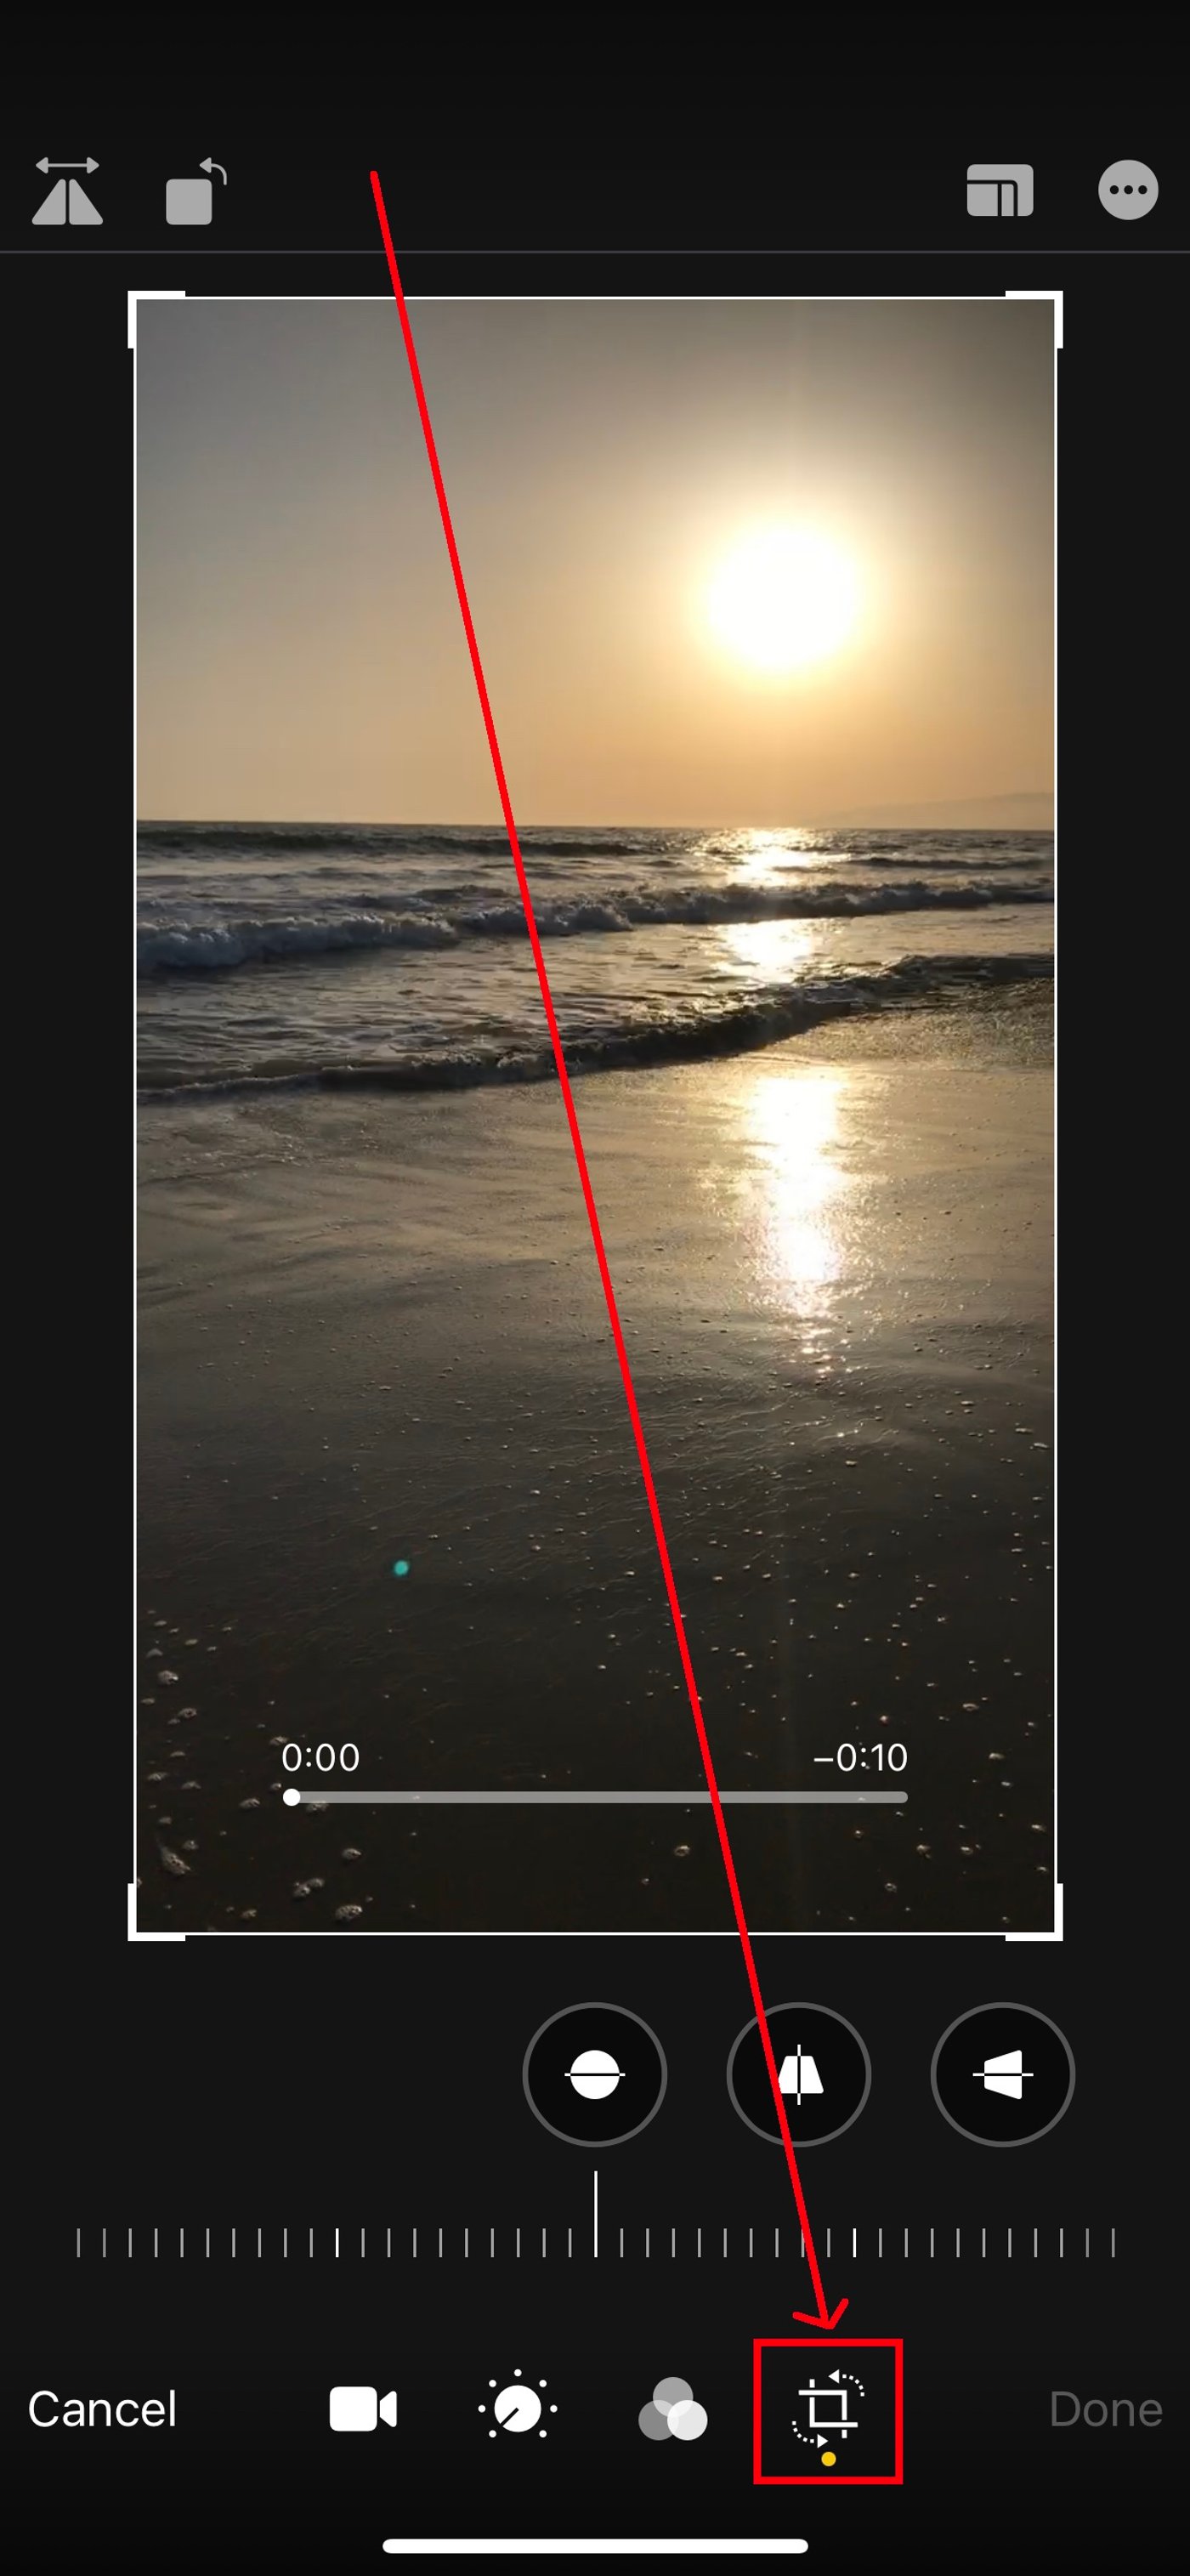
Step 3: Next tap on the “Aspect Ratio” button on the right top corner of your screen. Now select the aspect ratio you wish to crop your video to. Move the video to frame it and pinch in and out for the right kind of zoom. You can use the Freeform button for a custom cropping. Once satisfied, tap Done.
Note: Confused about aspect ratios? With this complete guide that we’ve put together on aspect ratios, you simply cannot go wrong!
Step 4: You can also flip or rotate your video by tapping on the crop button. Next tap the flip (triangular button) or rotate (square button) options on the top left corner of your screen. Tap Done once finished.

Step 5: You can trim your video by tapping and dragging the arrow at the very start of the video to the right. Size the frame to trim the video down to just the part you want to keep. You can press play at any time to ensure you like the edit.
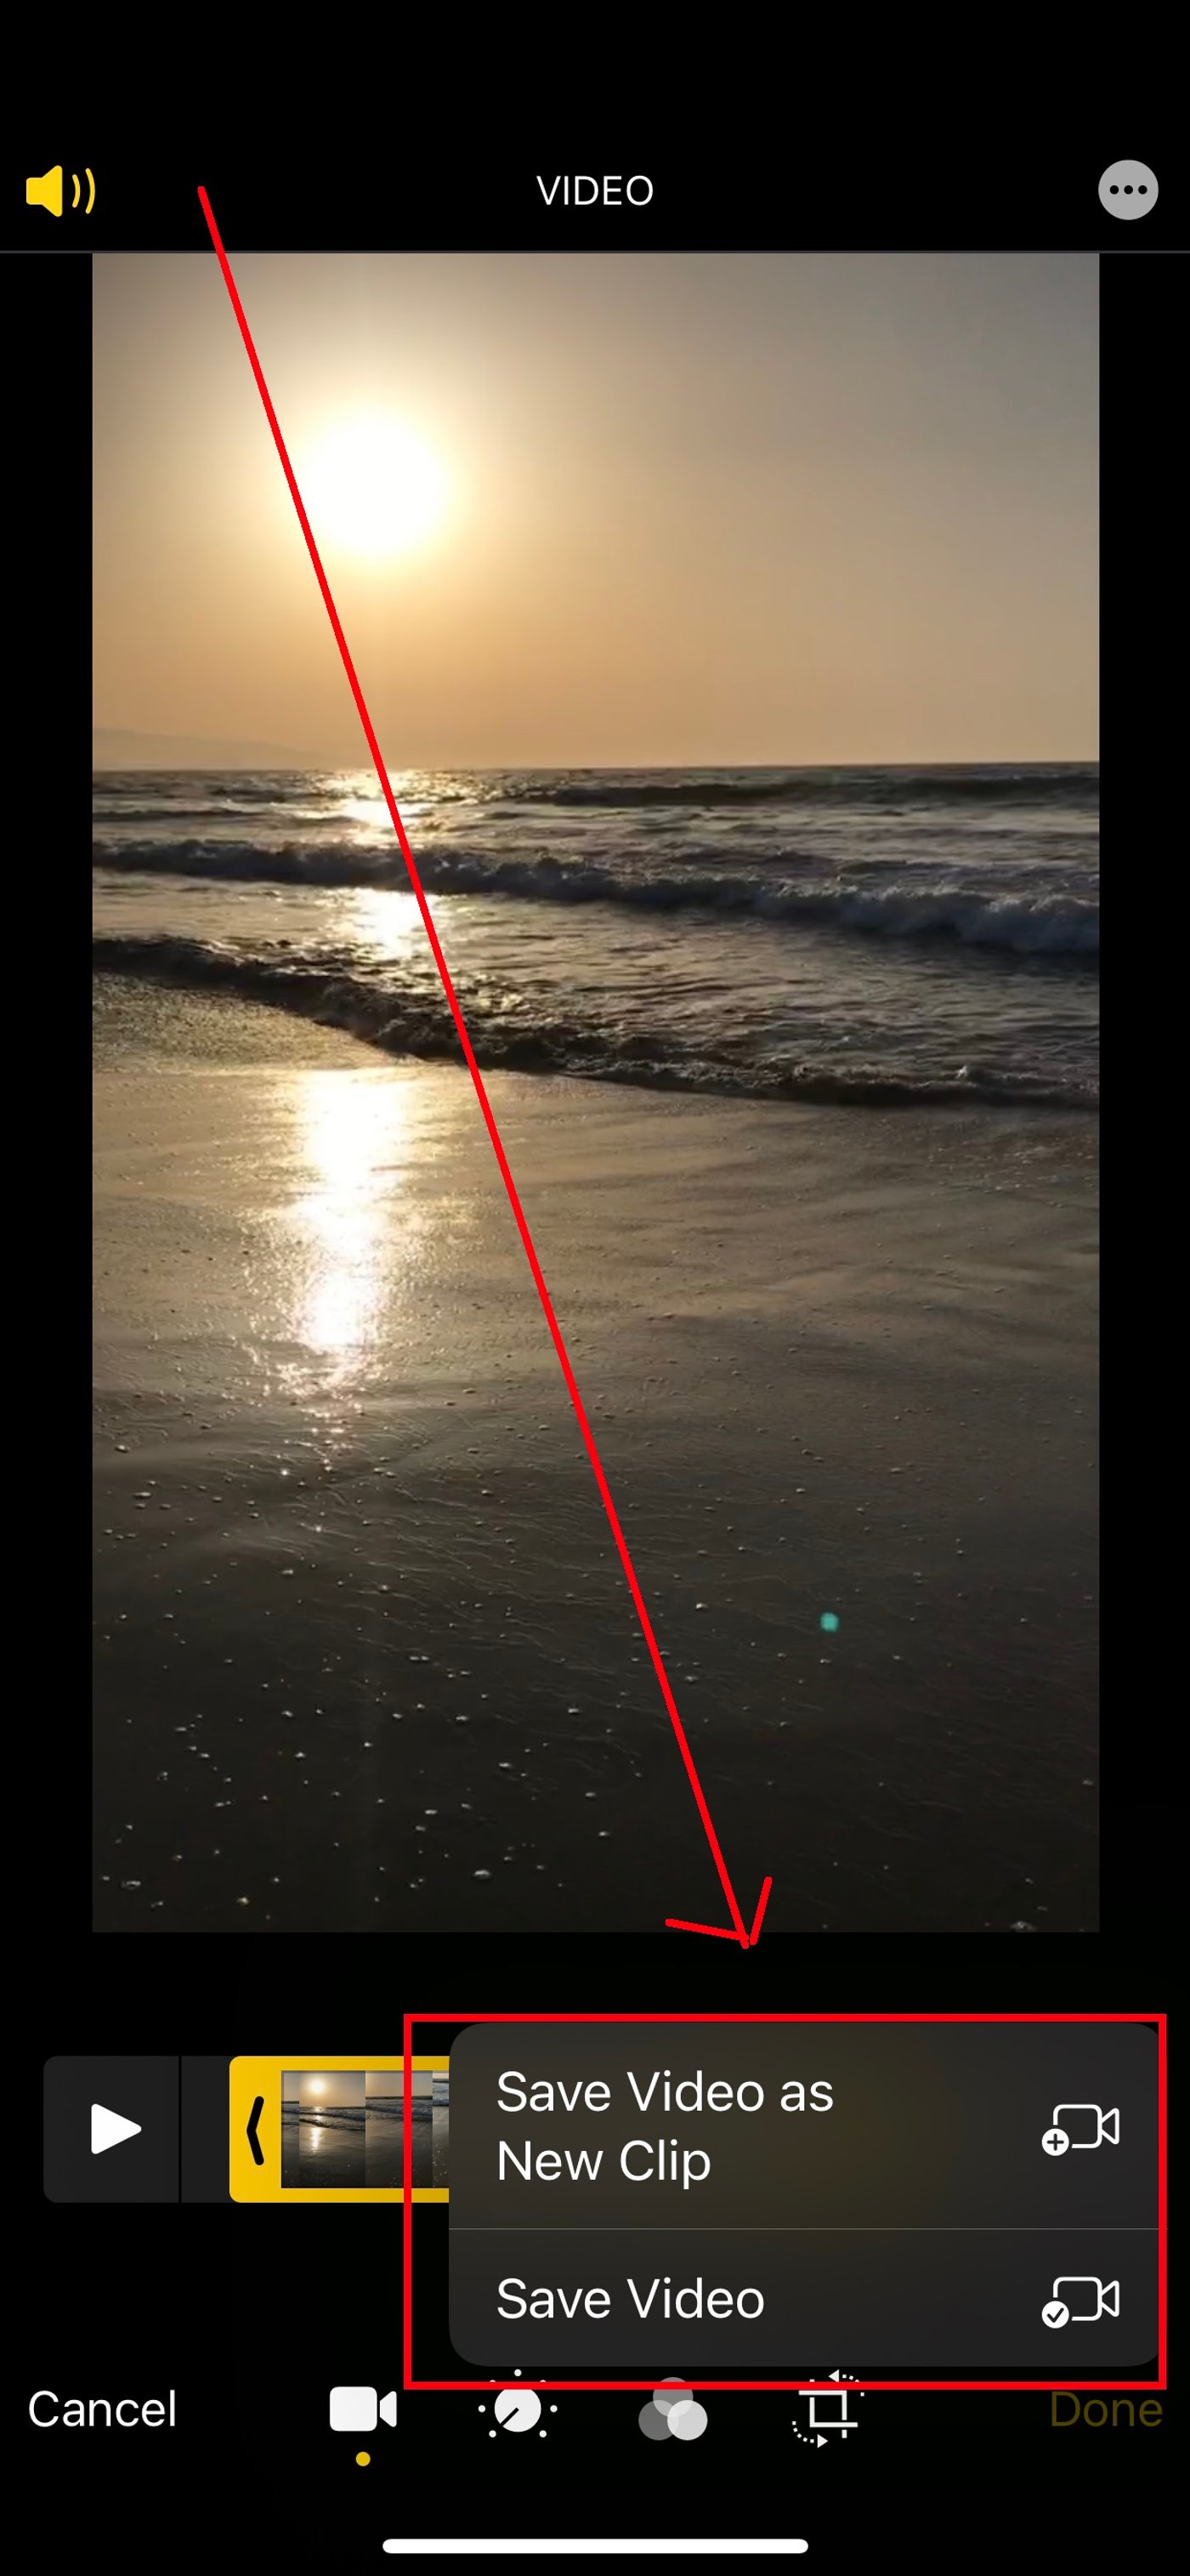
Step 6: To save your edited video, tap “Done.” You now have the option to:
- Save Video and replace your existing clip.
- Save Video as a New clip so that your original video remains unaffected.
Select the option you prefer to save your edited screen recording.
Check out this guide on how you can edit videos on your iPhone. Also, look at this super cool iPhone video editing app Filmr that makes it very easy to edit your screen recordings and videos below.
How to edit your screen-recordings and turn them into thumb-stopping PRO videos
While you can crop and trim your videos on the iPhone super easily, you can’t really make your video look professional. If you want to upgrade your iPhone screen recording video to the pro league, you can now do so using Filmr. Currently available to all iOS users, this is an app that allows you to create scroll stopping videos super easily.
Download Filmr and follow the simple steps below to start editing your screen recording or other videos!
Step 1: After downloading the Filmr app, launch it on your iPhone. Now tap the “Camera Roll” icon at the bottom left of your screen and select your screen recordings to be edited. Tap the “Import” button to import your screen recordings to Filmr.
Note: You can also select and import multiple video clips from your camera roll to Filmr.
Step 2: The cool thing about Filmr is the vertical editing interface made just for the smartphone. You will now see all the clips you’ve imported in a sequence. Drag the clips up or down to reposition them if you want to change the order of when the clips play.
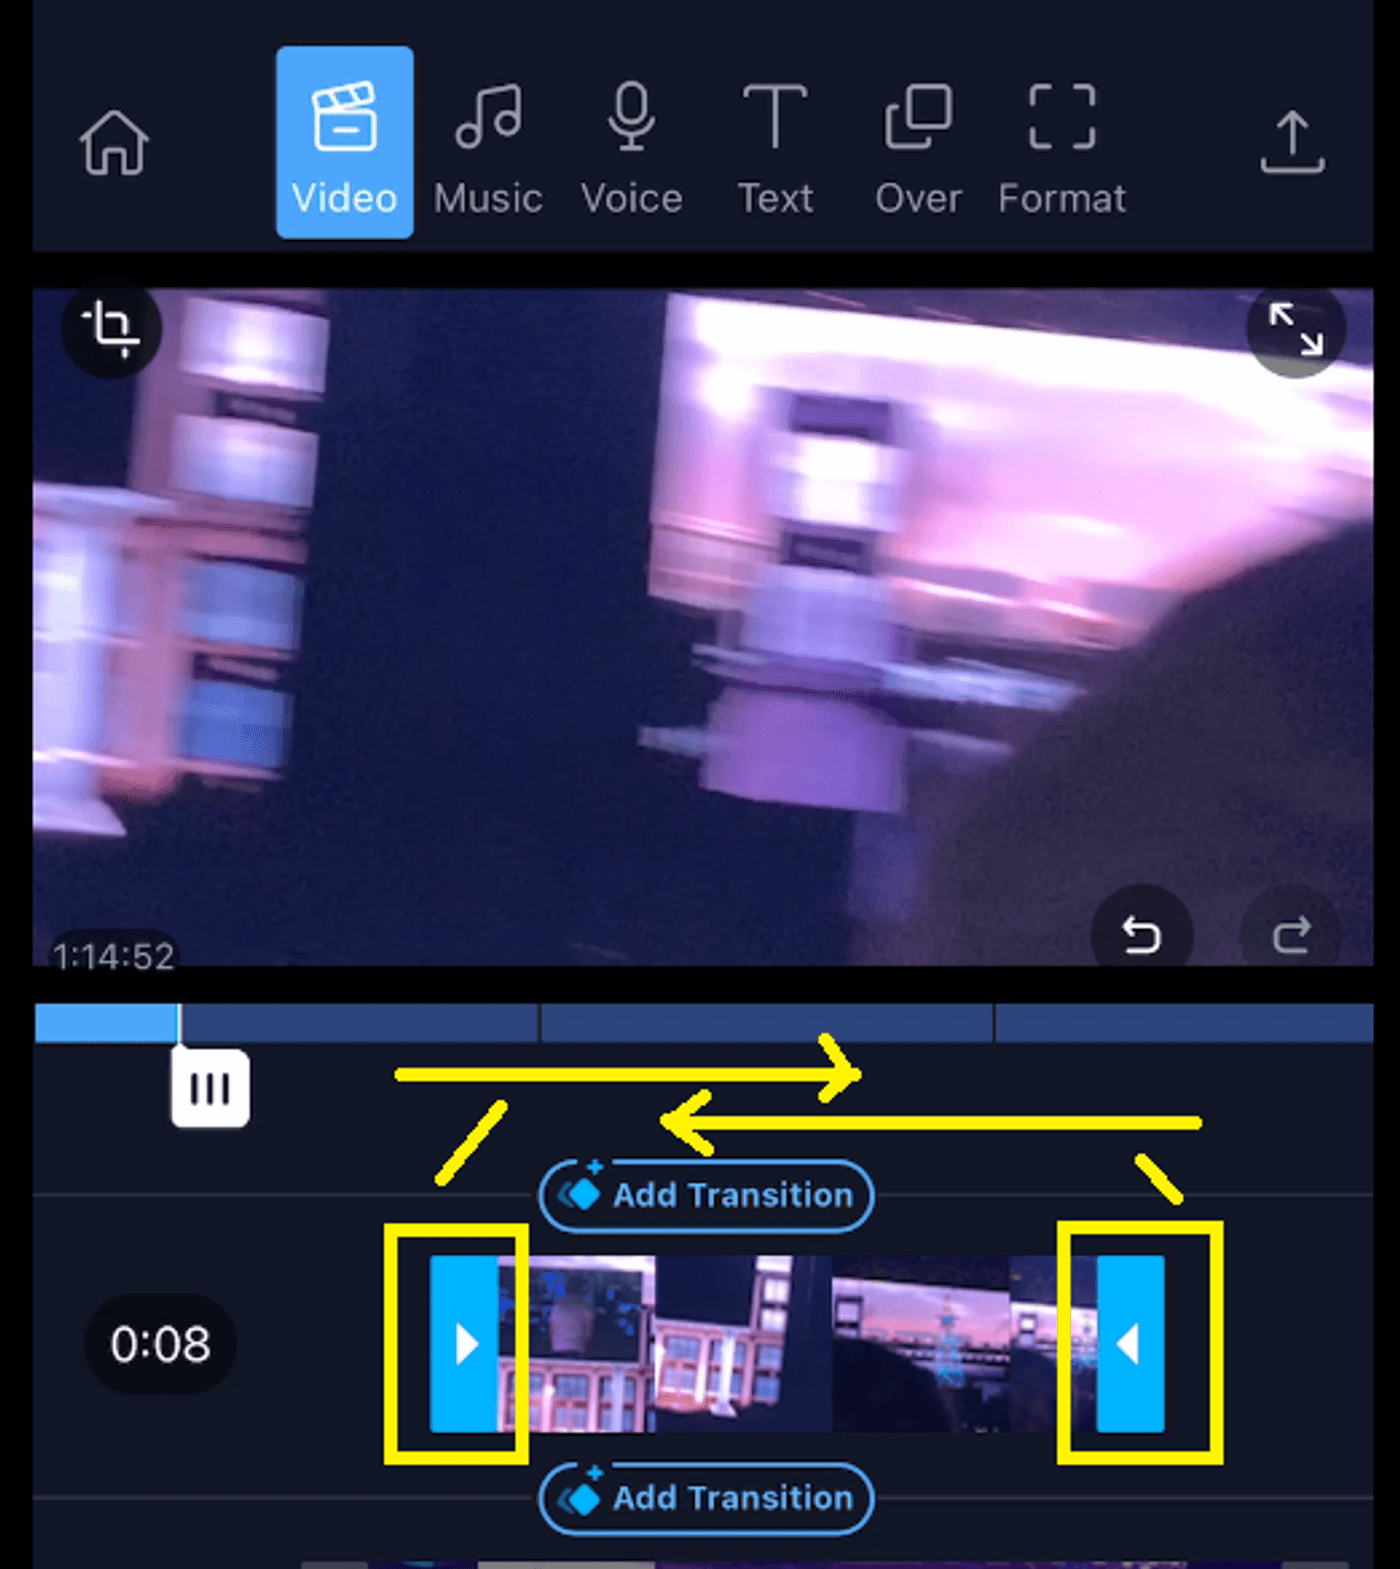
Step 3: Trim a clip by clicking on the clip layer and slide the arrows right or left at the start and end. It’s that simple.
Step 4: Tap the three dots on the left corner before a clip to open up your settings. You can split a clip from here, add effects, filters, speed up or slow down your video, adjust clip volume and lots more.
Note: Unlike other video editing apps, splitting a clip is really easy on Filmr because when you split or break your clip into parts, the parts are also be visible as a separate clip automatically.
Step 5: You can add effects to your videos by clicking on the three dots next to each clip and tapping on the “Effects” option.

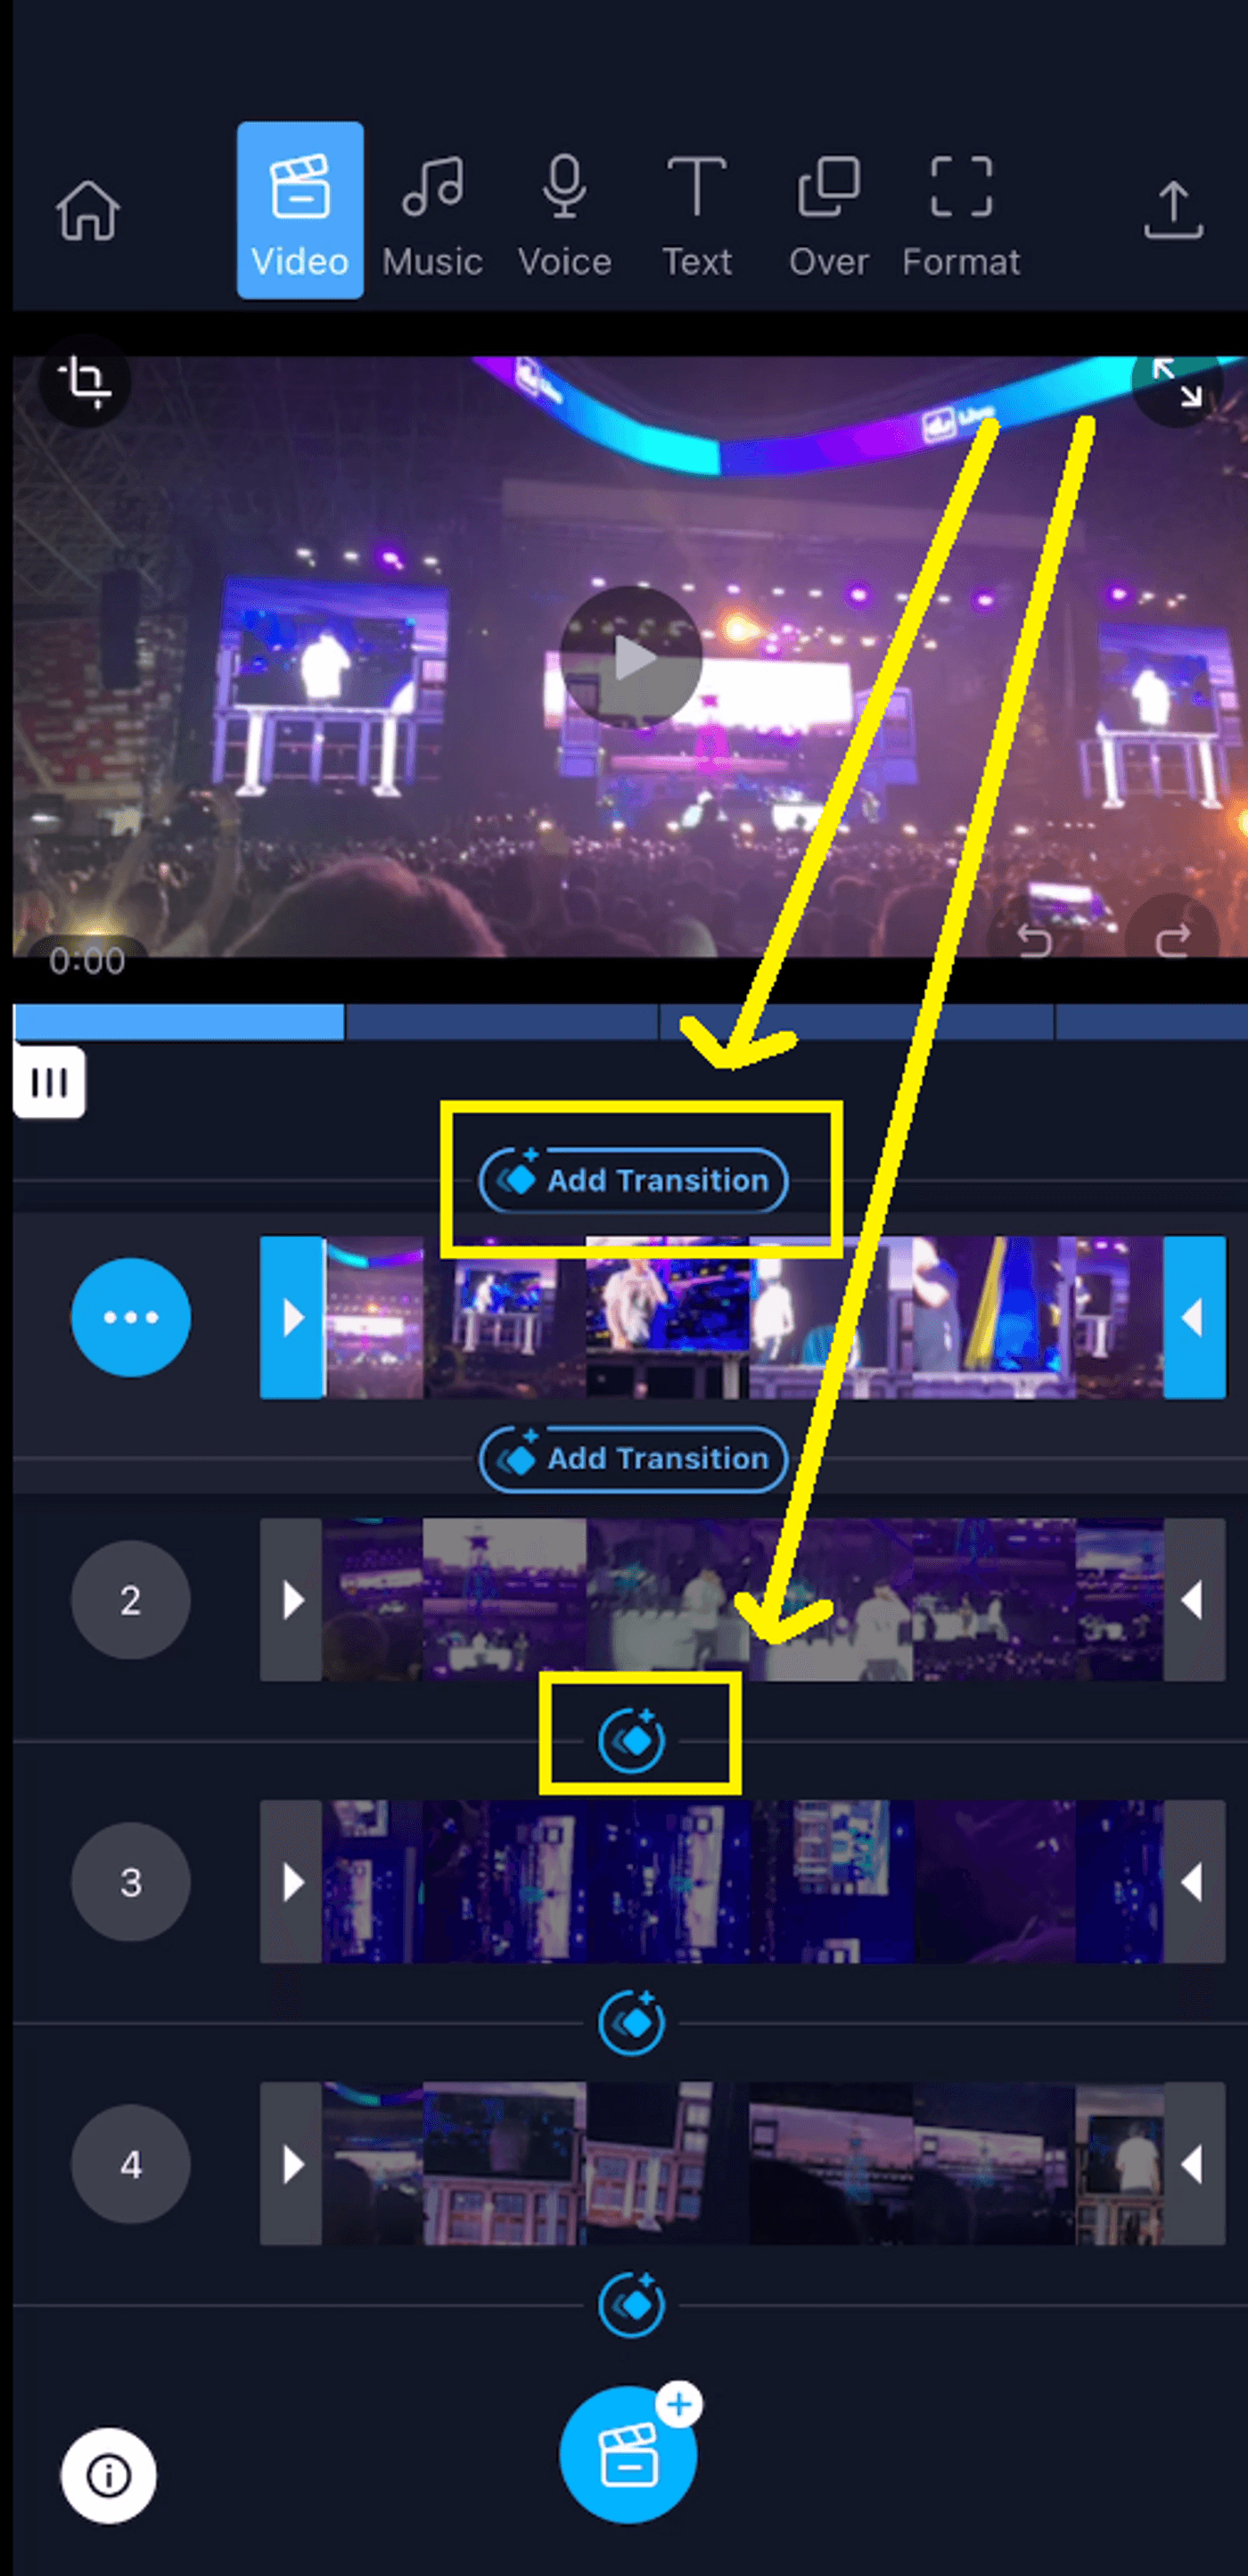
Step 6: Add transitions between clips to make your video look more professional by tapping on the transition button or icon between each clip.
Check out a detailed tutorial on how to edit your screen recording and any other videos using Filmr here:
Note: If you need to regularly screen record or even record your Zoom meetings, invest in the Filmr PRO version starting at just $4.99. And if you are already an InVideo PRO user, you’ll get access to Filmr PRO for free!

Wrapping Up -
So that’s how easy it is to screen record on iPhone. Now that you know the ins and outs of screen recording on your iPhone and want to do the same on your Mac, check out our guide on how to screen record on your Mac.
If you have any questions or want to continue the conversation, hop over to the InVideo community and learn from 25K other marketers and video creators just like you!
And don’t forget - if you’re looking to create thumb-stopping videos in minutes (even if you’re not a PRO)- Sign-up for an account on InVideo.io today.
FAQs
Q.1 Does the iPhone already have screen record?
Ans: Yes, iPhone’s have a screen recording functionality in-built. Whether you are using iOS 11, 12, 13 or 14, check out this step by step guide on how to set up screen record for an iPhone.
Q.2 What buttons do you press to screen record on iPhone?
Ans: You need to swipe up for iPhone 8 and below or slide down for iPhone X and above to navigate to the iPhone control center and press the screen record button to start recording your iPhone screen. View this detailed guide with pictures on how to screen record on iPhone.
Q.3 How long can you screen record on iPhone?
Ans: There is no time limit to how much you can record your screen. The only limit is the amount of empty space on your iPhone hard drive. You should be aware, however, that your video recording can randomly stop during very long recordings due to the large size.
Q.4 Can you screen record zoom on iPhone?
Ans: Your iPhone’s built-in screen recording feature makes it easy to record any Zoom meeting, whether you're hosting or simply attending. Check out how you can set up and record your Zoom meetings on an iPhone in this step-by-step guide.
This post was written by Upasna and edited by Abhilash from Team InVideo