Color Grading and Correction
Correct exposure, balance colors and create the look you want. Describe the grade to your AI agents on invideo or share a reference image, then fine-tune it with color wheels, curves and manual controls better than DaVinci Resolve studio.
















A color grading workflow, built for the way you work
The most complete color grading suite
Shape every detail of your video on a multitrack, frame-accurate timeline with color wheels, tone curves, hue and saturation curves, qualifiers, LUTs and a waveform scope for precise control over your grade.
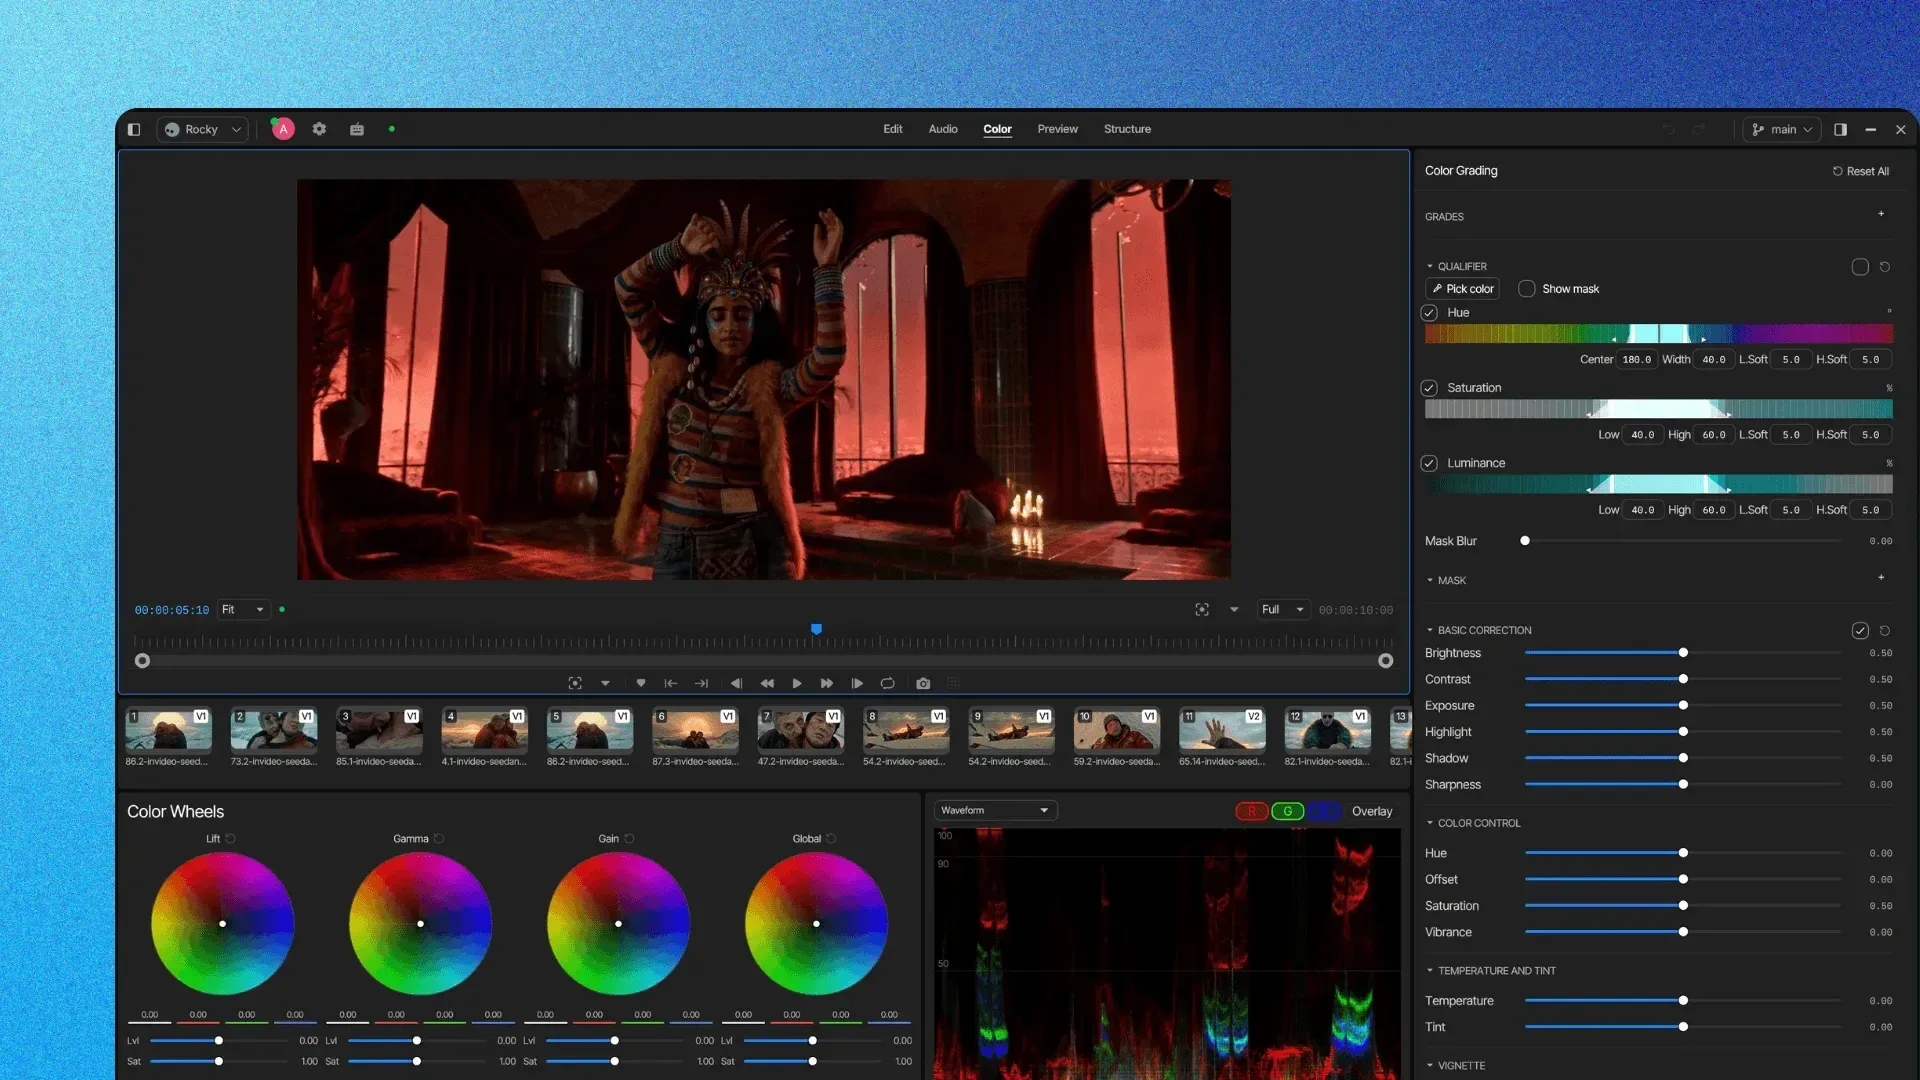
AI color grading
Tell AI the emotion you want to evoke, and it grades your footage to match. Change color temperature, split toning and cinematic looks to create suspense, nostalgia, warmth or any visual mood with simple text commands to the invideo editor.
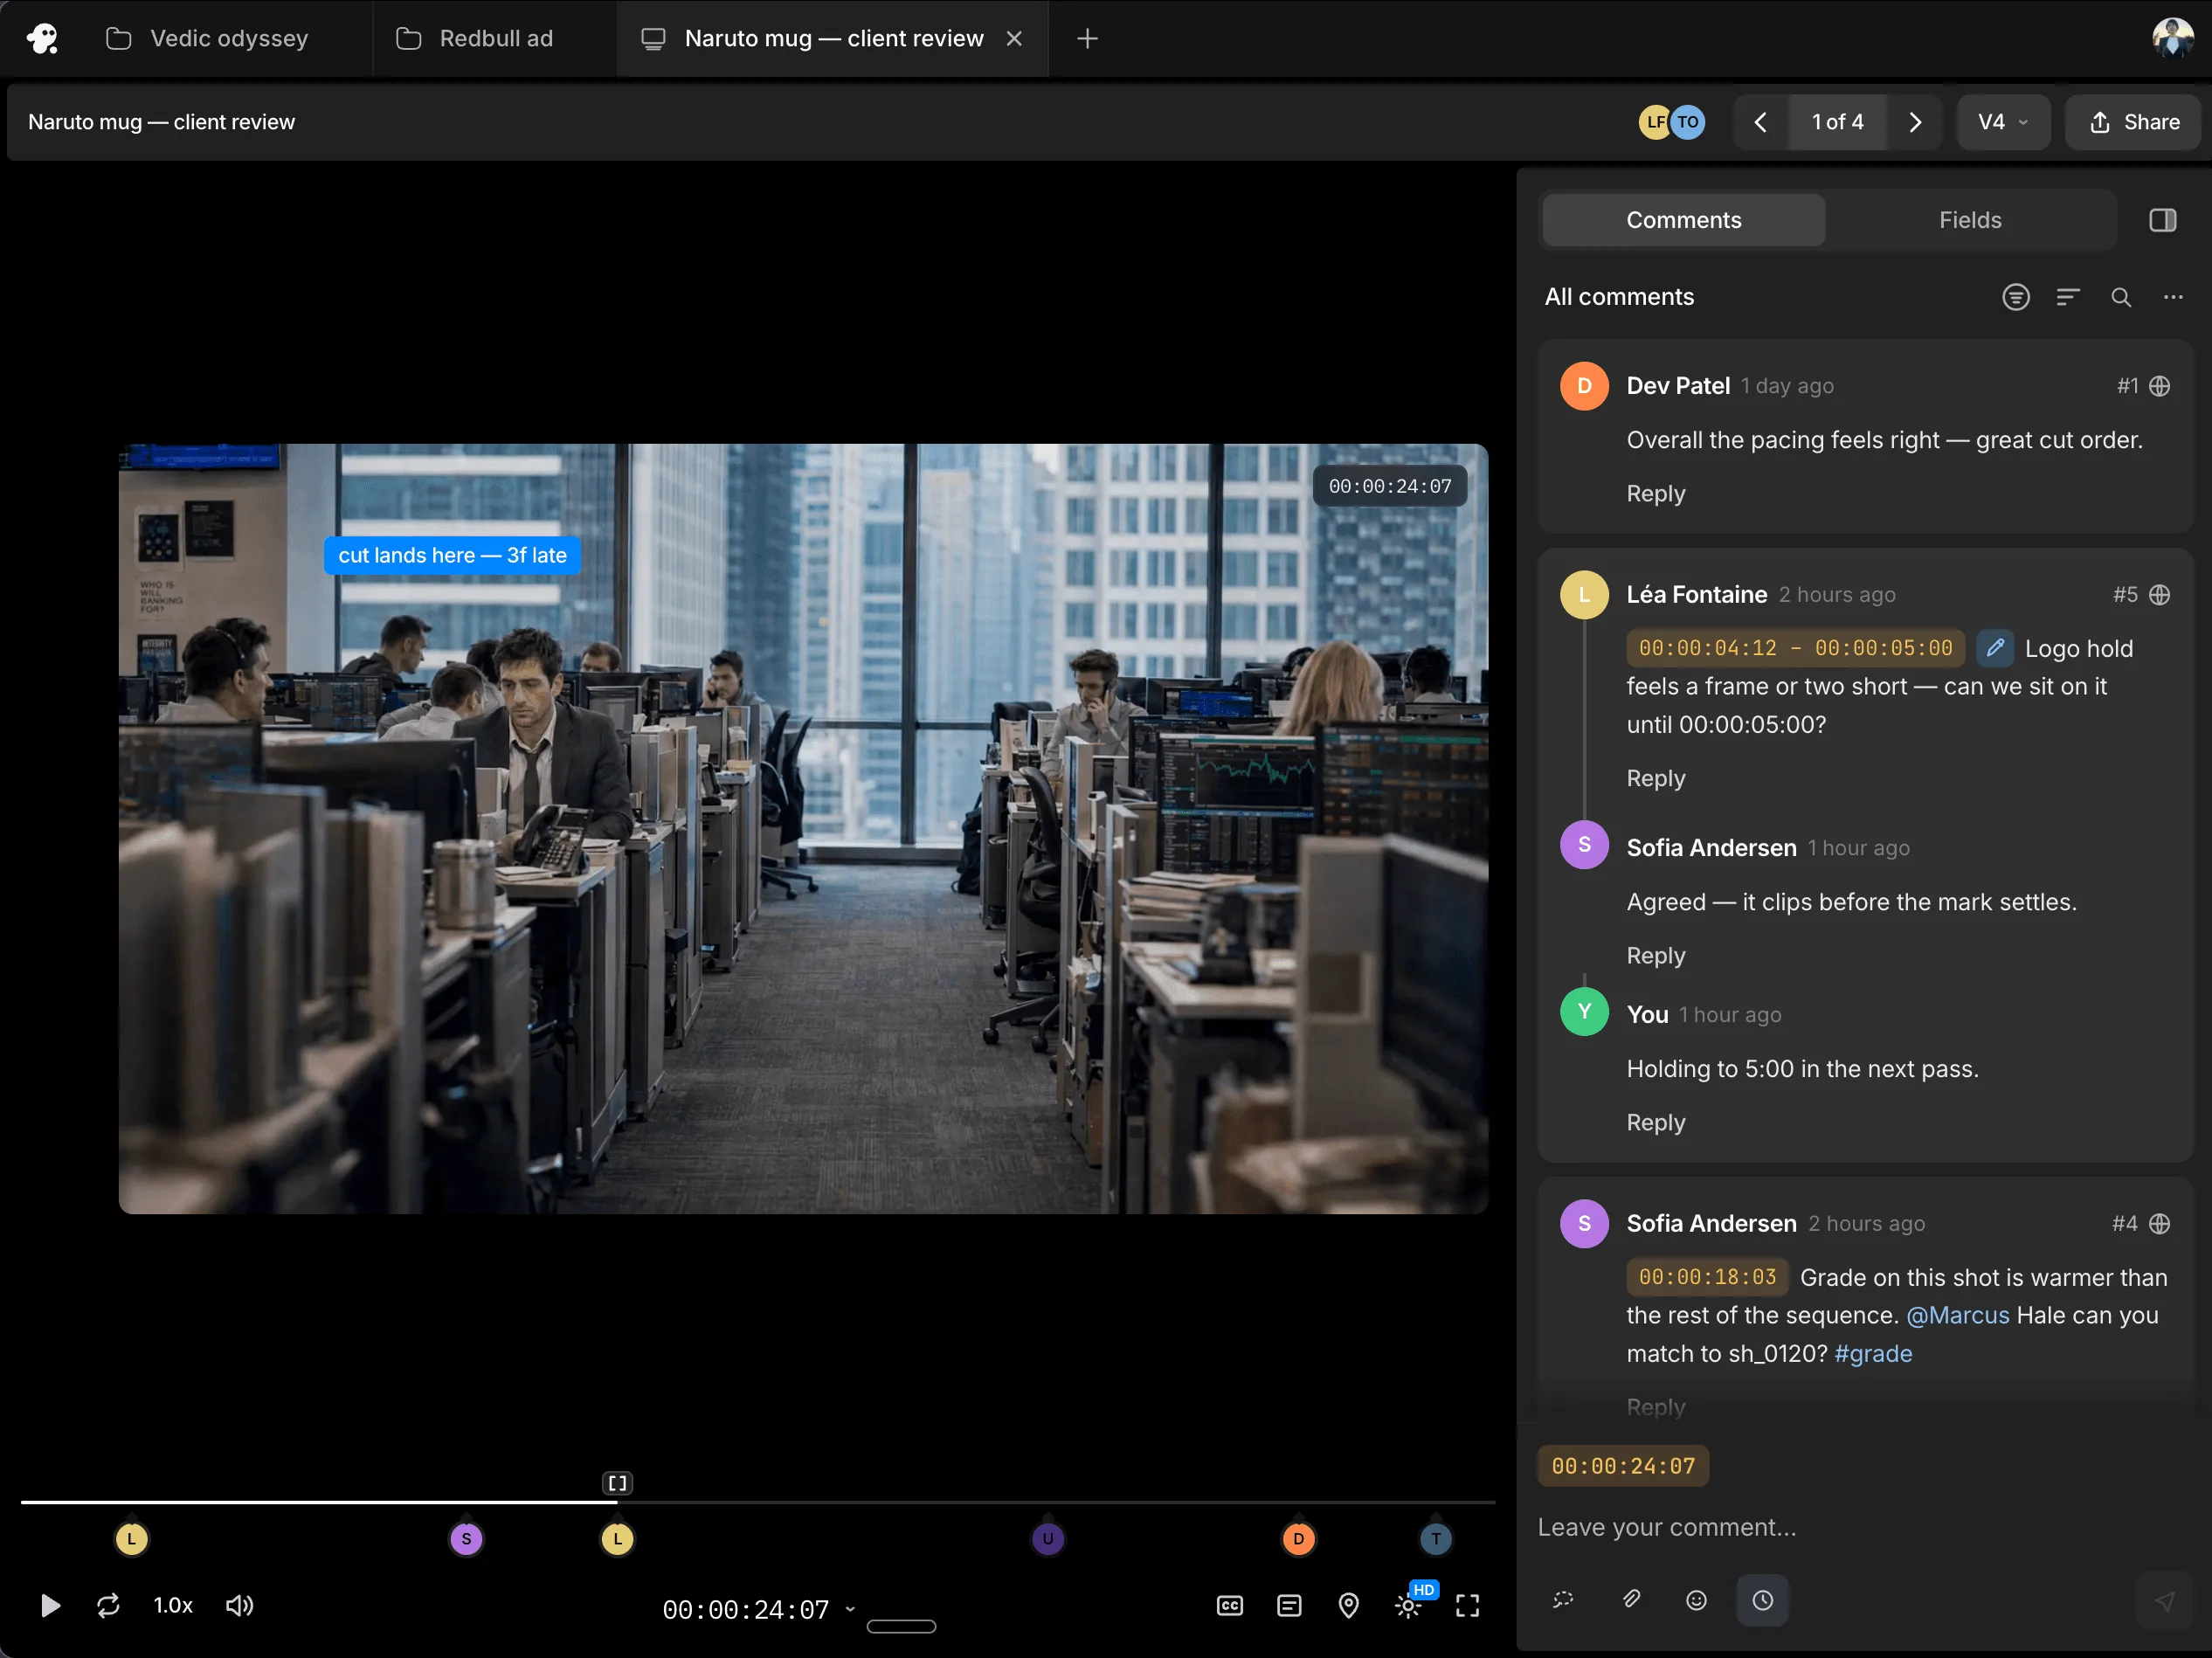
Collaborative editing
Grade together on the same timeline. Ask AI to duplicate your edit on multiple timelines with different color grades, compare looks, share reference frames, and collect frame-accurate feedback without exporting every version.
Shape the light and color in every shot
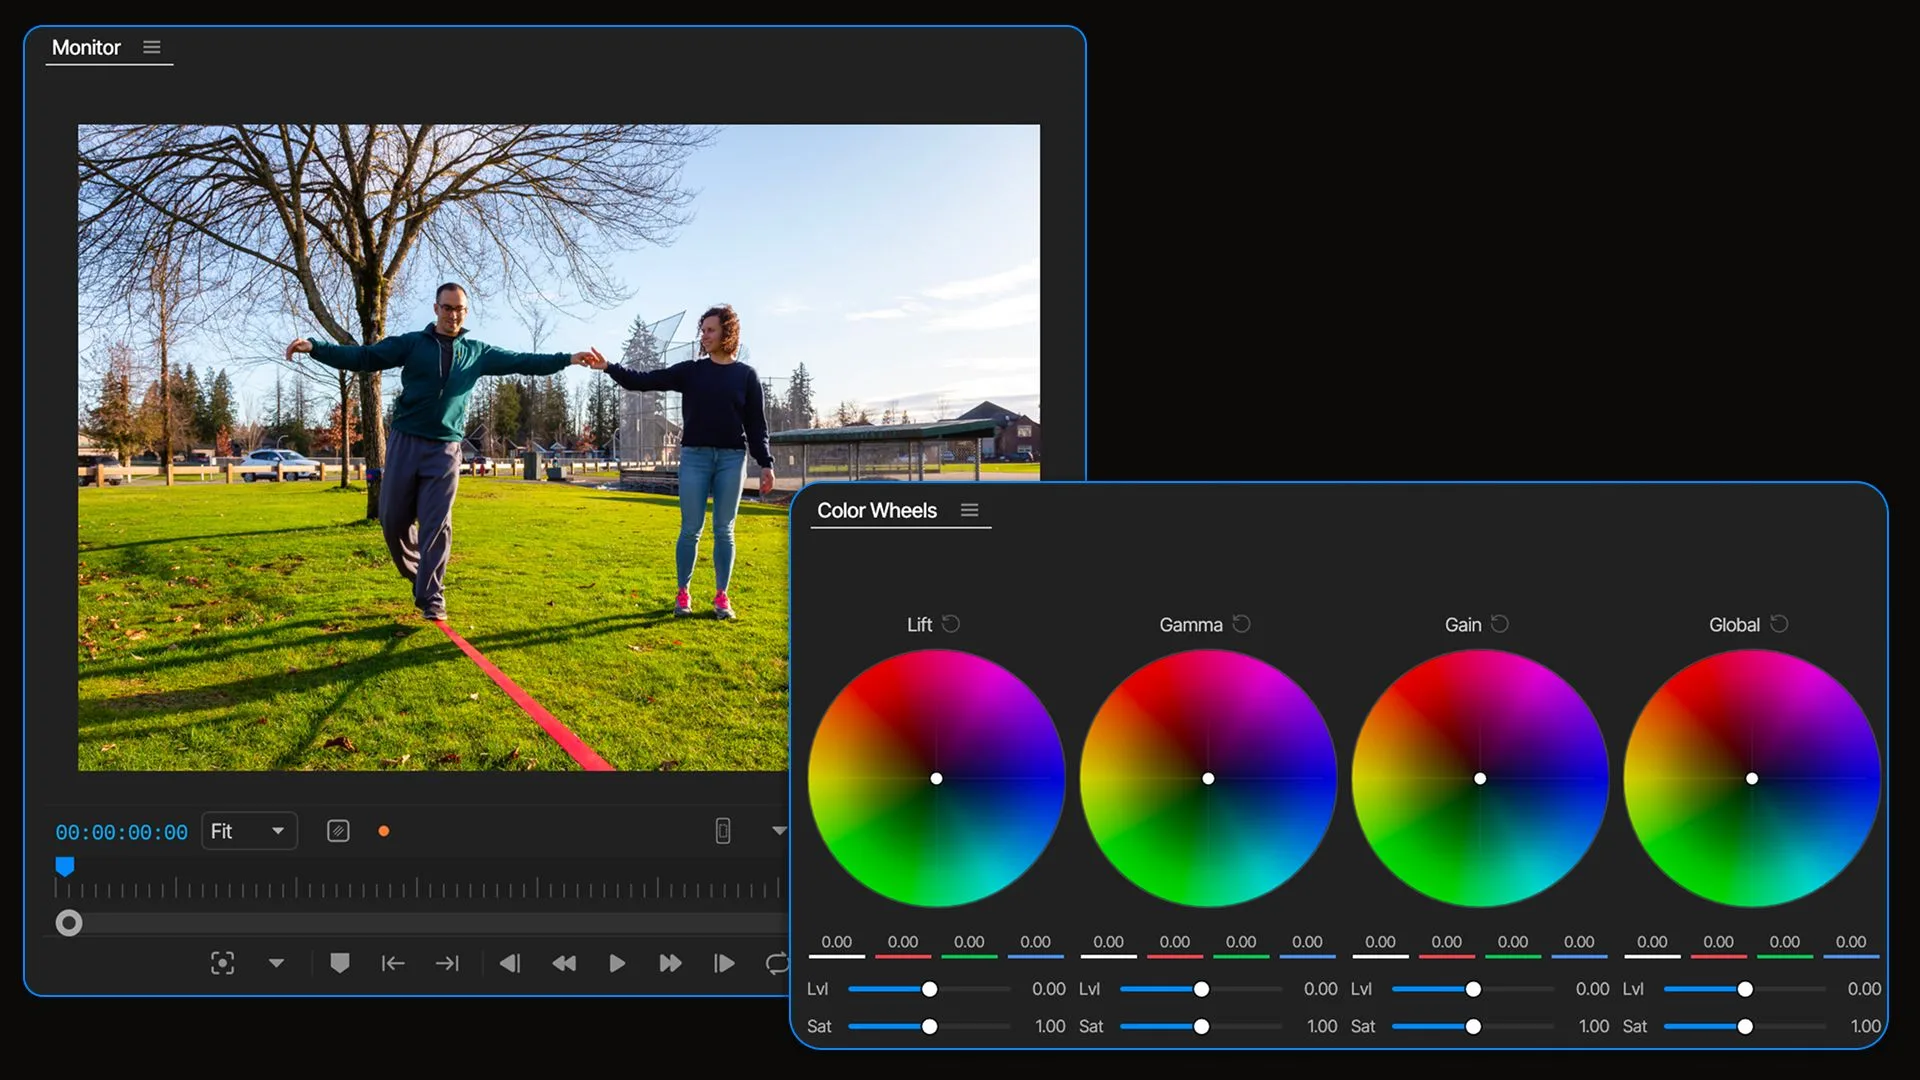
Lift, Gamma, Gain and Global wheels
Adjust the color and level of shadows, midtones and highlights with dedicated wheels, or use Global to affect the whole image. Each wheel also includes saturation controls to refine the color intensity across those tonal ranges.
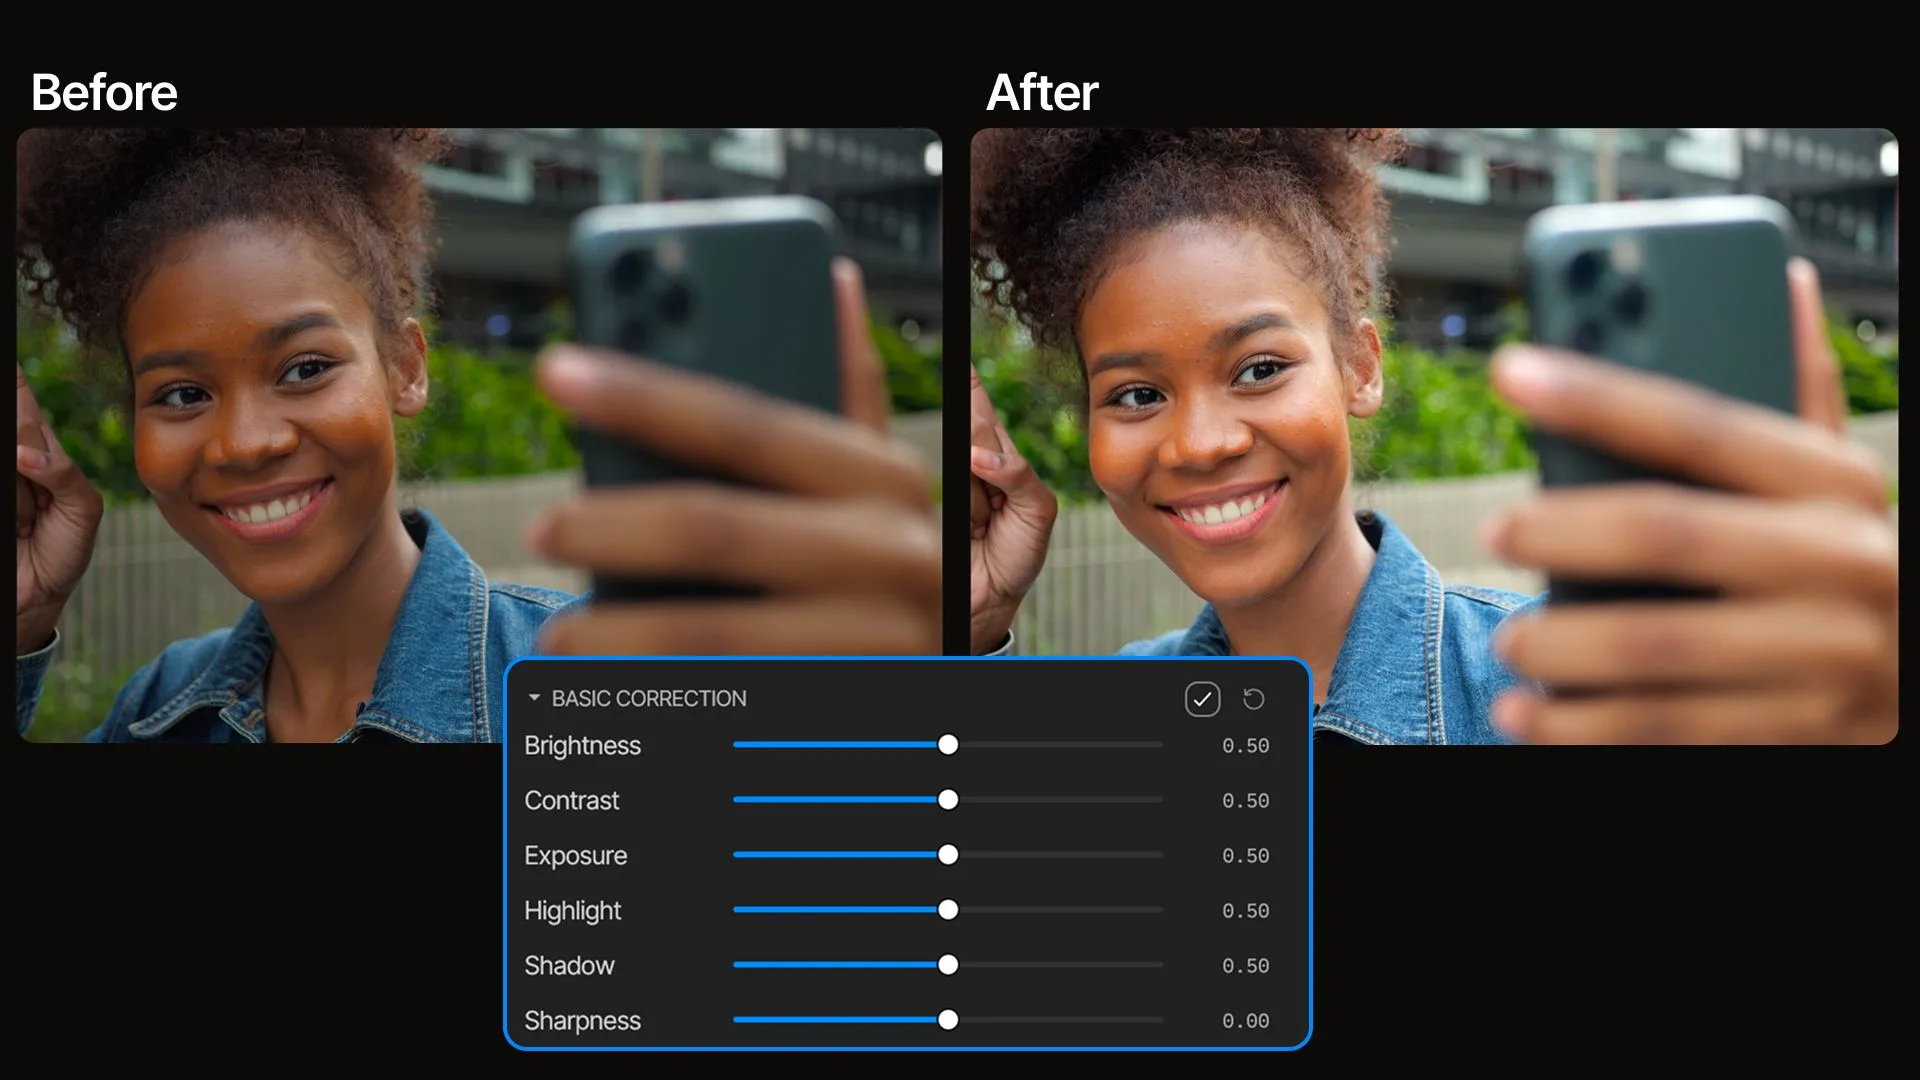
Exposure and contrast controls
Set the overall brightness and exposure, adjust contrast, and refine highlights and shadows with individual controls. Shape the balance between the lighter and darker parts of your footage without having to make every adjustment through a curve.
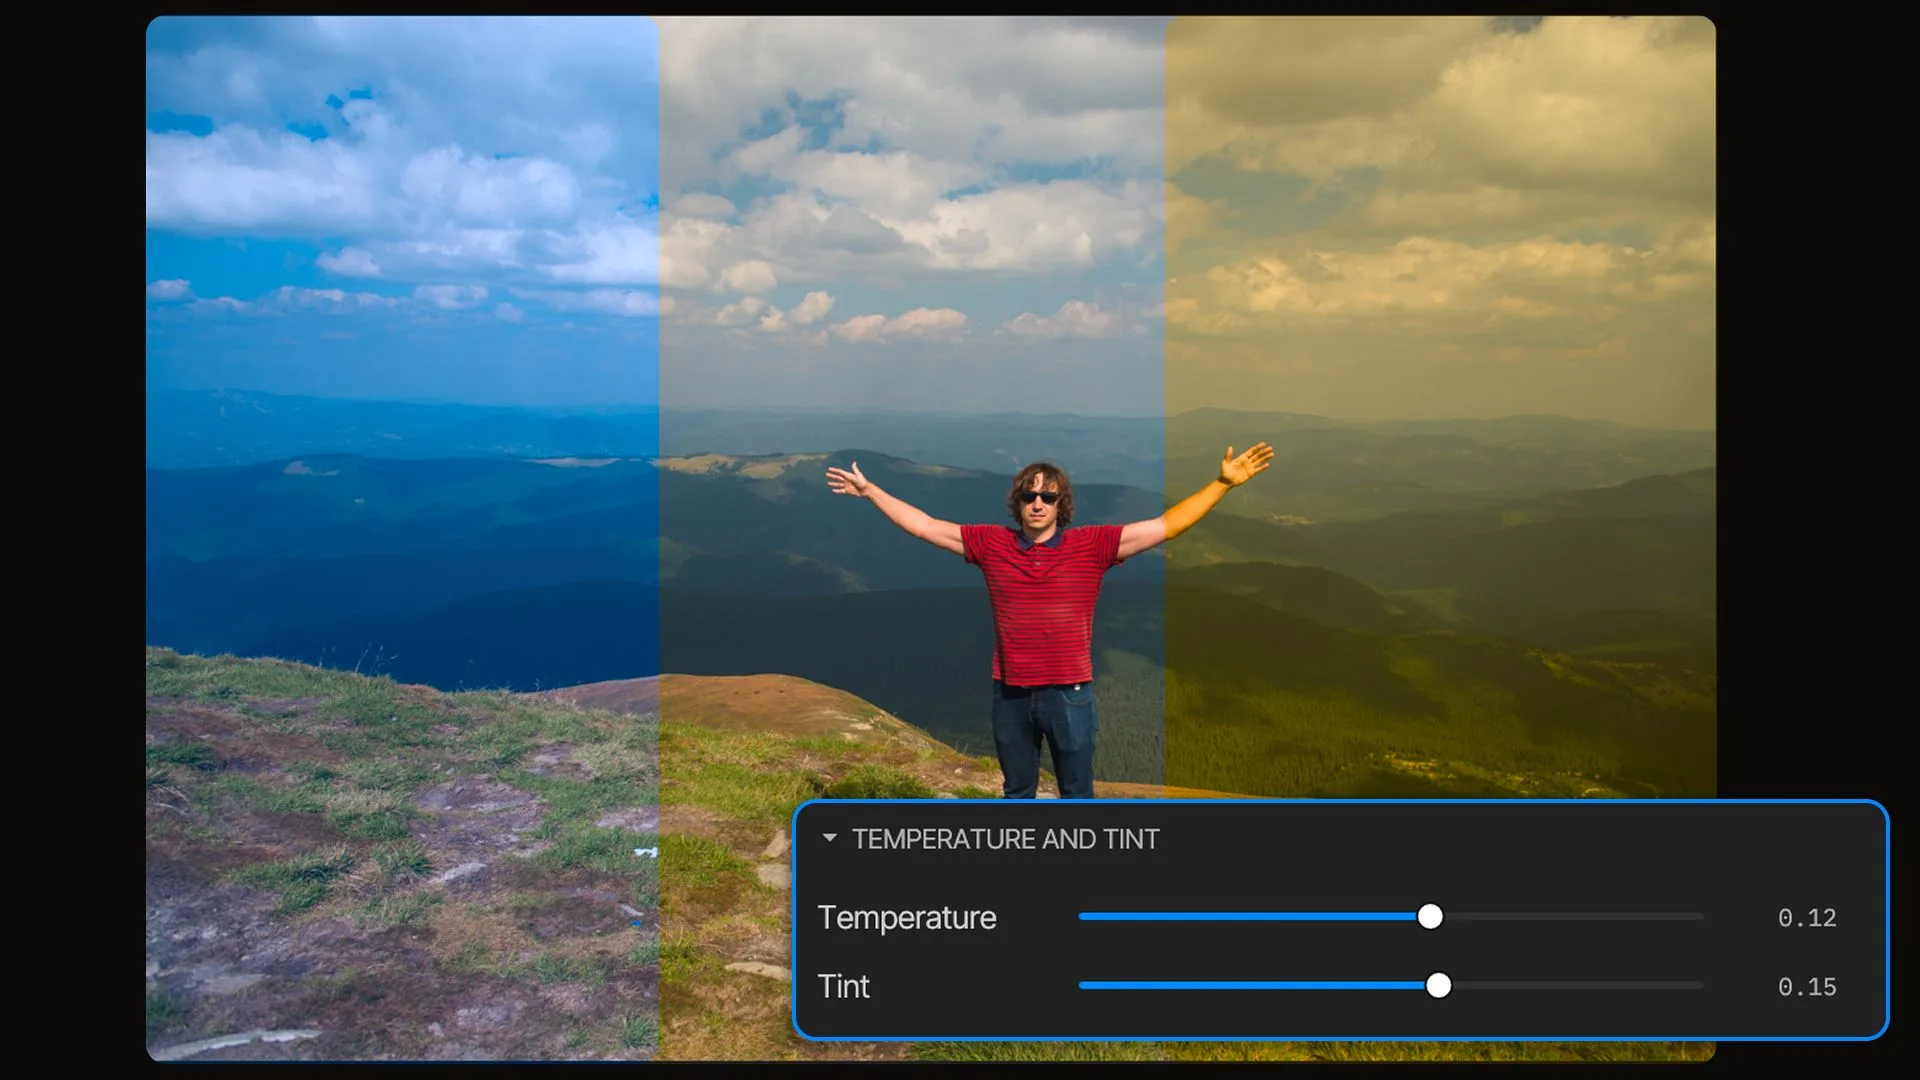
Temperature and tint
Warm up a scene, cool it down or correct an unwanted color cast. Temperature adjusts the balance between blue and yellow, while tint shifts it between green and magenta.
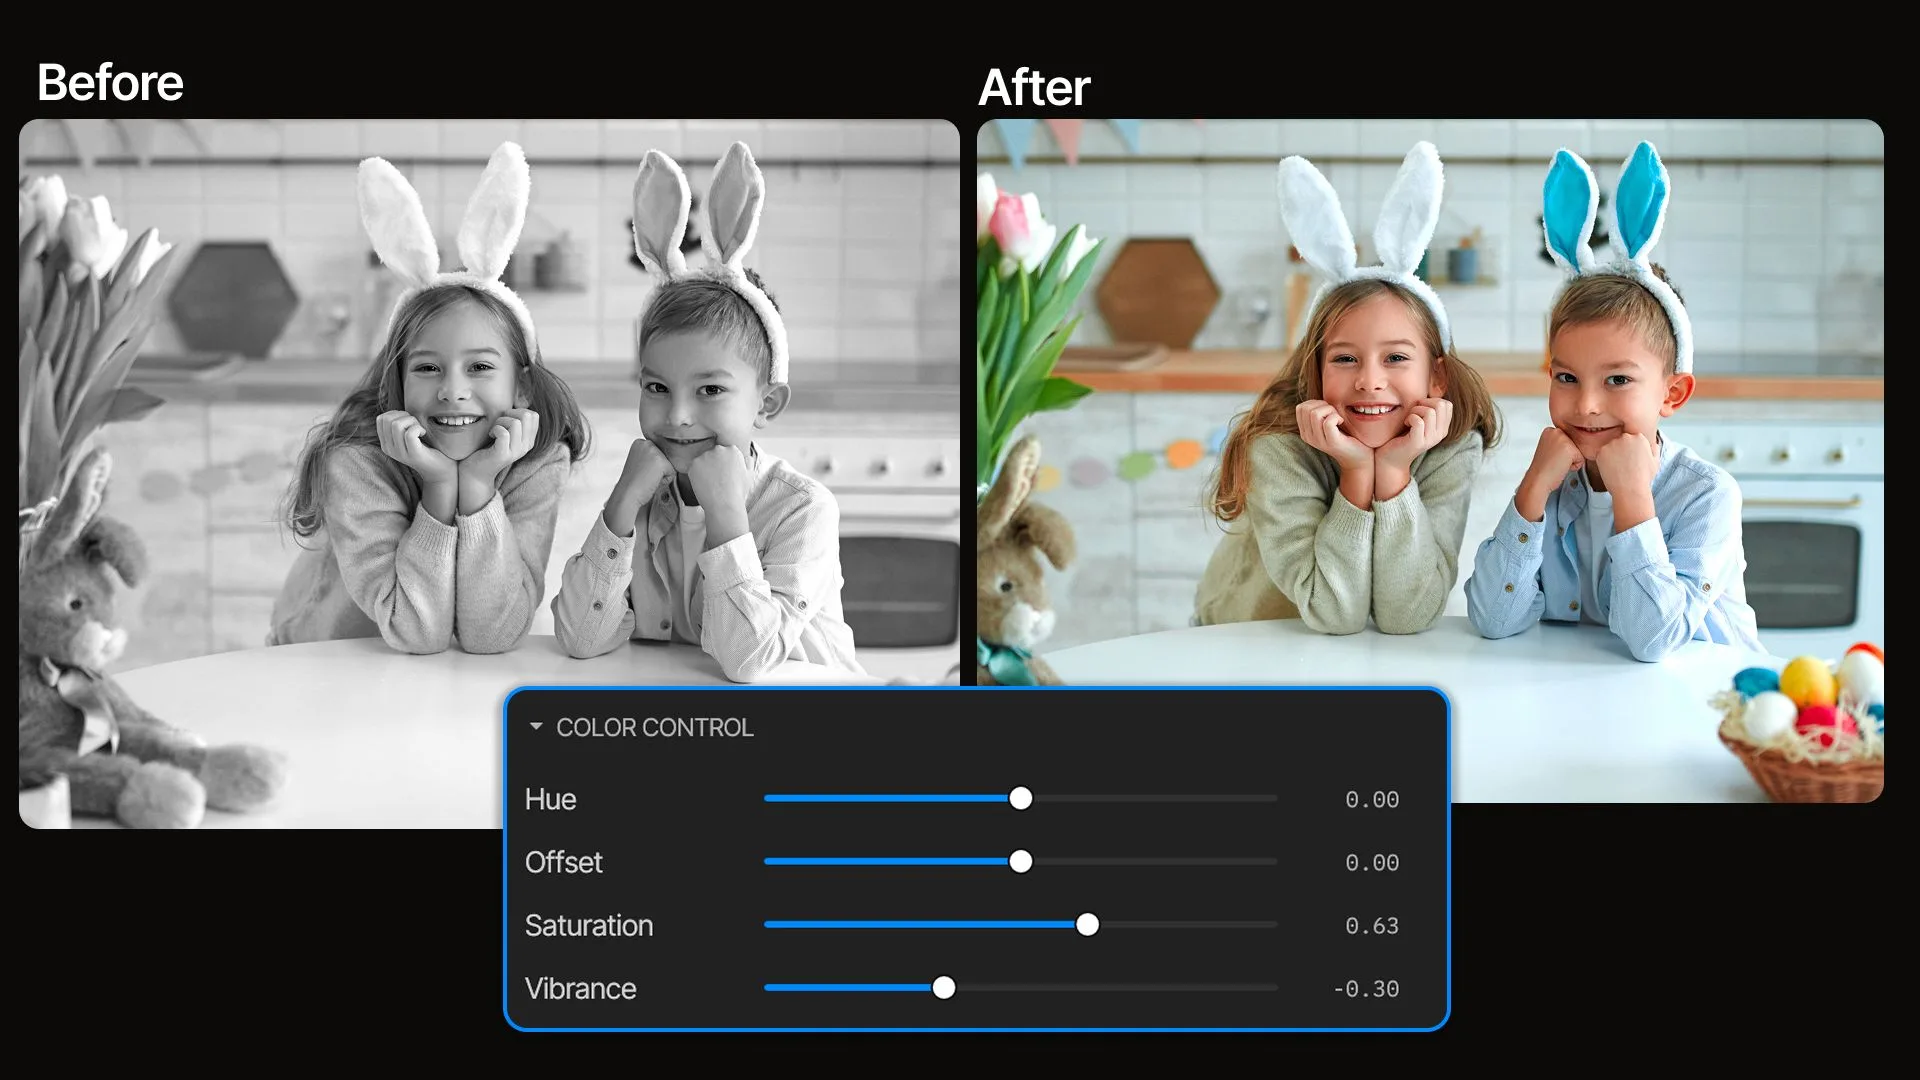
Saturation and vibrance
Control the intensity of color across your shot with saturation, or use vibrance for a more selective boost to less-saturated colors. Build a muted palette or a richer look to suit the scene.
Build a look from references
Share a reference image with the editing agent inside the invideo editor, and it applies the look to the footage on your timeline, with adjustable LUT strength and color controls for any refinements you choose to make.
Fine-tune your color and contrast curves
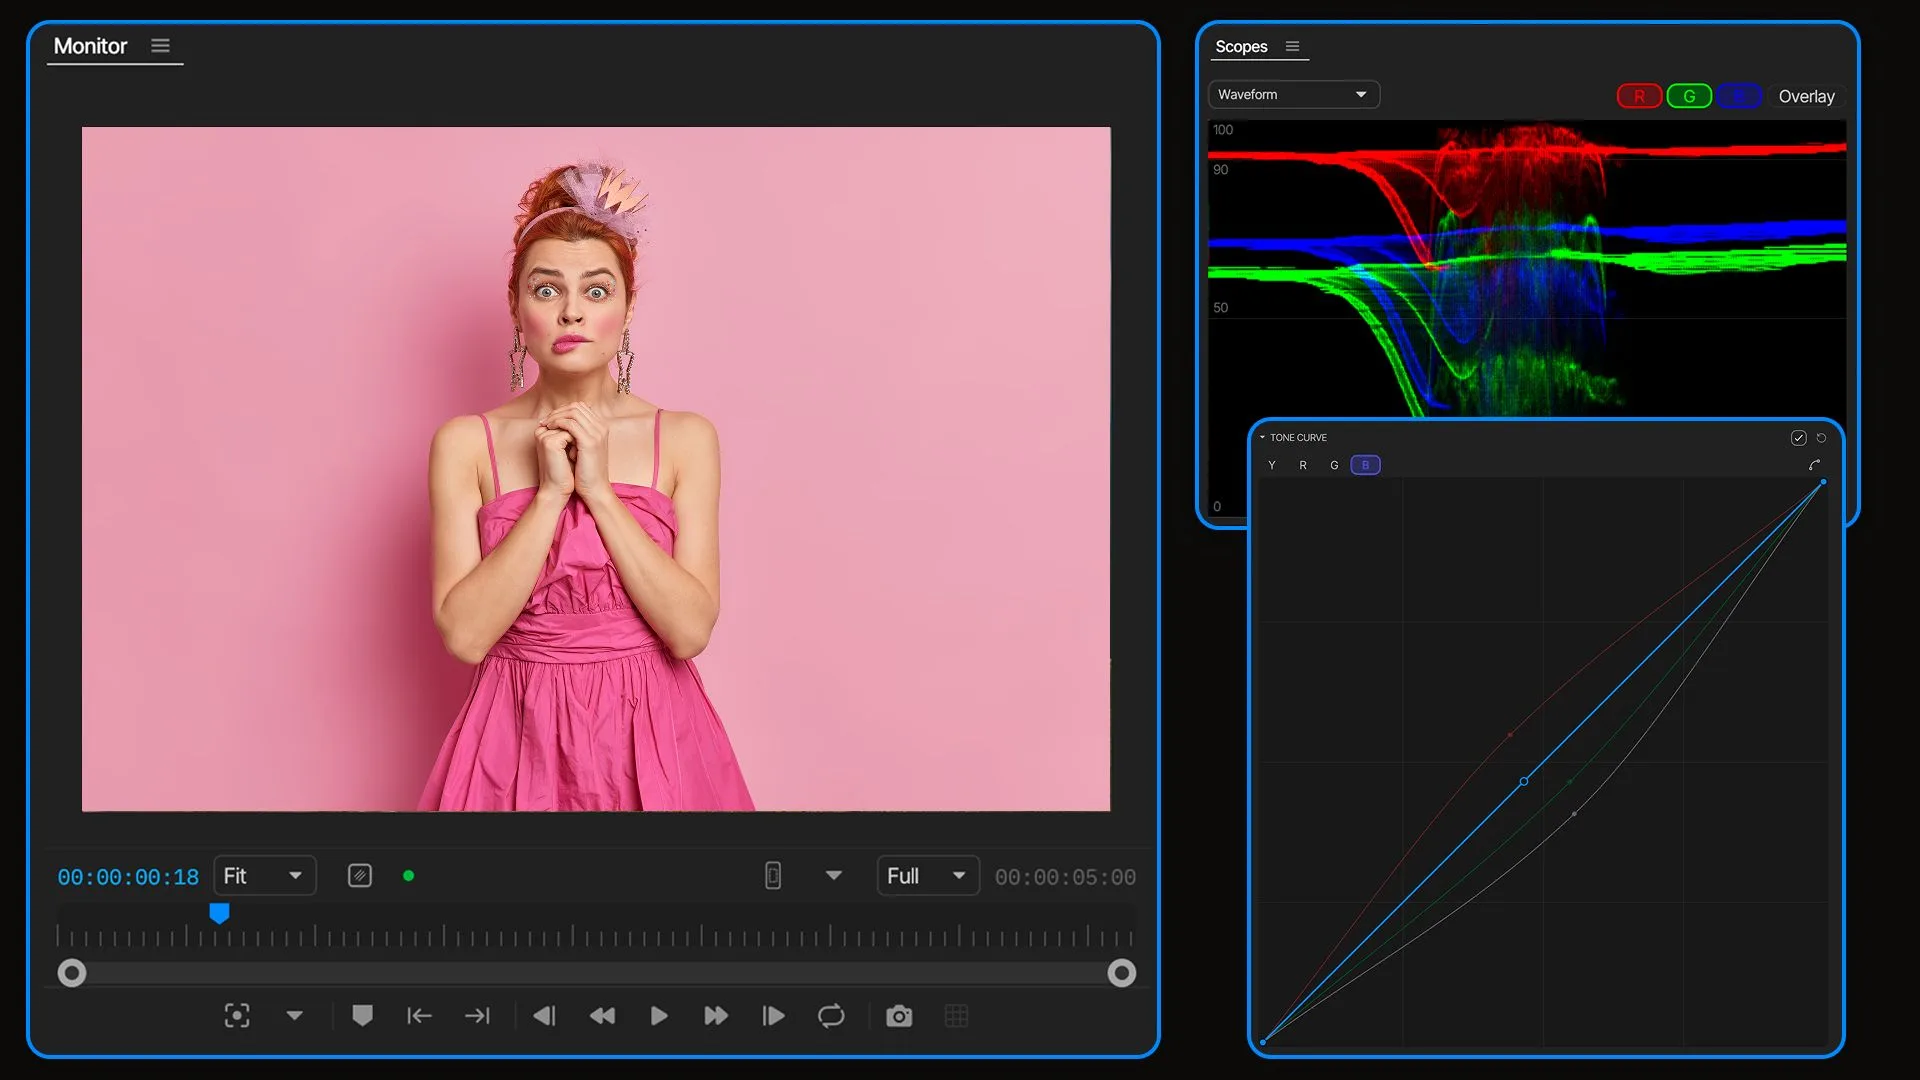
RGB and luminance curves
Shape contrast with the luminance curve, or adjust red, green and blue independently. Add points to control the tonal ranges you want to change, from a gentle lift in the shadows to a warmer color balance in the highlights.
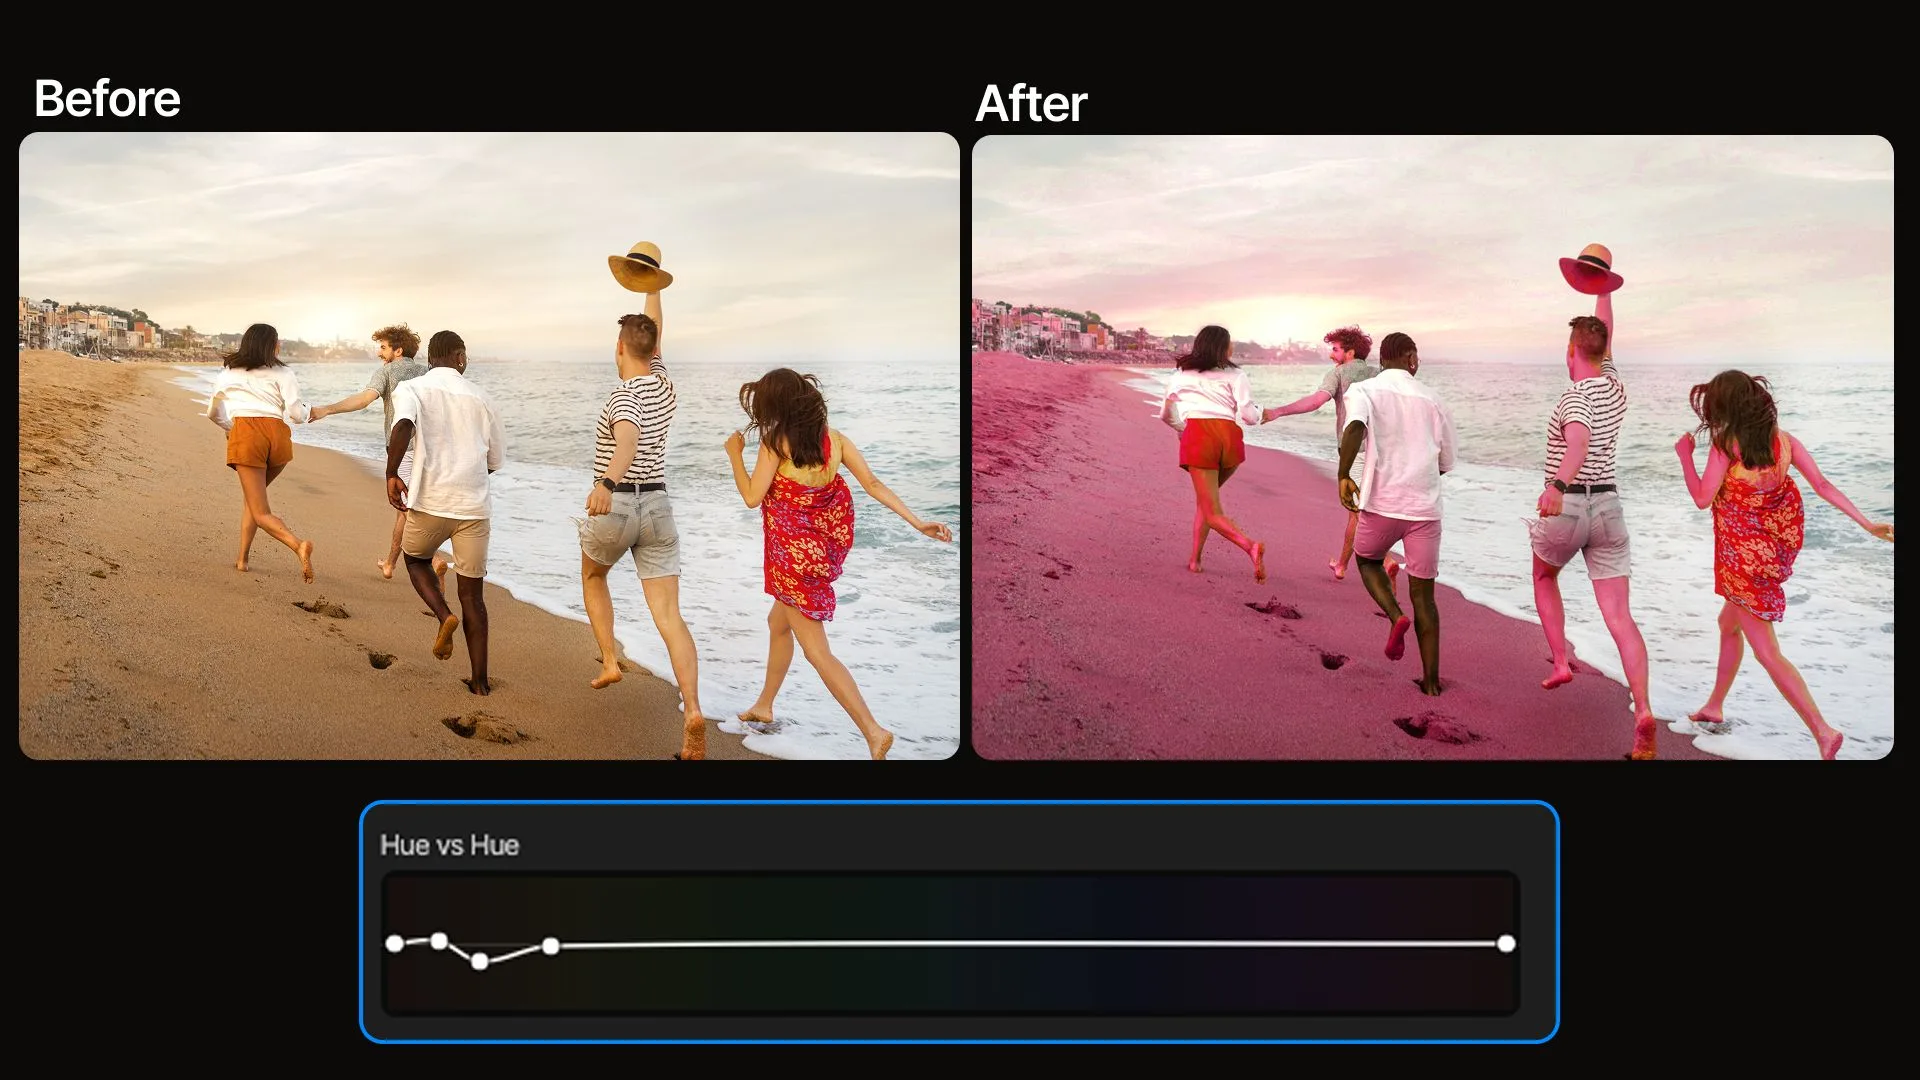
Hue vs Hue
Shift a selected color towards another hue. Turn a cyan sky towards a deeper blue or adjust the shade of clothing while leaving other color ranges outside the adjustment.
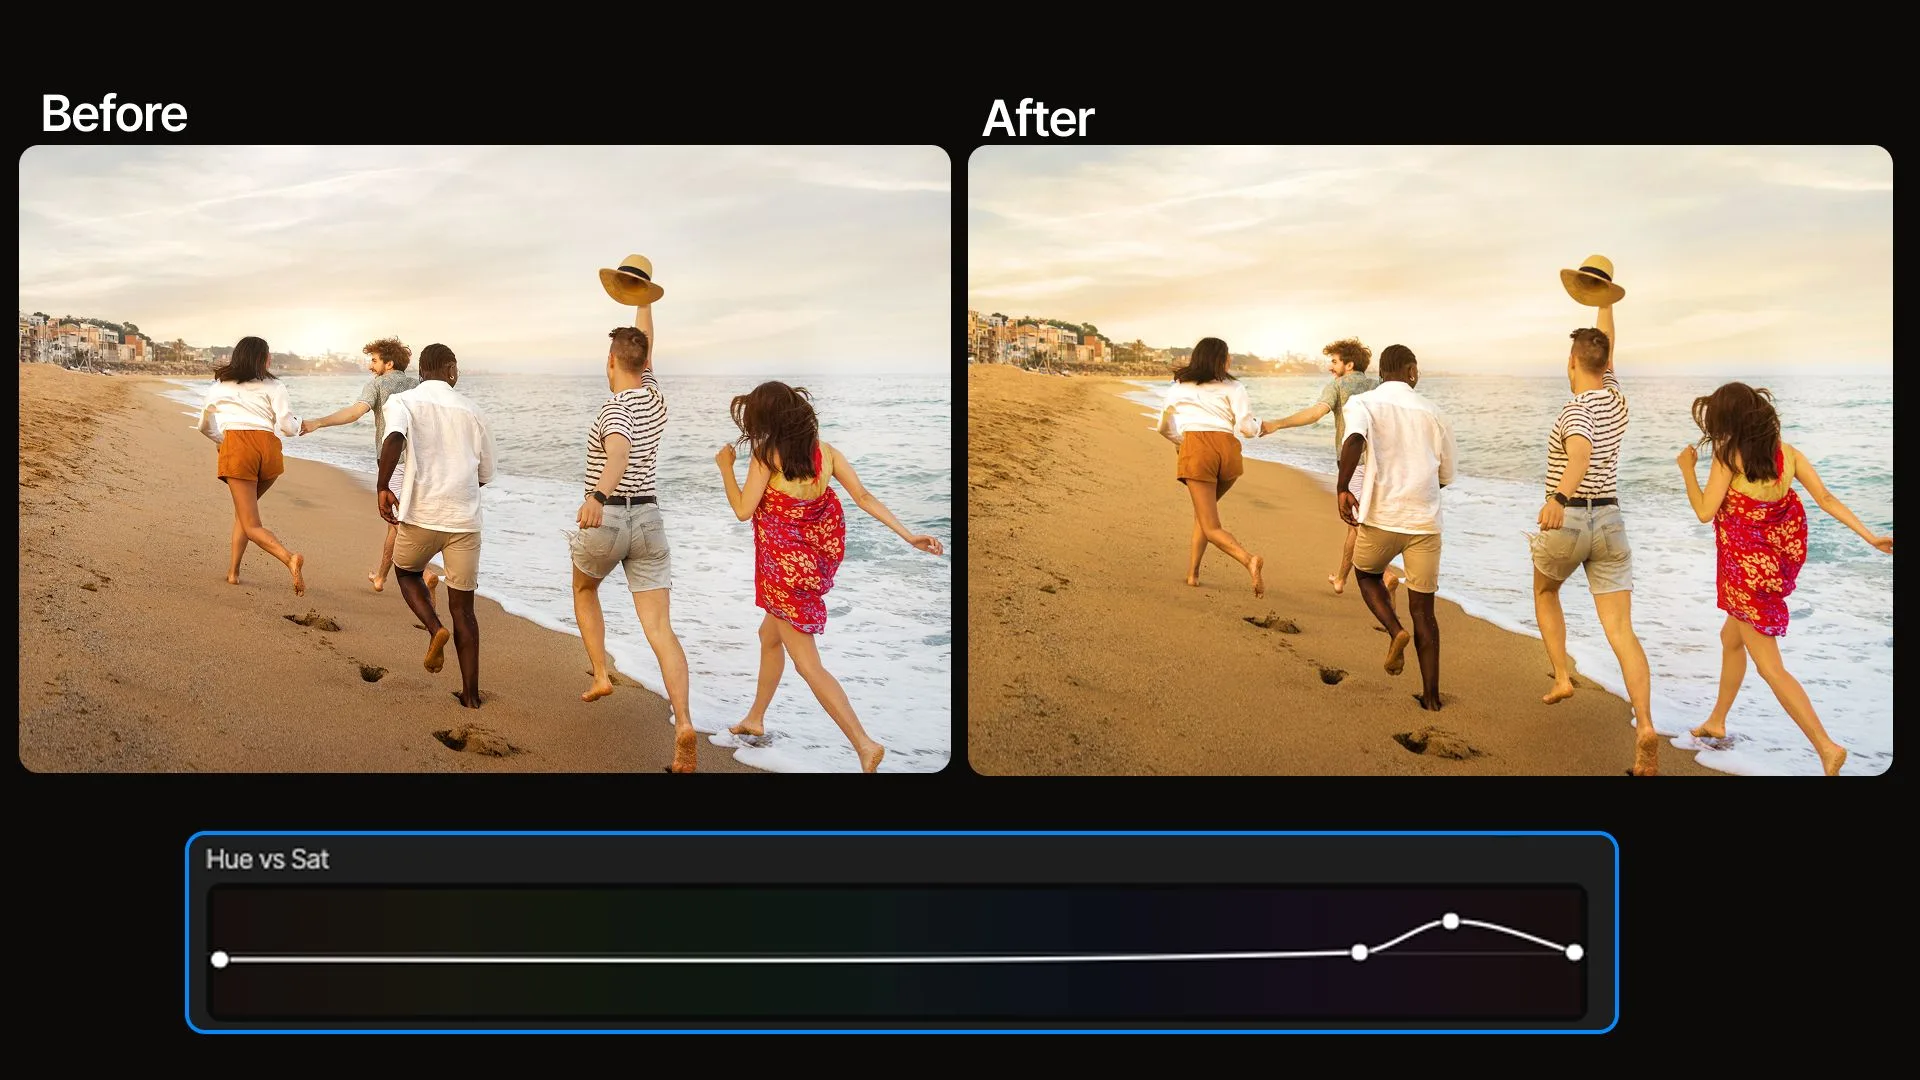
Hue vs Saturation
Increase or reduce the intensity of a particular color. Make a product’s color more prominent or soften an overly vivid background without changing saturation across the entire image.
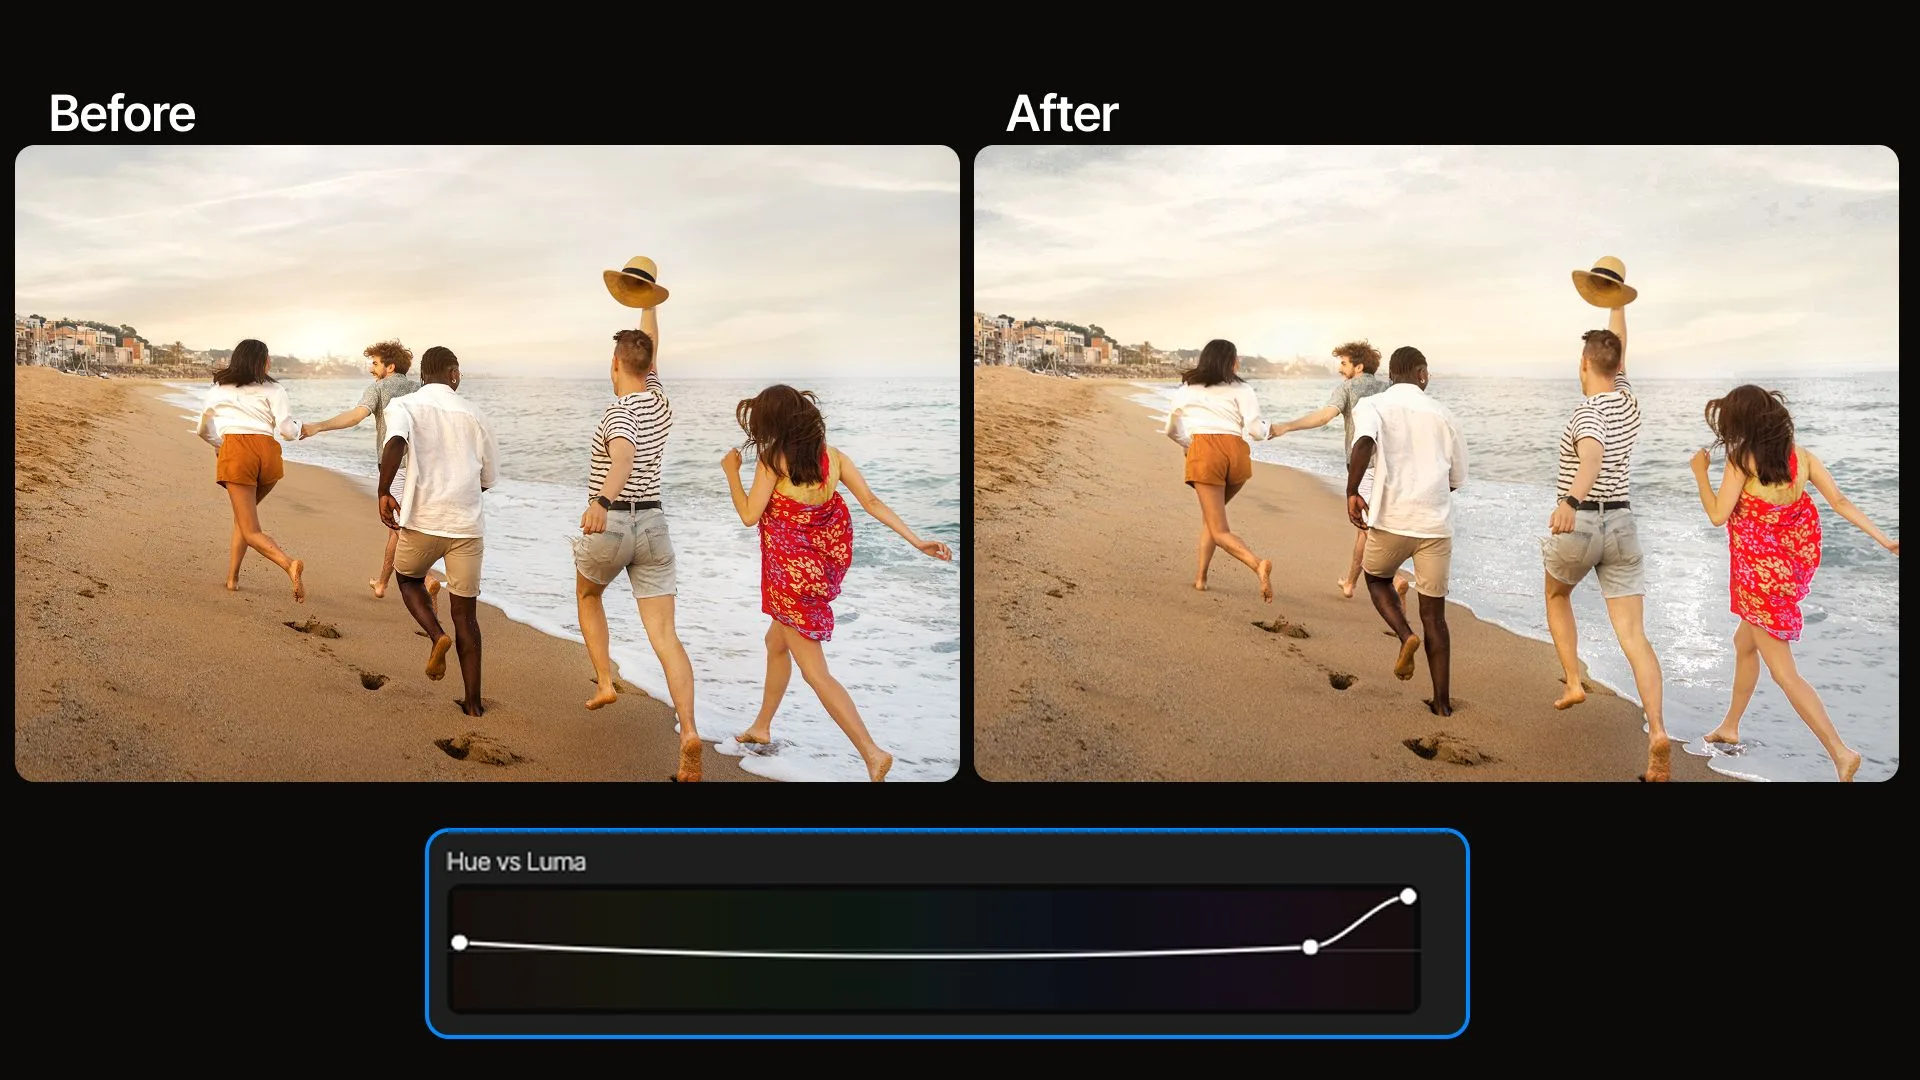
Hue vs Luminance
Lighten or darken a particular color range. Give blue skies more depth, lift green foliage or adjust the brightness of a colored object without changing the exposure of the whole shot.
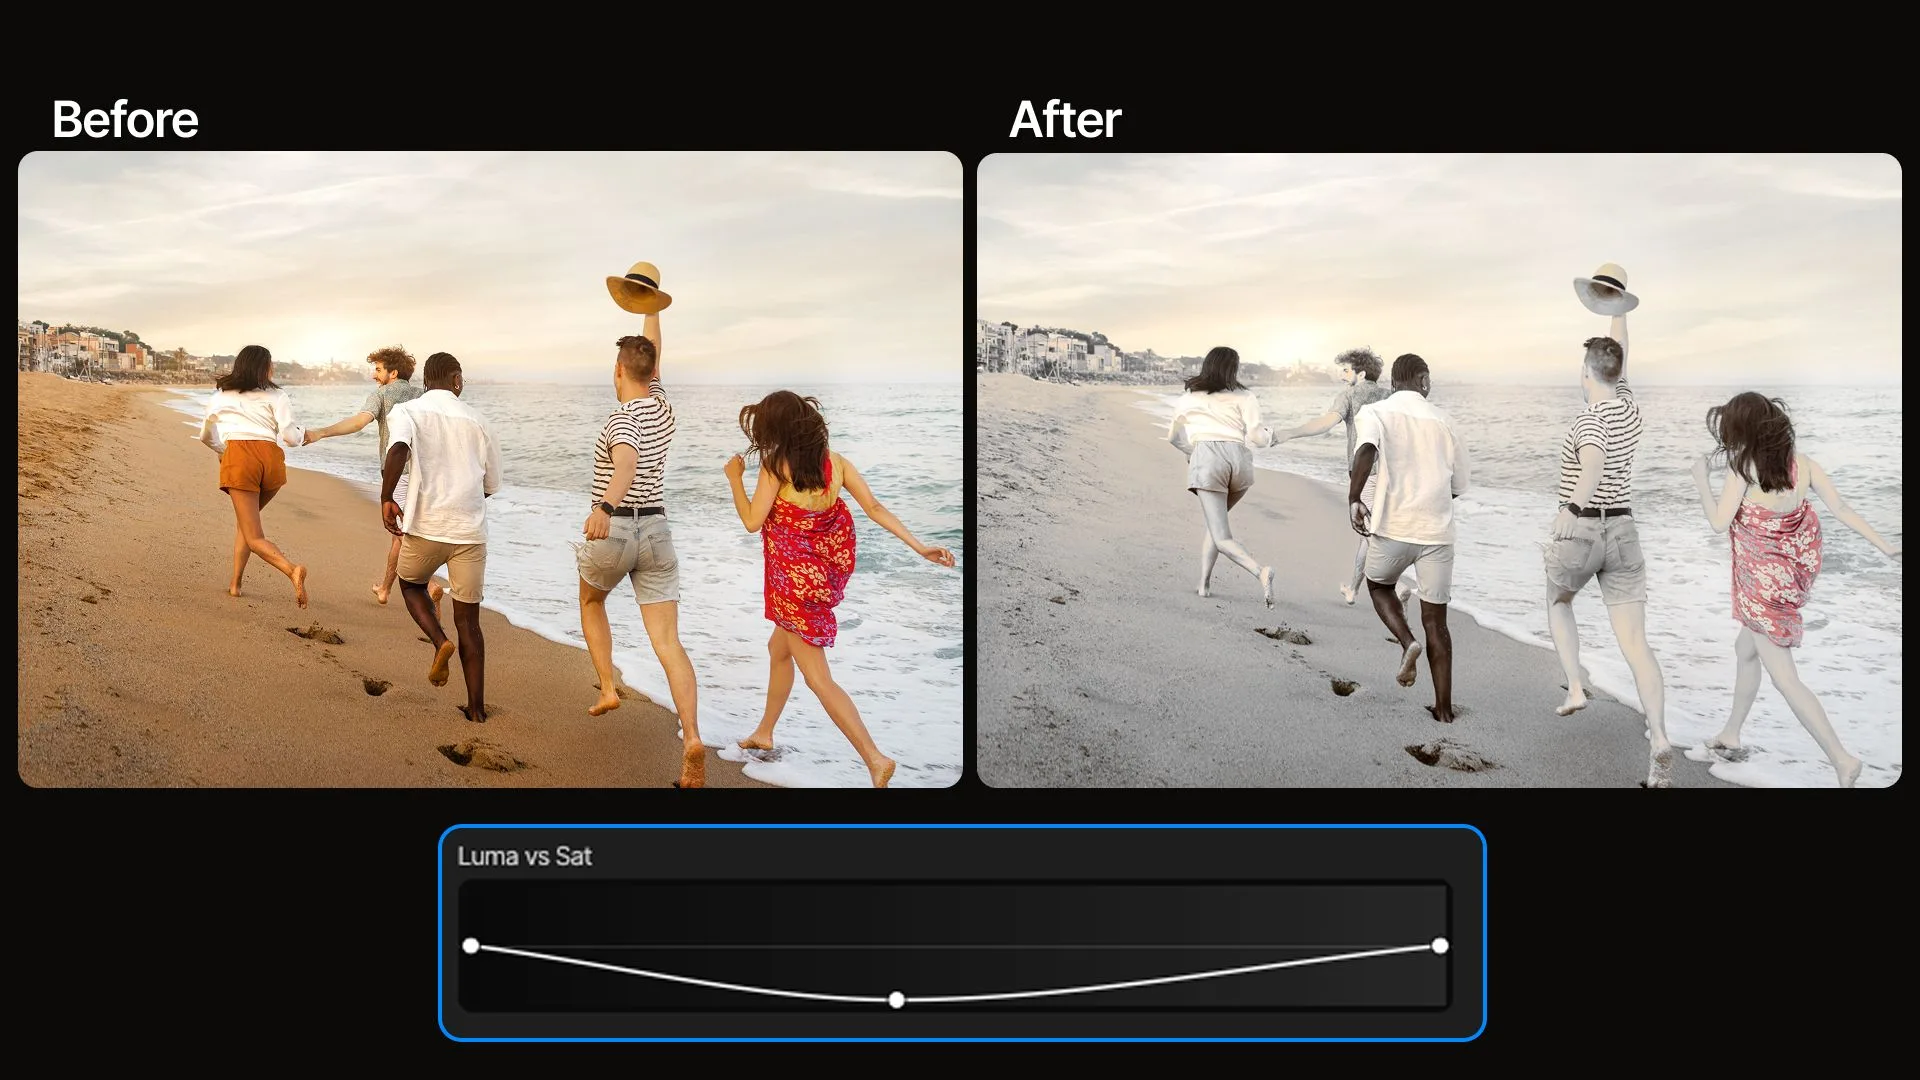
Luminance vs Saturation
Control color intensity according to brightness. Reduce saturation in the shadows, add color to the midtones or soften colorful highlights using one curve.
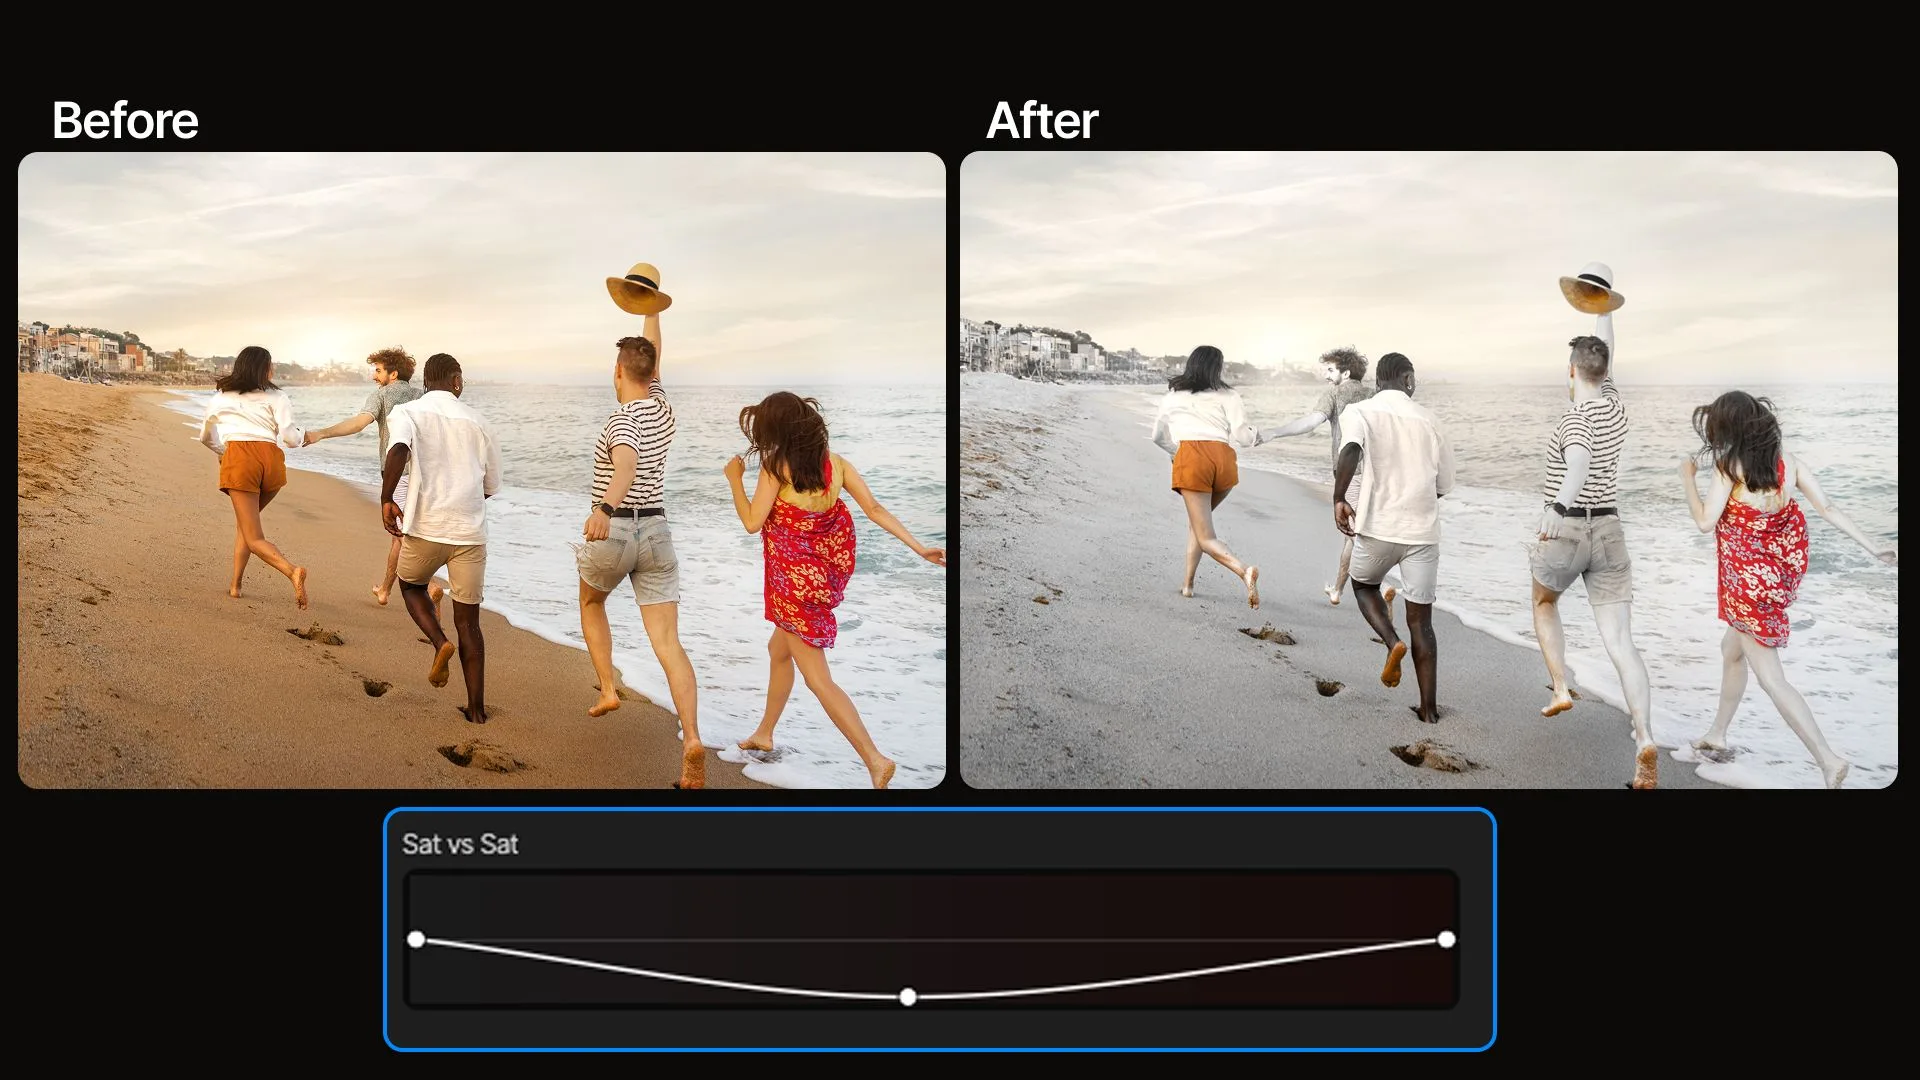
Saturation vs Saturation
Adjust colors based on how saturated they already are. Bring down the most intense colors or strengthen more muted areas without applying the same change to every pixel.
Share your feedback and let your AI agents revise the grade.
Ask for softer contrast, brighter mid-tones or a cooler overall feel, and your editing agent on invideo editor revises the grade around your feedback. Color wheels and curves give you optional control over individual tonal ranges and color channels.
Put every color adjustment where it belongs
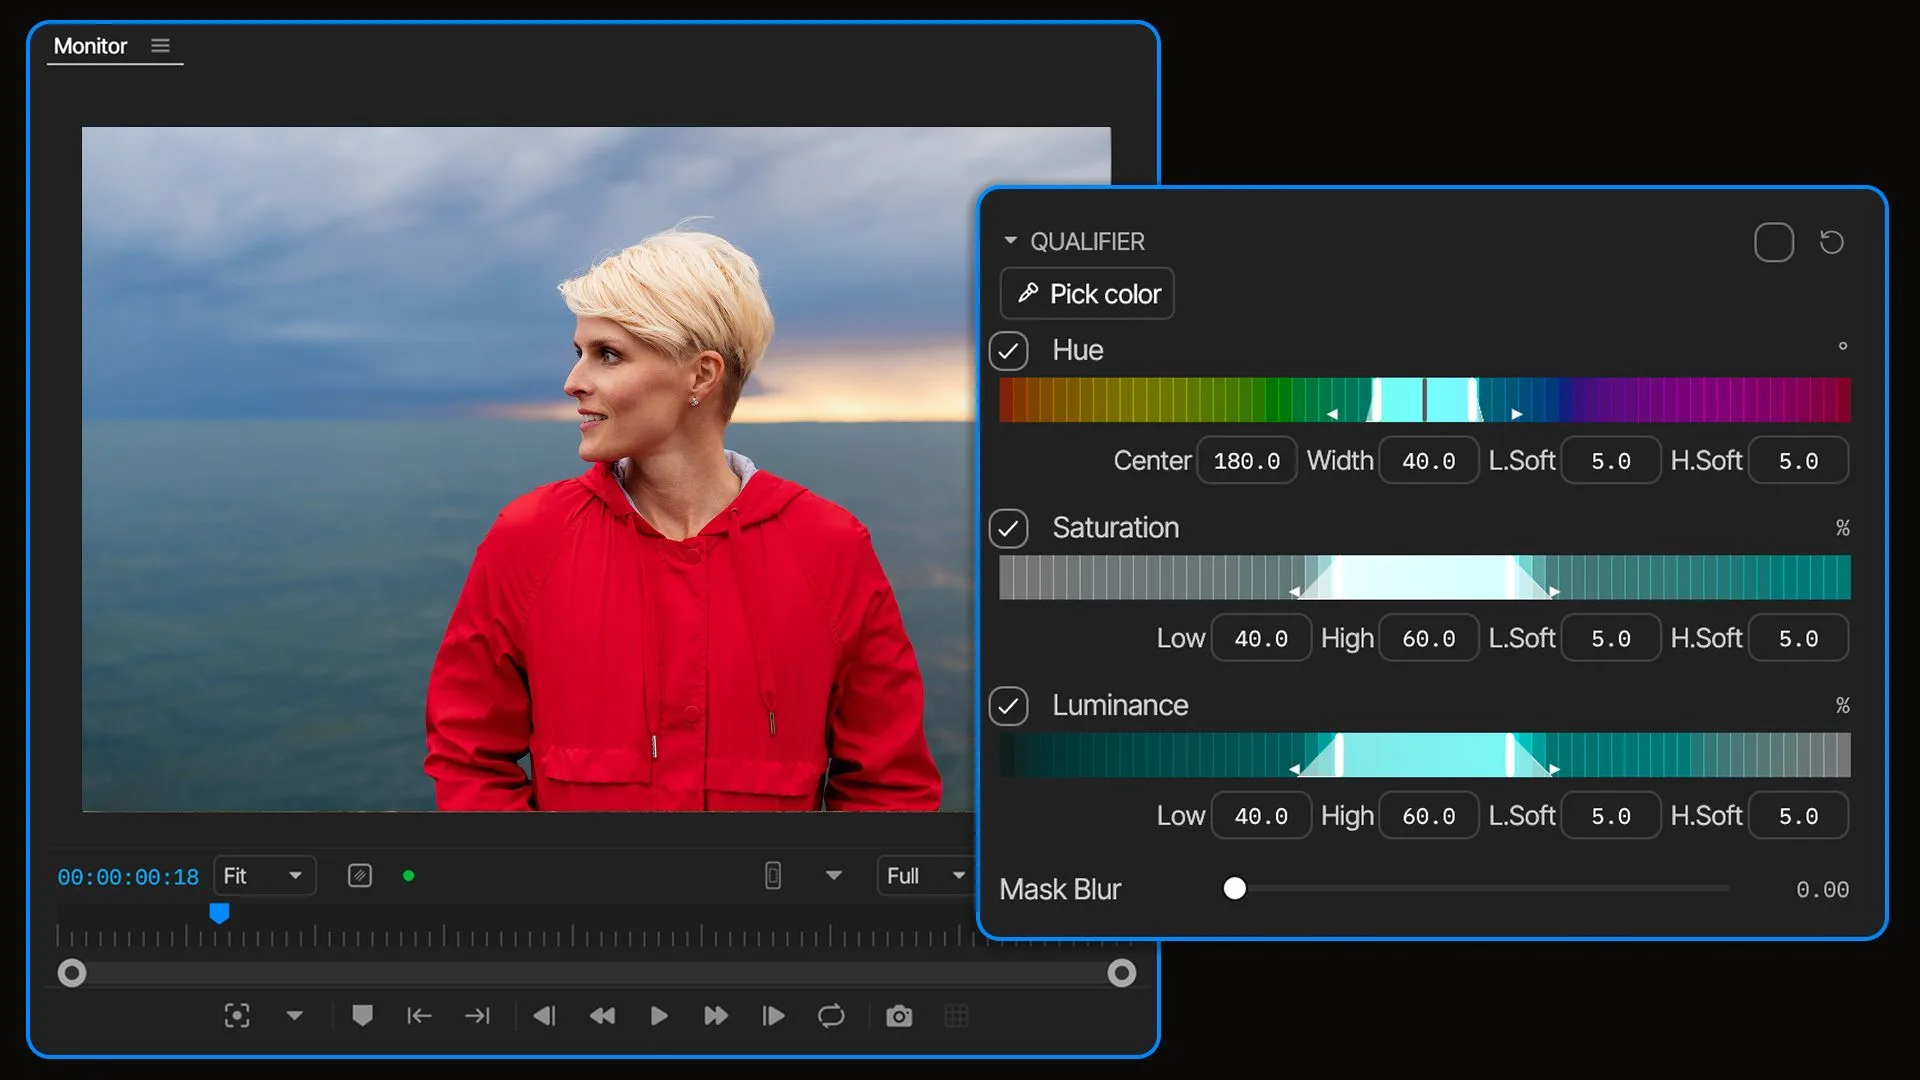
Hue, saturation and luminance qualifiers
Select a color with the picker, then refine the hue, saturation and brightness ranges included in your correction. Adjust the range softness and mask blur to smooth the transition between selected and unselected areas.
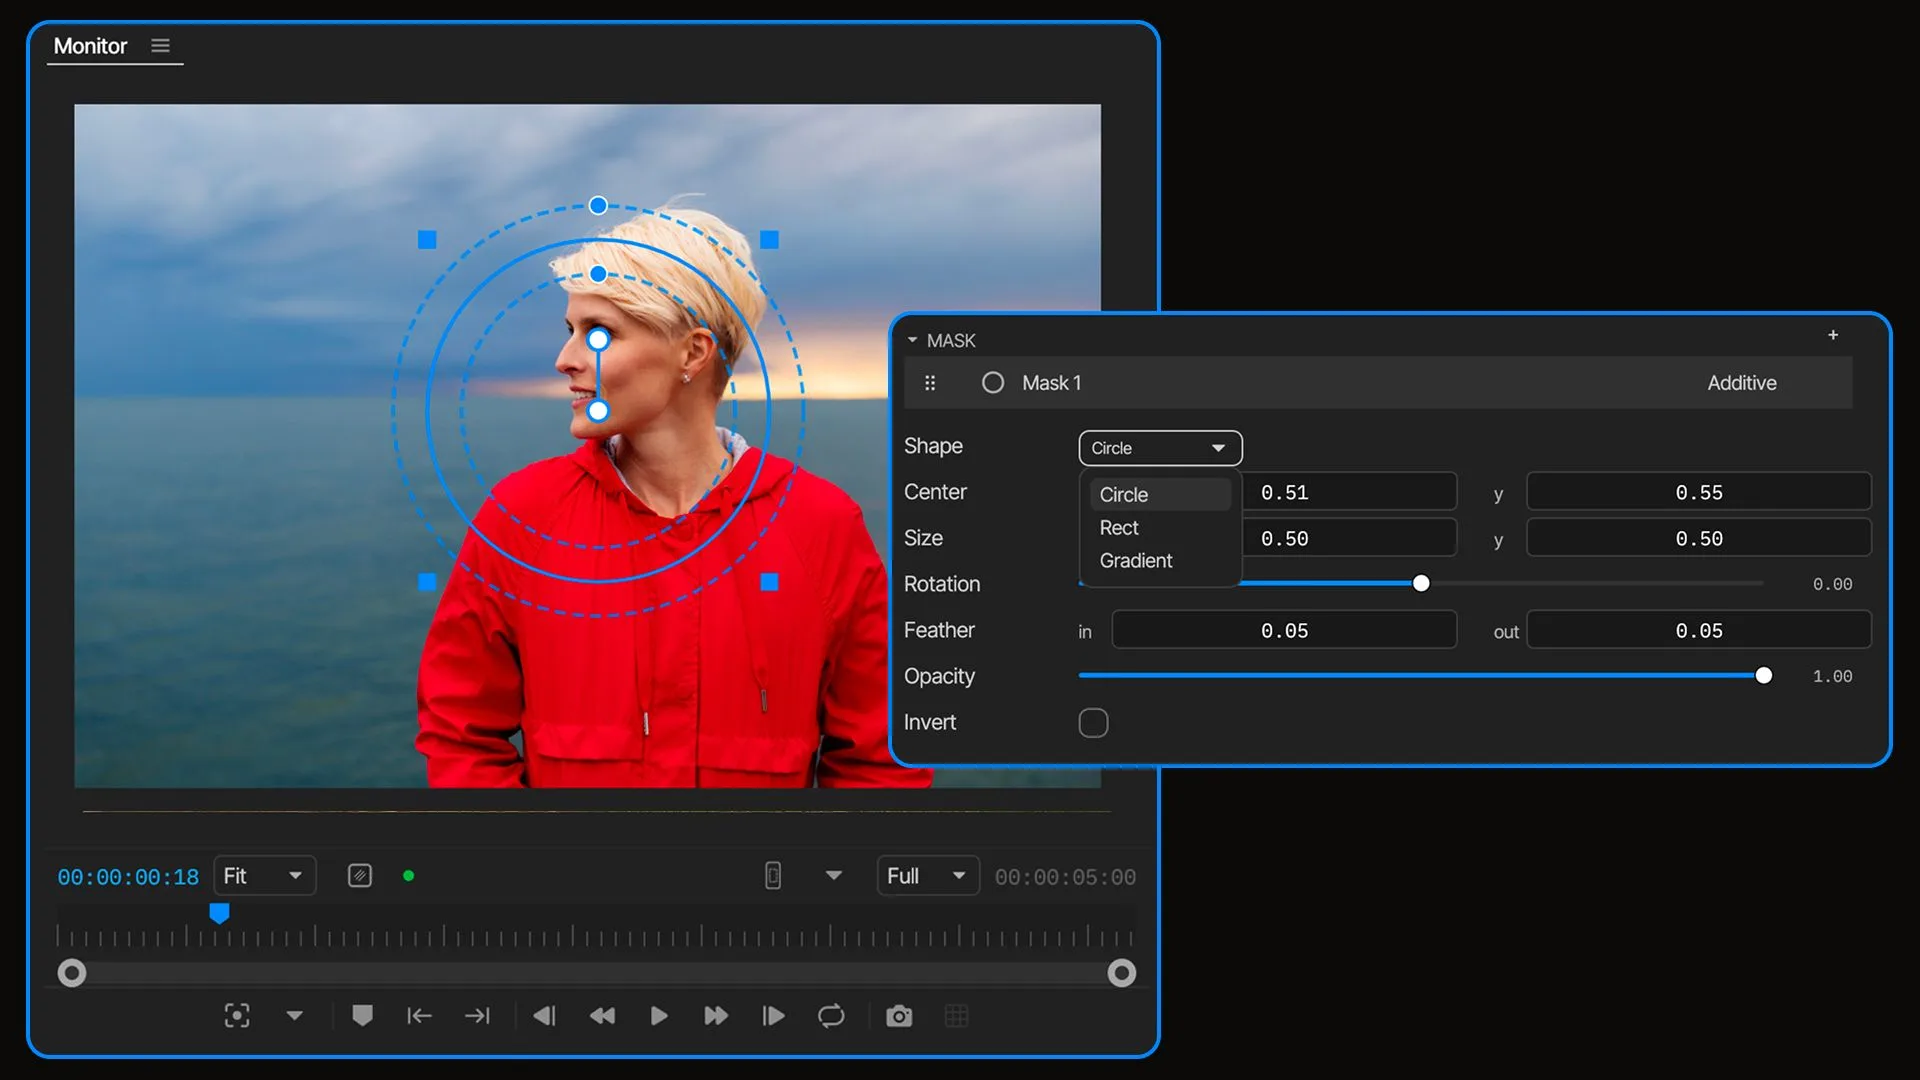
Circle, rectangle and gradient masks
Limit a grade to a chosen part of the frame with a circle or rectangle, or use a gradient for a gradual transition across the image. Adjust the mask’s position, size and rotation to place the correction where you need it.
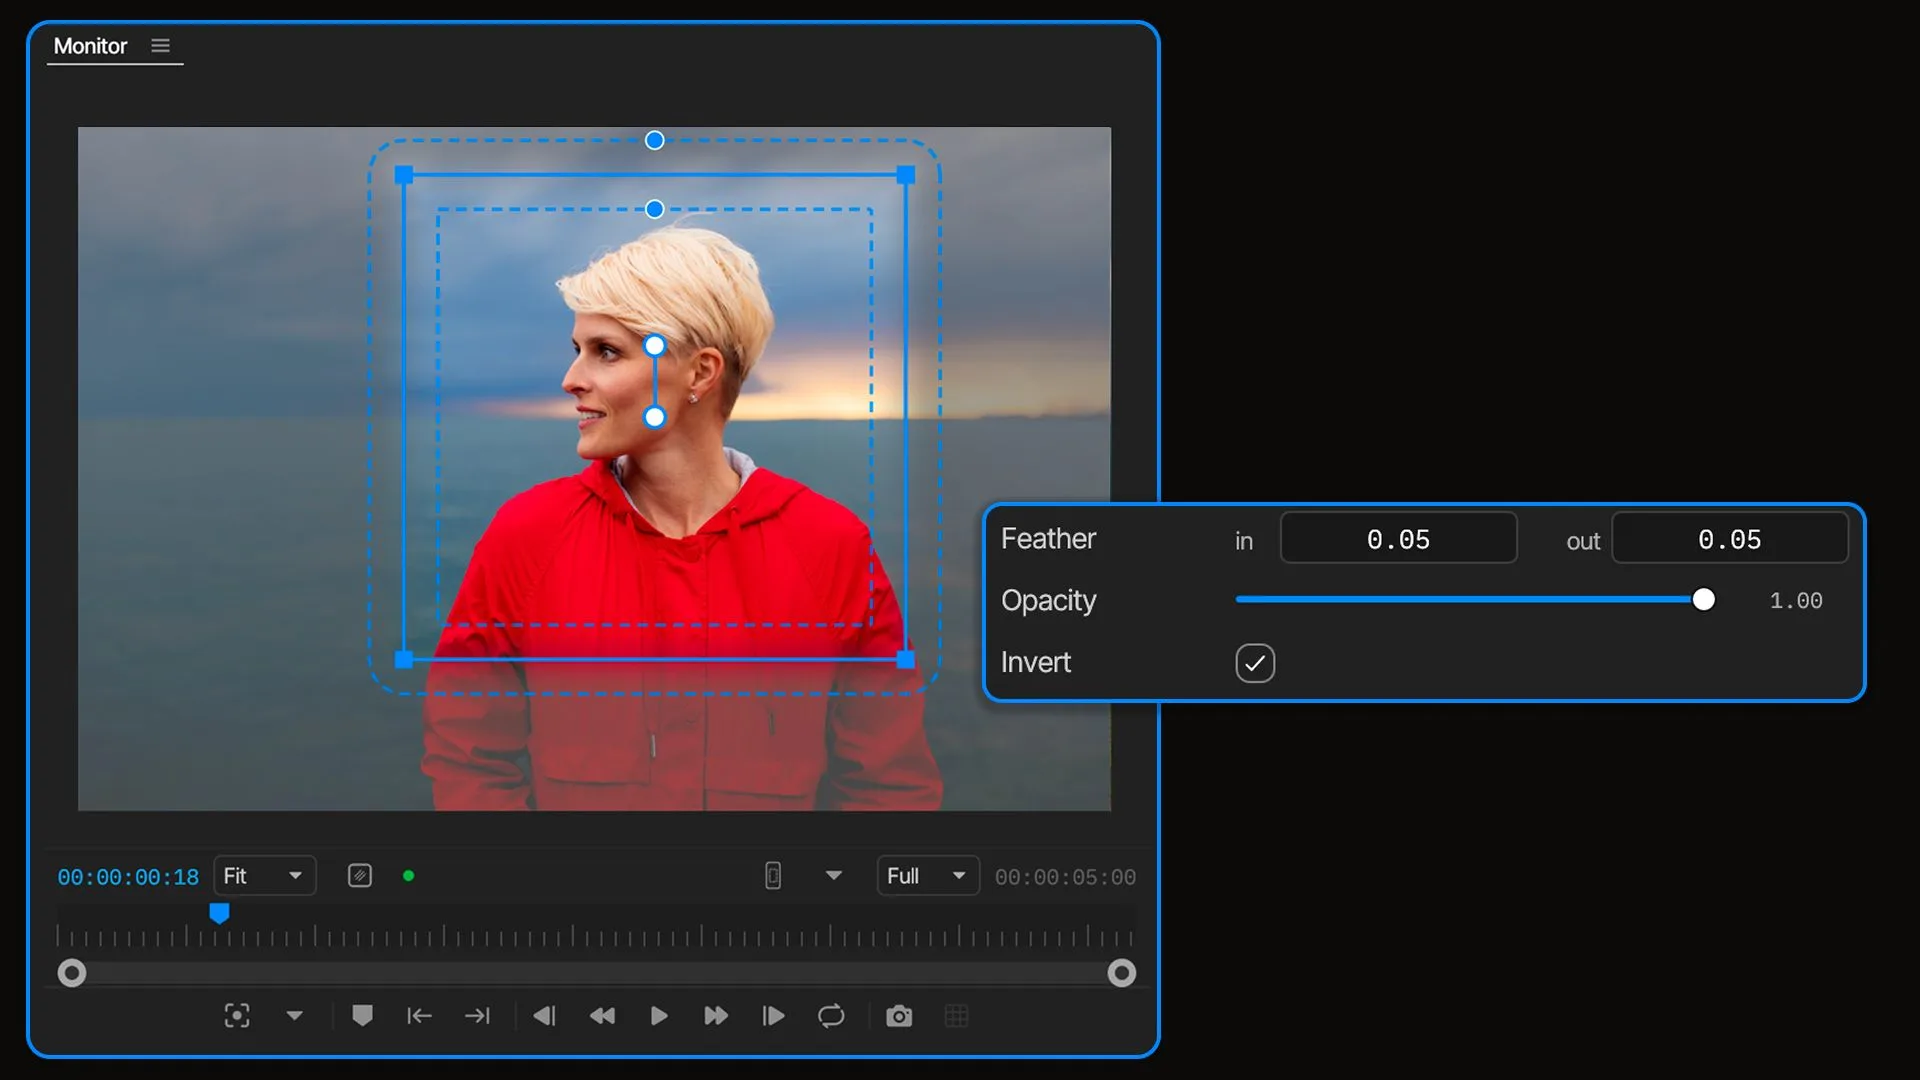
Feather, invert and combine masks
Soften mask edges, adjust opacity or invert a mask to affect the area outside it. Combine additive and subtractive masks to include or exclude regions within the same grade.
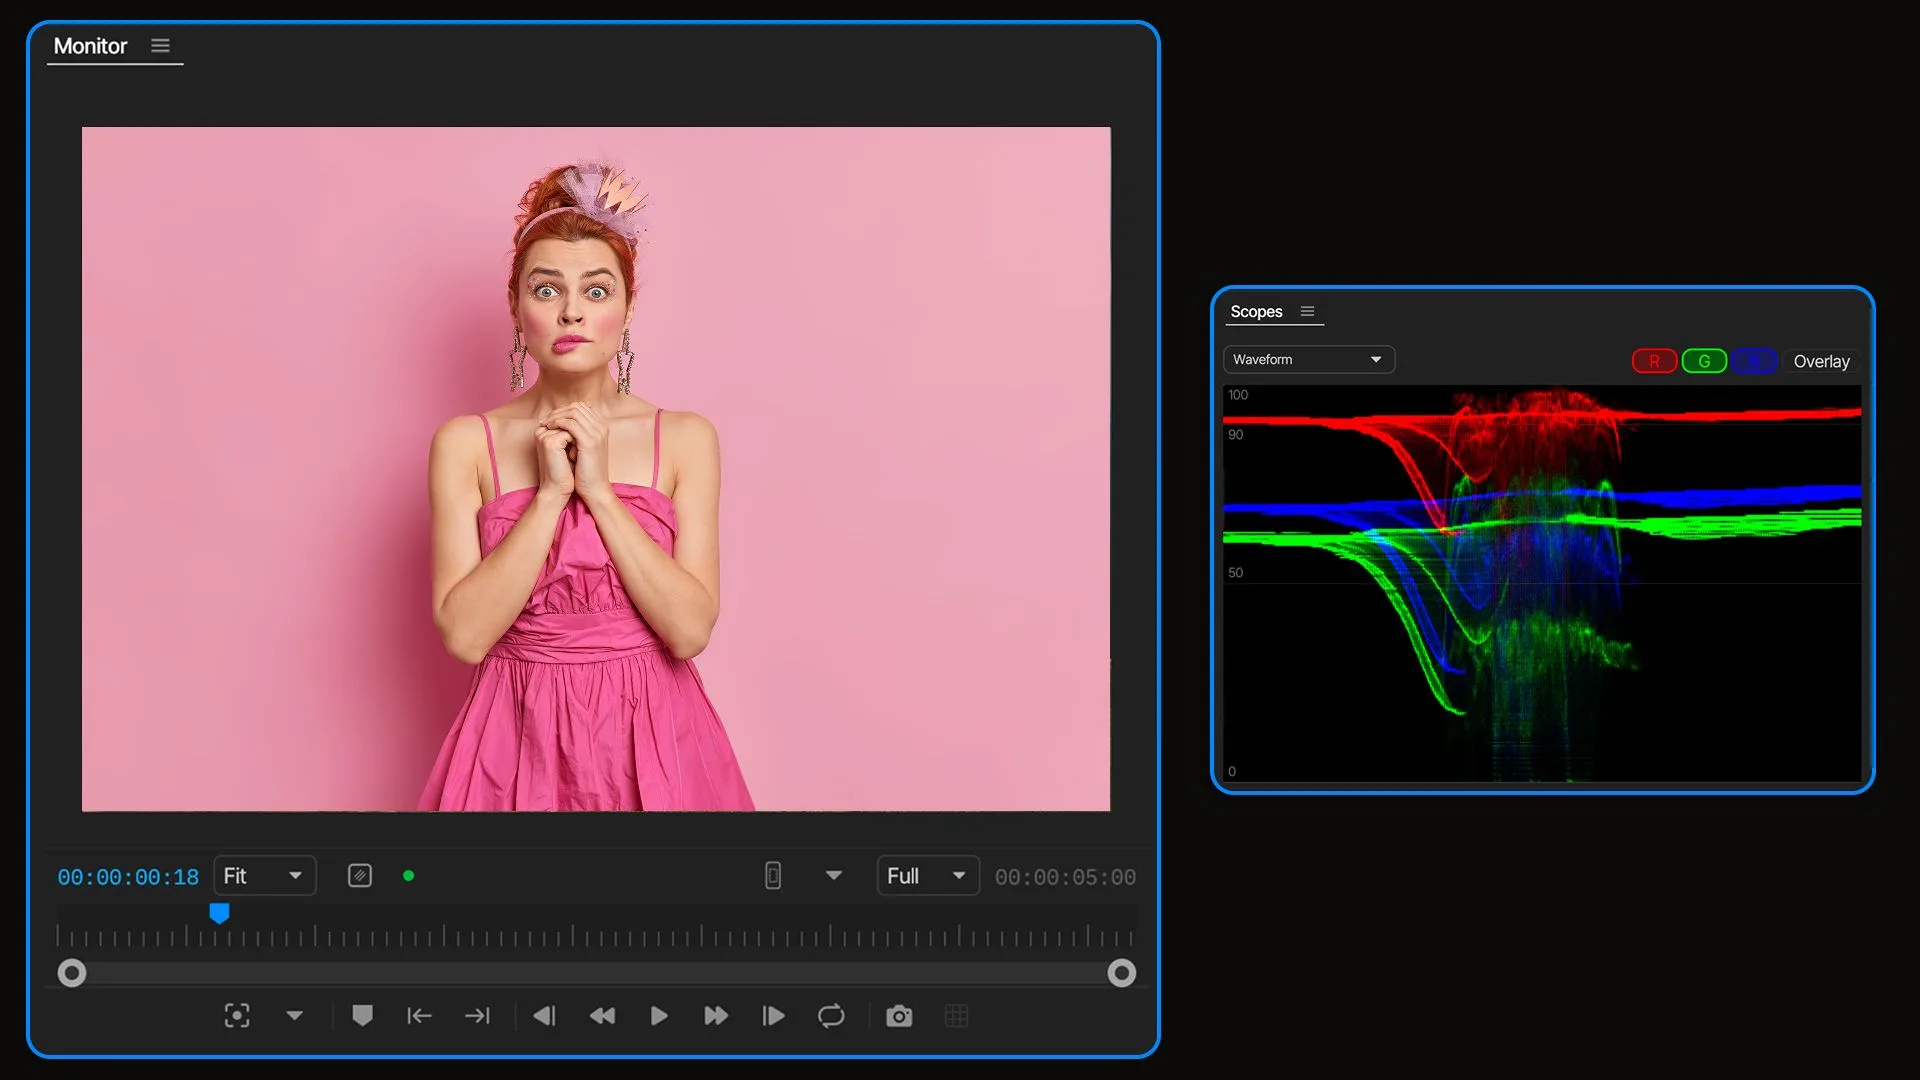
See your grade clearly with professional scopes
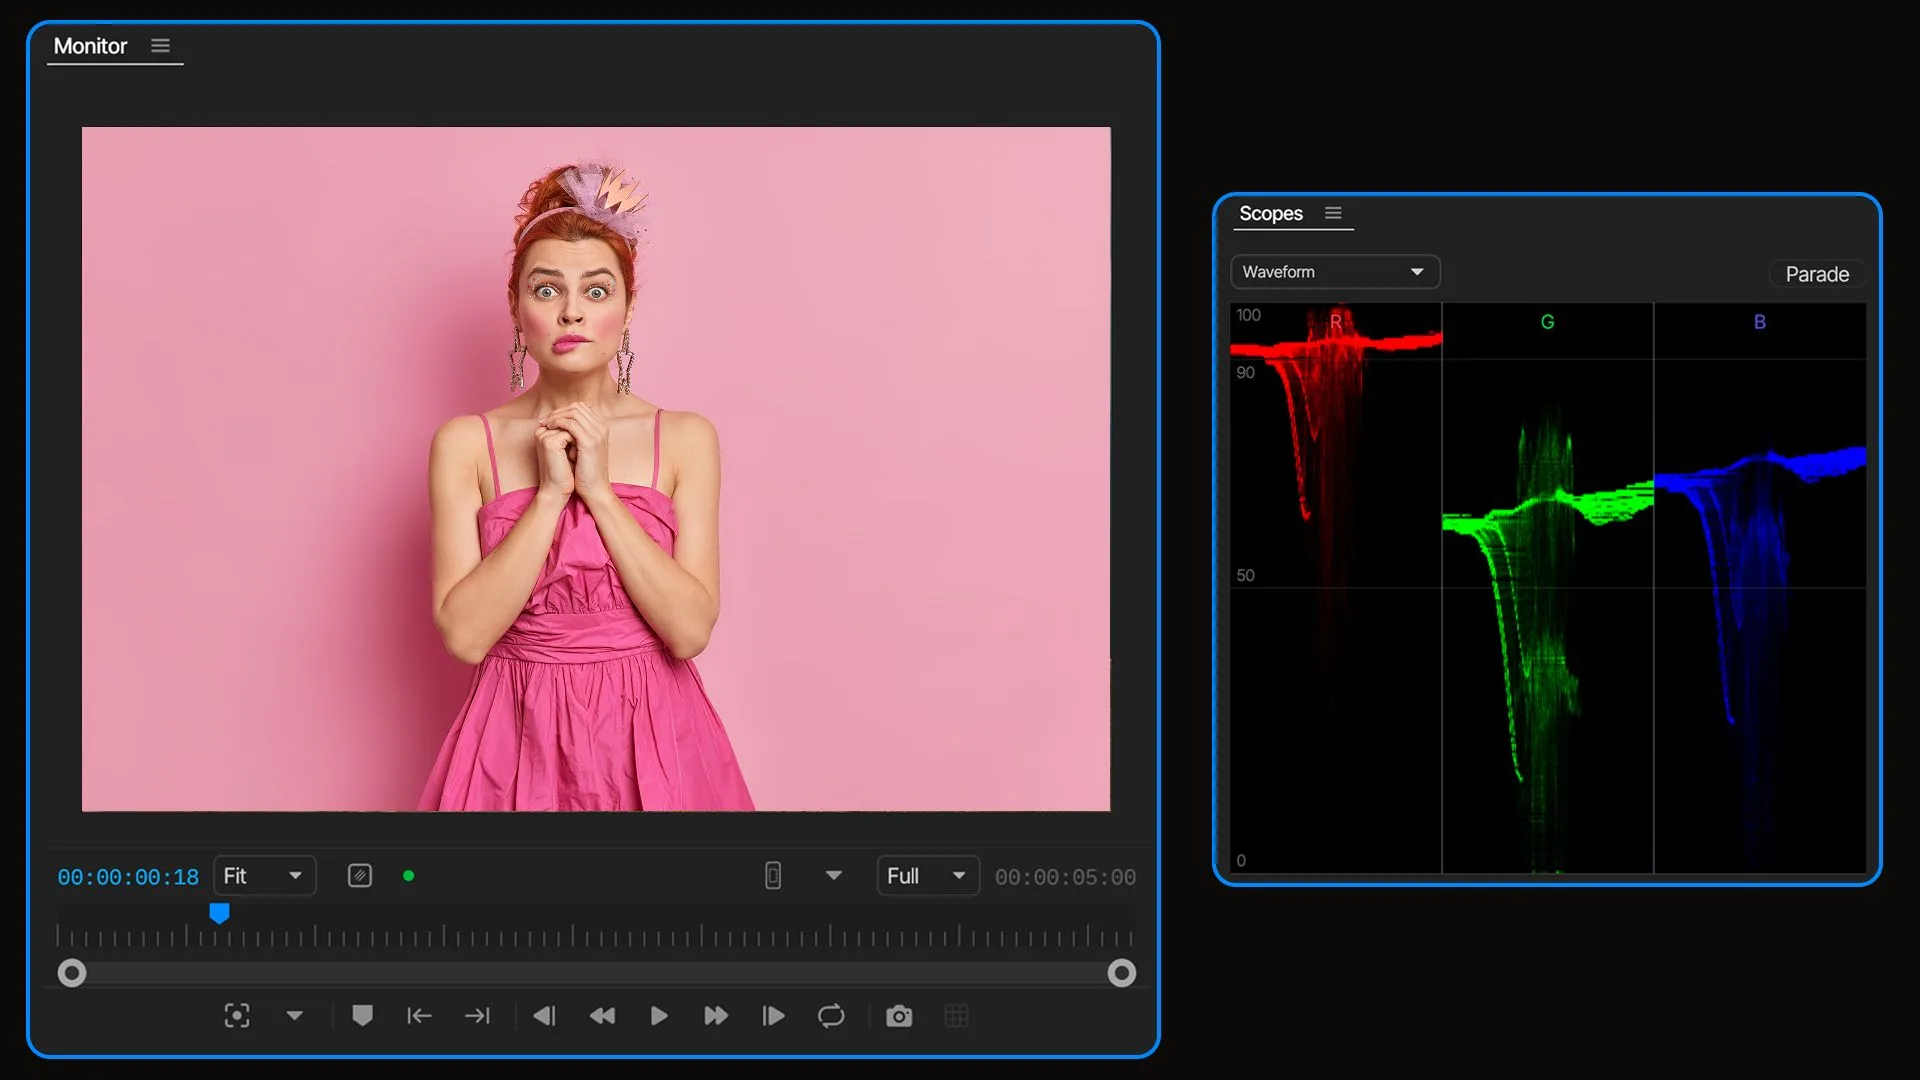
Waveform
Read brightness levels across the frame to see where your shadows, midtones and highlights sit. Use the waveform alongside the image to guide exposure and contrast adjustments.
RGB Parade
View the red, green and blue channels side by side to spot color imbalances. Compare their levels as you adjust temperature, tint or individual color channels.
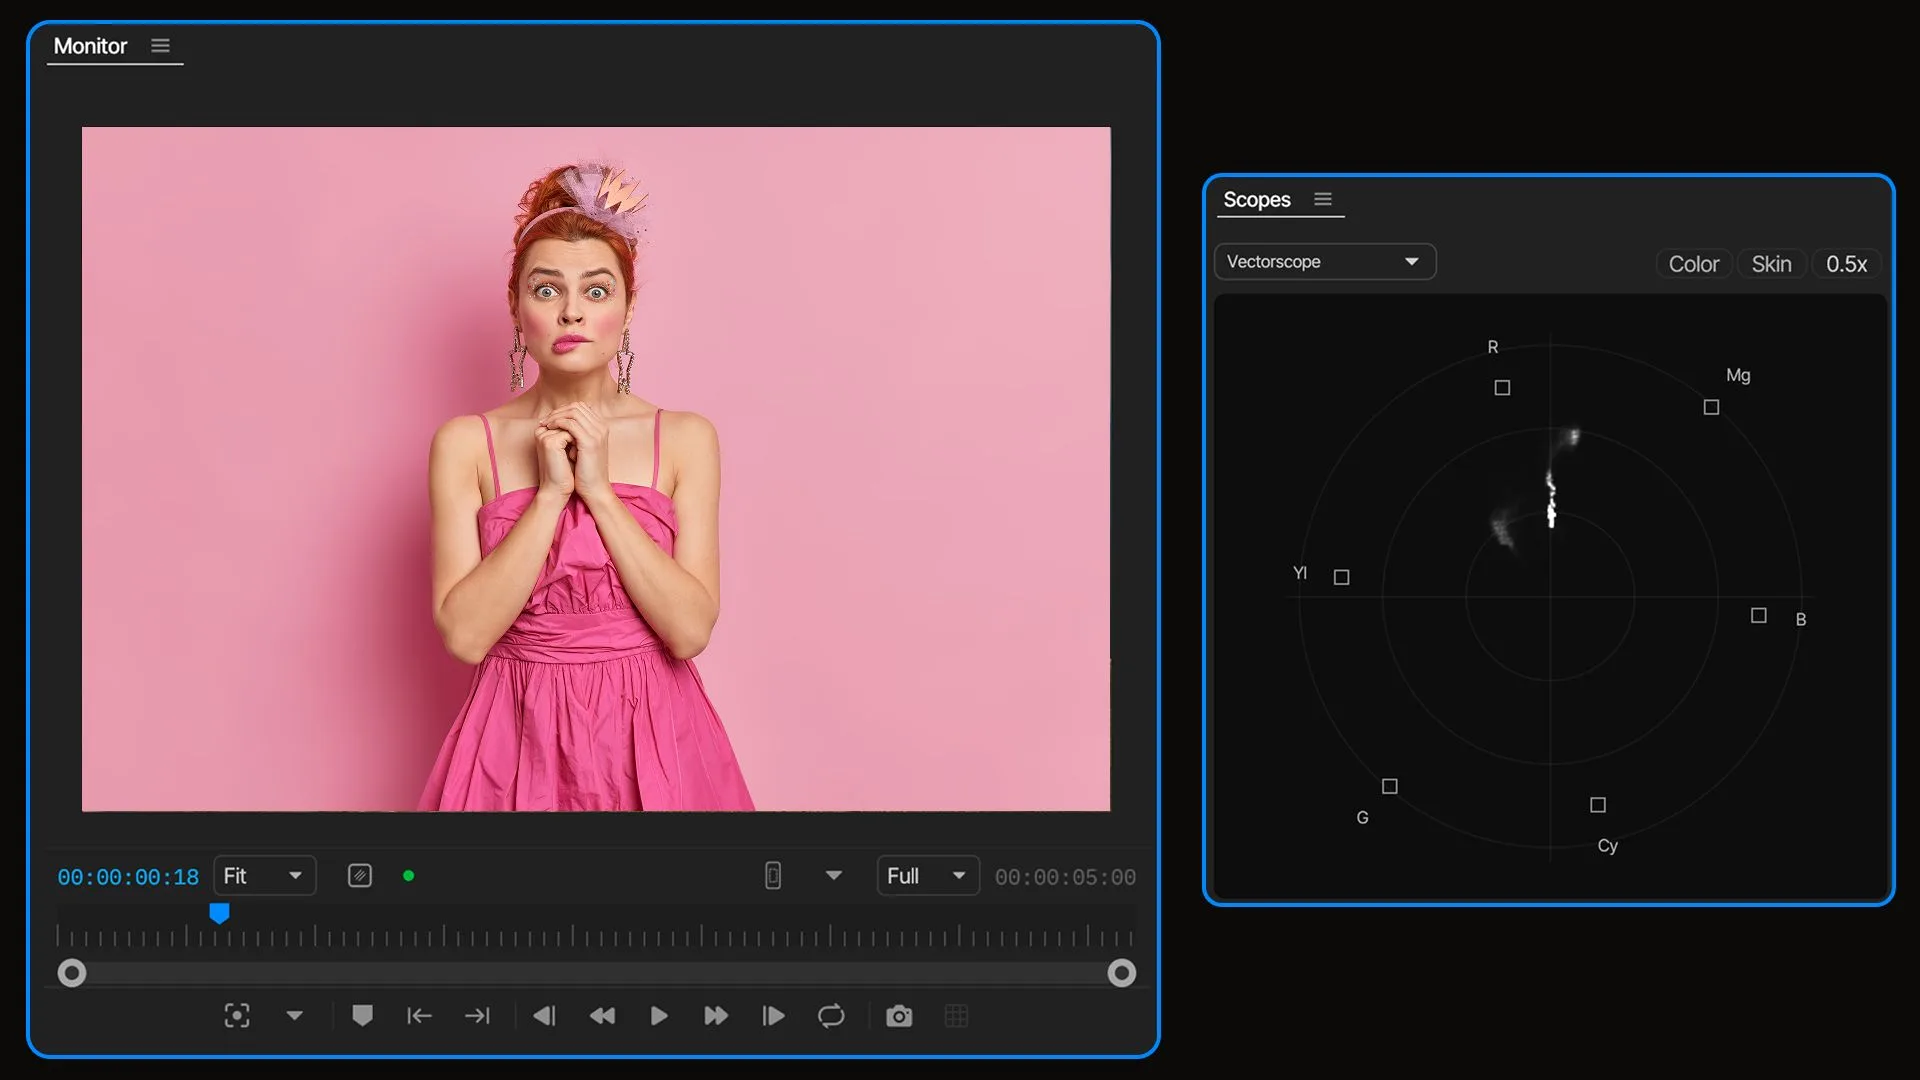
Vectorscope
Measure the hue and saturation of your image, with a skin-tone reference to help assess color shifts in faces. Check how far colors extend as you build or refine the palette.
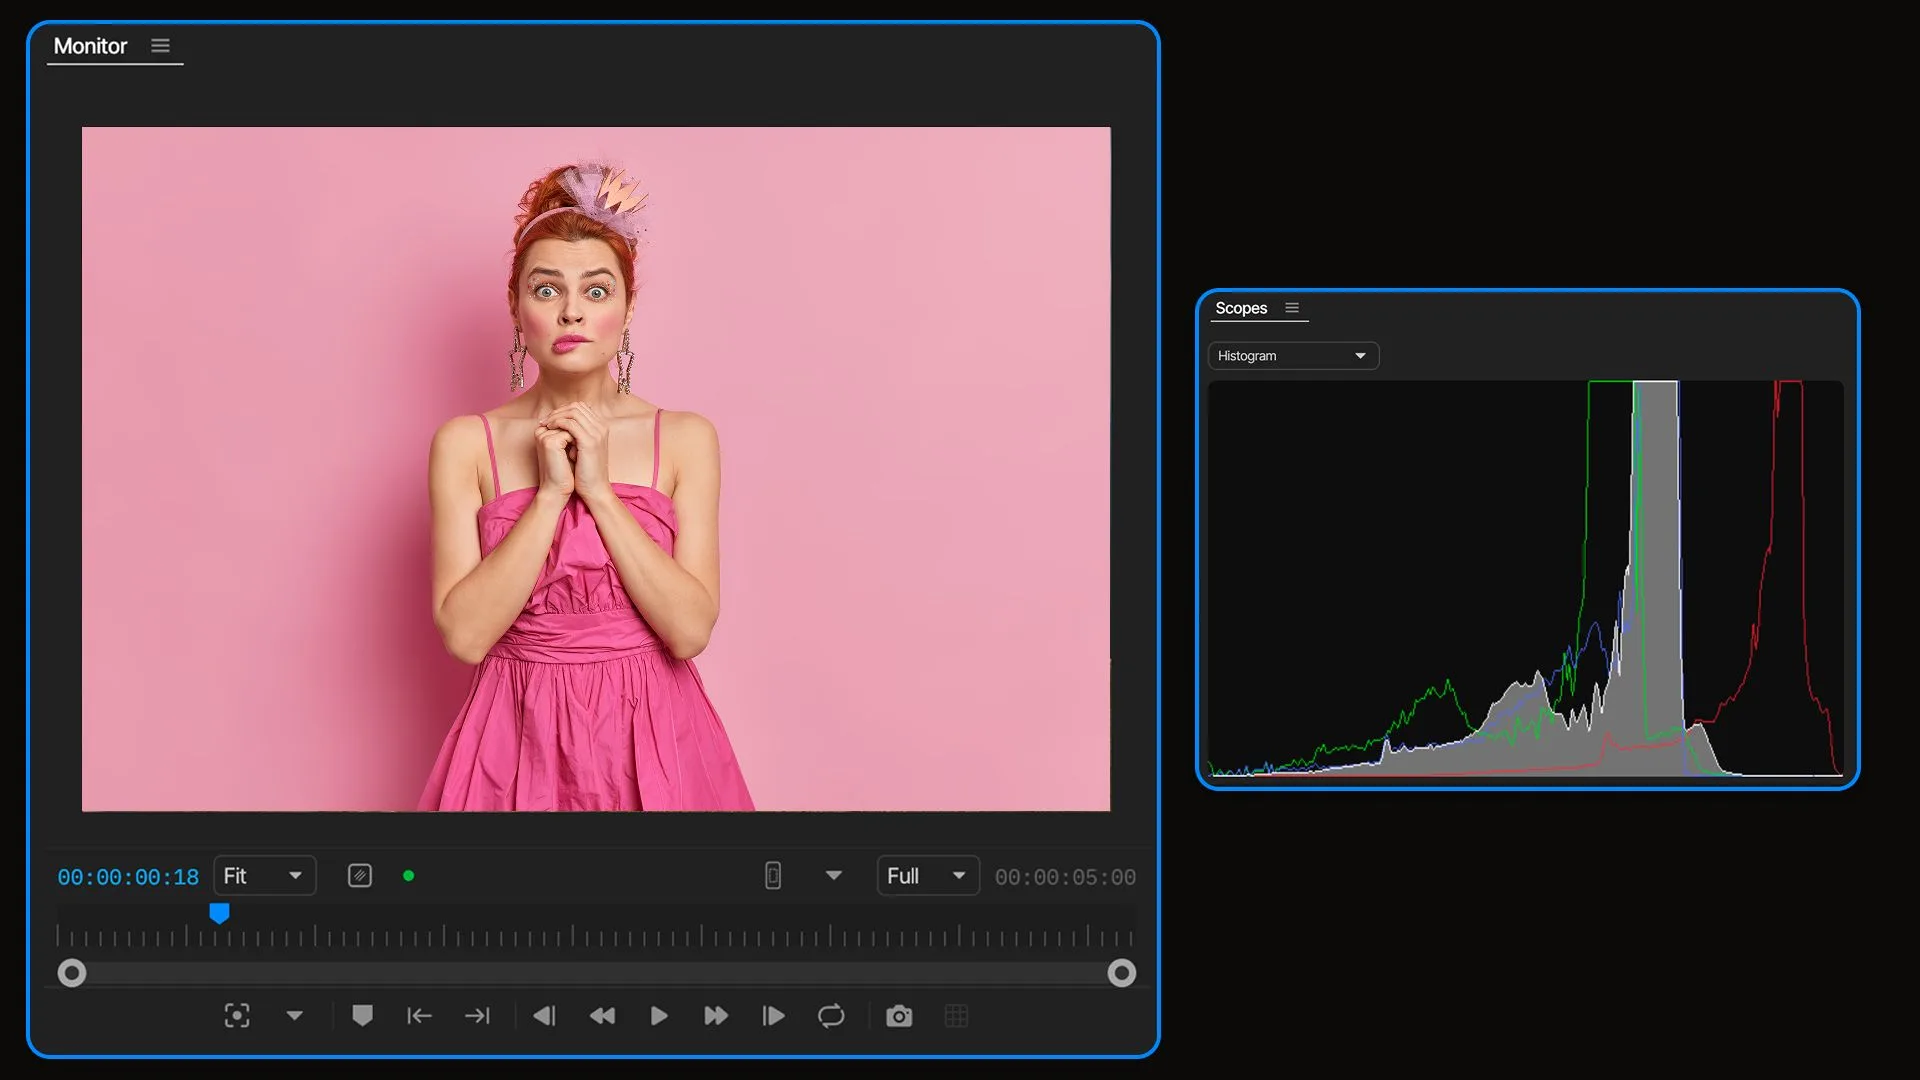
Histogram
See how the image is distributed across dark and bright values. Use the histogram to assess the tonal balance and guide changes to brightness and contrast.
Bring your own looks with custom LUTs
Choose a preset or import your own .cube or PNG LUT to apply a color look to your footage.
Adjust its strength and combine it with color wheels, curves and other corrections to suit the shot.

Carry your grade from one shot to the next
Copy a grade from one clip and paste it onto another from the color workspace or ask the editing agent to do it for you.
Reuse the adjustments as a starting point, then refine each shot for differences in lighting, exposure and color.
How to color grade with AI on invideo editor
Upload your footage
Bring your clips into the project. Add a reference image if you have a particular look in mind, or a LUT you want to work with.
Tell the agent what you want
Describe the creative treatment and which shots it should apply to. For example: “Soften the contrast and give it a warmer feel.”
Review, refine and export
Play back the graded footage and export when you’re happy with it. For further changes, give the agent more direction or use the color controls yourself.
Color correction and grading on invideo editor
What’s the difference between color correction and color grading?
Color correction adjusts exposure, white balance and color casts to create a balanced image. Color grading shapes the creative look through contrast, color and tone. You can do both inside invideo editor.
Can I use a reference image for my grade?
Yes. Share a reference and tell the agent which shot to work on. It interprets the reference’s color, warmth and contrast to guide the adjustments. The result also depends on your footage’s lighting and original colors.
Can I change the color in one portion of a shot?
You can use hue, saturation and luminance qualifiers to target a color range and adjust it selectively. If the same color appears elsewhere in the frame, that area may also be included in the selection.
Can I add a LUT and adjust its intensity?
Yes. The color workspace includes an Add LUT control and a strength adjustment. You can also combine the LUT with other corrections to refine the look.
Can I direct changes to a specific shot?
Yes. Tell the agent which shot you want changed and what you want it to do. You can request a targeted correction without asking it to regrade the entire sequence.
Can I fine-tune the grade manually?
Yes. You can keep the result or ask the agent for further adjustments. Color wheels, curves and other controls are available whenever you want to make changes yourself.