


Editing is the final and arguably the most important part of filmmaking. You can have the best script and the perfect shots, but it all falls flat unless you edit and turn these into a cohesive video.
So how can you ensure your editing is spot on? The first step is to understand how to cut your videos and put them together on the timeline. And that’s exactly what we’re going to show in this article.
In this article, we’ll be showing you 9 different video cuts and we'll be using InVideo's editor to show them since it is super easy and intuitive for anyone to use, but you can use the same across any video editor that you may already be using. The different types of video cuts covered in this article are:
1. J-Cuts and L-Cuts
2. Standard Cut
3. Jump Cut
4. Match Cut
5. Cut on action
6. Cut-ins
7. Montage
8. Shot-reverse-shot
9. Look-Object-React-Cut
Let's dive right in!
1. J-Cuts and L-Cuts
In A J-cut, you hear the new audio before the new video clip starts playing while in an L-cut, you start seeing the new video clip before the next audio track starts playing.
J-cuts and L-cuts are one of the most commonly used editing techniques in film, especially when it comes to adding a sense of realism in a conversation by overlapping dialogue. Additionally, these types of film cuts are also used to create intrigue amongst the audience while transitioning from one scene to the next.
This video explains the concept of J-cuts and L-cuts in depth:
Now, let’s take a look at how you can create a J-cut using the InVideo editor:
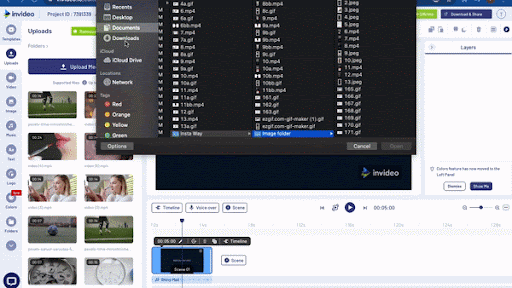
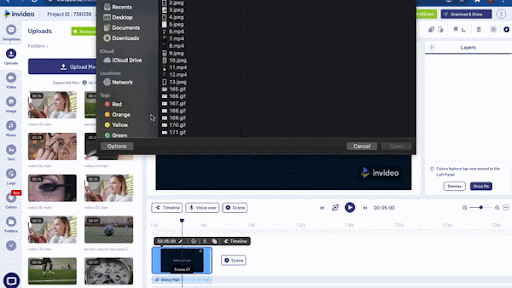
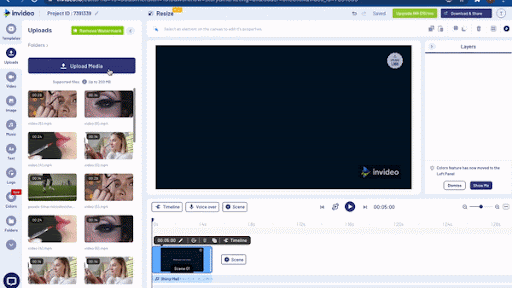
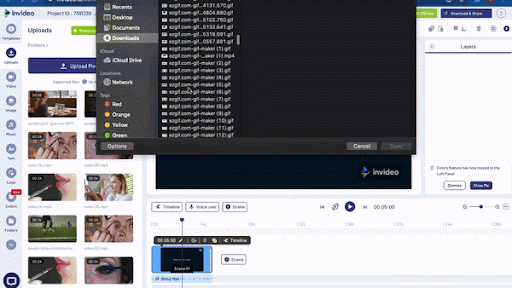
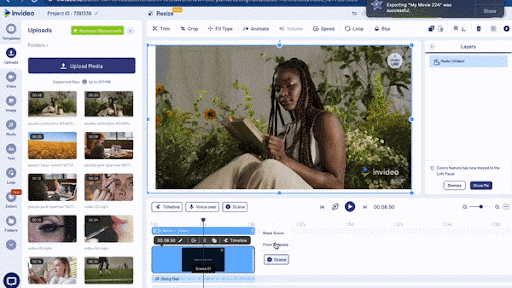
Step 1: Open up a blank canvas and upload your clips. Drag and drop your first clip on to the canvas and trim it to the desired length.
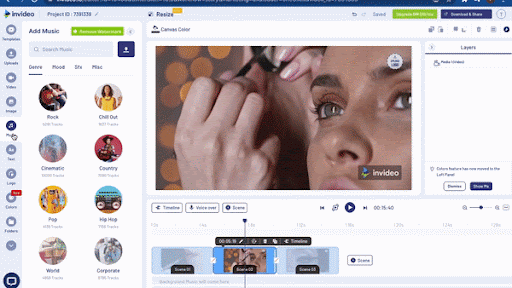
Step 2: Next you want to select a music track from the left menu panel and click on the + button next to the song to add it to the timeline.

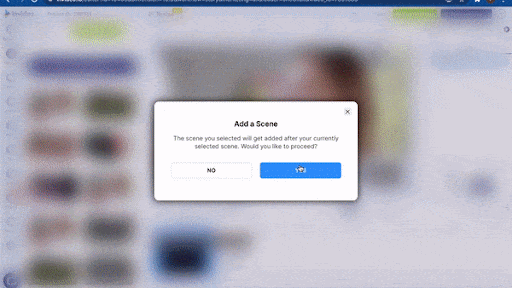
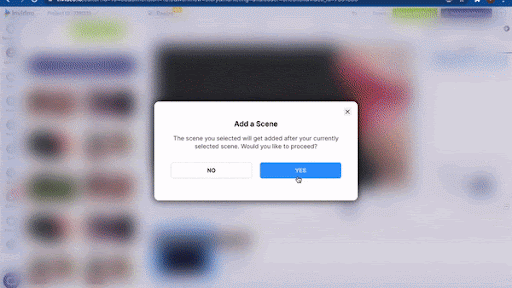
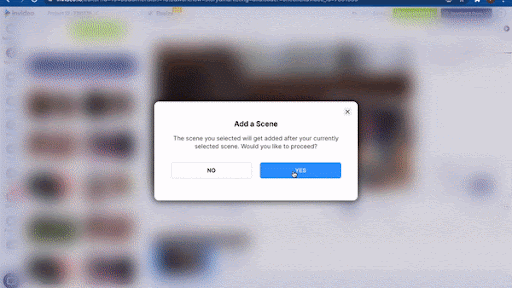
Step 3: Now, drag and drop the second clip from the side panel as a separate scene to the timeline and add another music track using the same steps as above.
Step 4: Click on the Advanced Timeline on the scene so you can see all the layers. Now, you want to drag the audio to start playing just a moment before the second clip starts. That’s your J-cut.
For an L-cut, all you need to do is drag the first audio to playing till just after a moment of when the second video begins.
2. Standard Cut
This is one of the most commonly used types of cuts in film. The standard cut or the hard cut is simple because it puts two shots together where one shot ends and another one begins.
Often, standard cuts are used to show the viewer what the narrator is talking about in the video or simply to show one scene a different angle, or to move the story along by showing the different aspects of a scene one after the other.
Standard cuts are popular because they don’t require the use of transitions to make a smooth cut between scenes. They work well for corporate or commercial videos, basically videos that are structured and don’t use a lot of flare or fuss.
Here’s what a standard cut looks like:
3. Jump Cut
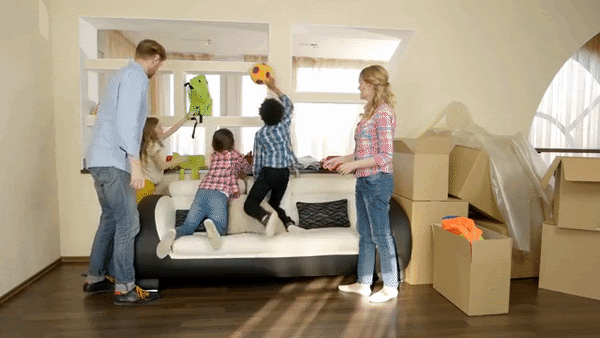
A jump cut is an editing technique in film when you cut from one clip to another in the same scene and the camera doesn't move or moves very slightly. This cut is usually used to show the passage of time.
For instance, in this scene below, the family goes from playing to sitting on the couch and finally settling there and the transition is shown by jumping from one point in the video to the next. If the entire passage of time was to be shown here, this would’ve become super lengthy.
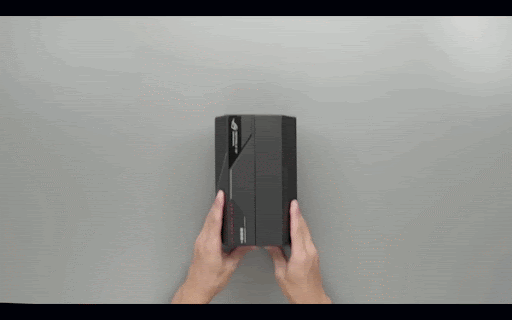
Jump cuts in film are also popular with product unboxing videos where creators switch from one step of the unboxing to the next using these cuts, as shown in this example below:
Here’s how to create a jump cut for your videos.
Step 1: Open up the InVideo editor and import your footage using the Upload media button. Simply drag and drop your first clip to the centre of the screen and trim it to the required length.

Step 2: Click +Add section to select another clip from the video. Now, add multiple sections and hit Done.
You can create as many cuts as you need this way and once you’re done, your jump cut is ready.
4. Match Cut
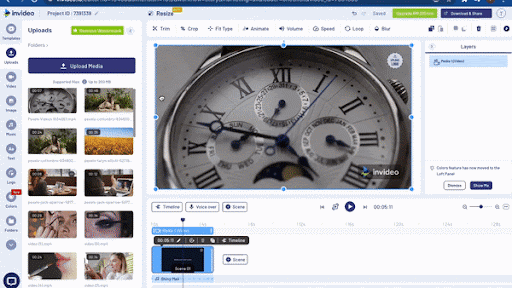
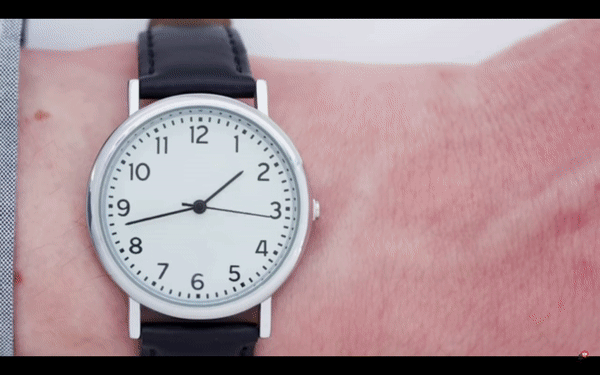
A match cut is a type of cut that uses a graphic match between two scenes to make the shift. It essentially cuts from one shot to another where the composition of the two shots is matched either due to the action being performed in the scene or simply by how the subject looks. For instance, in this clip below, the first shot ends with the frame on a wrist watch and the next shot picks up from a round clock with a dial very similar to the wrist watch.
Match cuts form the basis of continuity in editing by establishing a logical connection between two shots and there are a few different types of match cuts that you can experiment with. The one shown above is a graphic match cut. Another one is match or cut on action, which we will tackle in the next point. And then there’s a sound bridge where you use audio from the previous clip to transition into the next one.
The purpose of match cuts in film is to create smooth transitions but one thing you need to keep in mind is that these need to be planned in advance. But once you have your shots, it’s fairly simple to put them together in a video editor.
Here’s how you can do it on InVideo:
Step 1: Open up the InVideo editor and import your clips using the Upload media button. Simply drag and drop your first clip on to the blank canvas and trim it as per your requirement.

Step 2: For adding the second clip, click +Scene and select a Blank Scene to add the new shot. Drag and drop the clip which matches the visual composition of the first clip on the workspace and trim the video from the part where you want your next shot to begin. Hit Done and watch your match cut play effortlessly.

5. Cut On Action
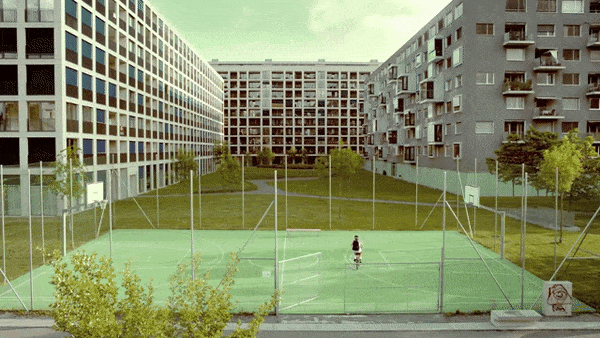
Cut on action or match on action is also a type of match cut. It transitions between two clips by cutting from where the action is happening in one scene to where the action is happening in the next scene. The key here is either having a similar action in both clips or having two clips of the same action from different angles.
Match on action shots work really well in sports and dance videos, or any other video that needs to show fast movements and transitions. For instance in this video below of the man doing the back flip, it seamlessly transitions to another location by cutting exactly while he is doing the backflip:
Here’s how you can create this type of cut on InVideo:
Step 1: Open up the InVideo editor and upload your clips or use clips from the stock library. Simply drag and drop the first clip on to the timeline and trim it to the middle of your action shot.
Step 2: Next, click +Scene to add another scene to which you can add your next clip. Drag and drop your next clip to the scene and trim it to the part where the similar action is starting. Play the clips together to see if they play seamlessly and then click Done.

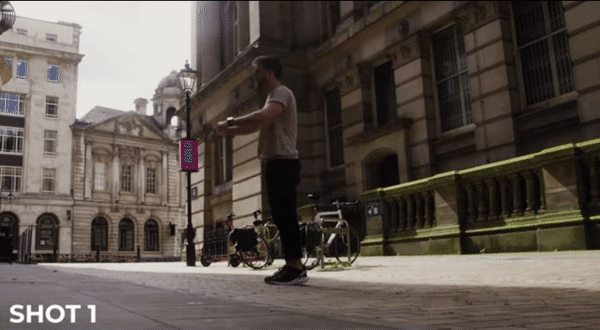
6. Cut-ins
A cut-in refers to a transition that cuts into a closer part of your frame. It is a great editing cut used to highlight a detail or bring attention to a particular part of the frame in your video. For instance, if you have a wide shot of a character holding an object, you cut into a closeup of the object she’s holding to draw more attention to it. Here’s an example of a cut-in shot where we go from a long shot to a close-up of the cyclist.
Once again, for the best cut-ins, you need to plan out your shots in advance because you need wide and close up shots to achieve this transition. However, if you’re working with videos that don’t have a large variety of shots or you’re editing talking head videos, you can also achieve a cut-in transition effect by digitally zooming into a part of the video.
Cut-ins are a type of film cut that work really well to provide more context in your storytelling by showcasing close-ups of the subject in relation to its environment.
To create a cut-in using InVideo, follow these steps:
Step 1: Open up a blank canvas and upload your clips on to the editor.
Step 2: Choose your first clip, preferably a wide shot of your frame, and drag it to the centre of the canvas to create a scene and trim your clip to the desired length.
Step 3: Next, you can simply add the close-up shot as a clip in a separate scene. Just click +Scene and add the clip. However, here, we’ll show you how to zoom into a part of your clip using InVideo.
Step 4: Select the clip you want to zoom into and click the crop button and select the area that you want a closeup of. Play the clips together to see if they play well together and then click Done.
7. Montage
A montage is a sequence of clips set to music that help tell a story, often within the context of a larger story like a movie. Montages are an editing technique in film used to show the passage of time, showcase a place, or a character working towards a goal like in classic sports training montages.
Here’s an example of a montage:
For brands, montages can be used to showcase behind the scenes action, a product launch, how a particular product is used, or even tell the brand’s story.
Here's how to create a montage for your brand or business using InVideo:
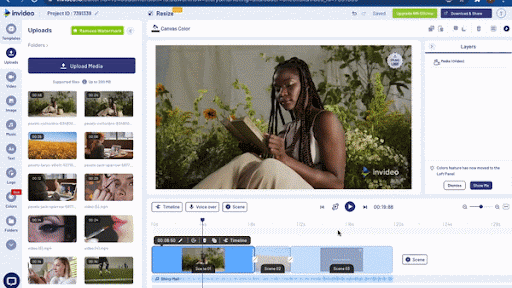
Step 1: Start by opening a blank canvas and upload your clips to the editor. Drag and drop your first clip on to the timeline and trim it to the desired length.
Step 2: Add the rest of the clips by adding scenes to the timeline (+Scene) and dragging and dropping one clip to each scene.
Step 3: Now before you begin trimming your scenes, select the music you want to edit your montage to. Browse through the InVideo music library and search for a song you want based on the mood of the video. Once you’ve found the right track, click the + button to add it to the video.
Step 4: Once your track is added, you can just drag and adjust the timing of the scenes to match with the beats of the track. Once you’re happy with the edits, just play the entire sequence to see if you’re happy with the edit and click Done.

8. Shot-reverse-shot
The Shot-Reverse-Shot is one of the most used types of cuts in film, especially when two characters are having a conversation. You'll start with a shot of one character looking at the other, and then add a clip of the second character. As they converse, you cut back and forth between the two characters.
Here’s an example of the shot-reverse-shot cut:

This cut is very simple and effective and is often used in filmmaking, however it is also not uncommon in brand videos where there is more than one character.
To create this cut using InVideo, start by importing your clips to the editor and creating your first scene by dragging and dropping the first clip on to the blank canvas. Trim the clip to where you want your first cut to be and click done.
For the next scene, click +Scene and then add the clip of the second person’s dialogue and click done. Trim the scenes to polish them and have them cut at exactly the right point and you’re done.
9. Look-Object-React Cut
This is a sequence of three shots and it's very similar to Shot-Reverse-Shot. You start with a close up shot of a person to their face and cut to the object that they're looking at and then cut back to their face to show their reaction.
Pro tip: Make this smoother by having your character move/turn in the direction of the object and then cut to the object to make the transition clearer, and then cut back to their face as they react.

Here’s how you can create the look-object-react cut for your videos with InVideo:
Step 1: Start by uploading your clips to InVideo and dragging and dropping the first clip of your subject’s close-up on to the blank canvas in the editor. Trim the clip to where the subject is looking at something.
Step 2: Next, add the clip with the object and by clicking the +Scene button and adding the object clip to that scene.
Step 3: Finally, add the third clip in the same way to show the subject’s reaction to the object they’re looking at. Here’s what your sequence should look like:
Wrapping Up -
Video cuts and transitions are the easiest way to make videos more engaging for your audience and with these 9 essential cuts, you're one step closer to creating better videos.
If you want to dig deeper into how to easily make cool edits to your videos, you can check out this guide. And you might also want to read up on how to add B-rolls to your videos to make them more visually engaging.
If you prefer learning via videos, you definitely should check out our YouTube channel, where we share daily video creation tips and tricks, the latest video trends and ideas, and help you make more money as a video creator.
Written by Mrignayni and Edited by Sarika