


We will be using InVideo’s online video editor to showcase these transitions since it is super intuitive and easy and you’ll be able to use these cuts for your videos even if you have no prior video editing experience. But the same steps and cuts can also be applied to any other video editor. You can get started with InVideo for free here.
Here’s all that we will be covering in this article:
1. Standard Cut
2. Jump Cut
3. L-cuts & J-cuts
4. Cross Dissolve
5. Wipe
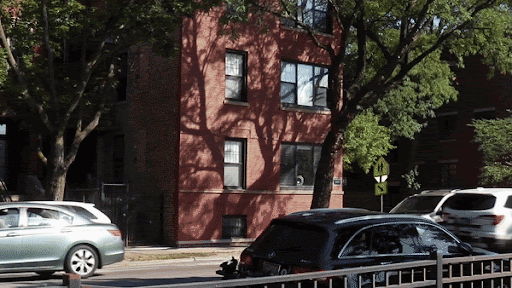
6. Film Roll-in
7. Cross Zoom
8. Light Leaks & Glitch
9. Pan
10. Whip
11. Object Block
12. Breaker Clips
13. Timelapse
But before we get started, let us try to understand in brief, what exactly are video transitions.
What are video transitions?
Video transitions are defined as an editing technique that help creators move from one scene to another. Film-makers and other creators use video transitions to move from one shot to the other, signify the passage of time, set mood for a scene or drive the storyline ahead. However, in the simplest terms, a video transition is a joint that connects two different shots.
With that out of the way, let’s get straight to our first transition.
13 super easy video transitions to try now
1. Standard cut
A standard cut is the most basic of video transitions - it is when one clip ends and another clip begins. It can be called the default cut for video editing. There are no added movements or effects in a standard cut, thus making it the most commonly used transition in video editing. This vlog by Allison Anderson is a great example of how neat and aesthetically pleasing standard cuts can be when matched to the beat of the music.
You will see this cut in almost all kinds of videos, be it travel, vlogging, or even a movie. This is also because the standard cut is one of the most seamless transitions, so much so, that it goes unnoticed. It moves in sync with the visuals and storyline - always keeping the audience’s attention on the story.

One thing you want to pay attention to while using standard cuts is that when you are using them in a talking head video like an interview or a tutorial video, you will want to make sure you use standard cuts sparingly and with intention. You don’t just want to use it to hide mistakes in your footage like cutting between footages because that will look super lazy and distract your audience from the storyline.
Here’s an example to illustrate how that may look:

One way to easily mask these cuts and make it seem super natural and organic is by cutting to another shot that is at a 30-degree angle from the first shot, or cutting to a Zoomed in shot - like shown in the example below.

If you don’t have a different angle or focal length between your two shots, you’ll end up with a jump cut - which is the next transition we will be talking about.
2. Jumpcut
Unlike standard cuts, a jump cut is a video shot in a single sequence and then cut to remove certain sections to create the effect of jumping forward in time. Here’s a famous jump-cut sequence from the movie Breathless.
This kind of video transition can make for a really cool video effect if you want to show a passage of time, a chase sequence, or a journey. The way to easily create a jump cut sequence like the one in the example above is to shoot one long video with your camera on a tripod, and then cut sections from it to show a jump in time.
You have to remember that a jump cut when used unintentionally or not well-planned can look distracting or lazy. So be careful while using this video transition.
3. L-cuts & J-cuts
Unlike the above cuts in which the visual leads the cut, L-cuts and J-cuts are video transition effects which are more dependent on the audio to make the cut look continuous. These are the most cinematic transitions to begin and end your video - and that’s why almost all movies have some degree of J & L cuts.
In an L-cut, the audio from the first clip carries onto the second clip and continues to play for a while underneath the second clip.
This brings a sense of continuity to the second clip and makes it easier to transition to the next clip while maintaining the storyline of your video. This makes it a great way to maintain continuity and flow, especially in travel videos and vlogs, and is a tried and tested method in a lot of movies and television series.
Watch this scene from the movie The tree of life where the editor has used an L-cut so you can hear the sound of the boy counting over the next sequence of shots.
A J-cut is the opposite of an L-cut. In this case, the audio of the second clip will start before the visuals of the second clip come in. For example, if you’re talking about visiting the ocean or a marketplace in your vlog, then you can let the sound of the ocean begin before you cut to the actual footage of the ocean.
Watch this video to see how the editor has used a J-cut to open the film in Whiplash - in which you can hear the reverberating sound of beating drums for almost 30 seconds before it opens the scene to reveal the protagonist.
4. Cross dissolve
Cross dissolve or fade is another basic transition that is very similar to a standard cut. In this video transition, the first clip slightly fades to introduce the visual of the second clip. Watch this classic example of a cross-dissolve from the movie Strangers on a train.
This seamless transition is mostly seen in music videos where the close-up shot of the singer fades into a clip of the piano. You can also use this video transition in slow montages, to show a passage of time and in music videos to transition between shots of the instruments, for example, a piano and the singer’s face.

5. Wipe
The wipe is a more noticeable video transition as compared to the standard cut and fade. In this video transition, the second clip slides in from one side or either the top or bottom, as if wiping across the screen. The wipe video transition can work very well for your video if it is placed with intention - like in a travel video when you are shifting to another location or revealing a monument or waterfall. This video transition can also be used to give a vintage look to your video since it was heavily used in movies during the 60s and 70s. Here are a few examples of wipe video transitions that were extensively used in Star Wars.
This video transition will look great if you’re using it with motion in your scene. For example, the shot of an elevator door closing or someone walking across the scene can be paired with the wipe transition in the same direction to smoothly move from one shot to another.
6. Film roll-in
This creative video transition looks as though you are playing a film reel. You can use this for videos where you want to give a vintage film look, like a 1920’s silent film look and it can also be a great fit to transition from your intro to the rest of your YouTube video. Check out this example of a fill roll-in video transition that was made using InVideo.

7. Cross zoom
The cross zoom transition will start by zooming in at the end of your first clip and will zoom out to your second clip with a little fade in the middle. This is a great music video transition, especially if you want to give your video a fast-paced feel and can also be used in travel videos or to show a flashback scene. You can also use this transition effect to cut from a wider shot, like that of a landscape to a closer shot of a person. Here’s a simple example of a cross zoom shot that was created in less than a minute using InVideo.

8. Light leaks & glitch
These are more contemporary and trendy video transitions as compared to the ones we have spoken about earlier. You must have seen these video transitions in intros, music videos, travel videos, and even corporate film videos.
Light leaks can give your video a very cinematic feel and is a great choice for categories like wedding videos or aspirational corporate videos. Light leaks are one of the best video transition effects for clips shot outdoors on a bright day because they look a lot like lens flare from the sun. Check out this video that shows you a series of light leak transitions on different kinds of footage.
On the other hand, glitches give a more sci-fi and futuristic feel and would make a great fit for intro and music videos. Check out this video that has multiple glitch video transition examples.
Next we are going to look at some transitions that can be created using your camera. These do require a little bit of pre-planning when you shoot but they will look great when the clips are merged together and combined with other effects like fade and glitch.
9. Pan
The pan is one of the common video transitions and needs to be pre-planned because it will require you to do some work while shooting the footage. You will essentially have to end your first video clip with a movement to either side or up and down, and then shoot your second clip continuing the same movement you ended the previous clip with. All you need to do after this is merge the videos together while you’re editing to show the transition from one space to another.
Here’s a compilation of pan shots from the movie The Grand Budapest Hotel to help you understand the movement involved in this transition.
This video transition will work very well for a vlog to shift from one location to another, a dramatic conversation, or even in travel videos to transition the scene from one landscape to another.
10. Whip
This next transition is basically a pan but much faster. Check out this behind-the-scenes video of a whip pan sequence being shot for the movie La La Land.
You will shoot this just like you did the pan shot but with a quicker motion. The quick camera movements make this a perfect video transition for sports and music videos that want to convey a fast-paced narrative.

You can also edit this on the InVideo editor in less than a minute by following the same steps to edit the pan transition.
11. Object block
This video transition is one of the easiest to create and lets you visually transport your audience from one place to another. All you have to do is end your first clip by completely blocking the frame with an object, like a tree or wall, like in the example below:

Then starting the second clip from a similar object.

When you join the two clips, it can make for a smooth video transition from one space to another.
This transition has now become very common with YouTubers using their hands or other everyday objects to block the frame and reveal their next location in the vlog or just move to another segment.
Watch this video by Brooker Films where they show you how to create this simple video transition effect by using your hand or lens cover.
Next we will look at how you can use breaker clips (establishing shots and montages) as transitions for your videos.
12. Breaker clips
Breaker clips are montages or visuals that allow you to break between two scenes. You must have seen these in sitcoms and television shows where the scene breaks into music and visuals of the place where the characters will be next, like in the example below from Fuller House where they shift from one location to the next using breaker clips to show the transition.

Breaker clips as video transition effects work best if you have a long video and want to establish the next scene before suddenly jumping to it. You can use this transition in vlogs and wedding films to show what is happening and where it is taking place.
13. Timelapse
Similar to establishing shots, a timelapse allows you to give your audience a sense of time and space between two scenes - like showing sunrise or sunset. You must have seen these in movies and television shows but they also work well for vlogs and travel videos. The example below is of a reality home renovation show where a timelapse is used as a transition to show a new day.

Bonus: How to Add Video Transitions on InVideo in 3 Simple Steps
Step 1: Log in or sign up for a free account on InVideo and select the Blank Canvas option. You can choose your preferred dimensions and click on the Make a video button.

Step 2: You can now upload your footage from the left hand side panel or choose high resolution stock footage from InVideo’s inbuilt library. All you need to do is simply drag and drop your files in the center of the screen. You can trim your video before uploading it on the editor, so trim it to where you want your first cut to be and then click Done.

Step 3: Click on the little box in between the two scenes on the timeline and this will open the transitions menu. You can then select from various wipe transitions like wipe up/down, wipe left/right, wipe x-axis/y-axis, and it will be applied to your video.


Wrapping up
In this post, we’ve shared with you the 13 most commonly used video transitions - what they are when to use them and how you can incorporate them in your videos. Now, all that’s left for you to do is try them out and hit the road running.
If you liked this blog and want to learn more about the step-by-step process to creating better videos, you must check out this guide where we take you through the entire process of how to make a video from start to finish.
And if you have any questions or want to continue the conversation, you can always hop over to the InVideo community and learn from 25K other marketers and video creators just like you!
FAQs
1. What is a video transition?
Video transitions are a post-production technique in video editing to connect one visual to another. Most videos are made of smaller clips and shots which are merged together while editing. Video transitions like roll-in, cross-zoom, cross-dissolve allow creators to smoothly maneuver from one shot to another while creating a seamless flow to tell the story.
Video transitions are also a great way to set the mood and tone of the video, move from one timeline to another (like with flashback scenes), or creatively switch to another point of focus.
In this article, we have shared 13 video transitions that are super simple to do but will take your video to the next level!
2. What is the difference between video transitions and video effects?
The only difference between a video effect and a video transition is that a video effect is only applied to a single clip whereas a video transition is applied between two video clips to help them blend together.
In this article, we are sharing with you 13 super easy video transitions that you can add to your videos in 3 simple steps to take them to the next level!