
Key takeaways
-
AI lets you control camera movement to change perspective, motion, etc, without reshoots.
-
Generate cinematic camera movements like dolly, whip pan, or bullet time in one click.
-
Every camera move shapes emotion. Smooth moves feel cinematic; aggressive moves drive energy and attention.
-
Short-form content thrives on bold motion. Crash zooms, whip pans stop the scroll.
-
Product and brand videos look premium with controlled movement. Side sweeps, jib moves, and 360 shots elevate polish.
-
Camera controls work from image input. Upload an image and apply realistic AI camera angles.
-
Testing multiple camera styles is fast and low-risk. Generate variations and keep what performs best.
We’ve all been there. You’ve generated or captured the perfect subject, the lighting is hitting just right, and the composition is solid. But once you play it back, it feels... flat. Maybe you realized too late that a slow dolly-in would have nailed the emotional stakes, or perhaps that product shot desperately needs an indoor side sweep to feel premium.
This realization usually leads to a painful choice: settle for a mediocre shot or shell out thousands for a reshoot to change the camera movement of your scene. Thankfully, AI enabled camera movements have solved that problem effectively.
You can now add cinematic camera movements like dolly in, whip pan, bullet time, or a 360-degree orbit while generating videos or after the footage has already shot. No rigs. No gimbals. No reshoots. Just intentional camera behavior applied in post production.
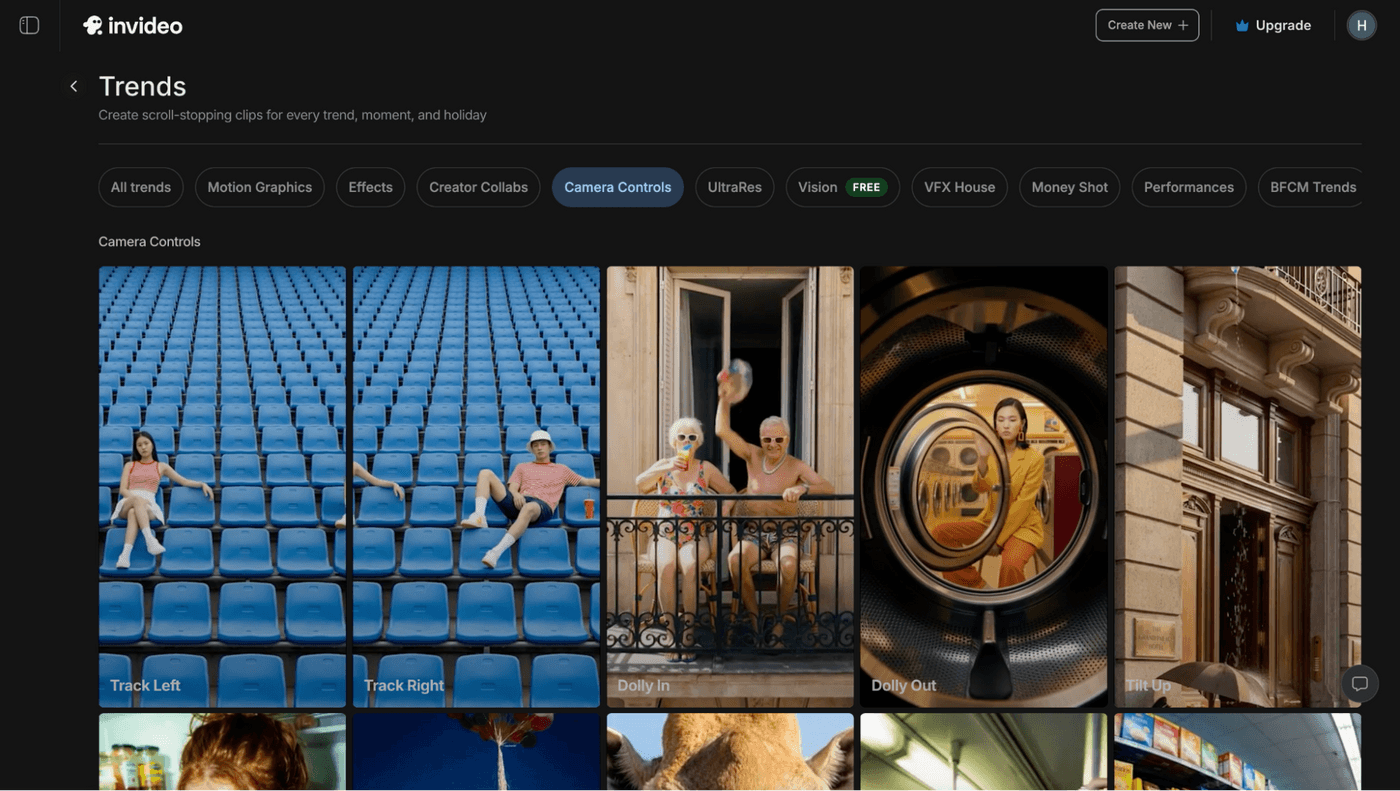
Most popular camera movements for AI videos
Choosing the right camera angle hold the key between a video that looks "AI-generated" and one that looks "cinematic." So here are some common camera movements you can use to create your next AI video.
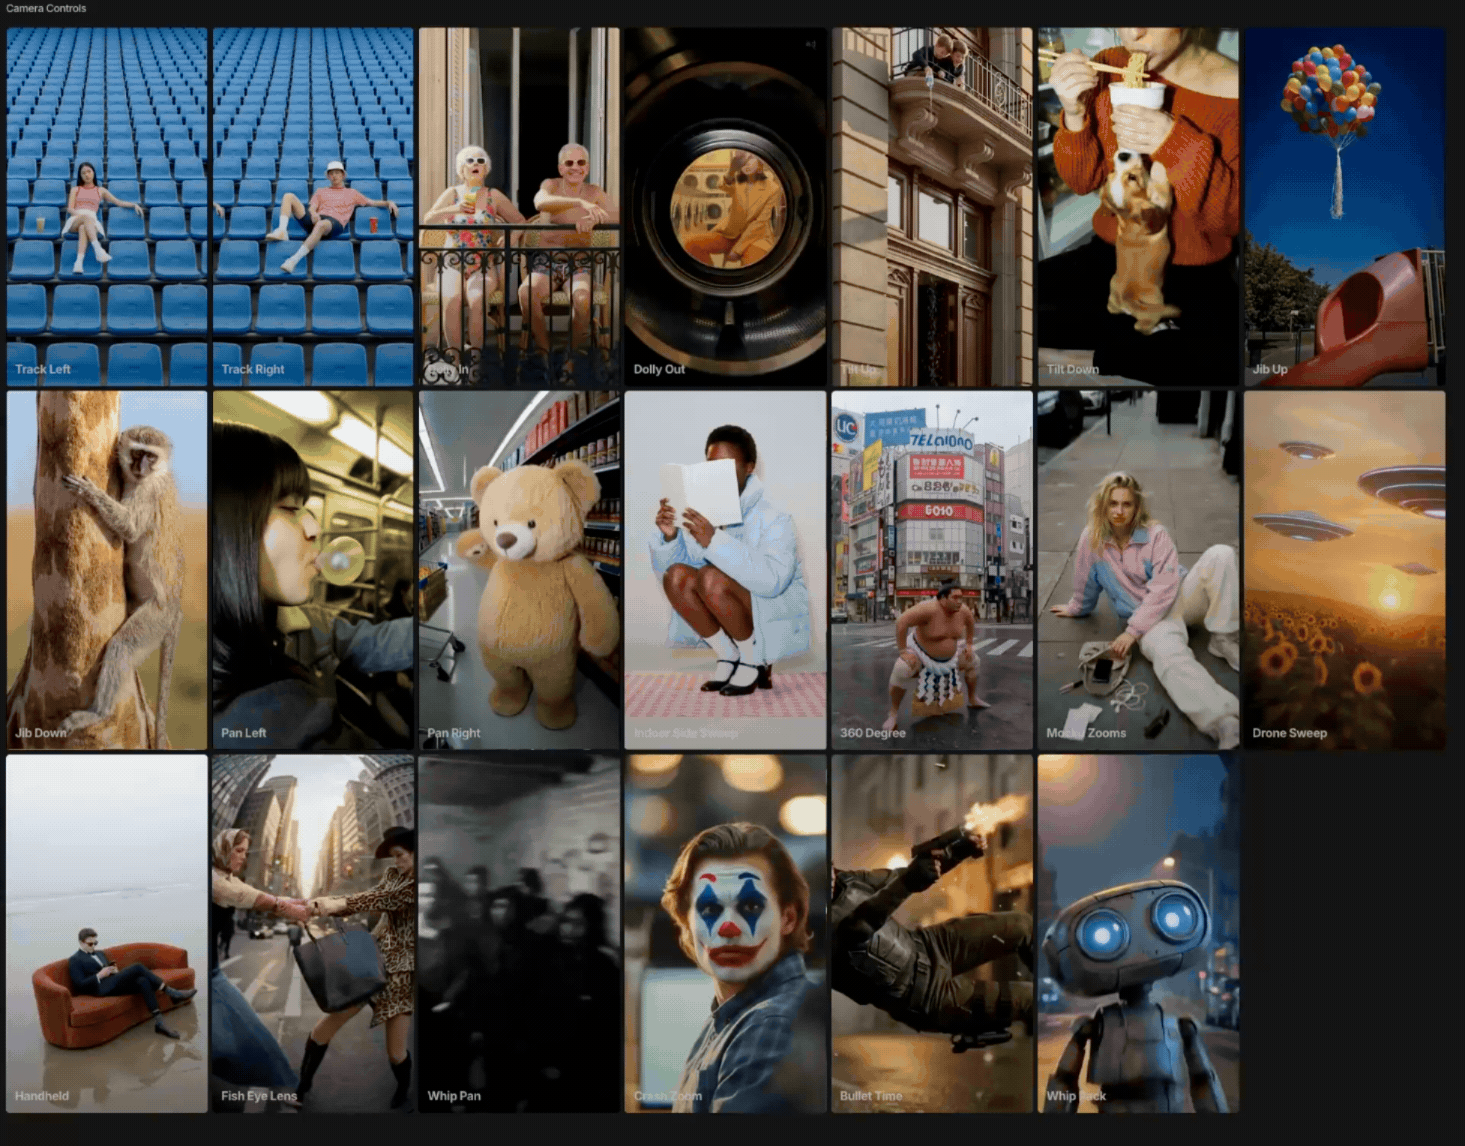
AI camera movement cheat sheet
One-click camera movements with AI [prompts + examples]
Instead of wrestling with keyframes or complex motion tracking, you select a preset, such as pan left, dolly in, or drone sweep.
Then AI calculates the depth, parallax, lens behavior, and motion path automatically to generate your scene with the type of camera movement your shot needs. Check out the camera movements prompts and the examples below for each type.
1. Pan(left/right) [Return to Table]
A horizontal rotation of the camera on a fixed axis, used to scan a scene, follow a moving subject, or reveal information gradually. Directors use it to guide the viewer's eye, build anticipation, or establish geography between two points. Best for landscape reveals, interview B-roll, sports coverage, vlogs, and storytelling content on YouTube and Instagram.
2. Dolly(in/out)
The entire camera physically moves toward or away from the subject, changing perspective and depth (unlike a zoom). Directors use a dolly-in to intensify emotion or focus attention, and a dolly-out to reveal context or create emotional distance. Best for cinematic films, dramatic moments in ads, interview setups, music videos, and narrative shorts.
3. Tilt(up/down)
A vertical rotation of the camera on a fixed axis, used to reveal height, scale, or shift focus between subjects stacked vertically. Directors use it to build awe (tilt up a skyscraper), suggest power dynamics, or unveil a character from feet to face. Ideal for fashion reels, architectural showcases, character introductions in films, and product reveals on social media.
4. Track(left/right)
Used to follow subjects laterally or reveal a scene's breadth, the tracking shot keeps the audience moving alongside the action. Directors use it to build narrative momentum, suggest pursuit, or unveil information progressively. It works best for walk-and-talk scenes in films, fashion reels, and narrative YouTube content where horizontal storytelling matters.
5. Jib(up/down)
A jib lifts or lowers the camera vertically, often used to reveal scale, transition between subjects, or create emotional shifts. Directors deploy it to convey grandeur (rising up) or intimacy/defeat (descending). Ideal for establishing shots in films, wedding videos, real estate showcases, and music videos.
6. Indoor side sweep
A controlled lateral sweep through interiors, used to showcase space, products, or atmosphere in a confined environment. It communicates luxury, attention to detail, or sets a mood without overwhelming the viewer. Best for real estate tours, hospitality marketing, interior design reels on Instagram, and product showcases.
"Camera performs a slow, controlled lateral sweep through the interior space, gliding sideways at a constant speed. Framing remains balanced, with smooth motion blur and stable horizon."
7. 360 degree camera movement
The camera circles fully around a subject, immersing viewers and emphasizing importance or transformation. Directors use it to create awe, suggest disorientation, or signal a pivotal moment. Perfect for action sequences, sports promos, music videos, hero shots in ads, and immersive social content.
"Camera orbits a full 360 degrees around the central focal point at a steady, cinematic pace. The subject remains centered in frame throughout the entire rotation, with seamless, gimbal-smooth motion."
8. Drone sweep
An aerial move that captures wide, sweeping perspectives from above, used to establish location or scale. Directors use it to evoke freedom, isolation, or epic grandeur. Ideal for travel vlogs, real estate, cinematic openings, outdoor brand commercials, and YouTube nature/adventure content.
"Aerial drone shot sweeping forward and upward at a smooth, cinematic pace. Wide, expansive perspective with gentle altitude gain, capturing sweeping motion across the landscape."
9. Handheld
A raw, unstabilized movement that mimics human perspective, adding urgency, realism, and emotional immediacy. Directors use it to convey chaos, intimacy, or documentary authenticity. Best for indie films, news, vlogs, reality content, and gritty action sequences on platforms like TikTok and YouTube.
""Handheld camera with natural, organic shake and subtle movement, mimicking human presence. Slight wobble and breathing motion, with realistic imperfections and documentary-style framing."
10. Fish eye lens
Not strictly a move but a distortion technique using an ultra-wide lens that warps perspective into a curved frame. It signals youth culture, energy, or a surreal/POV vibe. Popular in skate videos, hip-hop music videos, extreme sports content, and Gen-Z-focused TikTok and Instagram reels.
"Shot captured through an ultra-wide fish-eye lens with pronounced barrel distortion, curved edges, and exaggerated perspective. Center of frame is enlarged while edges warp dramatically."
11. Bullet time
A frozen or slow-motion moment with the camera rotating around the subject, made famous by The Matrix. Directors use it to suspend time and highlight a dramatic beat. Perfect for action films, sports highlights, sneaker and fashion drops, and viral social media stunts.
"Time freezes while the camera orbits 180 degrees around the subject in slow motion, creating a frozen-in-time bullet-time effect. Smooth rotational movement with extreme slow-mo or full motion-stop."
12. Crash zoom
A rapid, jarring zoom in or out, often punctuating comedic beats, shock, or sudden realization. Directors use it to grab attention, emphasize reactions, or inject energy. Ideal for comedy sketches, mockumentaries, YouTube edits, TikTok reaction content, and meme-driven reels.
Camera performs a rapid, aggressive crash zoom in under one second — either snapping in from wide framing to extreme close-up or pulling out from extreme close-up to wide framing. Movement is sudden, snappy, and punchy, with a sharp, decisive stop at the end.
13. Whip pan and whip rack
A whip pan is a fast horizontal sweep that blurs the frame, while a whip rack is a sudden focus shift, both used as transitions or for kinetic energy. Directors deploy them to connect scenes seamlessly or jolt attention to a new subject. Best for music videos, action sequences, fast-paced ads, vlogs, and TikTok edits.
14. Mocku zooms
A sudden, often awkward zoom-in on a character's face or reaction, popularized by shows like The Office and Parks and Recreation. Directors use it to highlight comedic disbelief, secondhand embarrassment, or a knowing glance at the audience. Perfect for mockumentary-style content, sitcoms, comedy sketches, branded humor ads, and viral TikTok or Instagram skits.
"Camera performs a quick, slightly awkward mockumentary-style zoom-in, with subtle handheld unsteadiness and a small reframe. Zoom is sudden but not extreme, punctuating the moment with documentary-style imperfection and a faint wobble."
How to use AI to create cinematic camera movements in one click?
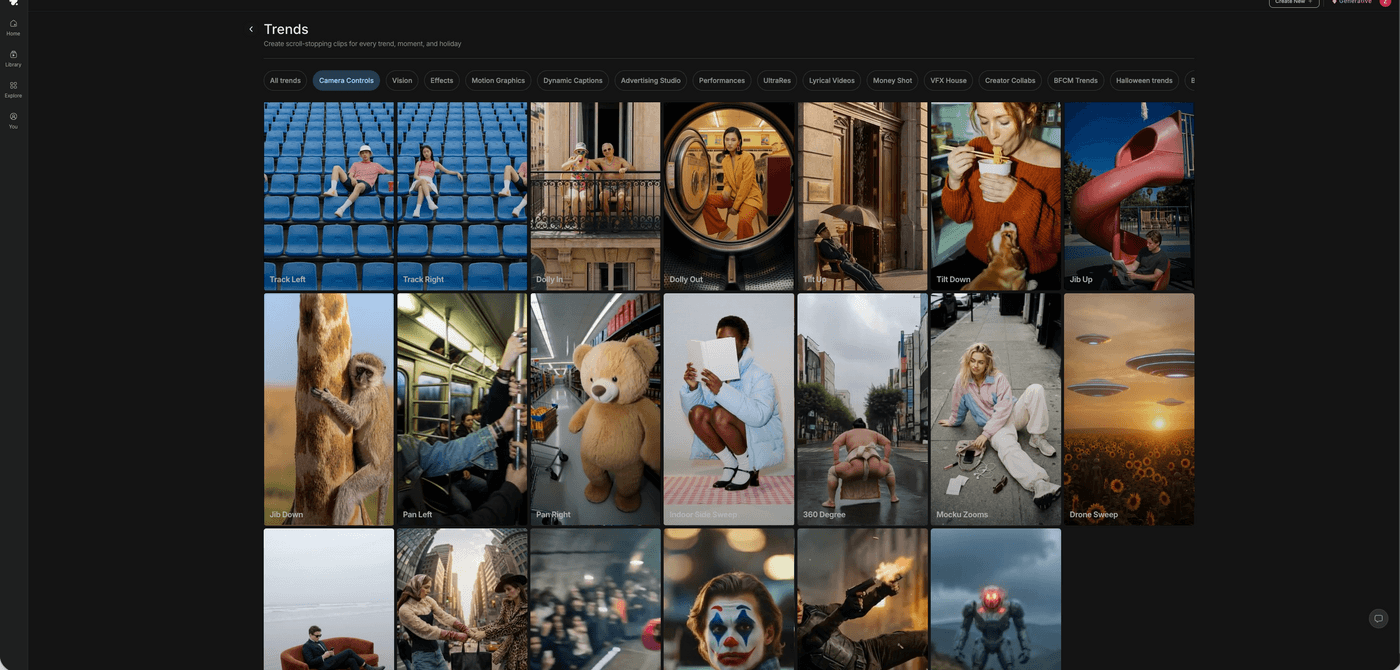
Step 1: Open camera controls in invideo
Open your invideo project and navigate to the Trends or Camera Controls tab. Here, you’ll see the full grid of presets, from pan left to bullet time.
Step 2: Select the right preset for your scene
Use intent as your filter. For instance, for a dramatic product moment, choose dolly-in, or if you wanna deliver a punchline or reaction, choose mocku zooms or whip pan for a high-energy transition.
Step 3: Plug in your image and context
Camera controls take an image as input. Upload at least one image representing the moment you want to animate, whether it’s a captured frame or one created with an image generator, along with a clear prompt describing the scene. Invideo uses this to apply the camera angle and movement accurately.
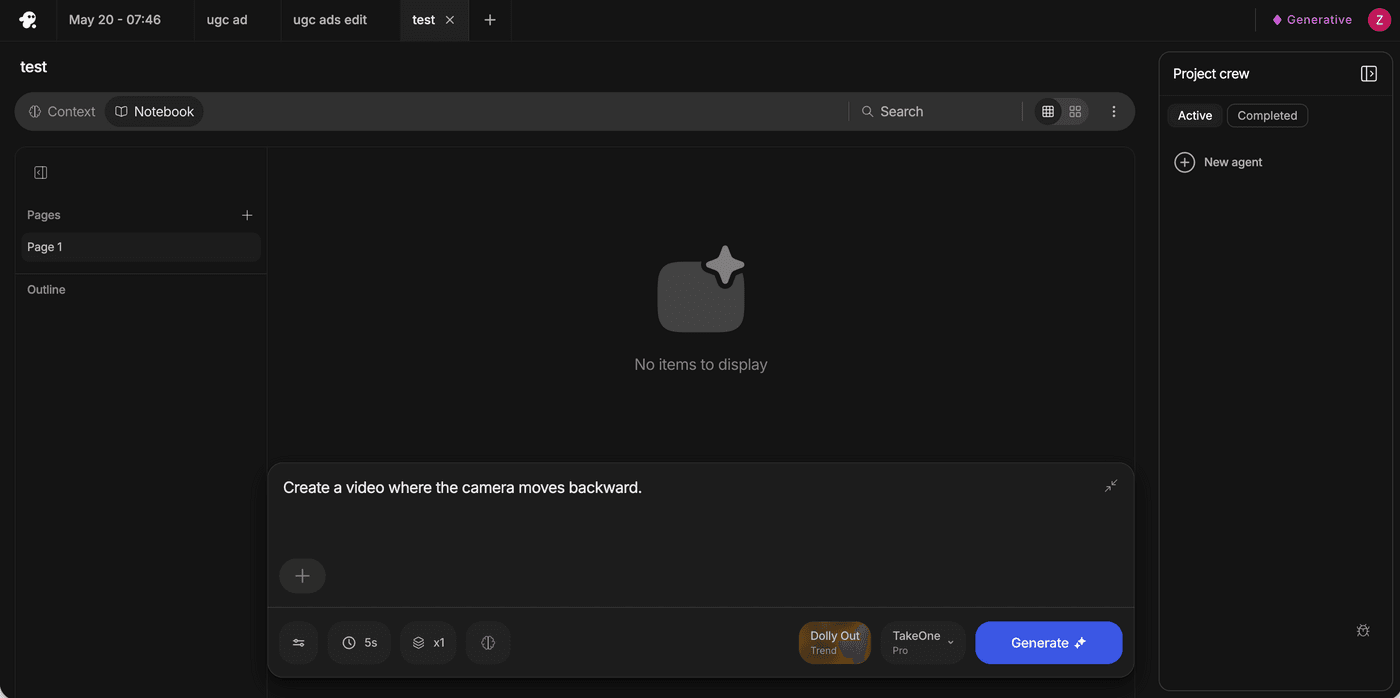
Step 4: Click 'Generate' and you are done.
Don’t settle for the first take. Generate a few variations, perhaps a track right and a 360-degree camera move.
Place them in your timeline to see which one flows better with your background music and overall edit.
Why filmmakers and creators are switching to AI camera movements and angles?
Traditional camera moves require planning, gear, and time. AI camera movement gives you flexibility after the fact.
With AI camera movement, editors become directors. You’re no longer fixing footage, you’re shaping perspective.
That’s especially powerful when:
- You can’t reshoot
- You’re producing content at scale
- You need multiple versions for testing and ads
Using camera movements for better storytelling
Traditionally, choosing the wrong camera move meant reshooting, renting gear, or compromising on the final cut. With AI-powered camera controls, that constraint disappears, you can experiment with a slow dolly-in for emotional impact, swap it for a crash zoom to add energy, or layer in a 360-degree orbit to elevate a hero moment, all without touching a camera rig.
And that's where "Camera Controls", by invideo, enables you to rethink camera movement as a post-production decision.
Whether you’re crafting cinematic ads, or creating movies with AI, or making brand films, the ability to change camera perspective after capture is a serious creative advantage.
FAQs
1. What is the difference between a "Zoom" and a "Dolly" in AI prompting?
If you prompt for a "Zoom In," AI often just enlarges the pixels, which can lead to "flat" looking shots. If you prompt for a "Dolly In" or "Push In," the AI simulates parallax, i.e., objects in the foreground move faster than the background, creating a much more professional, cinematic depth.
2. What are the different types of camera movements when making a clip?
Common movements include pan, tilt, dolly, track, jib, zooms, handheld motion, and specialty moves like bullet time and whip pan.
3. How to create a "Drone Shot" without AI just making the subject look tiny?
Use the term "Crane Shot" for low-to-mid altitude reveals or "FPV Drone Dive" for aggressive, fast-paced action. Specify the Lens behavior: "Wide-angle lens, high-altitude drone flyover" tells the AI to keep the field of view broad rather than zooming in and losing the scale.
4. Can AI handle complex movements like a "Dolly Zoom" (The Vertigo Effect)?
In 2026, AI video models (like Kling AI, Seedance 2.0) will recognize the term "Dolly Zoom" or "Zolly." For better results, describe the mechanics: "The camera physically dollies back while the lens zooms in simultaneously on the subject." This gives the AI the "math" needed to calculate the spatial distortion.
5. What’s the difference between pan/tilt and crash zoom/whip pan?
Pan and tilt are smooth, controlled movements. Crash zoom and whip pan are aggressive, high-energy moves meant to surprise or transition.
6. How do I stop the background from "warping" when the camera moves?
Use "Tracking Shots" or "Orbit" prompts with a Static Subject anchor. Example: "360-degree Orbit, keep subject centered, maintain background consistency." Providing a reference image of the environment (Image Guidance) also helps the AI "remember" what the background should look like as it moves through it.