
Whether you want to make dreamy sequences or give your videos a retro, vintage feel, light leaks can be your go-to effect. They are a neat trick that helps you change the mood of your videos and photos – but getting them right can be tough. You don’t need your video to get too bright or your light leaks to look out of place!
To make this easy for you, we’ve put together this guide where we will share everything you need to know about how you can use light leaks for your images and videos.
We’ll also show the easiest way to add 40+ light leaks or film burn overlays to your videos in under 15 mins using an online video editing tool like InVideo.
Let’s get into it.
Here’s what we will cover:
1. How to use light leaks
2. The easiest way to add light leaks to your videos
3. How to make light leaks in Photoshop
4. How to add light leaks in Premiere Pro
5. Best resources for downloading free light leaks overlays
1. How to use Light Leaks
A light leak is, by definition, a hole or gap in the body of a camera, or other optical instrument, where light is able to “leak” into the normally light-tight chamber, exposing the film or sensor with extra light. This is what traditionally created the bokeh or vintage feel in videos and photos.
While light leaks can be created during shooting, it is much easier to add them while editing your videos. You can digitally create light leaks to bring dynamism and atmosphere to your photos and videos. Check out these examples of how a light leak looks in digital photos.

Light leaks or film burn overlays can be used in many different ways to make your videos look more beautiful. From depth to transition, let’s check out a few reasons you can use light leaks in your videos.
1. You can use light leaks to color grade your films and give your videos a dynamic look. Check out how light leaks and a film burn overlay have been used in the Margherita With A Straw movie trailer.
2. One of the most popular uses of light leaks is to create or suggest ambience. You’ll probably see this ambient element in wedding videos or Indie films. This effect gives the footage the appearance of authenticity. Check out how light leaks have been used in this wedding film, to create a nostalgic, romantic ambience.
3. Light leaks are also used as a transition, or an effect used to go from one clip in your video to another. Check out this logo reveal video template by InVideo that uses a light leak overlay as a transition.
4. Many graphics artists use light leaks in their animations and title sequences. For example, check out this logo reveal video template that features a prominent light leak effect!
These are some instances when you can use light leaks in your videos. So now let’s get on to finding out just how you can apply a light leak or a film burn overlay to your video in a super-easy way.
2. The easiest way to add Light Leaks to your videos
You can create light leaks in your video super easily in under 15 minutes, even if you have never edited a video before. All of this can be done online, for free, without any external softwares! All you need to do is sign up or log in to InVideo.
Step 1: Once you have signed up and logged in, you next need to check the “Blank Canvas” option and select the video dimensions you want. Finally, you need to click the “Make A Video” button. You will now be taken directly to the InVideo editor.

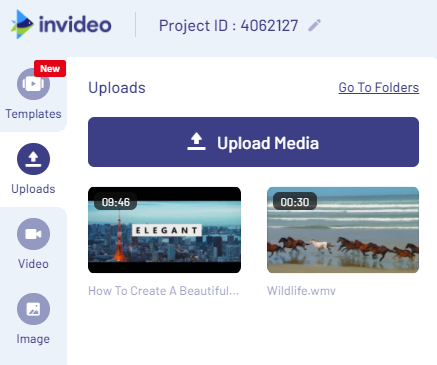
Step 2: Next you need to click on the “Upload Media” button to upload the video you want to add light leaks too.
Step 3: Once your video is uploaded, drag and drop it on the workspace in the right-center of your screen. You will now see a pop up that gives you the options to trim video, mute sound, etc. Go ahead and trim your video if you want. Once finished, click on the “Done” button. If you don’t want to trim your video or make any edits, just click on the “Use Full Video” button.

Step 4: Now go to the menu on the left corner of your screen and click on the “Overlays” section. In the search bar, type “light leaks.”
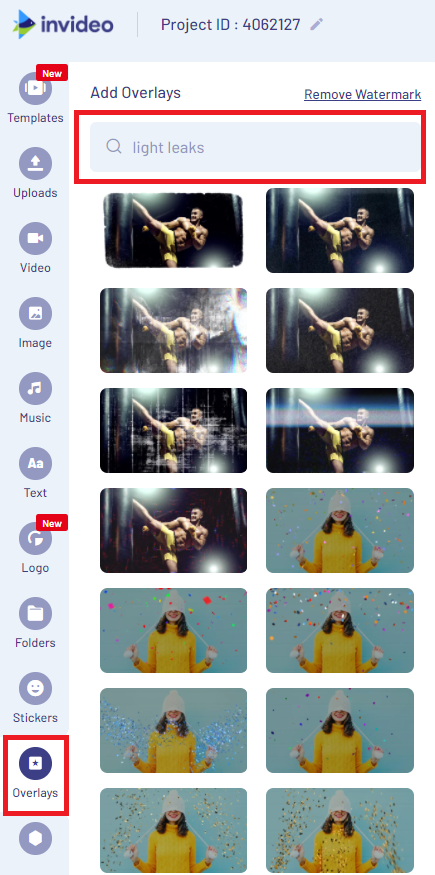
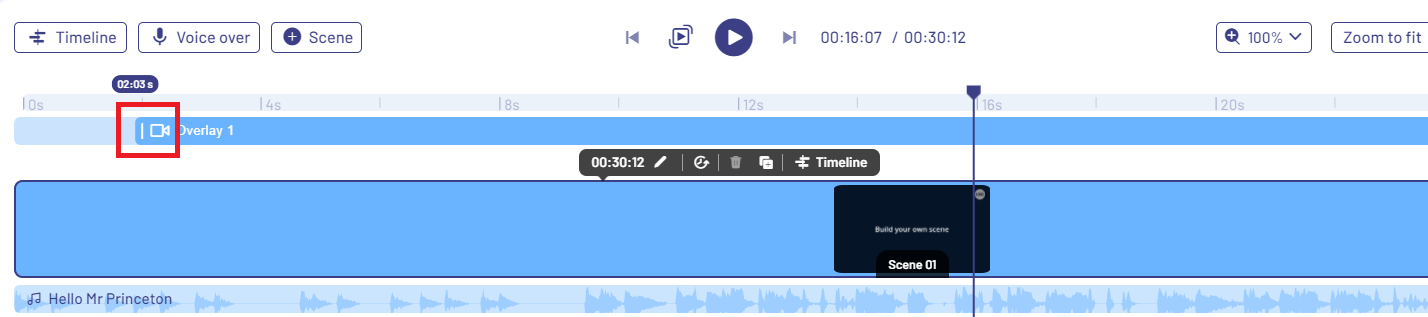
Step 5: You will now see 40+ different light leaks in the menu. Hover over your options to see how these effects will look on your video. Once you’ve decided which light leak you want, click on the effect and it will automatically be added to your timeline. Now it’s time to adjust and edit your light leak effect. Click on the light leak layer on your timeline to access the edit controls.

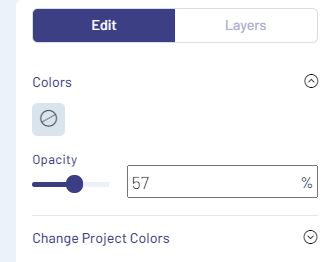
Step 6: Now you will see, on the right side of your screen, various edit options. Click on the “Colours” dropdown to change the brightness of your light leaks. The greater the “Opacity” percentage of your light leak effect, the brighter it looks. Reduce the opacity to decrease brightness.
Step 7: If you want your light leak to appear only for a small section of your video, you can do this simply clicking on the timeline and dragging the layer.
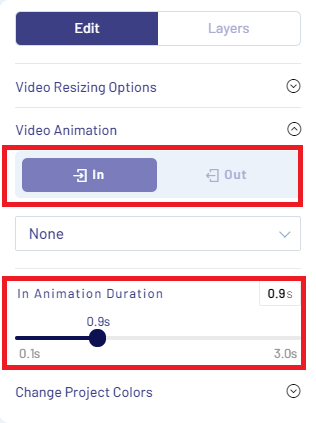
Step 8: When you are adding the overlay to a small portion of your timeline, you might see a jerk as the effect starts or ends. You can avoid this jerk by adding fade-in/out animations to your video. To do this, you need to select your video on your timeline. After this, go to the edit menu on the right and click on the “Video Animation” dropdown.

Step 9: Now position your cursor where you want your animation to start (9at the start of your overlay). Click on the “Fade in” button. Next position your cursor where you want your animation to end (at the end of your overlay). Click the “Fade Out” button. You can even determine the duration of your animation.
Step 10: In case you are using light leaks in your logo animation, or with text, you need to make sure that your text is readable. To this, you just need to go to the “Layers” section in your edit menu on the right corner of your screen.

Step 11: You’ll see the “overlay” layer right at the top. Simply drag the “Text” layer (with the T written next to it) at the very top. You can do the same for your logo to make sure it’s clearly visible.

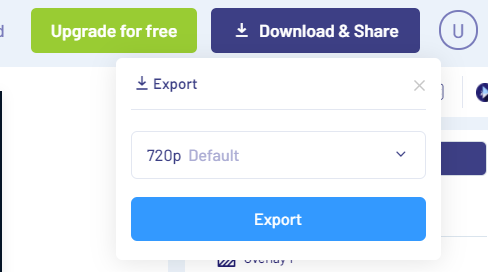
Step 12: Once done with all your edits, simply click on the “Download & Share” button and click “Export.”
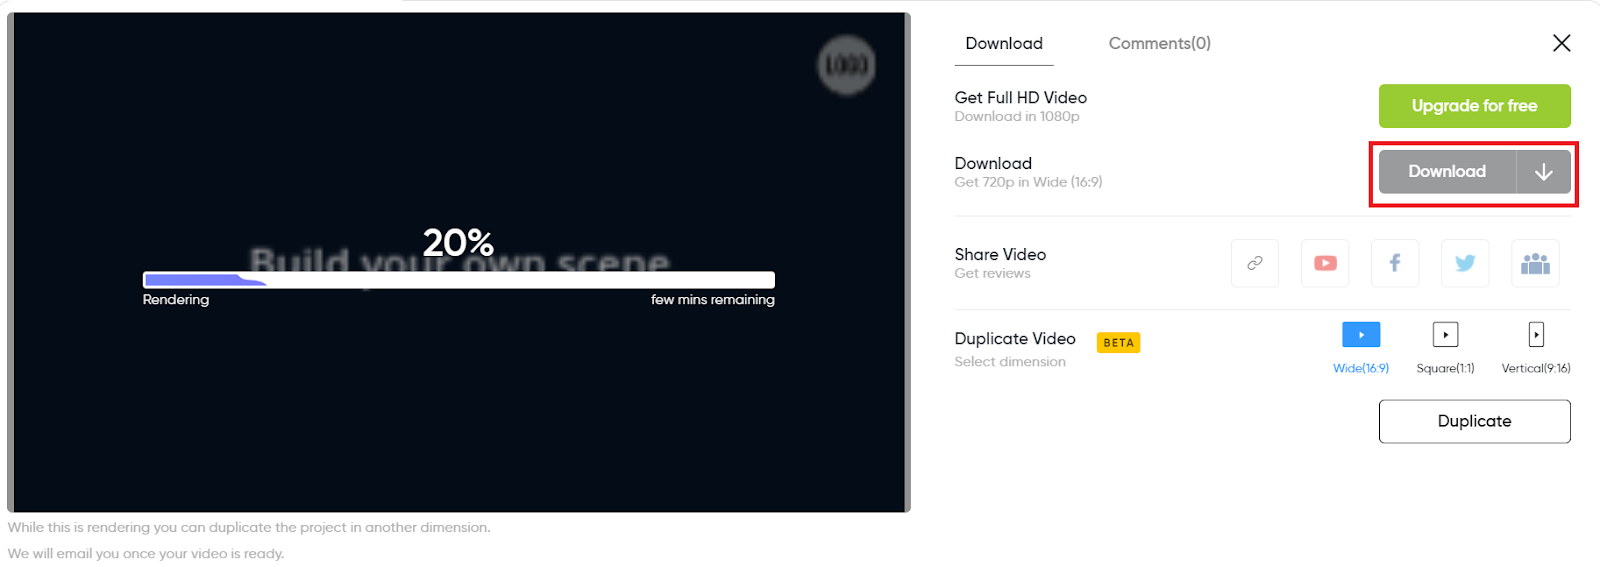
Step 13: Your video will now start to render. Once it’s complete, you can click on the “Download” button to save it to your system or share directly on various social media platforms.
This is a quick, super-easy way to use light leaks in your videos. Let’s check out some other methods to use light leaks.

3. How to make Light Leaks in Photoshop
Do you want to make your photos look super trendy, dreamy, moody, or just beautiful? If yes, you can use light leaks to edit your photos as well. You can do all this in Adobe Photoshop. It is possible to create your own light leaks in Photoshop. But it is much quicker to download light leak overlays and use them instead.
Here’s how you can use light leak overlays in Photoshop:
Step 1: Download your overlay file and save it! Now open the photo you want to edit in Photoshop. Open the folder where you’ve saved the light leak overlay. Drag and drop the overlay file onto the photo.
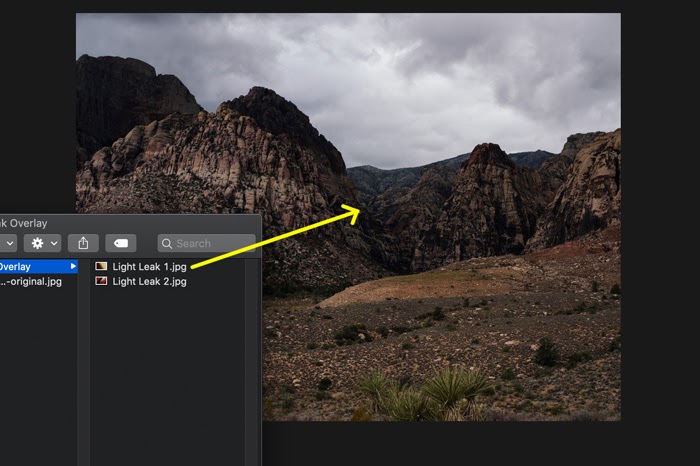
Step 2: It will automatically appear in a new layer. Resize or reposition if needed and double click on the photo to confirm.

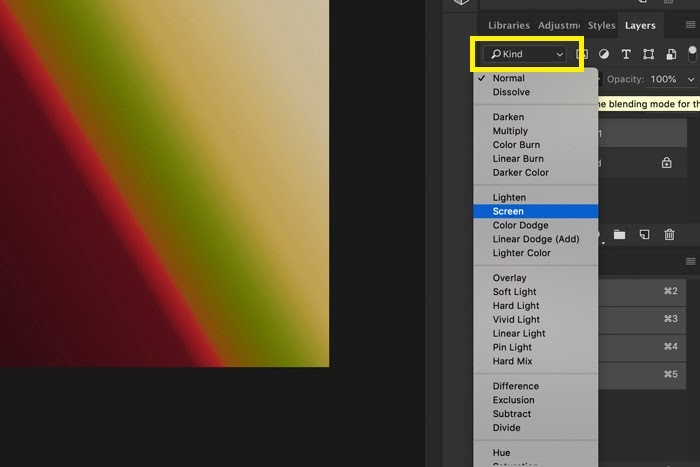
Step 3: Now, under the Layers tab, click on the Blending Mode drop down menu and select “Screen”.
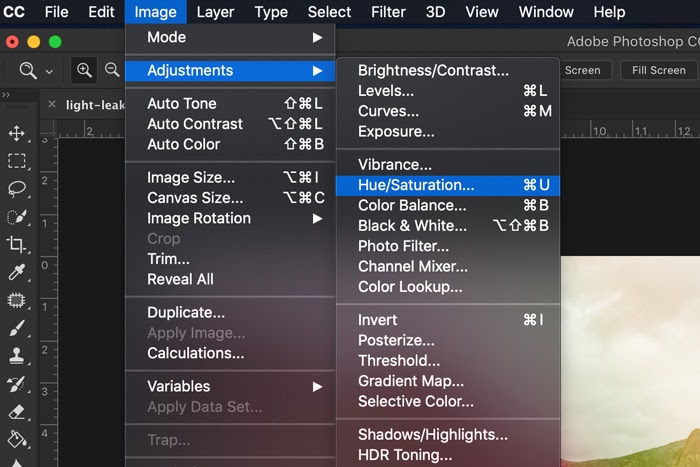
Step 4: Your light leak has been applied. It’s now time to edit the effect to match your photo or to live up to the mood you wish to create. For this. First, select the layer with the light leak overlay (click on it in the layers tab). Now go to Image > Adjustments and select “Hue/Saturation”. A new window will appear.
Step 5: Now drag the “Hue” slider left or right to change the color of the light leak.
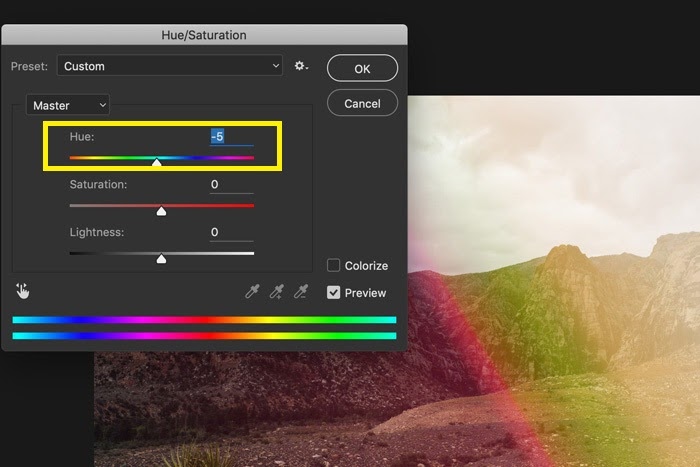
Step 6: Once done, save your edited photo!
Pretty simple right?! Now let’s check out how to use light leak overlays in Premiere Pro to edit videos!
4. How to add Light Leaks in Premiere Pro
You can create your own light leaks in Premiere Pro using various options like the Lighting Effects and other controls. But one of the simplest ways to add light leaks to your video on Premiere Pro is by downloading light leak or film burn overlays and using these. So let’s check out how you can add light leaks to your videos in Premiere Pro.
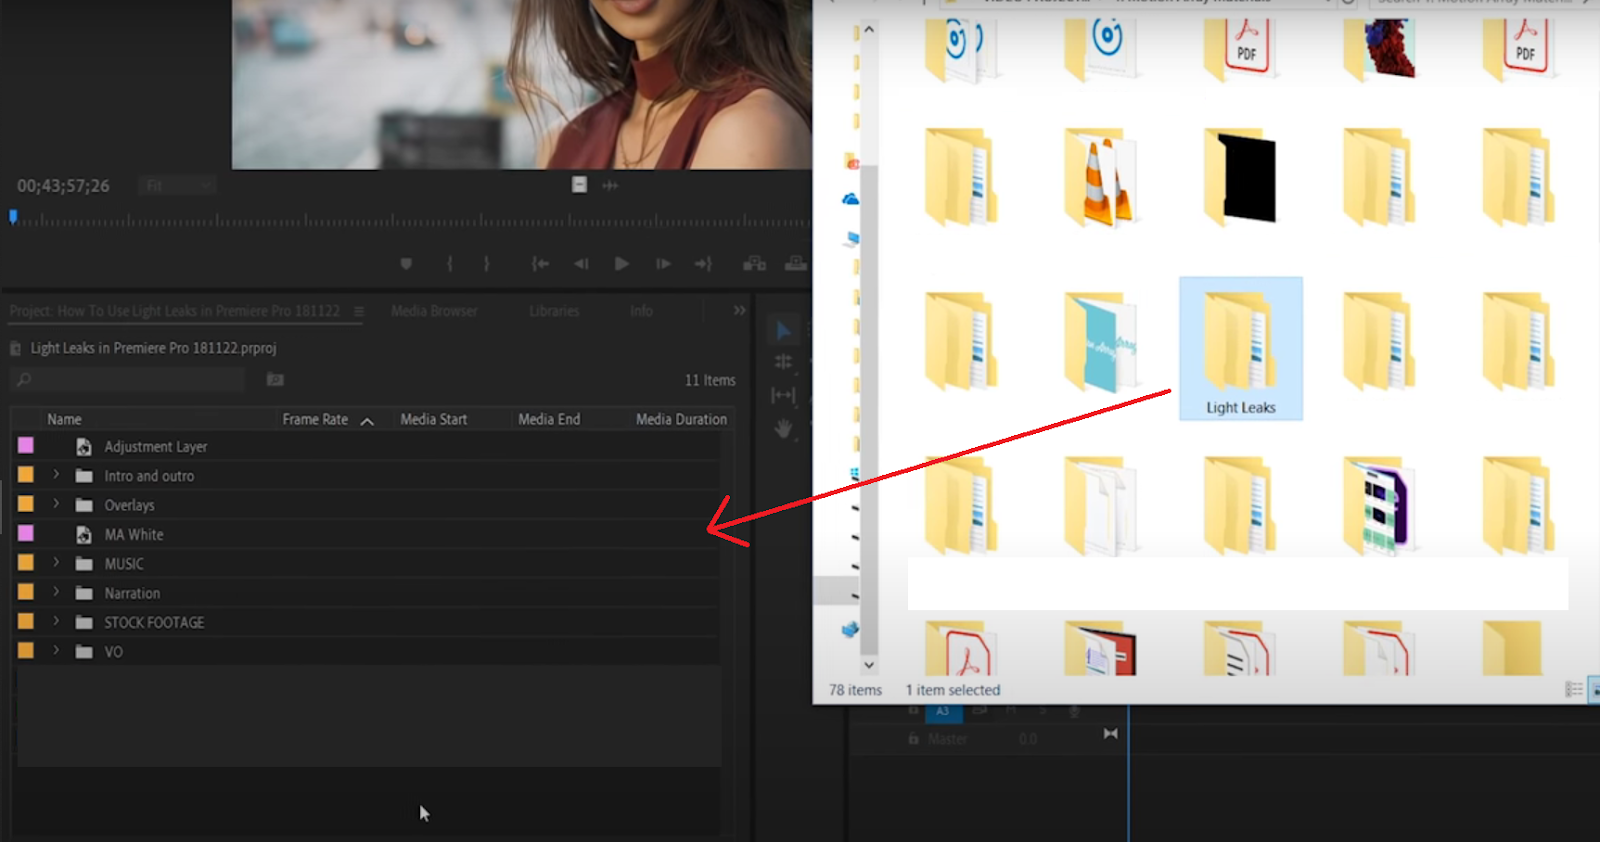
Step 1: Download your overlays and save them in a folder, ready to be imported! Now open up the video you want to edit in Premiere Pro. Next, drag and drop the saved folder with the overlays into your project manager on Premiere Pro.
Step 2: Now double click on the “Light Leaks” folder in your project manager and select the overlay you want to use. Drag and drop the selected overlay on the layer on top of your video in the Timeline.
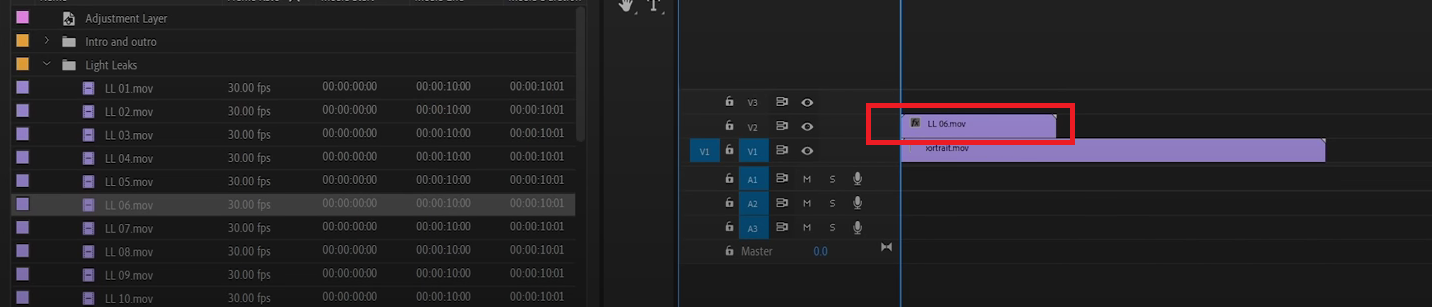
Step 3: You’ll notice that your video will now be hidden behind the light leak overlay. But that’s okay. To bring your video forward, you need to select and highlight your light leak footage first.

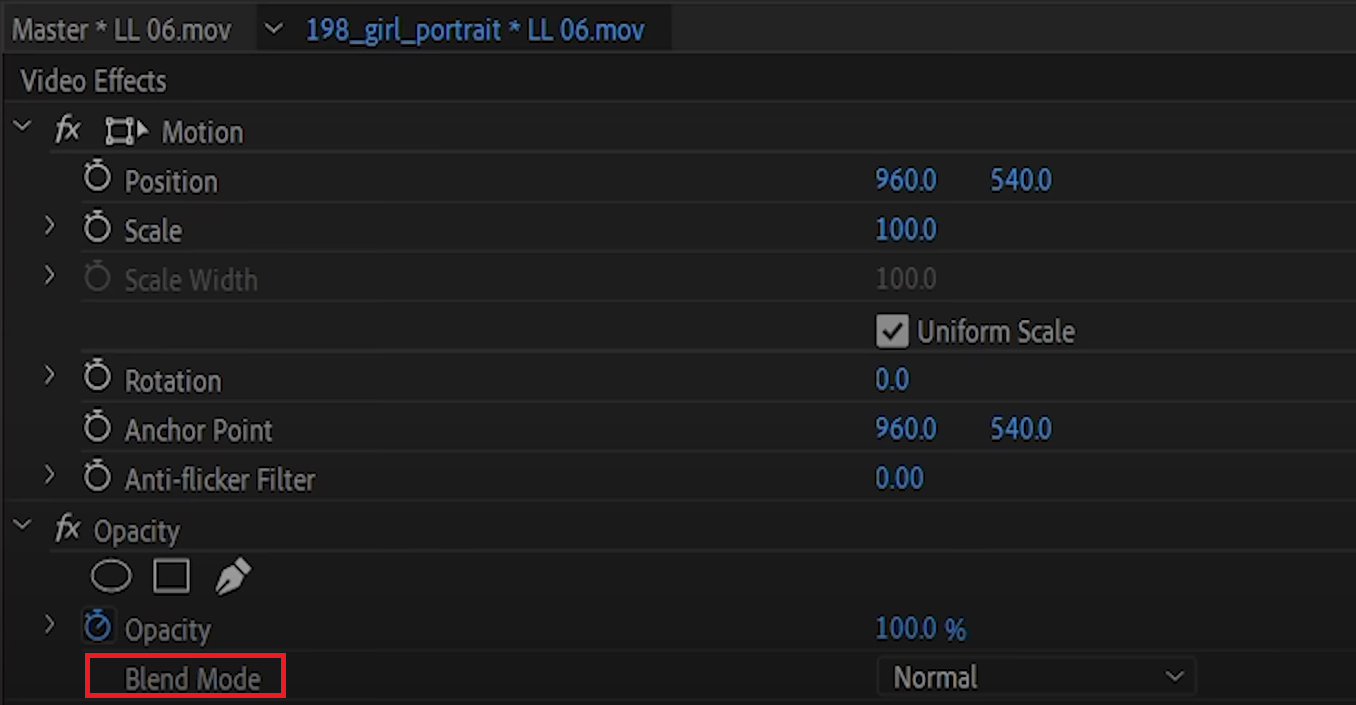
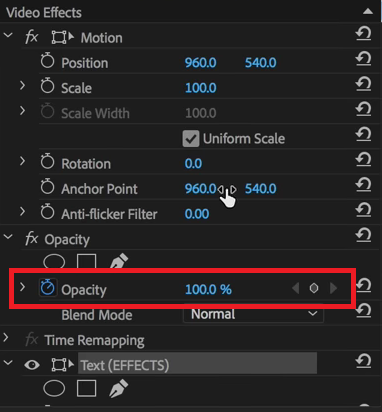
Step 4: Now go to the “Effect Controls” menu on the top left of your screen.
![]()
Step 5: Now go to the “Blend Mode” option.
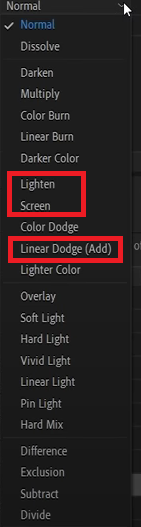
Step 6: You can select 3 different blend modes for your light leak – Screen, Lighten and Linear Dodge (Add). If you want a vintage look and feel to your light leak effect, the option you need to select is “Screen.”
Step 7: You might still feel that your video is too bright or over-exposed. To change this, you simply need to go back to the “Effect Controls” menu again. Make sure that your light leak layer is selected in the timeline first. Now in the Effect Controls menu, go to the “Opacity” dropdown. Click on the “Stopwatch” icon next to the Opacity filter to disable keyframes. Make sure that it’s not blue in colour, but white. Now edit the opacity till you are happy with it.
Step 8: You can also shorten or lengthen your light leak overlay video by selecting it and dragging the red arrow cursor left or right.

Step 9: If your overlay is too short for your video, just create a copy next to the first overlay video in the timeline. You can do this by holding the Alt or Option key and dragging the video clip to the right.

Once done with your video, you can export/ download/ save it.
Using both Photoshop and Premiere Pro require you to have a basic know-how about the softwares. Now, in the next section, let’s check some overlays available online for free.
5. Best resources for downloading free Light Leaks overlays
If you want to edit your videos hassle-free online, using the InVideo editor is really your best bet. You have access to 40+ light leak overlays that you can apply to your videos. But if you’re leaning more towards using a traditional desktop software, here are a few resources where you can download light leak overlays online too!
1. 35 Free Templates For Color Grading Videos By Rocketstock
Want to create beautiful, dreamy, vintage, retro, nostalgic videos? These 35 templates from Rocketstock (by Shutterstock) are free to use and will add depth and character to your videos.
2. Vegasaur’s Free Light Leaks
These 1080p light leaks are more traditional in their look, but they composite extremely well over most footage.
3. 25 Free Light Leaks By Projector Films
These 25 free light leaks include quick previews so you can choose the right clip before you drop it in your timeline. The pack includes light leaks for wipes to flares and burn effects.
4. Free Light Leaks Pack By Creative Dojo
Plexus Test from VinhSon Nguyen on Vimeo.
This pack contains 15, full 1080p HD clips of real light leaks. Pretty old school but you can play around with these!
5. Free Light Leak Videos From Cute Stock Footage
This pack contains unique overlays that can be across different types of footage.
6. Light Leak Love Samples
6.
Light Leak Love is giving out free samples from three of their different light leak packages. You can test the looks of their Light Organic, Crystal Collection, and Star Trek bundles.
7. 52 Free Light Leaks By Pixabay
This is a pack of 52 HD lens flares and light leaks that can be used for free.
8. 36 Free rainbow Light Leaks
If you need some glitchy, colourful light leaks, these 36 overlays are just for you.
As you can see, there’s various light leaks available online. These effects will help you create memorable and stunning videos. So these are the methods you can use to add light leaks to your videos!
If you found this useful, do share this with your friends and colleagues. Also, check out this tutorial on how you can easily add video inside text to create cinematic intros and promos that will help your work stand out.
For more quick tips and hacks on editing and creating videos, subscribe to InVideo’s YouTube Channel. Finally, if you’re looking to create thumb-stopping videos in minutes (even if you’re not a PRO)- sign-up for a free account on InVideo.io today.
This post was written by Upasna and edited by Abhilash from Team InVideo