
Gone are the days when you needed a lot of fancy equipment to make professional-looking videos. Nowadays you can shoot and edit compelling videos right on your smartphone. But if you’re filming yourself, that still means that you need to take care of a number of integral details such as framing, composition, film settings, and audio quality in addition to being in front of the camera. Seems like a lot of work, right?
That is why in this article we’re going to show you exactly how to film yourself with a phone with seven super useful tips. And if you stick around till the end, we also have a bonus section that shows you how to easily edit your videos on your phone using our InVideo mobile app.
Here’s what we will cover:
1. Use the right camera on your phone and monitor yourself
2. Use a gimbal/tripod
3. Get your video composition right
4. Use manual mode on your phone's camera
5. Make sure you're properly lighting your videos
6. Capture high-quality audio
7. Record enough B-roll
Let's get started!

1. Use the right camera on your phone and monitor yourself
A typical smartphone has two cameras: the front-facing camera or the selfie camera. When it comes to filming yourself with a phone, you can use either. The selfie camera has the one benefit of allowing you to see yourself while you record but the back-facing camera is always going to be of much higher quality. So as a general rule, when thinking of how to film yourself with a phone, you should use the back camera.
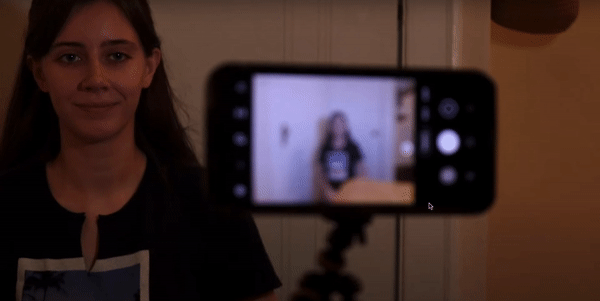
The challenge then is being able to see what you're filming. This is actually really important because you want to be able to monitor your video to make sure it's in focus and to make sure it's recording. There are a few different ways to get around this:
a) The first and simplest way is to use a mirror. This is old school, but it works perfectly well. It's also a great option because chances are you already have a mirror at home. So all you have to do is position the mirror behind your phone. You need to angle it upwards a little bit or slant it sideways a little bit. And that will allow you to see the reflection of your phone's screen.

b) The next option would be to mirror your phone screen to your laptop or your computer and then start to film yourself. So this is going to be different depending on the type of phone you have and the type of computer you have:
- If you have both an iPhone and a Mac computer: you'll be able to connect them using the lightning cable. And then you'll be able to open QuickTime on your computer, go to record a new movie, and then select your iPhone. So basically you're turning your phone into a webcam, so that will allow you to see what your phone screen is recording.
- If you have a Windows, computer, and an Android phone, there's an app called Connect that can allow you to view your phone’s screen if your phone and laptop are both signed into the same Wi-Fi network.
- If you have a tablet or an iPad or a Chromebook or some other type of mobile device, then you can download a screen-sharing app like Mirroring360. And if you download the same app to both your device and your phone, then you would be able to screencast between the two.
- And if you're not able to use any of those methods because of the type of equipment you have, you can download a software called Reflector. This is a screen-sharing software that will work no matter what kind of phone or computer you have, but it is going to cost you a little bit of money.
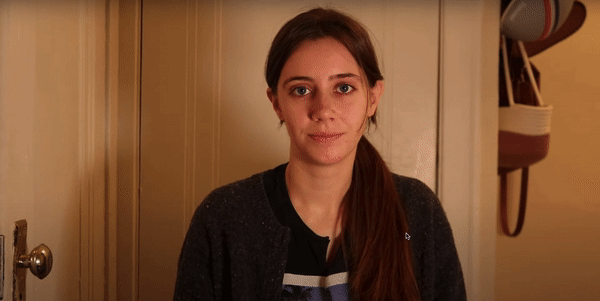
The important thing is to monitor your video as you're recording, just to make sure the video's going and everything you need to be in focus is in focus. But also when it comes to understanding how to film yourself with a phone, you want to make sure that you're always looking into the camera while you're talking. It's very noticeable and pretty distracting if you're looking slightly away from the camera to monitor yourself while you're talking. So to ensure this doesn’t happen, finish the sentence, then check on your monitor and then look back into the camera to start talking again.

Looking into the Camera v/s Looking Slightly Away from the Camera
2. Use a gimbal/tripod
If you’re thinking how to film yourself with a phone without having it fall over, then your next tip is to use a tripod for still shots and a gimbal for shots that involve movement instead of shooting handheld or keeping your phone on random surfaces.
If you're just filming yourself doing talking videos, you might not need to worry about getting a gimbal because it will just be still footage. But if you're going to be filming B-roll or vlogs that have a moving camera, you definitely want to look into getting a gimbal to stabilize your footage.

3. Get your video composition right
Composing your shot is key to enhancing the visual appeal of your video. The first thing you want to think about is the orientation of your shot. Are you going to be filming in portrait or landscape? If your video is going to be going on YouTube, you're going to want to film it horizontally or in landscape mode. And if it's going on TikTok, Instagram, or YouTube Shorts, you're going to want to film it vertically or portrait. If you're not sure where it's going to go, what you can do is film it horizontally, but leave enough space to crop it in later, if you need to.
You also need to think about headspace when you're composing a shot. You should always leave a little bit of space between the top of your head and the frame, and make sure the top of your head is never being cut off at all. It's actually a pretty easy mistake to make, but you should also make sure there's not too much space. To do this, you can either eyeball the entire thing or you can switch on the 3x3 grids on your phone to compose your shot according to the rule of thirds. With the grid lines you’ll be able to make out the placement of your subject in the frame easily.

If you’re shooting a talking head video, you want to keep your phone at level with your face. This tends to give the most appealing shots instead of having it filming from above your eye-level or below your eye-level. This is where your tripod comes in handy because you can easily adjust the height of the tripod legs to get your phone on a level that you want for your self-shot video.
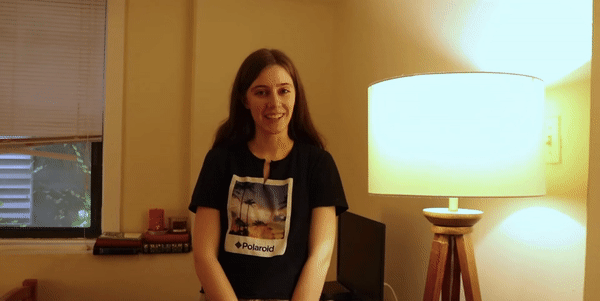
The next step of filming yourself with a phone is to set up your background. For a video where you're just talking to the camera, it's always a good idea to put some visual intrigue in the background. Steer clear of blank walls but also don't want to have too much clutter because that ends up looking distracting. It is best to have a fairly minimal background with a few items that either add a pop of color, act as the back light, or are related to your narrative in some way.

In this frame for instance, the computer screen and the lap are two fairly large objects in the background – these add depth to the frame and also act as back lights. They are also relevant to what Teresa is talking about in the video and they also showcase the brand – making it an ideal background setup for a self-shot video.
4. Use manual mode on your phone's camera
The fourth tip is to use manual camera settings. So every phone comes with a built-in camera app, but that app doesn't usually give you a lot of control over your focus, your shutter speed, your aperture, your ISO, and all the things that you could control on a professional camera. So instead of using your phone’s native camera app, you can download a third party app like Open Camera to control all these different features and have more control over the filming process.
Here are the standard video settings you want to use once you have your camera in manual mode:
a. Set your frame rate to 24 frames per second since this is the most commonly used frame in filmmaking that allows you to create smooth videos.
b. Set your shutter speed to 1/50th of a second to ensure it’s neither too fast or too slow and also lets enough light in without causing a flickr in the frame. You usually want your shutter speed to be double the frame rate you’re recording in.
c. Set your ISO to as low as possible – so that you get enough light in your shot without having grains in your footage. The higher your ISO, the granier your image is going to be.
d. Most smartphones nowadays have good autofocus capabilities but you might have trouble in low light situations. So for times like this it’s best to have an external light in order to ensure your camera sensor is getting enough light for it to be able to focus optimally. Alternatively, you can also opt for manually selecting the focus and lock it so that the frame doesn’t go in and out of focus.
Note: To set your focus, you need to have some object in the spot where you're going to sit (use a pillow or hat). And then just tap the screen to focus on that, and then lock that focus in.

5. Make sure you're properly lighting your videos
The next tip is to make sure you're properly lighting your videos. Most smartphones today come with very powerful high-quality cameras. But if you don't have good lighting in your videos, even with those high-quality cameras, you're not going to get those professional-looking shots. So let’s see how to film yourself with a phone camera while ensuring proper lighting.

The simplest method for lighting is to use natural light. So if you're going to shoot outdoors, you can shoot at golden hour, which is the hour before sunset or right after sunrise. That's when the sun provides the most ideal lighting for videos. It's a nice, soft light, as opposed to the harsh sunlight that you might get during noon.

If you are filming yourself closer to noon, you should be filming at home, and you can just set up in front of a window indoors. This is a great option because it's free. However, there are a lot of downsides to using natural light. It's unreliable. It changes all the time and you might not have a ton of it available to you, especially if you live in an apartment with very few windows.
We would recommend picking up a few LED video lights to create a three-point lighting setup for the best results.
(1) Key light
Have a key light, which is your brightest and main source of light. And you should position that just a little bit to the side of your face, let it hit your face on a bit of an angle – about 45°.

(2) Fill light
Have a fill light on the other side, which fills in some of the shadows on your face. This is less bright than the key light and creates softness in the shadows so that they don’t look unflattering. Again you want to keep this at about a 45° angle on the other side of the key light.

(3) Backlight
Have a backlight or a hair light behind you, which kind of makes you pop from the background. This is used to separate you from the background and give the subject definition. Again it’s ideal to have this not exactly behind you but at an angle.
6. Capture high-quality audio
The next tip is to make sure you're capturing high-quality audio. People will still tolerate average video quality, but they will click off very quickly if your audio is not good.
While some of the latest phones do have decent in-built microphones, as a rule of thumb it is better to not rely on those and instead use separate microphones.
You could look into a couple of different options depending on your requirement. In most cases a good lavalier mic, such as the Rode lav mic, is the way to go since it also gives you room for movement and to film sitting further away from your phone than say a shotgun mic (Rode video micro pro) which will need to be fixed on your phone.
Alternatively, you can also use separate recording devices such as the Zoom h1n recorder but in this case you will have to sync your audio and video while editing. That, however, is not very difficult to do. Ensure that when you’re recording, you begin by clapping your hands – this will create a spike in the audio that will be easily visible on the waveform when you get it to the editor.
Make sure your mic is placed at an appropriate distance from you so that it captures your voice clearly and doesn’t capture a lot of noise. Also ensure that if you’re using a lavalier microphone that you place it in a way that it doesn’t catch the rustling from your clothes or hair because that is not something you will be able to clean out during post production.
7. Record enough B-roll
That brings us to the last step on this journey of understanding how to film yourself with a phone, which is to make sure you record enough B-roll – which refers to the supporting footage and clips that are added to your video. Whether you're filming a tutorial or a vlog, having B roll is a great way to do show what you’re talking about. It also makes your video a lot more interesting to watch by breaking up the monotony of filming yourself and having just one single shot of a talking head.
So when it comes to a tutorial, you can make a list of just anything that would be easier to understand if there's a visual to go along with the explanation and then film all of that B-roll in advance. When it comes to a vlog, you can shoot anything that's interesting to you and adds to your narrative to make it more visually interesting. Here’s an example of what B-roll can look like in your video.

Those were our top seven tips on how to film yourself with a phone and they should help you confidently record high-quality videos of yourself using your smartphone.
If you find these tips for filming yourself helpful, you’d definitely want to check out our playlist on filmmaking fundamentals where we cover a lot of these concepts to help you become a better video creator. And now let’s move on to our bonus section, where we show you how you can edit videos directly on your phone!

Bonus Section: How to edit your phone videos like a PRO on Filmr
If you’re a creator or someone who works on the move, having an app that you can use to quickly churn out high-quality video content is a boon. This is where Filmr comes in. Available for both iOS and Android, Filmr is ideal for both beginners and advanced users alike. With its collection of hundreds of filters and effects, and a library of over 20 million royalty-free songs, it makes editing on the move super simple.
Let’s see how you can edit videos on your phone using Filmr!
Step 1: Download and sign up for a new account on the Filmr app. For this tutorial, I am using my Filmr account on an iPhone, but the same steps can also be followed on the Android app. You can also sign in using the same credentials as your InVideo account and if you have a paid subscription with InVideo, you automatically get access to Filmr PRO that gives you access to a host of additional features, filters, and effects.

Step 2: Once you’ve signed in, you can choose to either upload footage from your camera roll or shoot a video using the Filmr app. For this tutorial, we’ll be uploading a video from the gallery. Simply click on Camera Roll and scroll to choose the video you want to edit.

Later, if you want to add more clips to your video, you can click on the video icon at the bottom to do so.

Step 3: Once you import all of your clips into the Filmr app, you will see that they are placed on a vertical timeline – which is built for mobile phones. You can drag and reorder your clips to get them in the order you want. Simply select the clip you want to move and long press on the 3 dots on the left side to drag it above or below the other clips.

Step 4: Click on Format and select the orientation and aspect ratio depending on the platform you want to publish on. Once you choose your aspect ratio, your main edit canvas will change to that format orientation.

If you have any clips that are not of the same aspect ratio as your canvas, they will have black bars added to them. To optimize them for the format of your choice, you can use the crop function to zoom into each clip according to your needed aspect ratio. You can even leave the black bars if you want to include the entire clip without cropping it in any way.

Step 5: Once the basics are sorted, it’s time to trim your clips to select only the parts you want in the video. For this, simply drag the end points of the videos to the points where you want the video to begin and end.

Step 6: Now that all of our clips are in the right order and duration, let’s fine-tune these clips and lock our visuals. To access the other editing features like Delete, Effects, Filters, Speed, Split, Rotate, Reverse, Duplicate, etc, click on the 3 dots next to each clip and you will see a menu open up. You can select the feature you like to make the adjustments.

Step 7: Next, you can add transitions between your clips to make your edit flow more smoothly. Simply click on the Add transition tab under your video clip and choose the transition you want from the pop-up menu. You can also edit the duration of the transitions.
While there are several transitions on the free plan, you can access the full library by signing up for Filmr PRO.

Step 8: Now that our clips are sorted, let’s look at how we can add audio to our video. If you want to add a voiceover, you can simply record that on the Filmr app. Click on the Voice option at the top of the screen, then hit record and start talking!

Step 9: To add background music, click on the Music option at the top of the screen. You can select a file downloaded on your phone or you can select music from the stock library. To adjust the duration of the music, just drag the end points to where you want the track to begin and end.

If you are planning on using these videos professionally for your brand or business or on YouTube, then it’s recommended to either only use licensed audio, or buy a subscription to a royalty-free audio library like Epidemic music — you will find an option to do that from within the app itself.

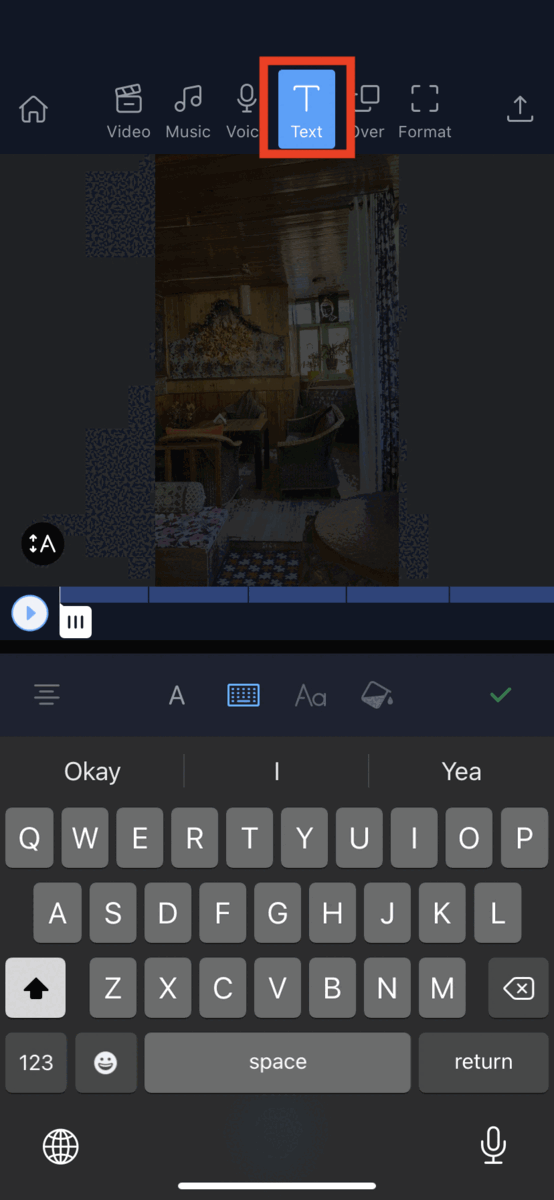
Step 10: Add text to your videos to spruce it up. Go over to the Text option on the top of the screen and after clicking on it, simply type out the text you want to use in your video. You can then play around with different fonts, colours and also adjust the duration of the text.
Step 11: To take things even further, you can add stickers to your videos by clicking on the Over option on the top of the screen. Then choose Stickers, and at the bottom of the screen. If you’re a PRO user, you can also add another video on top of your video with the Video in Video option.

Step 12: Once you’re done making all the changes, preview your video and if you’re satisfied, click on the Share button at the top right corner to export your video. You can save your video locally and you can even save it as a GIF! Filmr also lets you decide your resolution and FPS. Here we will select 1080p, but you can select any resolution, even 4k!
You can also directly publish your video to any of your social media platforms like IGTV, Reels, Stories, Facebook, Twitter, etc, too. However, to upload directly on other platforms, you need a PRO subscription. If you have a free account then you can save the video to your phone first and then upload it to your social media platforms.
Wrapping up
As you saw, it is super simple to film yourself and edit stunning videos on your phone using our tips and the Filmr app! If you want to dig deeper into making good videos, check out our article on How to Make a Video. And if you want to level up beyond the basic editing you just learnt, check out our video editing tips and learn how to add cool effects to your videos to make them more engaging.
And if you prefer learning via videos, you definitely should check out our YouTube channel where we share daily video creation tips and tricks, the latest video trends and ideas, and help you make more money as a video creator.
This post was written by Yashvi and edited by Adete from Team InVideo