
Key Takeaways
-
AI generative fill lets you add, modify, or replace parts of an image using simple text prompts.
-
The AI generates new pixels that blend naturally with your original shot.
-
The best results come from using the right model for the task. Using the wrong tool can slow down your whole workflow.
-
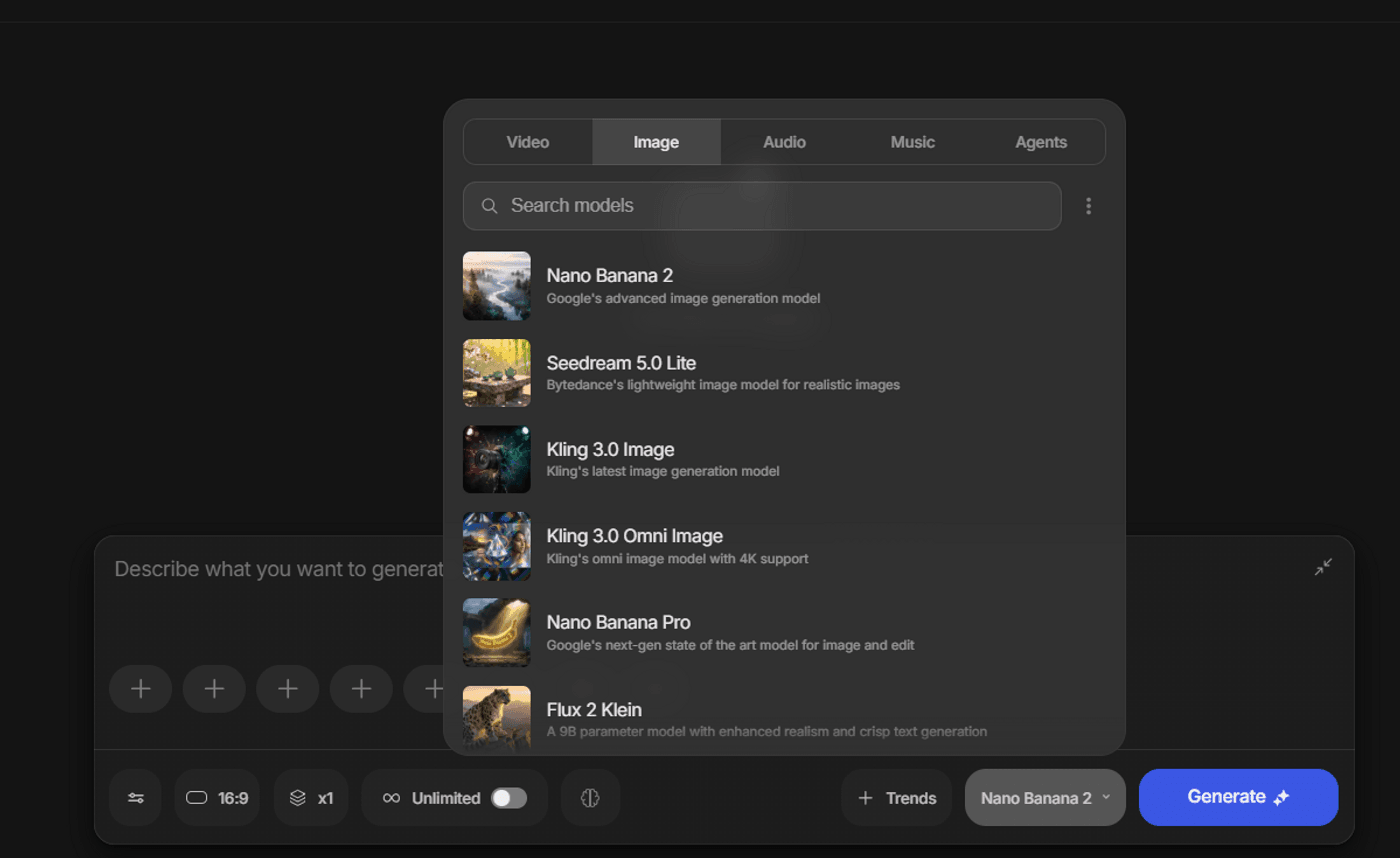
In invideo, you can use Nano Banana 2 for cleanup, Seedream 5 for extension, Kling 3.0 for format changes, and Flux 2 Klien for final polish, or use Agent One that does all these multi-step tasks in one conversation.
A great image can stop working one fine day for the smallest of reasons. Sometimes it's cropped too tight. A stray object pulls focus away from your subject. Or maybe your favorite square shot falls apart the second you need it for a wide banner or landing page.
That's where AI generative fill helps. Instead of settling for a flawed image or spending time on tedious fixes, you can clean up, extend, and reshape the same visual, or add brand-new elements in minutes.
In invideo, that becomes even more practical because you're not stuck with one model for every edit. You can improve the same image for different needs and turn it into a high-quality asset. Let's look at how it works and how to use it well.
What Is AI Generative Fill and How Does It Work?
AI generative fill uses context-aware technology to add, remove, replace, or recreate images with AI. It scans existing textures, lighting, and perspective, and understands your instructions for inserting new elements into a selected space. Instead of covering a gap, AI synthesizes new pixels that blend naturally with your original shot.
You can generally use this for specific tasks:
-
Fix: Erasing distractions inside the frame, like a photobomber or a messy background detail.
-
Extend: Widening a shot or restoring a missing edge beyond the image's original borders.
-
Expand: Resizing a canvas to fit a new size or aspect ratio while using an AI image fill to keep the composition balanced.
-
Add: Inserting brand-new elements like a prop, a person, or a specific background feature into an existing scene.
-
Refine: Polishing lighting and textures to give any image a high-resolution, professional look.
The challenge is that most AI tools for image editing rely on a single model. One model may handle landscapes well but struggle with realistic product textures or clean object removal. That usually means bouncing between tools to get one image over the line.
Invideo solves this by giving you access to specialized AI image models within a single workflow, so your AI filler image looks intentional, not artificial. You can pick the right brain for your specific edit, leading to faster turnarounds and consistent results.
How to Use AI Generative Fill to Add, Extend, Expand, or Fix Images in Invideo
Best generative fill AI edits rely on a high-quality foundation. You can upload your own reference shot or generate a fresh one directly in invideo.
If you're starting from scratch, use Nano Banana 2. The better your starting point, the easier it is to extend, expand, add details, or clean up later. Use this prompt framework to give the AI clear creative boundaries and get the best results on your first try.
Nano Banana 2 Master Prompt Formula
Create a [asset type] about [subject] aimed at [audience], in a [style/mood] style. Show [scene/composition] with [camera/angle]. Aspect ratio [AR], high resolution.
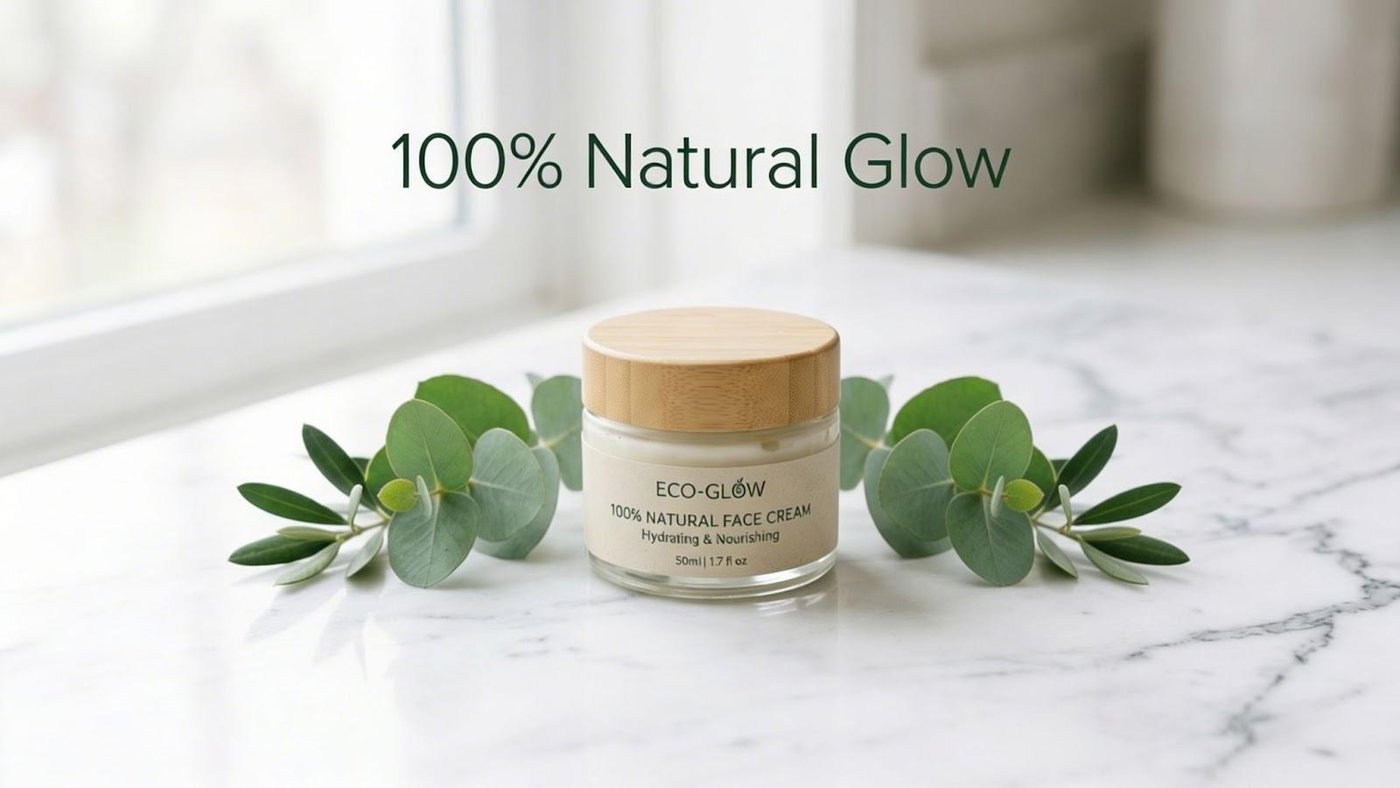
For instance, suppose you're building a skincare campaign. You may need one hero visual that works across Instagram, YouTube, and your landing page. Instead of creating separate assets for each one, fill the master formula to create a single strong base image.
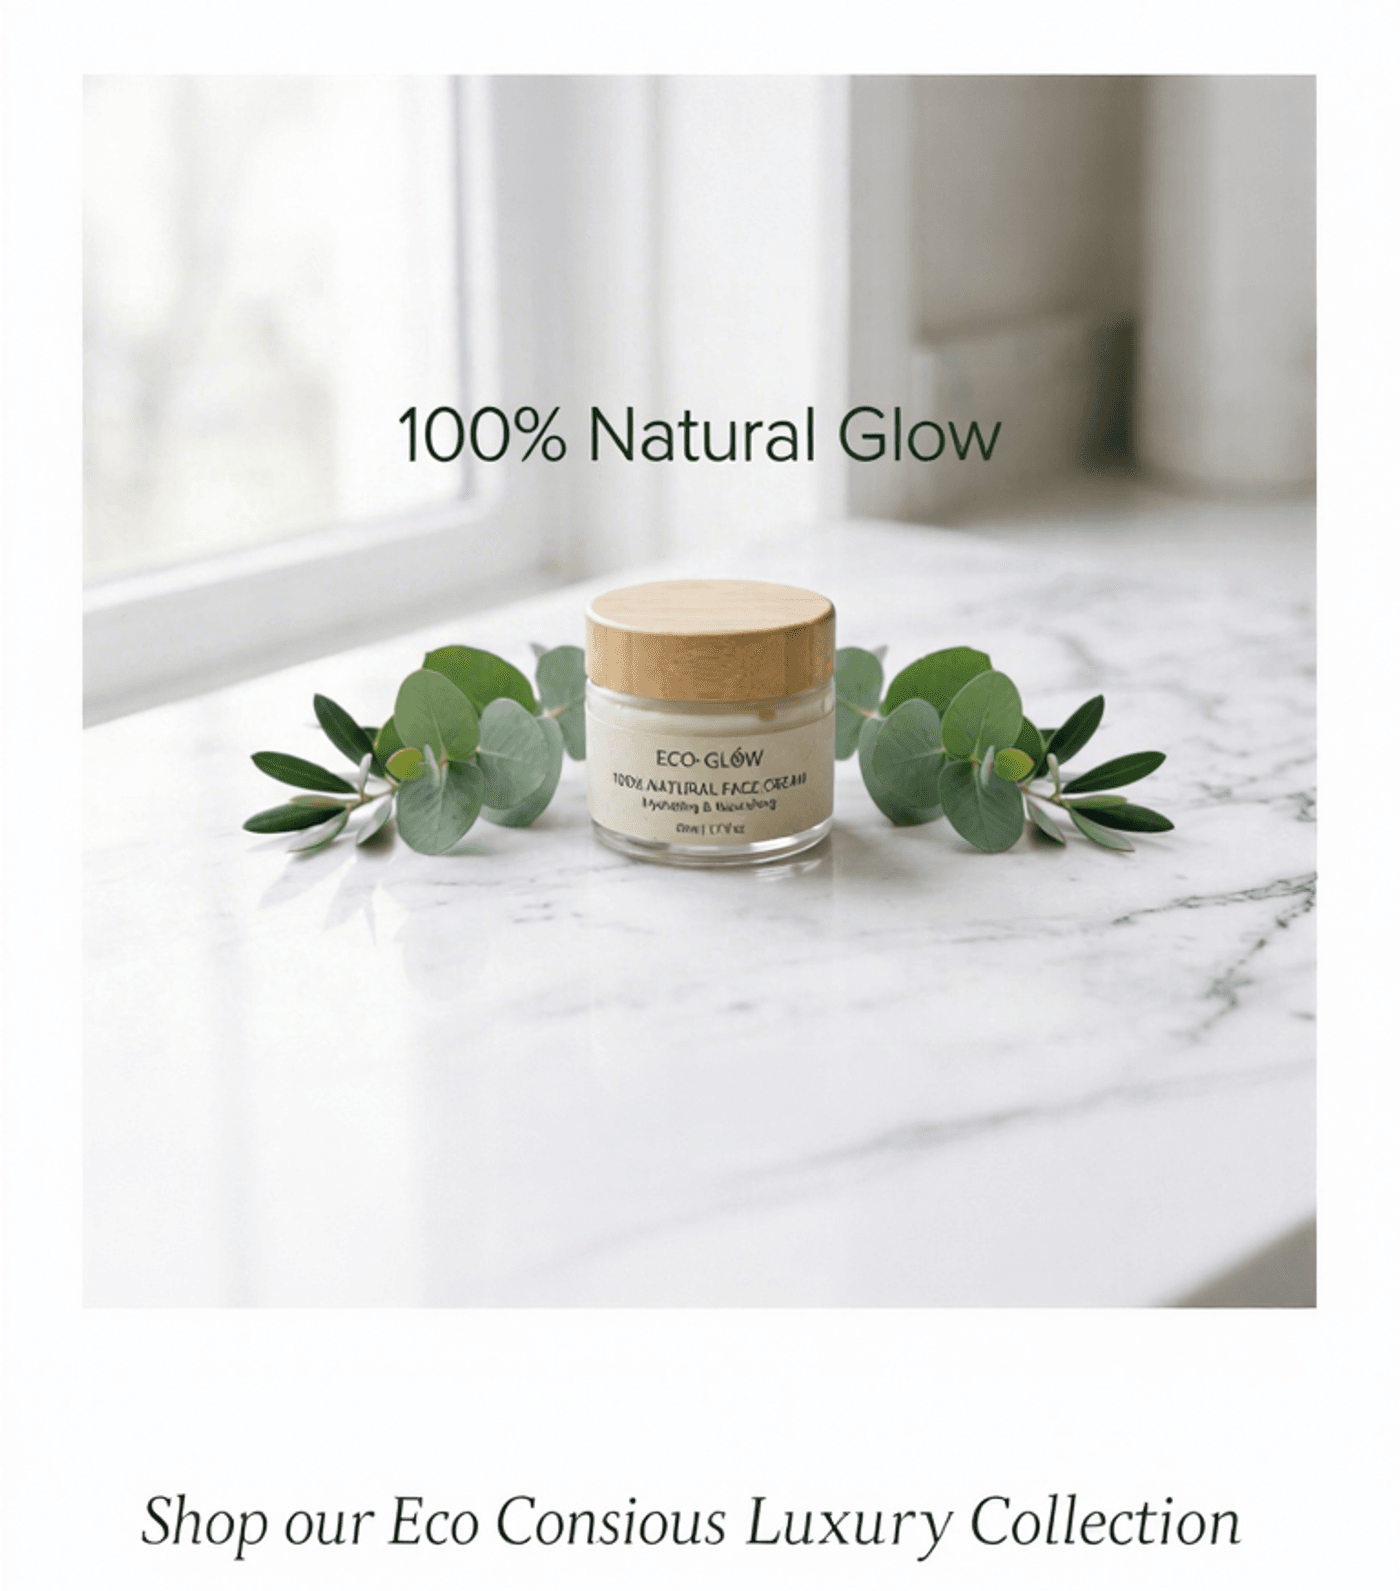
Create a product photo for eco-friendly skincare, aimed at social media audiences, in a clean, minimalist style. Show a glass jar of cream on a marble counter, with green leaves, from a front camera angle. Add on-image text "100% Natural Glow" in English. Aspect ratio 1:1, high resolution.
Now that you have your base image ready, use specific models for surgical edits. Apply them individually for a quick fix or stack them into a complete production pipeline.
| Phase | Model | Primary Function | Why It Fits |
|---|---|---|---|
| Fix | Nano Banana 2 | Object Removal | Handles fast object removal and texture cleanup |
| Extend | Seedream 5 | Outpainting | Maintains correct perspective and vanishing points |
| Expand | Kling 3.0 | Format Adaptation | Preserves subject proportions across new aspect ratios |
| Add | Nano Banana 2 | Creative Insertion | High-fidelity for adding brand-new elements |
| Refine | Flux 2 Klien | Final Polish | Enhances lighting, texture, and realism |
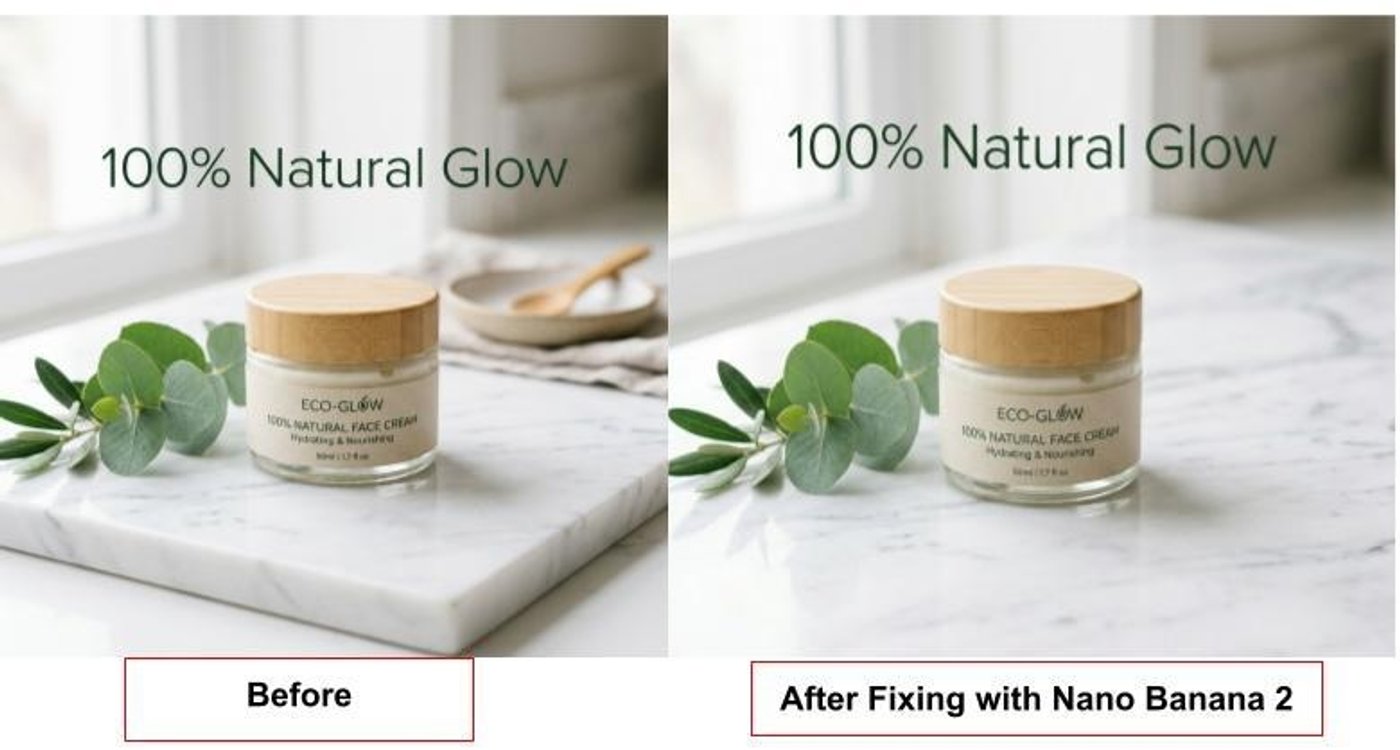
1. Fix Distractions or Unwanted Elements with Nano Banana 2
Your first pass should always be subtractive. Use Nano Banana 2 to clean up visual clutter, stray props, or awkward reflections before you grow the canvas. This model handles the surgical work without breaking the background's logic.
In your base image, the ceramic plate and wooden spoon distract from the minimalist, eco-friendly vibe. By using the AI replace part of the image feature, you can clear the mess and keep your jar as the anchor of the shot.
2. Extend the Background with Seedream 5
Sometimes you have a perfect shot, but the framing feels too cramped. When you need to add "room to breathe" without stretching your subject, use Seedream.
This model specializes in image outpainting. It analyzes the vanishing points and lighting of your original photo to continue the environment. Upload your cleaned-up version (or the base image) and use a specific prompt to widen the canvas.
The result feels like a wider shot you planned from the start, with enough room for copy, buttons, or campaign text.
Pro Tip: Use an extension to create intentional negative space. This extra room holds headlines and CTA buttons, so your copy never crowds the subject.
Look how you can create completely different ads from a single source image by adapting your AI image fill instructions to your latest marketing goal.
-
Prompt 1: Add elegant white text 'Eco-Conscious Luxury' in a clean serif font to the negative space. Add 'Sustainably Sourced' below it. Keep the product centered and leave the headline unobstructed.
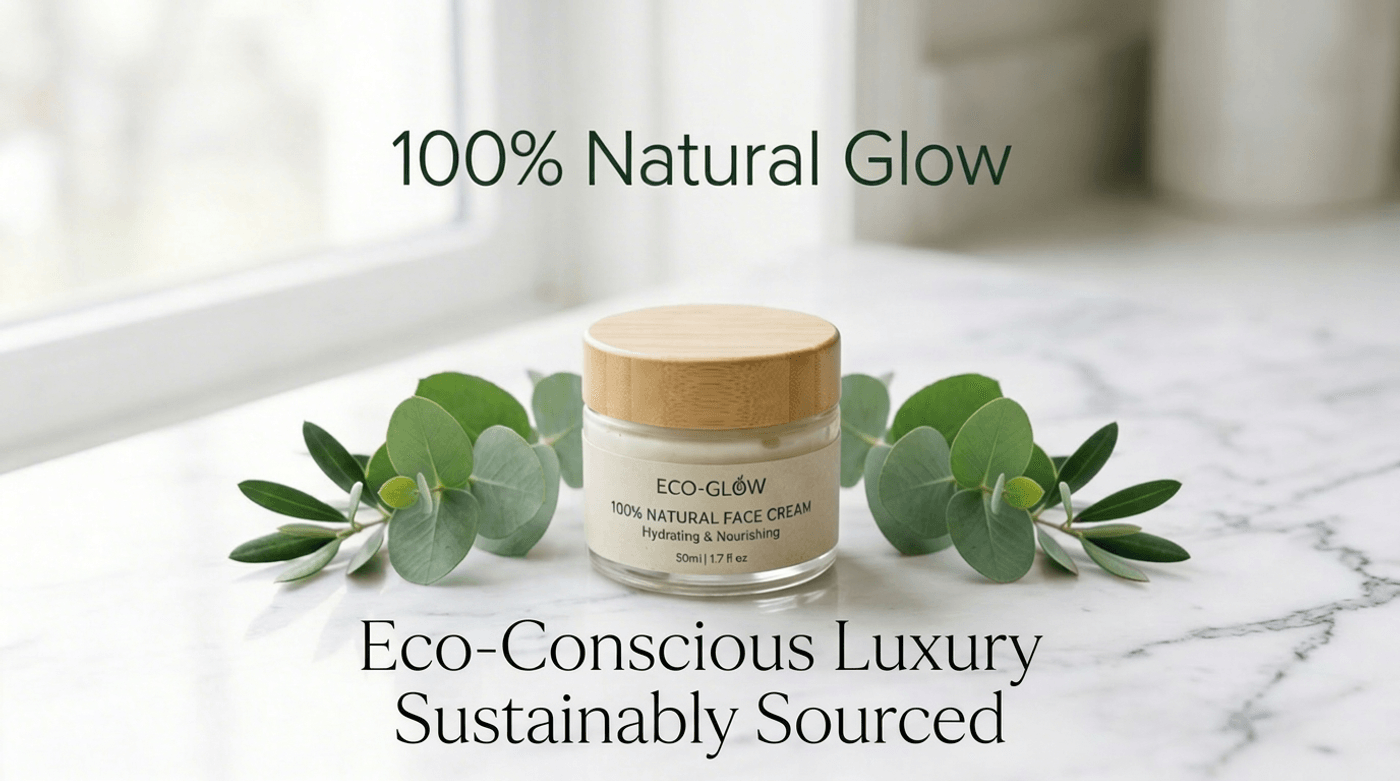
-
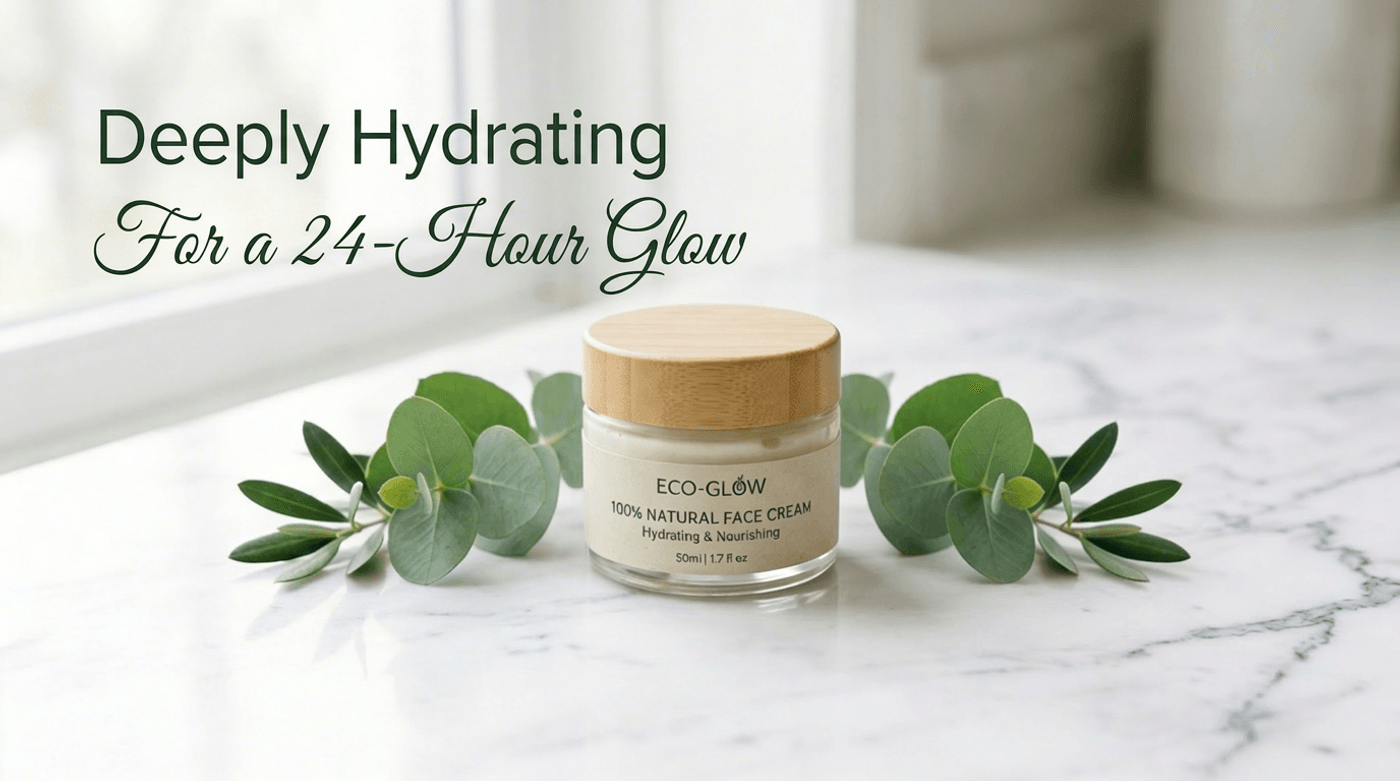
Prompt 2: Replace the top text with 'Deeply Hydrating' on the left. Add 'For a 24-Hour Glow' in an elegant script below it.
3. Expand the Frame for New Formats with Kling 3.0 Image
You have stunning square product photos, but the campaign just pivoted to vertical TikTok ads or Instagram Stories. Standard cropping cuts off your subject, and stretching ruins the proportions. You need a visual that feels native to a mobile screen.
Kling 3.0 specializes in format adaptation. It identifies the "hero" and builds new pixels above and below it. Instead of just adding space, this model understands the vertical hierarchy of a scene. It adds the necessary "headroom" and "foreground" to fill a 9:16 frame while keeping your product crisp and undistorted.
Expansion helps you avoid awkward crops, blurry filler bars, and the cheap look that comes from forcing one image into every format.
4. Add Brand-New Elements with Nano Banana 2
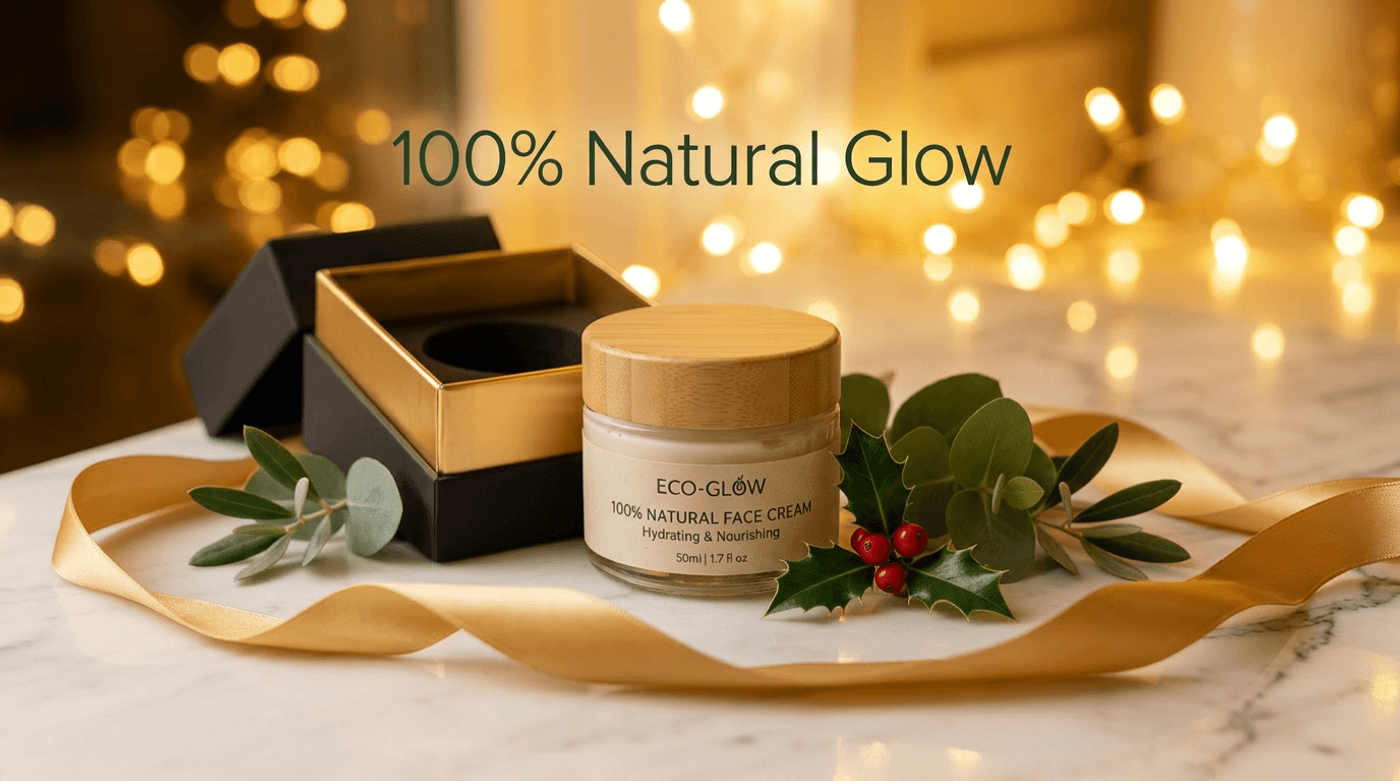
Do you have a winning hero visual that needs a rapid refresh for a holiday bundle, limited drop, or flash sale?
Instead of starting from scratch, use Nano Banana 2 to add campaign-specific props and environmental details directly into your existing composition. This allows you to shift the mood of a visual while keeping the core subject and brand style consistent.
For example, you can turn your skincare product image into a holiday-ready asset by layering festive details rather than rebuilding the entire scene.
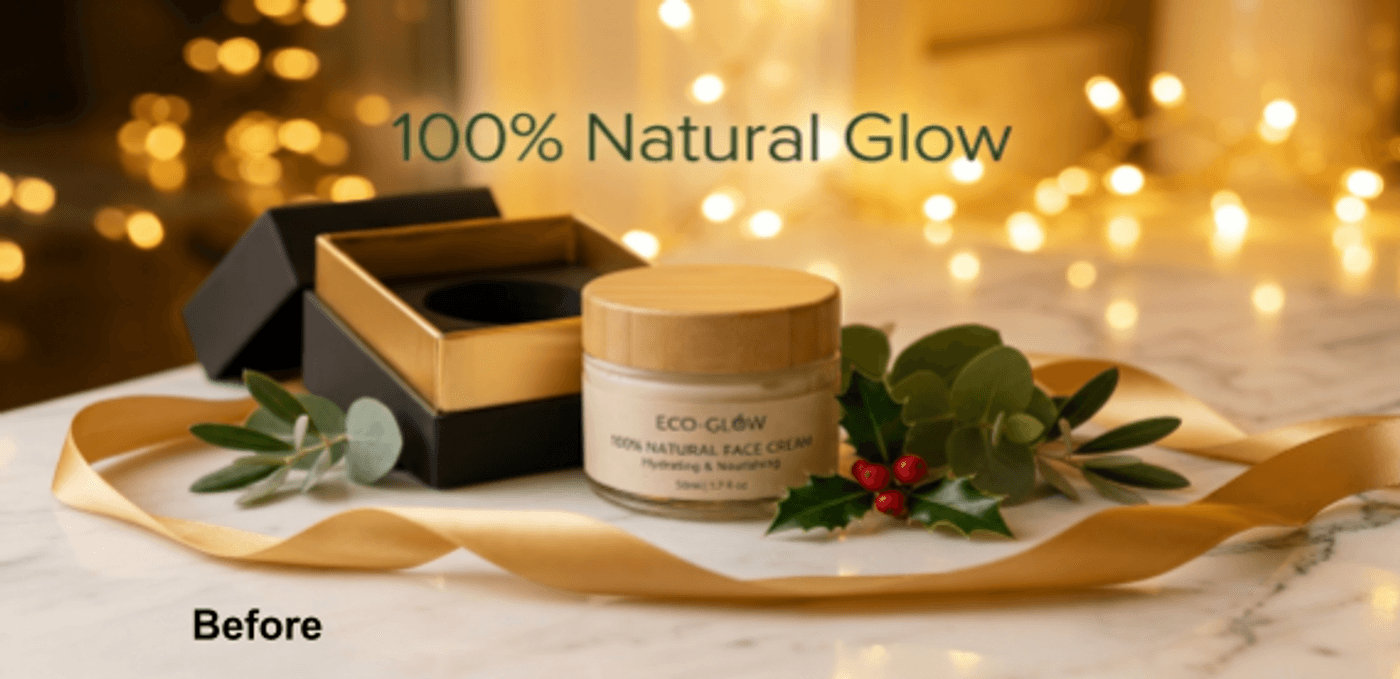
5. Refine the Visual with Flux 2 Klien
Not every edit requires more changes. The real win is achieving total visual cohesion, ensuring original pixels and AI-filled areas appear as one seamless shot from the start.
Flux 2 on invideo is a high-end AI image enhancement tool that unifies your visual logic by smoothing gaps in lighting, texture, and resolution. It eliminates the "stitched" look common after multiple AI edits, fusing all modifications into a single cohesive, high-end asset.
The difference is evident. This final pass replaces flat tones with high-contrast brilliance, giving the entire scene a professional magazine-quality pop. It sharpens micro-textures and adds realistic light bounces, fusing every AI edit into a studio-grade masterpiece.
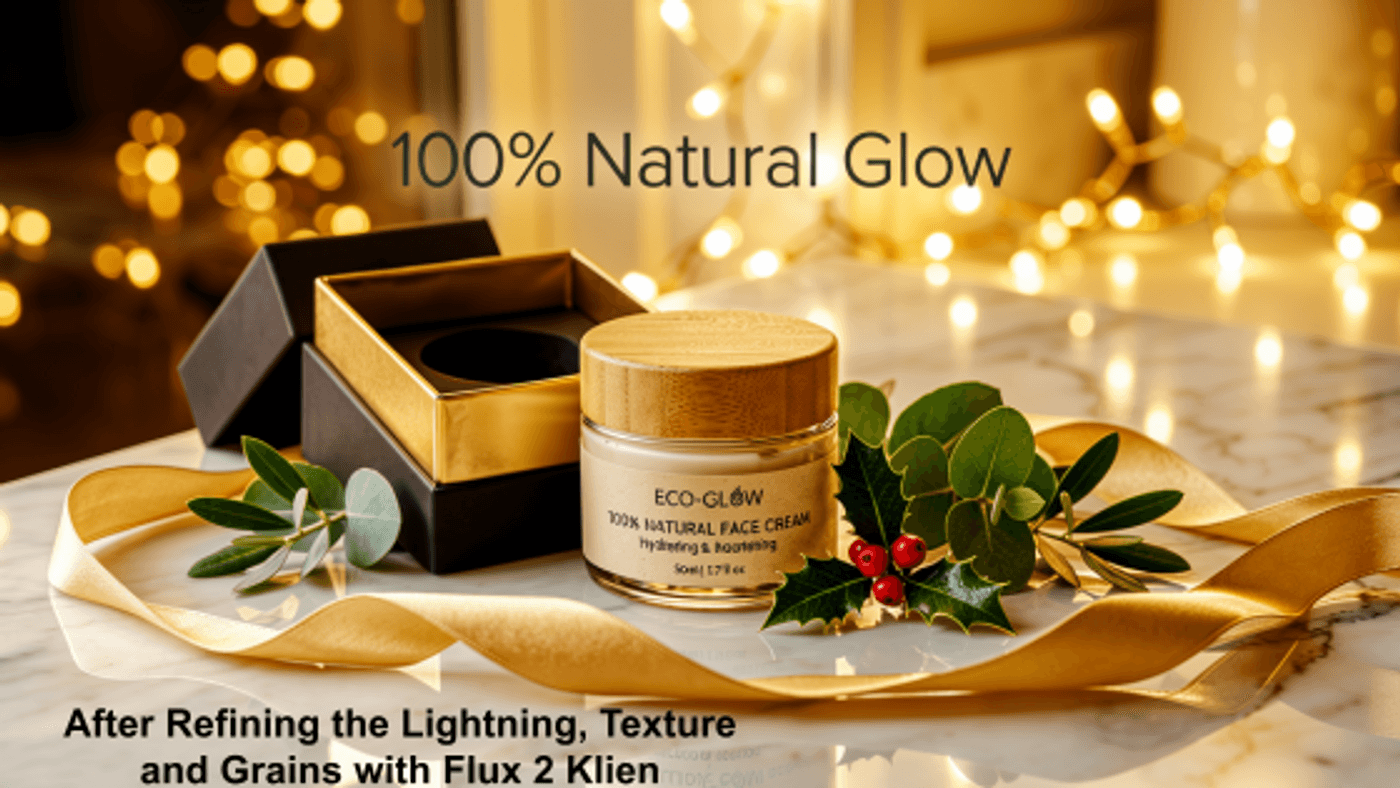
Pro Tip:If the AI starts altering details you want to preserve, add a "protective" line to your prompt: "Do not change the text or branding on the jar." This locks in your core product identity while the rest of the environment receives a premium polish.
How to Get More Natural AI Generative Fill Results
Even the best generative fill AI workflows depend on clear prompts and smart direction. Follow these principles to get more realistic, consistent, and production-ready results:
1. Stop letting the AI guess your textures
Any generative fill edit works better when you describe the surface clearly. If your prompt is vague, the model may guess the wrong material or create a "pasted-on" look that disconnects from the original image.
Scenario: A coffee cup on a rustic oak table.
Weaker Prompt: "Expand the image and make it look better."
2. Match the original perspective
A mismatched viewpoint creates uncanny, inconsistent fills. Use the original camera height as your anchor to keep the fill grounded.
Scenario: A hiker standing on a mountain ridge.
Weaker Prompt: "Make the mountain bigger for the vertical story."
3. Be specific about light and shadow
Shadows are the biggest giveaway of an AI edit. If the light in your photo comes from the left, your new background cannot have shadows falling in the opposite direction. Briefly mention where the light is coming from to keep the logic intact.
Scenario: A portrait of a person at sunset.
Weaker Prompt: "Make the lighting look natural and bright."
4. Design for utility, not just detail
Less is more. Over-extending or over-filling an image makes it lose realism and distracts from your product. Direct the AI to create clean "landing zones" tailored to your headlines or CTA buttons.
Scenario: A laptop on a desk for a website banner.
Weaker Prompt: "Add more office stuff to the background."
Turn Every Image into a Scalable Asset with Invideo
AI generative fill is no longer just a clever editing shortcut. It is a faster way to get more value from every image you create. Instead of throwing out a visual because it is too cluttered or built for only one format, you can reshape it for new creative needs in minutes.
That's where invideo stands out. With access to different models for different types of edits, you are not forcing one tool to do everything. You can fix distractions, extend backgrounds, adapt layouts, add various elements, and refine the final look in a single flexible workflow.
Explore invideo and turn one strong image into a full pipeline of scroll-stopping assets.
Keep the momentum going with these next reads:
FAQs
-
1.
What does an AI filler image mean?
An AI filler image is the visual content, or the pixels, a model synthesizes to complete, extend, or fix a photo. It allows you to expand a background, fill an empty area, or add missing elements while maintaining the original lighting and style. This turns a single static shot into a flexible asset for banners, landing pages, and social media posts.
-
2.
Can AI replace part of an image?
Yes. It can replace selected areas with new content that matches the surrounding lighting, texture, and perspective. This is useful for removing distractions or cleaning up product shots.
-
3.
Is there any good AI generative fill online free?
Yes, some tools offer free access through limited credits or basic plans. But for better control, stronger model choice, and higher-quality results, platforms like invideo offer a more flexible workflow for serious creative work.
-
4.
Which AI tools are best for image editing?
That depends on the task. Nano Banana 2 is strong for image creation, cleanup, adding new details, and object removal. Seedream 5 works well for natural background extension. Kling 3.0 Image helps adapt visuals to new formats, and Flux 2 is useful for final polish and consistency. That is where invideo stands out. Instead of forcing one model to do everything, it lets you choose the right one (even beyond these) for each stage of the edit.