


According to a May 2018 Google study, 60% of Americans between the ages of 35-54 say they visited YouTube for music-related content at least once a week.
With the availability of accessible video making equipment and easy and free online editing software such as InVideo, making music videos has never been easier.
If you are here to learn how to make a music video, you have come to the right place!
We’ve covered everything—from conceptualisation and storyboarding to location and crew selection. In fact, you can also make a music video out of only InVideo’s stock footage, and we’ve created a step-by-step breakdown of exactly this in the Bonus section you’ll find at the end of this article.
You can read along or jump ahead to a section that you are super interested in.
Let’s get started!
Index:
1. Music and Conceptualisation
2. Storyboarding
3. Location Scouting Based on Your Storyboard
4. Planning Your Shots and Production Schedule
5. Equipment
6. Casting and Crew
7. Filming Your Music Video
8. Editing and Color Correction
Step 1: Music and Conceptualisation
Before you start shooting a music video, you must first finalise on two major aspects of the video—the music and the concept. When you’re making a music video, there can be two scenarios a filmmaker can find themselves in.
Scenario 1—
In the first scenario, you know what the video is about but you are yet to find music that is apt.
For instance, you want to make a montage video of your travels; you already have the images and clips but you’re on the lookout for the perfect track.
How do you make sure you choose the right music, though?
Here's a video that will show you how to perfect the music selection for your video:
If you’re learning how to make a music video by yourself or if you have freelance clients, here are some useful tips:

Tip 1: Understand Your Message
Are you making a music video to amplify your brand or are you looking for the perfect soundtrack to your family’s summer vacation video? What are the emotions you want to evoke in the viewer?
Understanding the intention or message of your video can help in choosing the apt background music for it.
Tip 2: Search by Mood
If you want to learn how to make a video with music, you need to be able to understand the mood of a certain kind of music. What are you going for? Something solemn and introspective? Or something very upbeat, fast-paced, and energetic?
Tip 3: Choose Your Genre, Pace & Tempo
Have you got fast cuts and fast edits in your video? It’s like you’d want to go with a faster-paced or upbeat song.
Tempo is measured by BPM (or beats per minute). The higher the BPM, the more upbeat and fast-paced the song is.
Say, you’re looking to start a YouTube channel and you’re not sure about what kind of music to pick; we would encourage you to look at music with 130 bpm or higher for a music video with an upbeat feel. Narrowing down on a genre can also help you choose the right tracks which fit your video to a T.
To a certain extent, the number of tracks you need depends on the length of the video, and also if there’s some sort of shift in it to transition from one kind of music to another. In this case, you might need tracks from varying genres.

Tip 4: Decide on the Role of the Music
Decide on the role you want the music to play in your music video. Do you want it to inspire nostalgia or joy? How prominent do you want it to be?
To select a background score that complements your video, make sure the music is not too loud so that it does not distract the viewer from the video. If your video has narration, avoid vocal tracks, and try to choose music with a steady pace and no sudden spikes in mood or instrumentation.
Tip 5: The Easiest Way to Find the Right Music Track for Free
In case you do not have the music to your music video concept, you can always access InVideo’s music library containing thousands of copyright-free soundtracks!
Here’s how—
On your left hand panel, you can select the Music option and select from a range of pre-loaded soundtracks for your video.

You can search by genre, mood, sound effects and miscellaneous options:

Say, we’re making that travel montage we mentioned and we want to use something inspiring. So we click on Mood.

Then we click on Inspiring, which has over 7000 free tracks to choose from.
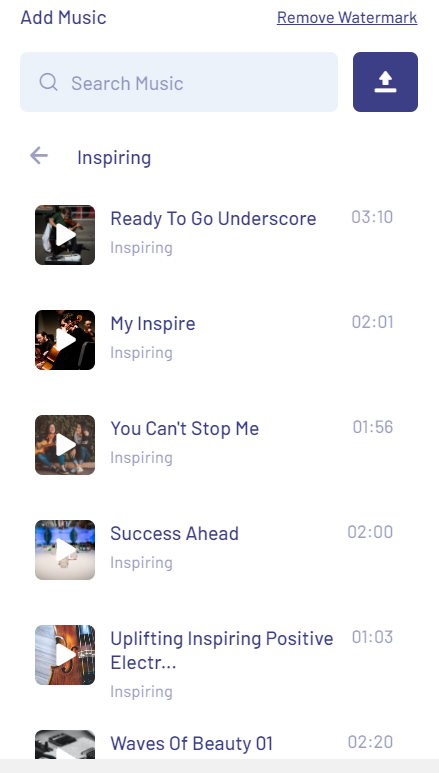
You can listen to each of the tracks by clicking on the Play button, next to the title track.

To add a track to the video, click on the three dots that appear next to the track when you hover your cursor on it and select ‘Replace music’, ‘Add before track’ or ‘Add after track’ depending on which part of the montage you want it to play.

Once your track has been loaded, you can edit it by either trimming it, looping it, duplicating it or deleting it.
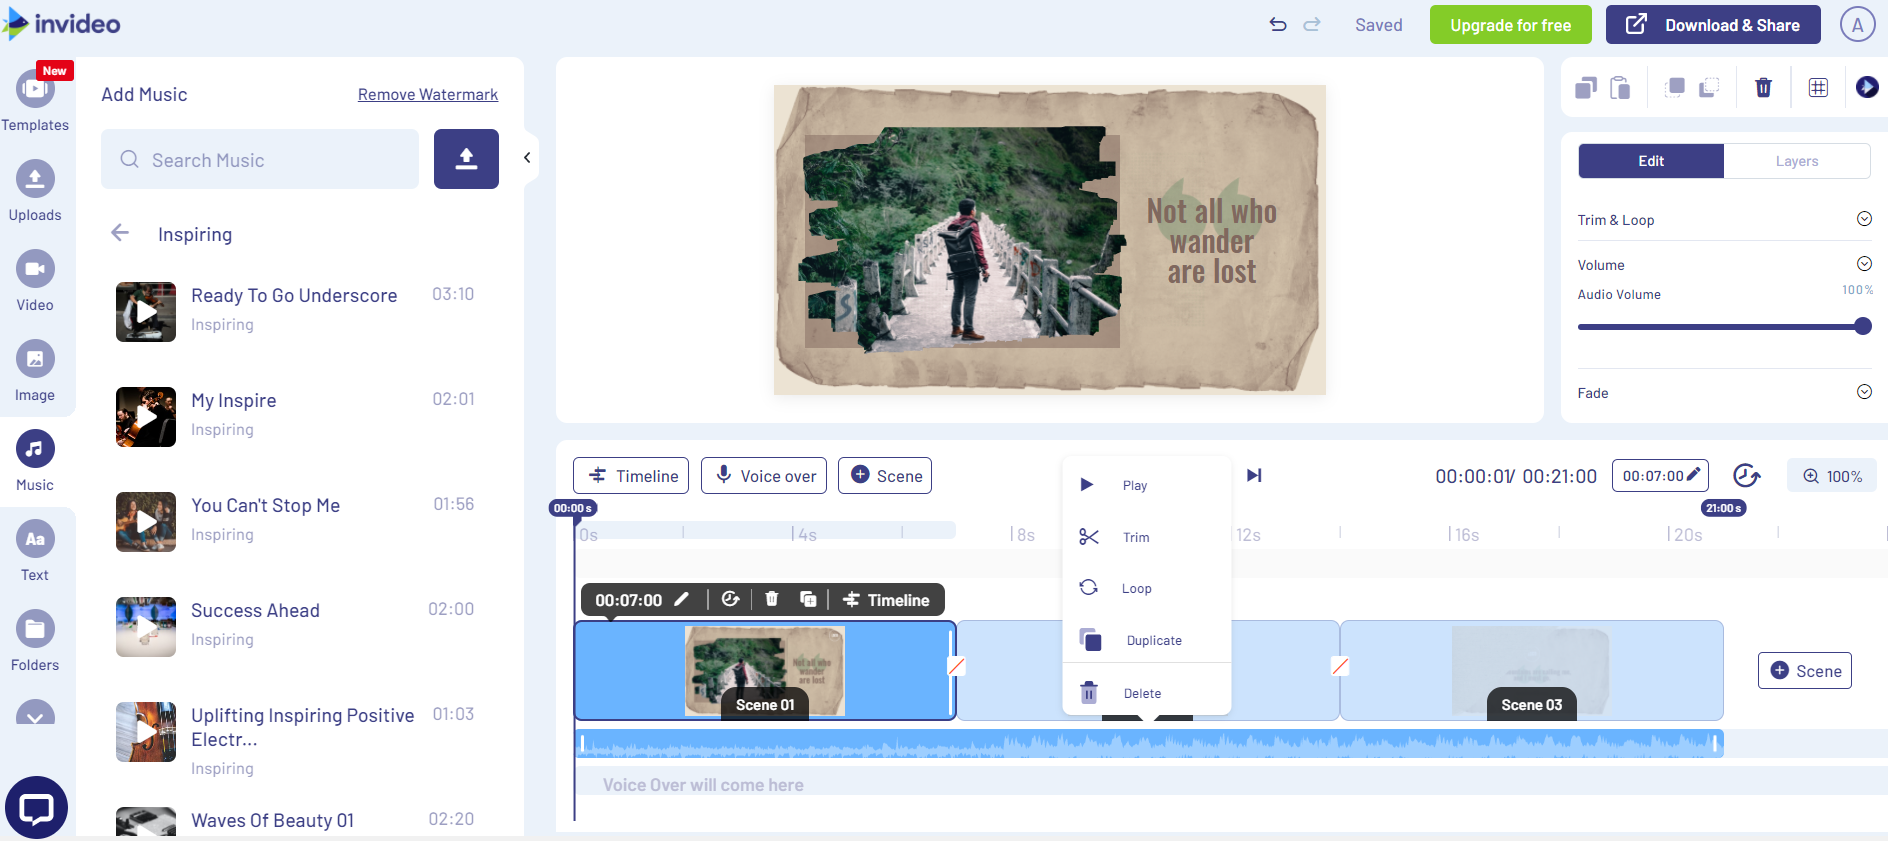
You can also adjust the Audio Volume or use the Fade effect from the right hand side panel.
Congratulations! You’re all set to add the perfect audio track that complements your video.

Now that you know how to make a video with music, let’s move on to the next scenario. For a full-blown music video, where the music track has already been produced and takes center-stage—read on for Scenario 2.
Scenario 2—
If the soundtrack has been produced, the artist may leave the conceptualisation to you.
So where do you start?

In such cases, here are the factors to keep in mind:
(A) The Setting
Ask yourself—what does the music make you think of? What kind of ambient setting do you think would be best suited for the music? You can approach the setting as a total list of elements you can show in the video to compliment the tone of the soundtrack.
For instance, in this song, the music is melancholic but still fast-paced and it denotes the promise of true love – which is depicted very well in the setting of the video as a chase sequence:
(B) Video Type
You can approach the concept as a narrative-based video or a performance-based video.
A narrative-based video would include a parallel plotline or a story around the soundtrack. Think of music videos such as Michael Jackson’s ‘Thriller’:
Or the Bee Gees’ legendary ‘Stayin’ Alive’:
A performance-based music video, on the other hand is quite literally a live performance of the artist’s soundtrack in the music video. An example of this would include Snarky Puppy’s ‘Shofukan’:
(C) Still Images
You can also use still images for conceptualisation. You might come across a still that catches your eye and is seemingly the perfect fit for a certain scene in the music video.
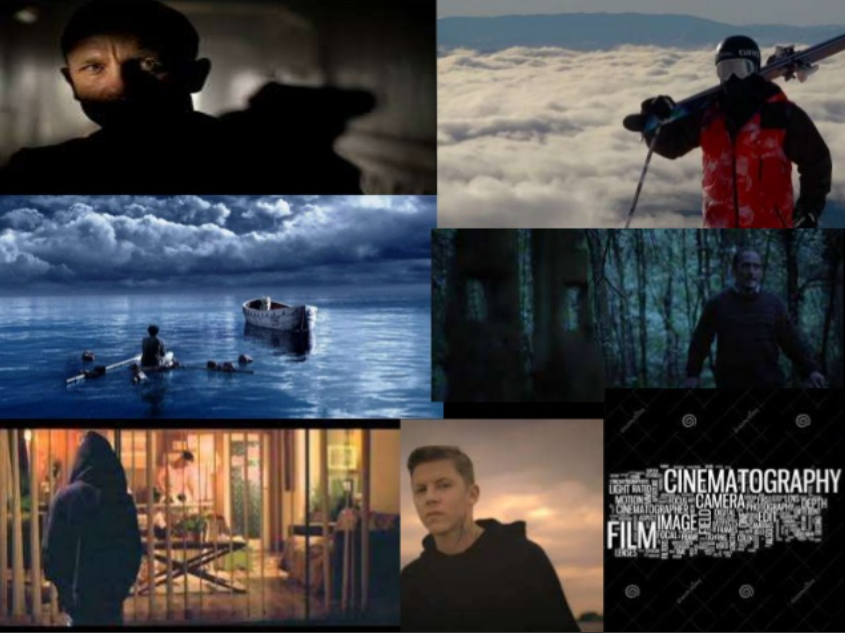
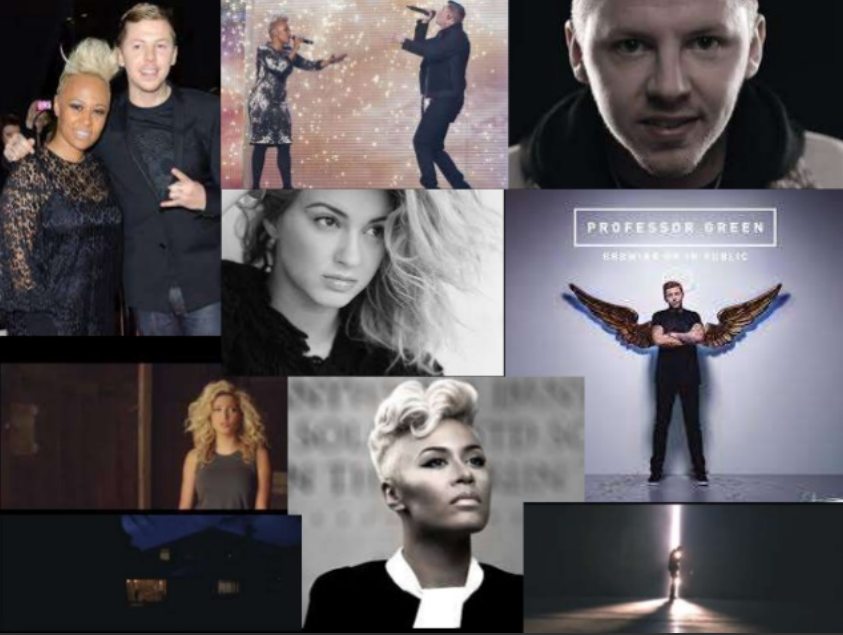
Music directors approach conceptualisation by browsing through hundreds of still images to draw inspiration for a music video concept and create a mood board out of them. This is not so much a shot list or a storyboard that’s laid out, it’s more like a collage of images to represent the vibe that you’re looking to give a music video.
Watch this video that depicts an example:
Here are a few more examples:
A. For cinematography—
B. For characters in the music video—
C. For setting—

See what we mean?
Creating mood boards is not about giving exact references, it’s about experimenting with different still images and creating a vision for the final video, to clearly communicate the vibe you’re going for.
(D) Treatment
Pitch your ‘treatment’ to the artist. A treatment is a creative outline, usually in the form of a document, used to present the concept for a video or film production to a client; it clearly outlines how the music video is going to look, and what it’s going to be about.
If you’re working with artists, it’s likely they will want to see a music video treatment before you start shooting. Music labels also reach out to directors and ask for treatments that they can pitch to artists, other labels they’re working with etc.
Here’s how you can go about writing a treatment:
Here are three quick tips on how to write music video treatments:
- Make them visual-heavy with a lot of reference images. Try and keep your words to a minimum.
- Get to the point quickly.
- Make it aesthetically-appealing and interesting with a unique design.
Here’s an example of a completed music video treatment. You can take a cue from this, and use it as a guide to create your own treatment.
This is the first visual reference of the music video you’re trying to create. After this, it’s time to move on to storyboarding!
Step 2: Storyboarding
If you want to learn how to make music videos, you have to master the art of storyboarding first.
A storyboard is nothing but a combination of the script and corresponding visuals for each scene. It allows you to break down your concept visually, and also zero in on key visuals.

A sample storyboard can look something like this:

The above is from a video for a Nate Henry song called ‘Lightly Stepping’. Study the storyboard here and see how it comes to life in the video.
To summarise, storyboards are a graphic and visual representation of the video sequence with images, words, sketches, and key production details such as lighting, camera setups, and transitions.
To make an effective storyboard for a music video, you can follow the steps below:
Step 1: Scene Planning
You can split your storyboard scene by scene, by drawing various shots with specific rectangular frames that complement the aspect ratio of your video. You can storyboard on paper, computer, or tablet—whatever works best for you.
You can start with a basic sketch of the scene, and show the visuals scene-by-scene with key indicators on production requirements like lighting, camera placement, etc. This process will also indicate to the client how the story’s concept will unfold.
For example, for Childish Gambino’s “Sober”, you can review the scene planning below and see how it comes to life in the official music video.

Step 2: Establishing the Types of Shots
You will have to distinguish your shots between wide establishing shots and close-up shots. You would usually begin with the former, and then move on to close-ups as you progress.
You don’t have to possess any major artistic skills to create a storyboard—you can use simple stick figures to indicate what’s happening in the scene. Reference shots or mock shoots with your phone can also be helpful.

Your lighting and camera placement requirements would vary as you decide on the kind of establishing shots you intend to create. Here’s a link for a deep dive on how to plan your shots.
Step 3: Scene Breakup
Create a breakup storyboard of each scene within rectangular scene templates, where you can break down each component within a scene as its own unique element known as shots.
In the image below for a popular Linkin Park song, notice how the camera placements have been marked out within each scene breakup in the storyboard. This helps the music director assess the required production planning elements within each scene.

Here’s a simple storyboard template we have put together that you can download and use to start off with. You’re welcome! Also, check out this video for more tips on storyboarding.
On to location-scouting.
Step 3: Location Scouting Based On Your Storyboard
You must have heard the popular adage, “Location, location, location.” Location decisions are essential to making a music video.

Here are the factors to consider while scouting for locations:
(A) Budget
How much does a music video cost? It depends on your budget, really. Find a location that fits your budget and video concept. If your video is a performance-based video, a studio or a live music venue can serve your purpose effectively. You can also find locations for your music video on peerspace which can reduce your search efforts and help you stay within budget.
If you’re on a strict budget, try and tap into your existing resources and network. Check out this video:
(B) Dimensions
Based on your storyboard and production requirements, you will need to assess if the location has the requisite height, width, and length to include all your production and crew requirements.
(C) Weather
Weather can play a massive role in terms of your location decision. An outdoor location choice, especially, would require you to plan well ahead on the weather conditions and how they may affect the production of your music video.
When making a music video, make sure you also check up on the weather reports and what to expect since weather can also affect your equipment.
(D) Location Options and Recces
Once you finalize on a budget location, you can choose between indoor and outdoor locations. Each of these demands their own unique production requirements that can help your concept see the light of day. This could range from ambient settings to natural landscapes and acquiring permissions beforehand to shoot.
Trust us—unless you’re filming in a studio, you’re going to want to figure this out beforehand.
Scout out a few locations and do a recce with your team. Figure out whether you need permission to shoot, and whether there are certain hours the spot is inaccessible, and whether you can flip the location to shoot it from multiple angles for different shots.

This way, you can even do some test shots in terms of your planned frames or lighting.
(E) Scout for Leading Lines & Symmetry in the Frames
The beauty of planning ahead is that you can craft exactly the kind of music video aesthetic you’re going for with existing elements in the frame.
Leading lines are points in a frame that create a natural point of attention; they could be tables, poles, chairs—really anything that guides your viewer and shows them where they should be looking.
For example, look at the image below.
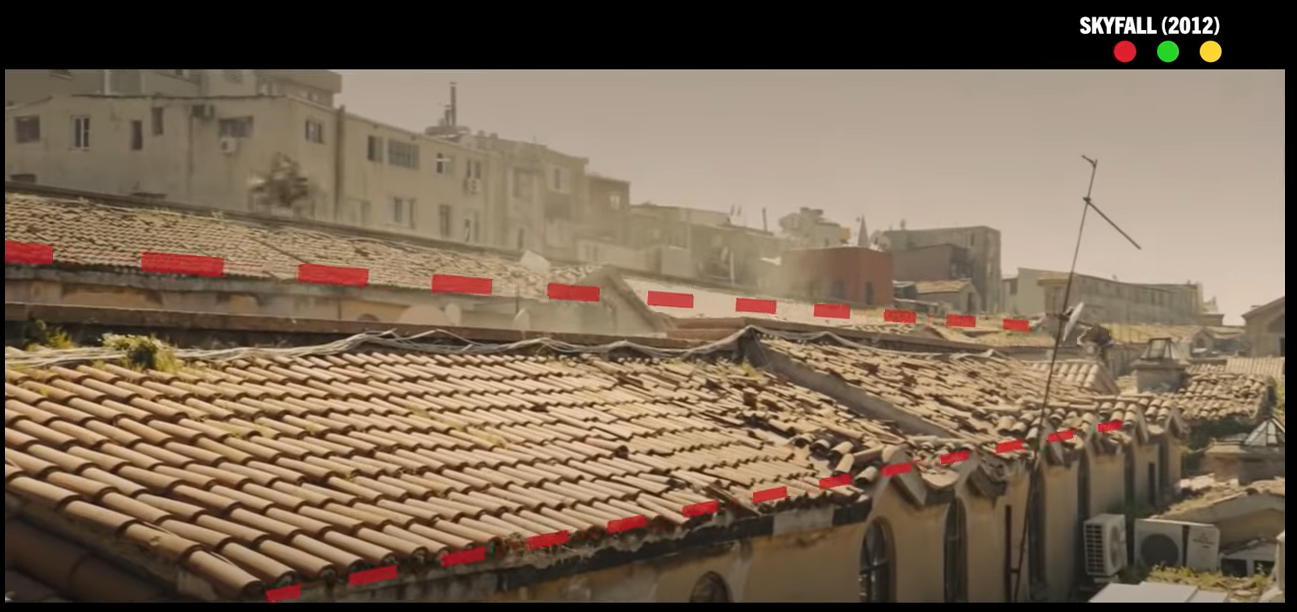
Source: IndyMogul
See the lines of the rooftop? They are the leading lines of this frame that draw the eye of the viewers towards them.
Here’s another example:

When it comes to symmetry, consider the balance between both sides of the frame.
Think Wes Anderson films.
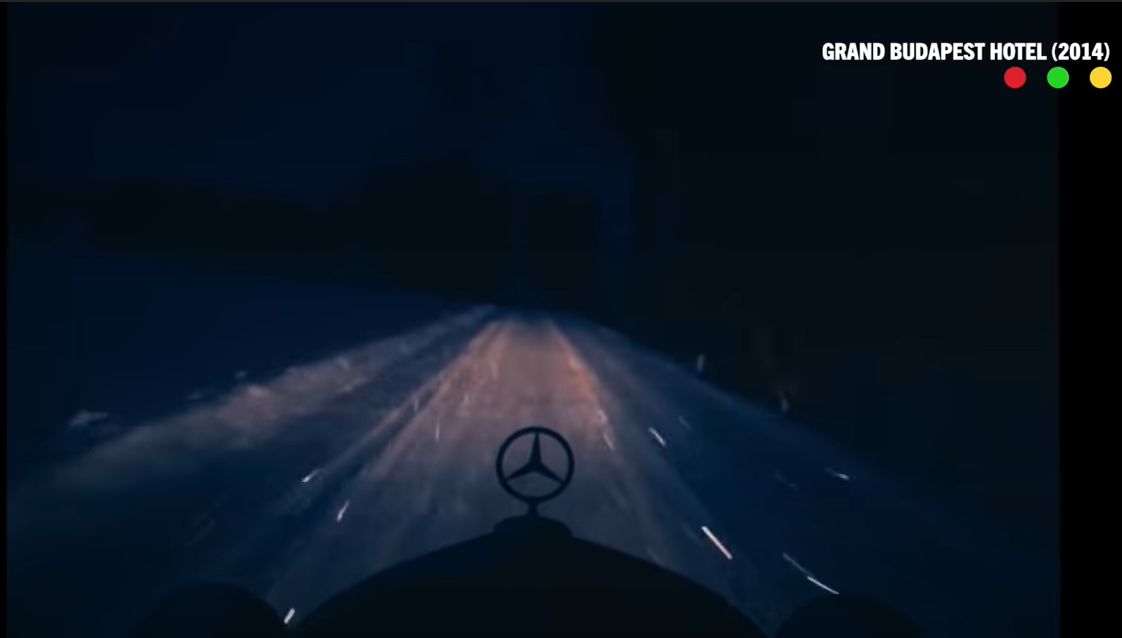
Source: IndyMogul
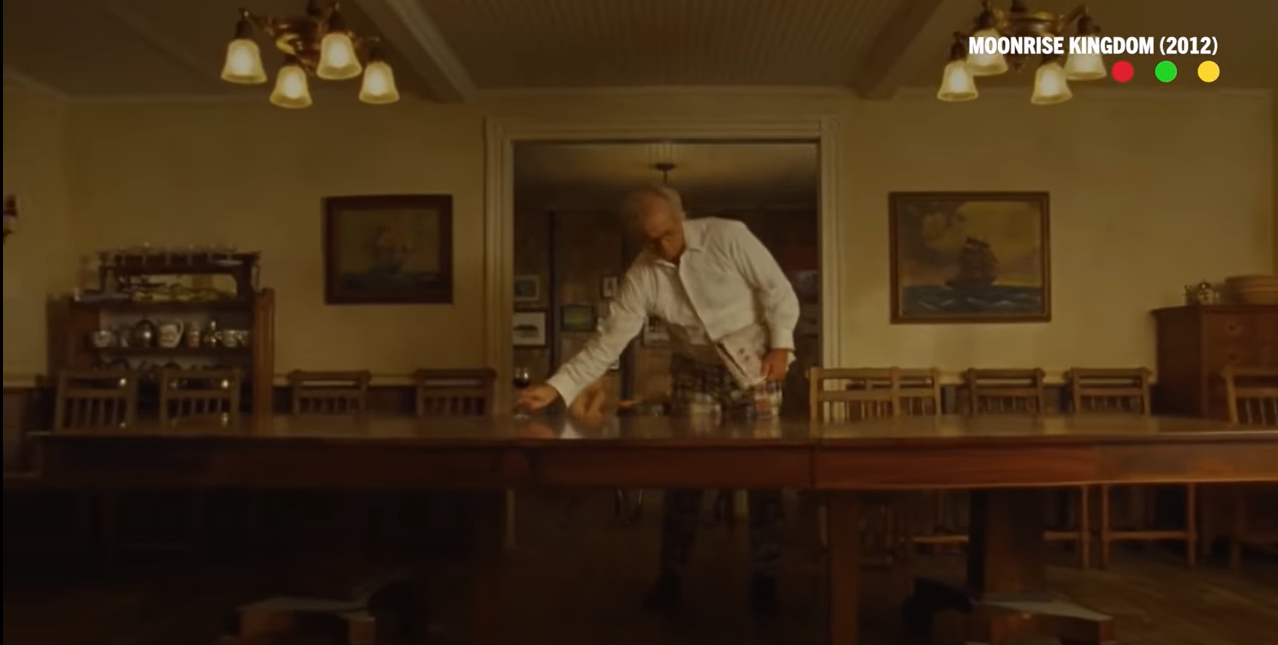
Source: IndyMogul
What do you think makes them so aesthetically pleasing? You got it—it’s symmetry. It’s visually stunning and draws in your viewer instantly.
The bottom line—it’s useful to plan ahead. When you look for leading lines or symmetry when you go location-scouting, it makes your shooting process a lot easier because you already have an idea of the frame or shot you want to create. This is the kind of preemptive planning while scouting for locations that can save you a lot of effort later on in the production process!
Now that you’ve got your location in place, let’s move on to planning your shots and production schedule next.
Step 4: Planning Your Shots and Production Schedule
A key step you must consider when you want to learn how to create a music video is to plan your shots and schedule. Experts agree that bad planning can lead to high production costs, risks of production disruptions, and crew members who are on standby due to lack of work for the day.

Some of the key aspects around planning your shots and schedules include the following:
(A) Create a Shot List & Production Schedule Based on Your Storyboard
Now that you have a storyboard and location ready, you can quickly jot down the production requirements which would include the following — Equipment (Lighting, Camera, and Mics), Cast and Crew, and a schedule for every element based on what scenes you plan to film.
What scenes are you filming, and at what time?
A shot list is a document that charts out exactly what will occur and what will be used in that specific shot of the film. It is an essential step in pre-production planning, especially if there are a lot of variables.
A basic shot list should broadly include:
- Scene number
- Shot number
- Location (indoors or outdoors)
- Shot description
- Camera angle, framing, and camera movement
- Action/dialogue
- Subjects/ actors in the scene
- Props needed
- Description of the shot and extra notes

Here’s a Shot List template you can download and use for your own video.
Now that your other fundamentals are planned, you need to plan your shooting schedule. This is a crucial tool in managing the expectations of your cast and crew with respect to the time needed.
Your video production schedule should include:
- Location
- Scene/shot
- Equipment
- People needed
- Contact info
- Date and time
This document should be updated regularly and shared with the entire team. Here’s a look at a sample production schedule:
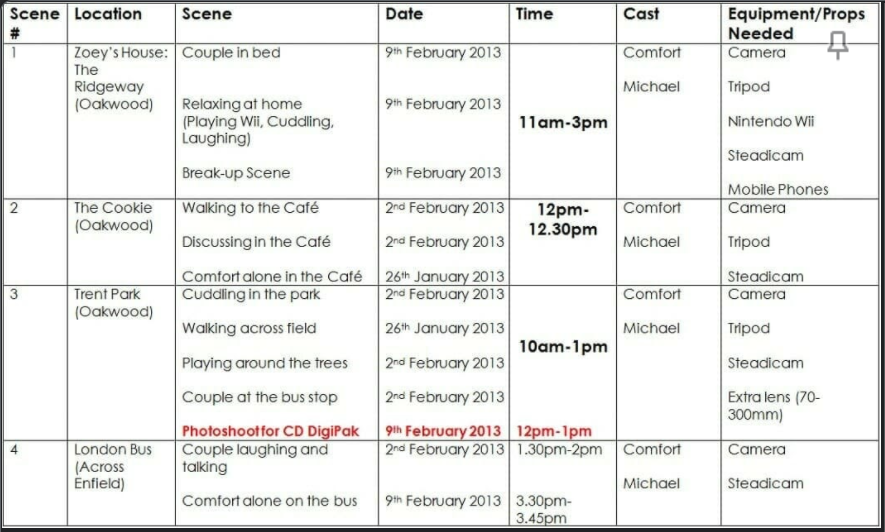
Source: Valoso
Here’s a Production Schedule template you can download and use for your own music video.
(B) Communicate Expectations
Your crew must be aware of your everyday plan. Every member and vendor must know when you need them to be mobilised.
Once you have finalized your shot list and production schedule, ensure you communicate each requirement scene-by-scene. Take your crew and your vendors through the locations and help them understand what you need set up, plus the objective behind each setup.
Make sure you’re open to questions and recommendations since you could end up executing something much more creative than you initially planned for!
(C) Hiring Equipment
You won’t always have everything you need in your equipment kit and this would lead to hiring equipment for specific shoot days. Your schedule should ideally specify the days where rented equipment is required.
Ask yourself basic questions. Will you need to hire cameras or gimbals? Will you hire additional lenses for specific shots? Do you need to rent out green screens? Do you have the required number of cables for the lighting requirements you are looking for? Will you need a monitor? And so on.
(D) Rehearse Before Shoot
Sometimes, you cannot plan it all at one go.
Rehearsing a day before or a few hours before a shot should help you and the crew identify any shortcomings that exist, regardless of the type of music video it is. This is key in ensuring costs are in control and the time to finish shooting isn’t extended.
(E) Plan Your Props
Once you have rehearsed, start assessing the kind of props you would like to include within each scene.
Sometimes, you can ideate on props at storyboarding level, and sometimes, you will receive recommendations on the props you can use to complement your concept.
Ask yourself questions such as—do you need any prosthetics, wigs, custom-made or hired costumes? Will you need ready-made props or do you need to hire artisans to create the props you want? Make sure you include this in your production schedule as well.
Up next—we’re talking all things equipment!
Step 5: Equipment
If you want to learn how to make a music video, you need the right equipment and the knowledge to use it well. Broadly speaking, here are the types of music video equipment you’re going to need:

We’ve done you a solid and put together two kits with our best buy options — one is a basic starter kit for those you are going to make your first music video, and the other is a professional kit with a few extra additions for the seasoned music video creators.
Let’s get right into it.
A. Basic Starter Kit
Here’s all the gear you’ll need with our recommended best buy for each piece of equipment:
Camera
(a) Shoot with a smartphone ($259) that will be readily available if you don’t want to invest in a camera,
(b) Canon EOS REBEL T7 DSLR Camera | 2 Lens Kit (under $550) which is a great value-for-money option, or,
(c) Best buy: Sony Alpha a6000 Mirrorless Digital Camera w/16-50mm Power Zoom Lens (under $650)
Lenses
We suggest using the Sigma 30mm F1.4 Contemporary DC DN Lens for Sony E.
Stabilisers
(a) Neewer Portable Shoulder Rig (under $70) which is a great value-f0r-money option,
(b) miliboo MTT705 Aluminum Portable Fluid Head Camera Monopod (under $170) which has a large, fluid head with good resistance, and adjusts to good heights for lean shots, can also be used for inverted shots, or,
(c) Best buy: Manfrotto Compact Action Aluminum 5-Section Tripod Kit (under $70) which allows you to select between a photo and video function, helps you achieve smooth pans and maximum control. The quick-release plate also supports a range of devices, and this tripod offers outstanding stability.
Light
(a) If you want the light to follow you as you move with the subject, you can use an on-camera LED light panel ($24.99),
(b) VILTROX 2 Packs LED Video Light kit with Light Stand and Wireless Remote (under $200) which are versatile, portable, and reasonably priced; the remote is a bonus,
(c) This stick light by Godox ($239) can be used to add colors or a cinematic feel to the performance, or,
(d) Best buy: GVM 2 Pack LED Video Lighting Kits (under $230) which is value-for-money. These lights are strong, sturdy, and easy to assemble and dismantle.
Audio
(a) A shotgun mic like the RODE Video ($229), along with
(b) A dead cat ($29.95) to capture the audio clearly outdoors, or,
(c) Best buy: Rode VideoMicro Compact On-Camera Microphone which is great for high-quality audio recordings, with Rycote Lyre Shock Mount, which is way more effective at minimising unwanted vibrations, handling, and cable-borne noise than traditional elastic suspensions (under $60).
(d) We also suggest using the Bose Soundlink Micro for a budget set-up to play the song on-set.
Softwares
(a) InVideo, if you want to leverage ready-to-use templates, assets, stock footage, and music.
(b) Premiere Pro for super-detailed control while editing the video.
B. Professional Kit
Here’s all the gear you’ll need with our recommended best buy for each piece of equipment:
Camera
(a) Panasonic LUMIX GH5 4K Digital Camera (under $1300) which is a great value-for-money option, or,
(b) Best buy: Canon Full Frame Mirrorless Camera [EOS R]| Vlogging Camera (Body) (under $1800) is the best camera for music videos as it has in-body stabilisation, is ergonomically designed to fit well in your hands, and also has digital image stabilisation.
Lenses
We suggest using the Sigma 18-35mm F1.8 Art DC HSM Lens for Canon (under $700) which is one of your best bets to shoot music videos cinematically, and they are also very affordable.
Filters
(a) PolarPro 77mm Variable ND Filter
(b) Tiffen 77VND 77mm Variable Neutral Density Filter
Stabilisers
(a) Manfrotto MVH502A,546GB-1 Professional Fluid Video System (under $670) which offers professional features such as high-performance variable fluidity and a counterbalance setting to match the weight of the most popular cameras and their accessories, such as external monitors, lights, or microphones, or,
(b) Best buy: DJI Ronin-S – Camera Stabilizer (under $550) which is perfect for DSLR mirrorless cameras, empowers creators to shoot stabilised, smooth and cinematic shots on the move and offers a range of advanced capturing features such as panorama, timelapse, motion lapse and track.
Light
(a) Aputure Amaran MC RGBWW Mini On Camera Video Light (under $110) which has great features, especially with app control, and depicts colors very accurately; this one’s great for tabletop product shots and effects, or,
(b) Best buy: HPUSN Softbox Lighting Kit Professional Studio Photography Equipment Continuous Lighting which is durable, portable, and has a quick and easy set-up.
Audio
(a) We suggest using the Rode VideoMic Pro+ Compact Directional On-Camera Shotgun Condenser Microphone (under $370).
(b) We also suggest using Bose SoundLink Revolve+ (under $250) speakers.
External Camera Monitors
(a) Blackmagic Design Video Assist HDMI/6G-SDI Recorder, or,
(b) Best buy: Atomos Ninja V Atomos Ninja V 4Kp60 10bit HDR Daylight Viewable 1000nit Portable Monitor/Recorder (under $600) which is a great option that ensures that you have everything you want in focus, and the frame is just right.
Softwares:
(a) InVideo, if the video is under 15 minutes long and you want to leverage ready-to-use templates, assets, stock footage, and music.
(b) Premiere Pro for super-detailed control while editing the video.
Now that we’re through with the first few steps of how to make a music video, let’s move on to talking about the element that can really make or break a production: the people.
Step 6: Casting & Crew
This is your team; you will be working together on learning how to make a music video that is high-quality.

Your crew will comprise the following:
A) Director’s Department:
The team will consist of your Director, 1 Assistant Director, and 2 Assistant Director. They are the key visionaries in turning a blank location into a cool music video backdrop. They will enable specific direction ensuring storyboards get converted into filmed scenes as planned.
B) Production Design:
Everyone needs to look a certain way in front of the camera. The location also needs to look a certain way in most cases. The Production Design team consisting of Art Directors, Set Dressers, Prop Designers, Hair and Makeup Artists and Set Builders are the ones who will work around the clock during the shoot to ensure that the scene-by-scene adaptation of a storyboard is executed as planned.
C) Cinematography Department:
This team will consist of a Director of Photography, Gaffer, Key Grip, Best Boy, Lamp Ops, DMT and many more. They are key to the last-mile music video production process since they are the ones who bring the equipment, assist with the setup and ensure that the shots are done safely.
Here’s a link for further reading if you want to know more about the roles and responsibilities of each member of the cast and crew.
Step 7: Filming Your Music Video
We’ve covered the pre-production phase, and it’s time to get the camera rolling. So, now—how do you make a music video?
Here are a few tips to keep in mind when you start shooting a music video:

(A) Composition and Framing of Shots
How you compose your frame is a massive part of how you tell your story! The frame composition combines all the elements of the shots, including its lighting, actions, and dialogue, to portray the story and evoke emotion.
The three main types of shots used in YouTube videos are:
1. Wide-angle shots — these add context to the shot by emphasizing on the location or background of the video.
2. Medium shots — these are great for connecting one part of your footage to another.
3. Close-up shots — these are useful for emphasizing certain elements you want to highlight and clearly communicate a point
Here’s a video that will take you through the basic camera angles:
We’ve put together a few tips to best film these shots from expert filmmakers to make good music videos. Here’s what they suggest:
Tip #1 - Use the Rule of Thirds
This means dividing your frame into thirds both vertically and horizontally and putting your subject on one of the intersections. This helps balance your image for an interesting composition.

Tip #2 - Create Depth in the Frame
Set the focus off-center in the shot, and away from the background. This will create depth in the frame.
Using different lens focuses and positioning objects at different lengths from the camera will make the scene look bigger and make for a more interesting frame.
Tip #3 - Observe the Location
This is something that you should ideally start doing in the pre-production phase when you go location scouting. By observing the location carefully and pinpointing what you want to highlight, you ensure your shot has sound aesthetics which are in line with your content. This is also where the leading lines and symmetry you planned in the storyboard come into play.
(B) Plenty of Light
Even if your video is great in every other way, if your lighting is too dark, too bright, or looks amateurish, it’s going to put viewers off; so don’t depend on just “fixing it in post”.
Lighting makes a big difference to the quality of your YouTube video, so prioritise your planning lighting during pre-production and executing it properly when you’re filming.
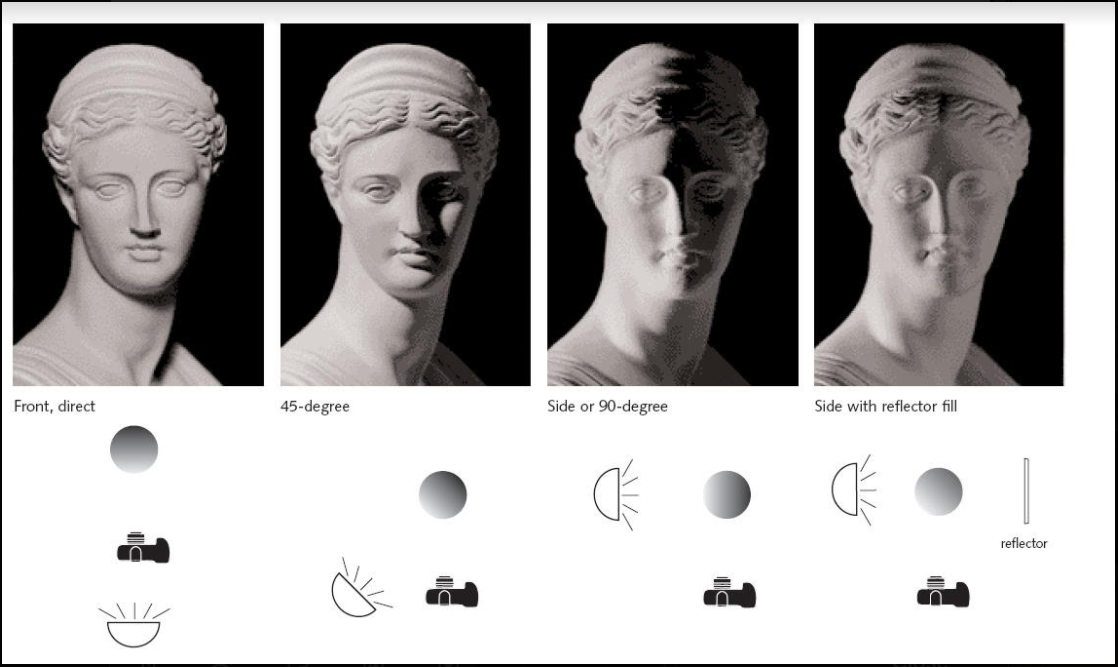
Here’s a breakdown of the types of lighting, their respective sources, advantages, and disadvantages:
| Type of Lighting | Source | Advantages | Disadvantages |
| Natural Lighting | Outdoors (the sky, the sun, or the moon) and can be used with diffusers and reflectors |
|
|
| Artificial Lighting | Usually indoors (Direct lighting from electric bulbs) |
|
|
Power tip: Regardless of where you’re shooting, make sure that your primary light source is even and consistent.
If you are using natural lighting —
- Try and film in the morning or evening, when the light is flattering, and not as harsh as it is midday.
- You can use diffusers and reflectors to soften the lighting and shadows.
- If you do have to shoot midday, try and choose a day when it is cloudy or find an area with shade.
If you are using artificial lighting —
- Avoid ‘spotlighting’ your subject in direct pools of light. Avoid overhead lighting as well as it causes unflattering shadows.
- Using little or no shadows is best for marketing videos, and it creates a more open and approachable vibe.
- Below, you’ll find a few techniques which can be used to achieve specific effects.
Source: Wordstream
Here’s a video on effective lighting for a high-quality music video:
(C) Crisp and Clear Audio
One of the easiest ways to lose viewers by having them hit the ‘back’ button? Low-quality audio. With a music video, especially, this is an absolute no-go.
You’ll be overlaying the produced track or copyright-free music over the video in the editing process, but if you are going to be creating a narrative-based music video, you need to keep some things in mind.
Here are some pre-emptive steps you can take for crisp and clear audio output that can take your video to the next level:
Step 1 - Make Sure You Invest in a Good Microphone
We understand that music video creators who are just starting out might not be able to invest a lot in equipment right away.
So we’ve done the legwork here, and put together a few budget options:
(a) The Fifine condenser K669B USB microphone at under $40. We suggest you pair this mic mount with it for stability.
(b) The SGC-598 Photography Interview Shotgun MIC Microphone for Nikon Canon DSLR Camera for under $40.
(c) The compact and easy-to-use Blue Yeti USB Microphone for under $150.
(d) The handy and portable Zoom H1n Digital Recorder for under $150.
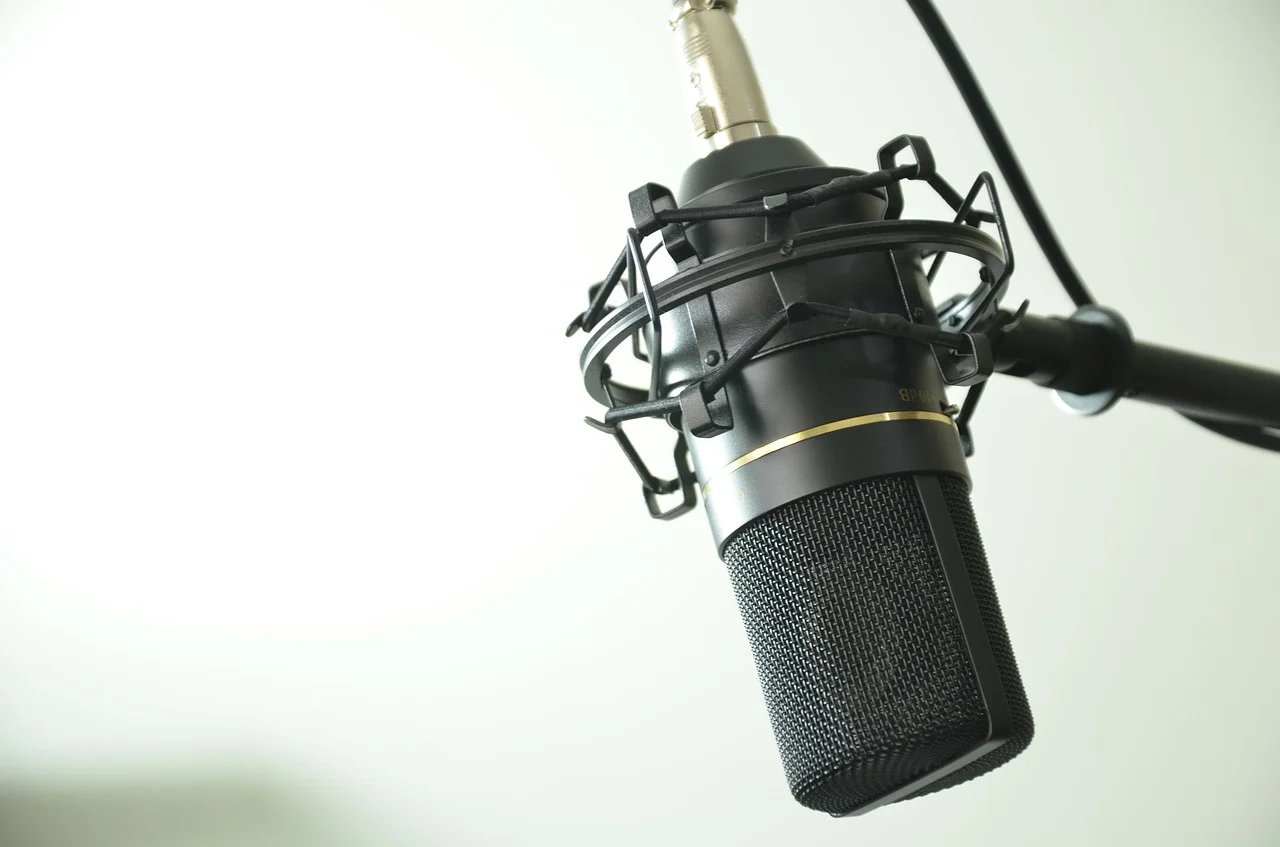
Source: Pixabay
Step 2 - Position your Audio Equipment Properly
Make sure you put your microphone as close to the subject as possible so that your audio is crisp and clear; this is especially for narrative-based music videos where there might be some dialogue. Consider using a pop filter to get rid of crackles and blips on the recording.
(D) Film in Small Segments
Segmenting your script into smaller takes will make your job much easier both while shooting, as well as during editing your music video. It also lends a certain level of flexibility to post-production with easy-to-use clips. Here are few tips:
Tip #1 - Shoot Multiple Takes
Even the best of filmmakers mess up sometimes, so make sure you take multiple takes of each scene to give yourself more shot options in the editing process. Even if your first take seems to have gone perfectly, get another one, just in case.
Tip #2 - Shoot from a Variety of Angles
Try and get shots from a variety of angles so you can choose the shots you think work best in the post-production phase.
Tip #3 - Shoot B-roll Footage
B Roll or background footage is a great way to make your video more interesting and add a variety of visuals. If you plan when you’re going to use B rolls in advance, you’ll be doing yourself a favour by saving a lot of time later on.
Next up—editing and color correcting your music video.
Step 8: Editing and Color Correction of Your Music Video
When it comes to how to edit music videos, this is the part of the production process where you can flex your creative muscles a little bit.
If you’re looking to create videos of up to 15 mins, the easiest option at your disposal is InVideo — a one-stop shop for video creators. It comes with:
– 5000+ pre-built templates that you can readily use or you can start with a blank canvas.
– An in-built media library of 8M+ royalty-free video clips, images, and music from premium sources like iStock and Shutterstock.
– A super intuitive and easy to use video editor that’ll allow you to edit your videos in mins even if you’ve never edited a video before
– 24*7 live chat support so you can always ask for help
Seeing is believing. This is the sort of edit you can make with InVideo:
The best part — it’s completely free for you to start with and you can create as many videos as you’d like with your own brand logo/watermark and export them in 720p. And If you’d like to get your videos out in 1080p, as well as get access to the premium media library, it’ll just set you back by $20/month or $120/year.
If you want to know more about how to use InVideo and get started today, check out this tutorial:
For more heavy-duty, detailed editing, here’s a tutorial on how to edit a music video in Adobe Premiere Pro:
Pro Tip: Check out this video for three important rules to remember while editing music
Here are some tips to edit your music video:

(A) Organisation
This is crucial to the speed of your editing process. There are a lot of people who go on and organize every clip, by the type of shot, the kind of take, and so on. Once you get to the professional levels of editing, you’ll appreciate being able to know how to organize and label your footage, because it will help you find your footage quicker and also edit quicker.
You can also just drag all the clips into your software and start piecing it together if that works for you better for now.

(B) Edit the Music Video “Performance” First
Essentially, you add all the performance shots and start cutting the video together as one big performance video. After all this, you start chopping and adding the B-roll moments to keep things interesting and tell the story well.
This will help you finish your edit quicker.
(C) Edit to the Beat or Rhythm of the Music
There needs to be a beat, rhythm, or a motivating sound that is the reason for your cut, it cannot be arbitrary. Use the music to influence your edit, and enhance the music, and vice-versa. It is a music video, after all.
Watch our video below to know more about rhythm and how you can edit your videos to the beat.
(D) Develop Your Own Unique Editing Style
When it comes to editing music videos, you can be experimental and you can try cool and different things. You can have fun with your zooms, flashes, and shots! Whether it’s visual effects or the way you cut footage, play around and take the time to develop your own signature style that will help you stand out. Music video editing is very stylistic, and that’s why practice is important to develop a style.
Go through the effects tab in your editing tab and just drag each effect onto a clip, and see what it can do. Know your software, know your effects, and play around until you find what makes you unique!
When it comes to the color correction of a music video, we’re talking about exposure (how bright or dark your image is), contrast (how much of a difference exists between your shadows, highlights, and mid-tones), and color balance.
This will make your music video consistently look good, and more cinematic overall. You’re going to have really consistent colors throughout your footage that makes for a high-quality music video.
Here’s a tutorial that will take you through the color correction workflow:
If you want to dig deeper, here’s the complete guide to color correction in Adobe Premiere Pro.
Next up, we have our special Bonus section!
BONUS: How to make a music video using InVideo stock footage
We understand that shooting your own footage can be pretty daunting, especially if it’s your first music video. So we’re here to let you know that there’s another way to make your own music video! Two words: stock footage. It’s the easiest way to make music videos online.
Here’s what you can do using only stock footage on InVideo:
Here are some pre-made music video templates worth checking out.
One of the main reasons why InVideo is a fantastic solution for creating captivating music videos is that it’s an easy-to-use platform with plenty of features, including a powerful inbuilt stock media library that draws from world-class sources like iStock and Shutterstock. You don’t need to have previous experience with video editing software; InVideo was made for beginners who want to get amazing results with little effort.
Here’s a step-by-step breakdown of how to go about creating a music video on InVideo using only stock footage.
Step 1
Go to https://invideo.io/

Step 2
Select Blank canvas, Wide (16:9), and click on Make a video.

Step 3
Here, we will be selecting a stock music sample first and then choosing stock videos to make a music video. You can also upload your music from the Uploads tab on the left-hand panel.

Step 4
There is a stock music track which is provided by default. Delete it before adding different music. You can do this by clicking on the track in the bottom Scene panel and clicking Delete.
Step 5
Click on the Music tab on the left side panel, and select a genre.

Step 6
Select a track from the available stock music. You can also go Premium for just $20/month and get a wider variety.
At this stage of the process, you can play the tracks, and once you find something that suits your needs, hover over it to see a “+” sign to add the track to your scene.

Step 7
Check the duration of the selected track. This should ideally be the maximum duration of your video.
Step 8
Now that you have selected your music, it’s time to select videos from the stock videos available. Click on the Video tab on the left side panel and select a video from a range of free and premium options.

Step 9
Add scenes to add more videos and play with their sizes by trimming them, to fit to the beats and rhythm of your track.
Step 10
You can do micro edits for each video. Or even have multiple videos collaged in one scene. There is a huge array of options to play with which will make your creation unique.
Step 11
Here you will be taken to a Rendering window. After your video is rendered, download it.

Step 12
Finally, when you are happy with the results, click on the Download & Share button on the top right. Then, either upgrade to Premium or click on the Export with Watermark button.

While you’d spend hours creating a music video with many other solutions on the market, our platform enables you to come up with fantastic videos in less than ten minutes.
InVideo is a cloud-based platform, which means that everything you create is stored online. It’s also compatible with different operating systems—you can start creating your video on a Mac device and continue doing so on Windows. You can also go Premium for just $20/month and get access to more features to make a high-quality music video with only stock footage.
When you’re done, upload your videos to YouTube and share them with your fans. You can also use InVideo to create Facebook and Instagram stories to promote your music video.
Conclusion
You now have everything you need to make a music video!
If you want to learn how to make music videos for YouTube, you can dig deeper into this blog where we show you how to make YouTube videos from start to finish.
For more quick tips and hacks on editing and creating videos, subscribe to InVideo’s YouTube Channel. Finally, if you’re looking to create thumb-stopping videos in minutes (even if you’re not a PRO)- sign-up for a free account on InVideo.io today.