


Wondering how to start a Facebook group for business? We’ve got you.
Setting up a Facebook group is a simple 10-minute task but if you’re looking to create one for your business, there are a few things you need to do that will help you build an engaged Facebook community.
In this reading, we start from the very beginning of how to start a Facebook group for business and then go on to give it the finishing touches of adding member questions, setting rules, and more.
Let’s jump right in then!

Step 1: Add your Facebook Business Page as Admin
If you‘re wondering how to add an admin to a Facebook group that already has a Facebook business page, you can simply link the two. Your business page on Facebook can be the admin of up to 200 groups and all of these groups can be listed on your page. However, pages with age restrictions cannot be linked to a group.

Here’s how you can link your Facebook business page to your group:
1. Go to the Groups tab on your Facebook business page
2. Click on the option ‘Link Your Group’
3. If you have multiple groups, select the one you want to link on this business page.

If you’re wondering how to start a Facebook group and have it directly linked to your business page on Facebook, follow this simple 4 step process:
1. Click Pages in the left menu on your newsfeed and select your page.
2. Click More and from the dropdown, select Groups.
3. Click on Create Linked Group and fill out the details of your group, like if you want a private Facebook group or a public one.
4. When you’re done, click Create.
Step 2: Finding the Purpose of your Group
Once you’ve figured out the basics like how to start a Facebook group and the type of group you want to create, you should consider thinking about the purpose of your Facebook group.
If you know your ideal audience, you can break down their interests and make a group that serves them best. However, if you’re unsure of who you’re serving, think about the kind of people your business would want to connect with in real life. What are the things that they share in common?
Put yourself in the shoes of your future members. What needs in their life are you fulfilling? How will being on your Facebook group benefit them? Also, remember that the members of your group must share a common need.
Pro-tip: If you already have a business page, you can make a poll on Facebook and ask your users what you can do to help them.
As a business, you will also need to know where you want to navigate the group and what you want out of it. Otherwise, you will be stuck in an endless loop, and let’s be honest, no investment is good if it doesn’t lead to revenue.
Revenue can come in a lot of different ways, like a subscription or a direct sale. It is important for you to know which part of the sales funnel does your community fits in.

Are you hoping to catch a wide audience (top of the funnel) and make them aware of your product or service?
For example,
A sustainable products company can have a “Plastic Free Society” group that encourages people to adopt sustainable practices and switch to eco-friendly products.
Are you looking to create a niche community of people (middle of the funnel) who are already invested in?
For example,
A sports company can create a group for free runners – a community of people who are already practicing the sport. Their content will be driven towards helping people improve their skills by sharing tips and fitness strategies.
Want to add more value to users who have already purchased with you (bottom of the funnel)?
You can create a group for your existing customers to interact with each other and discuss specifically your product or service.
For example,
InVideo has a Facebook group that is accessible to those who use the tool. It’s a private group that allows its members to post their questions, share the work they created using InVideo, and also learn from fellow community members.
Answering these questions at an early stage, probably right when you are learning about how to start a Facebook group, will help you design the strategy and content for your target audience.
Step 3: Setting Rules for your Facebook Group![Step 3: Setting Rules for your Facebook Group]()
An engaged Facebook group will have a lot of exciting discussions and so it is important to set boundaries so members know what is off-limits. While Facebook has suggested rules that you can use, you can also choose to create and add your own specific rules.
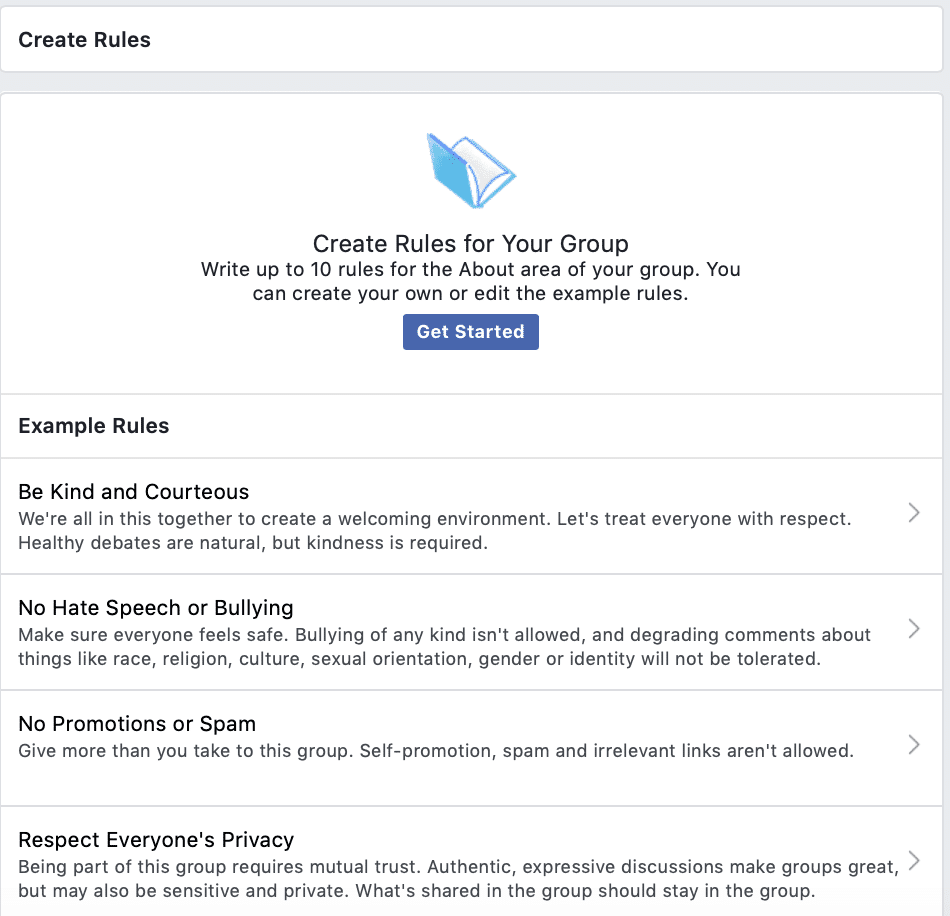
You will use these rules to moderate the group and if such a time comes when a member or more has violated the community guidelines, Facebook lets you send them a warning and ban notification, citing the reason for misconduct.
Step 4: Member Questions
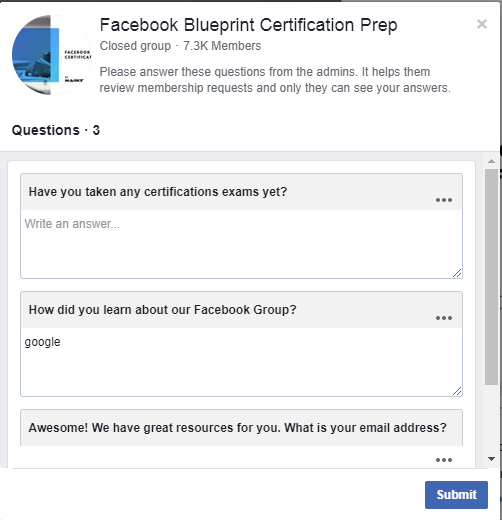
Facebook lets you ask 3 questions to potential members who wish to join your group. This feature lets you have quality control on who you give access to be a part of your community.
Wondering how to start a Facebook group where you have quality control on who you give access to be a part of your community? Facebook lets you ask 3 questions to potential members who wish to join your group.
If used well, these questions can be leveraged to give you insightful data about your users. Here are 3 questions to ask that will give you quick data that not only lets you filter your members but also understand them better.
Question 1: What is your email address?
Getting your user’s email address ensures that even if tomorrow for whatever reason Facebook stops working, you can connect with them by email.
If you plan to send out regular newsletters or emails, be sure to mention it in the question. You can also send them a welcome email or give them instant gratification by sending them a freebie (e-book, discount coupon, cheat sheet, etc.) for joining the group.
Question 2: What is your biggest challenge?
When your members share their challenges with you it helps you gauge their needs and how you can add value to them. Use this data to create content buckets and strategize how you can help them overcome these bottlenecks.
Question 3 can be of your choice as long as it helps you get valuable information for your business.
Pro-tip: Facebook does not save this data for you and so you can get plugins that will put all of your answers to these group gateway questions into an excel sheet. This will allow you to make patterns and create content buckets.
Thinking about how to start a Facebook group and automatically send data from the group to Excel? Zapier allows you to integrate your Facebook group to 2000+ apps, one of which is Microsoft Excel (they also have Google sheets).Other apps that you can connect with Zapier include Google Calendar, Slack, DropBox, PayPal, and more.
Step 5: Description
Your description is the first communication you have with your audience. You must set expectations of who you are, what the group is for, and who the group is for.
Once you’ve figured out how to start a Facebook group, you must then set expectations of who you are and what/who the group is for - and that is where the group description comes into the picture.
While you do have rules to inform your members of what is acceptable in the group and what is not, you can specify the important ones in the description as well. Set the expectations of the group in the description itself.
For example:
If you don’t want members to share promotions or in case of a TV show group – spoilers, mention that. Not only does this drive the point home but it also makes members feel safe (from spammy promotions, spoilers, etc.) while joining the group.
Step 6: Pinned Post

When you’ve accepted a person’s request to join the group, a pinned post will allow you to choose the first thing he sees. It is a space for you to welcome members, introduce them to the group’s culture, revise the rules and you can even share videos or links with them.
Pro-tip: Use this space to welcome new members and make them feel connected to the community.
Step 7: Cover Photo
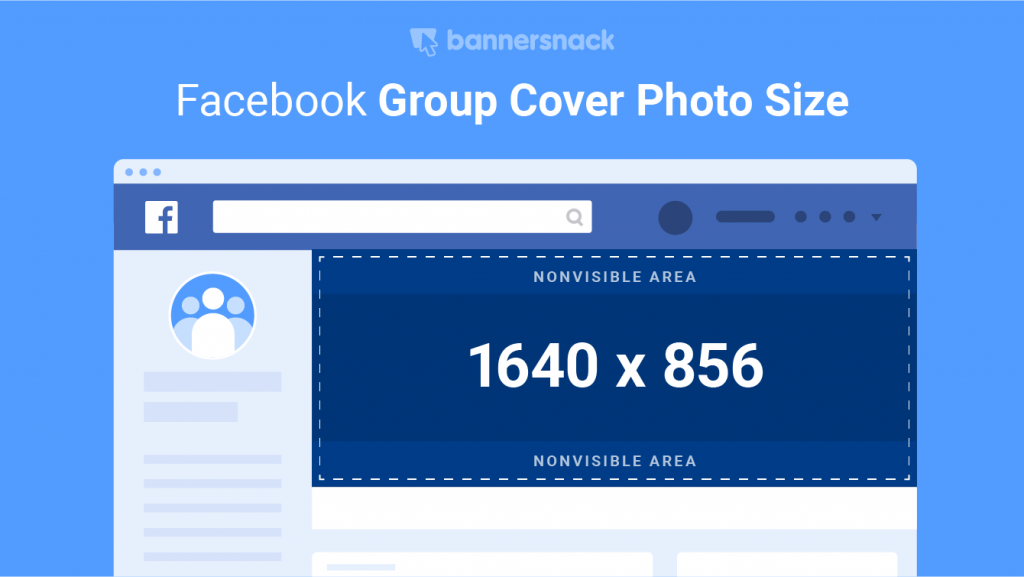
After having understood the basics of how to start a Facebook group, all you’re left to do is make your group more attractive. Adding a great cover photo will do the trick. Remember that the cover photo is the main highlight of any property on Facebook because it is the first thing you see. Make sure it visually communicates your business’s message with its audience.
Each of these steps helps in building a comfortable and exciting space for a Facebook community. Once you know how to start a Facebook group, your next challenge is to understand how to grow a Facebook group. As a business, you have multiple networks that you can leverage and let your audience know about your Facebook community. Go here for tactical tips to get more people to join your Facebook group.