Creating gold-standard videos for YouTube is so much more than just hitting the record button. Whether you’re an absolute beginner who’s looking to get consistent at creating content or someone who’s already created their first set of videos and is now looking to create TV quality videos like your favourite YouTubers, getting your hands on the right equipment to make YouTube videos could make all the difference. And pair that with an intuitive video editor like InVideo and you’re on your way to creating gold-standard videos in no time.

But I know what you’re thinking – there are so many options out there for every piece of this puzzle from cameras to microphones to light set-ups. Hence, we’ve put together this super tactical guide that will cut through the noise and tell you exactly what you need depending on the kind of videos you want to create and the kind of budgets you have.
How to make the most out of this guide?
We’ve deep-dived into every piece of equipment needed to make YouTube videos and have segregated them into beginner, intermediate and advanced levels based on pricing and the kind of output you can expect. You can simply browse through each equipment type and pick the option that best suits your budget and needs.
Alternatively, you can also directly jump to our snapshots at the end of this article for different types of videos such as vlogs and get a list of everything you’ll need with the most optimal gear recommendations by our team for different types of videos.
1. Camera & Lenses
2. External stabilizers
3. Lighting set-up
4. All things audio
5. PC
6. Memory cards
7. Software
8. Snapshots: Equipment lists for different types of videos
1. Camera & Lenses
The most important equipment in your kit is a camera and the right set of lenses. You don’t necessarily need to buy the most expensive camera in the store. In a lot of cases, all you need is a camera that can record in high-quality (1080p). We’ve segregated the best cameras in the market, based on where you are in your YouTube journey. Let’s get down to it.
(A) Beginner ($200 – $800)
If you’re just starting out with YouTube, a camcorder or webcam are great options. They’re easy-to-set-up, user-friendly, compact, and don’t cost a fortune. These work best for simple videos that don’t require a lot of post-production, like doing live streams, shooting videos from your desk, or creating on-the-go vlogs.
I. Camcorders (under $300)
Camcorders are portable, automatic, and built for adjustable shooting. Like point and shoot cameras, all you have to do is click the record button to start. One of the biggest drawbacks of these cameras is that they don’t come with manual features and record in 1080p or less, as compared to DSLRs and digital cameras which now record in 4K. However, if you’re just starting out, these will make for the best YouTube equipment for beginners. Check out this holiday film by Thea which was shot on a camcorder.
4 factors to check before you buy a Camcorder:
a. Optical zoom range - It must be at least 50x zoom allowing you to record things at a distance.
b. Sensor quality - The larger the effective area of the sensor, the better the pixel quality of the image, allowing you to shoot in dim light as well. Your camcorder should have a 22.3mm width, APS-C sensor with a maximum 1.6 crop factor.
c. Video resolution - The video resolution quality should be a minimum of 1080p.
d. Image stabilization - In-built image stabilization helps reduce the shakiness in the video while it is being recorded.

We’ve listed 2 camcorders under $300 for you to start creating videos on YouTube.
(i) Panasonic Camcorder HC-V180K ($228)
This compact camcorder is a great choice for vloggers and creators who are always on the go. It is extremely handy and comes with a 50-90X optical zoom which allows you to get zoom into a distance subject. You can also use the in-built creative filters like 8mm movie, silent movie, miniature effect, and timelapse effect to create stunning visuals to add to your YouTube video.
Here’s a video that’ll show you the kind of footage quality you can get from the Panasonic HC-V180K Camcorder.
(ii) Sony – HDRCX405 ($233)
The Handycam has been a favourite amongst tourists to record their travel videos. Like the Panasonic camcorder, it also comes with 7 in-built creative effects, AVCHD-MP4 dual recording, face detection, and SteadyShot image stabilization which makes it a great choice to shoot on the go.
Watch this video by the fiX files where he has compiled sample footage taken from the Sony HDRCX405 Handycam.
II. Webcam ($60 – $210)
Webcams on the other hand are the best for shooting videos from your desk – like tutorial videos or live streams. These attach straight to your laptop or desktop and you need to only adjust the focal length and frame for your webcam once. These are easy to set up as the system reads the hardware driver automatically and after that, it is literally plug-and-play.
2 factors you should check before buying a Webcam:
a. Output quality and resolution - The minimum output quality and resolution of your webcam should be 1080p. You should also check the frames per second – the higher the fps, the better the quality of the image. Most webcams come with a standard 30fps.
b. Auto-focus - Manual focusing on webcams can be very tedious. Always pick up a webcam that has an auto-focus feature and can also detect faces.
Here are 2 webcams that will allow you to record your live streams in high definition, under $210.
(i) Logitech Brio ($206)
The Logitech Brio is one of the first 4K compatible webcams that shoots at 30FPS. It also shoots 1080p at 30/60FPS. It comes with light adjustment and auto-focus which compensates the exposure in different settings, making sure you’re always visible and everything looks perfect. It has a dual-mic setup for great audio and a 90 degree field of view which allows you to have a wide set-up, especially if you plan to record or live stream tutorials. You can use the control panel from the Logitech app to zoom in to a particular frame as well. The control panel also allows you to manage the brightness/contrast, colour intensity, and white balance of the frame.
Check out Justin Tse’s experience with the Logitech Brio as he tests out the features and shows you the quality of the footage.
(ii) Logitech c920S ($90)
The Logitech c920 records in 1080p at 30/60FPS. Like the BRIO, it also has a light correction, auto-focus, and shoots a wide frame. If you are on a budget, you should pick the Logitech c920 which is one of the best webcams for starting a YouTube channel. It also comes with a privacy shutter that protects the lens when you’re not using it.
Watch this review by TimmyTechTV to get a sense of the video quality you can get out of the Logitech c920S.
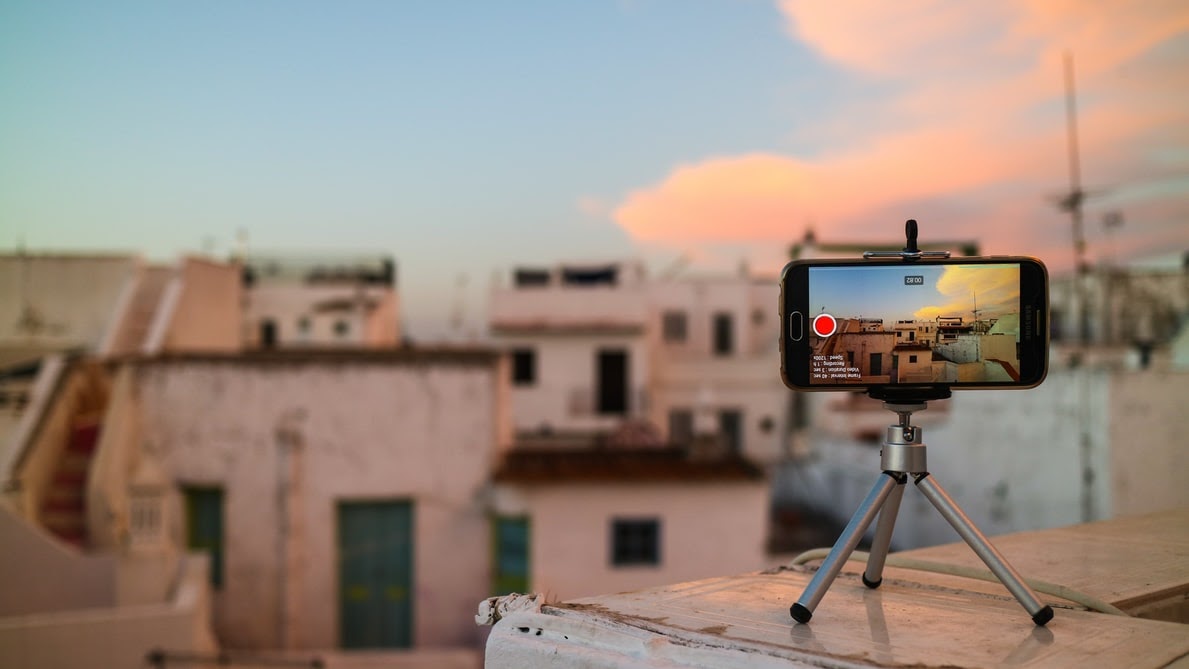
III. Cell-phone cameras ($170- $906)
If you don’t want to make an investment right away, you can use your cell-phone camera. Most smartphones these days come with at least a 12MP camera which records in 1080p. These make for easy-to-carry equipment and are great for shooting outdoors without restrictions. However, you will have to invest in a gimbal or tripod to shoot stable videos. Smartphones today also come with filters and effects like slow-motion, panorama, and timelapse. We’ve listed budget as well as expensive options for you to make an informed decision.
3 factors to consider if you’re planning to use your phone to shoot Youtube Videos:
a. Megapixels - Make sure your mobile camera has a minimum of 13MP to get sharp footage for your YouTube videos.
b. Image stability - This feature will stabilize shaky videos and is essential if you plan to shoot your videos handheld.
c. Storage - 128GB storage will allow you to use apps and store your footage without memory getting constantly full.
d. Low-light compatibility - Your cell-phone should be able to shoot under low-light circumstances so that you don’t need to invest in external lights.

We’ve listed below 3 cell-phones – budget, midrange, and expensive, all of which are great for shooting videos.
(i) Huawei P30 Lite ($170)
Camera specifications: 24MP+8MP+2MP triple rear camera
This budget cell-phone comes with Leica lenses and lets you record brighter and wider videos as compared to its competitors in the market. It also comes with image stabilization and you can attach it to a tripod or gimbal for more stable videos.
Check out this video by Dave West Media where he puts the Huawei P30 Lite to the ultimate video test.
(ii) OnePlus 7T ($399)
Camera specifications: 48MP+16MP+12MP triple rear camera
The OnePlus7T has an ultrawide camera with a 2x optical zoom. The triple rear cameras give extreme clarity and accurate colour reproduction. Known for its image and recording quality, the OnePlus 7T has an in-built image stabilizer and records videos at 1080p on 30 and 60 frames per second.
Watch this super detailed test of the OnePlus 7T’s camera before you make a purchase decision.
(iii) Iphone 12 ($906)
Camera specifications: 12MP – Wide camera, Telephoto camera, ultra-wide camera
One of the best features of the iPhone 12 is the ultra-wide camera that allows more light to seep in, making it a great fit for shooting in low-light conditions. It also records, edits, and plays in Dolby Vision and comes with a 10-bit HDR video recording that delivers 60 times more colour than the regular 8-bit video. If you’re a travel vlogger, you will love the night mode time-lapse video that can record light trails and motion when mounted on a tripod.
Watch this video by fStoppers where they compare the iPhone 12 Pro to the Sony A7 RIII, a full-frame mirrorless DSLR camera.
Want to know more about how you can shoot amazing YouTube videos just using your phone? Check out this tutorial by Sean Cannell.
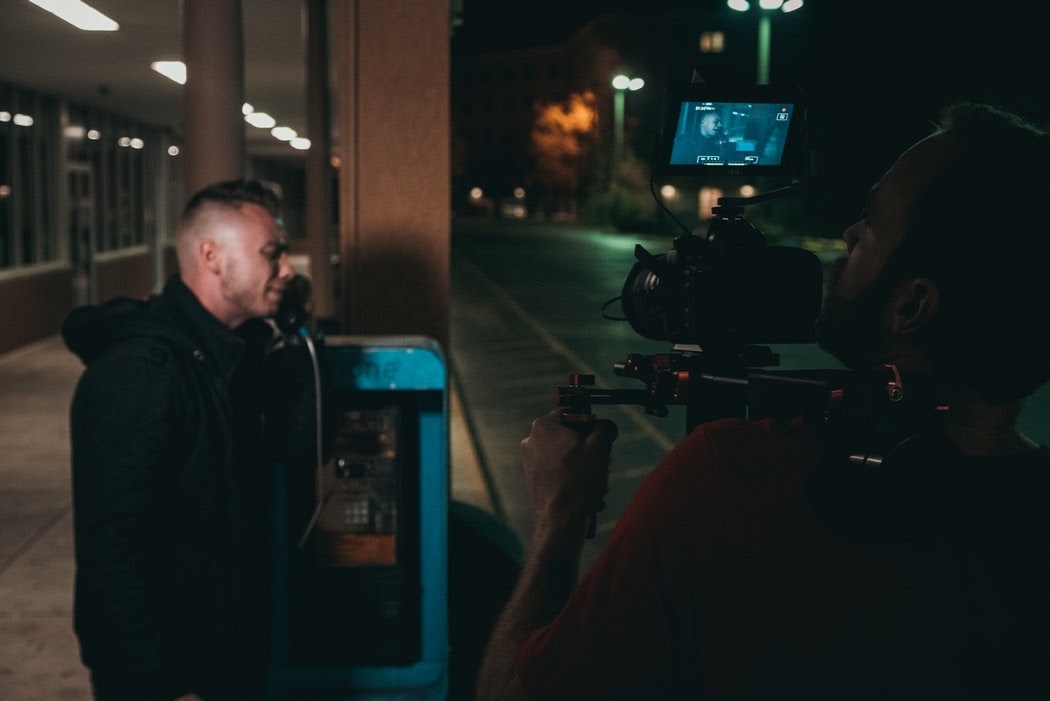
(B) Intermediate ($350 – $1300)
If you’ve been making videos on YouTube for a while now or you love creating videos with post-production effects, you must consider upgrading to a digital camera, DSLR, or an action camera. These cameras allow you to manually put in the settings or choose presets and create your own effects while shooting your videos. Most YouTubers use a DSLR to create their content because it allows them to create high-resolution videos from scratch. The resolution in these cameras is top-notch and will take your videos to the next level with respect to clarity and colour intensity.
I. Digital cameras
If you’re not someone who is interested in getting into camera settings, digital cameras are for you. These compact cameras are simple to use – literally point and shoot. They come with different presets that allow you to manage the light and colours depending on where you are shooting, and you can also manually input the settings of your choice. Canon and Sony both recently launched cameras specifically suited for vloggers and content creators to be able to shoot ultra high definition videos without learning the technicality behind producing videos.
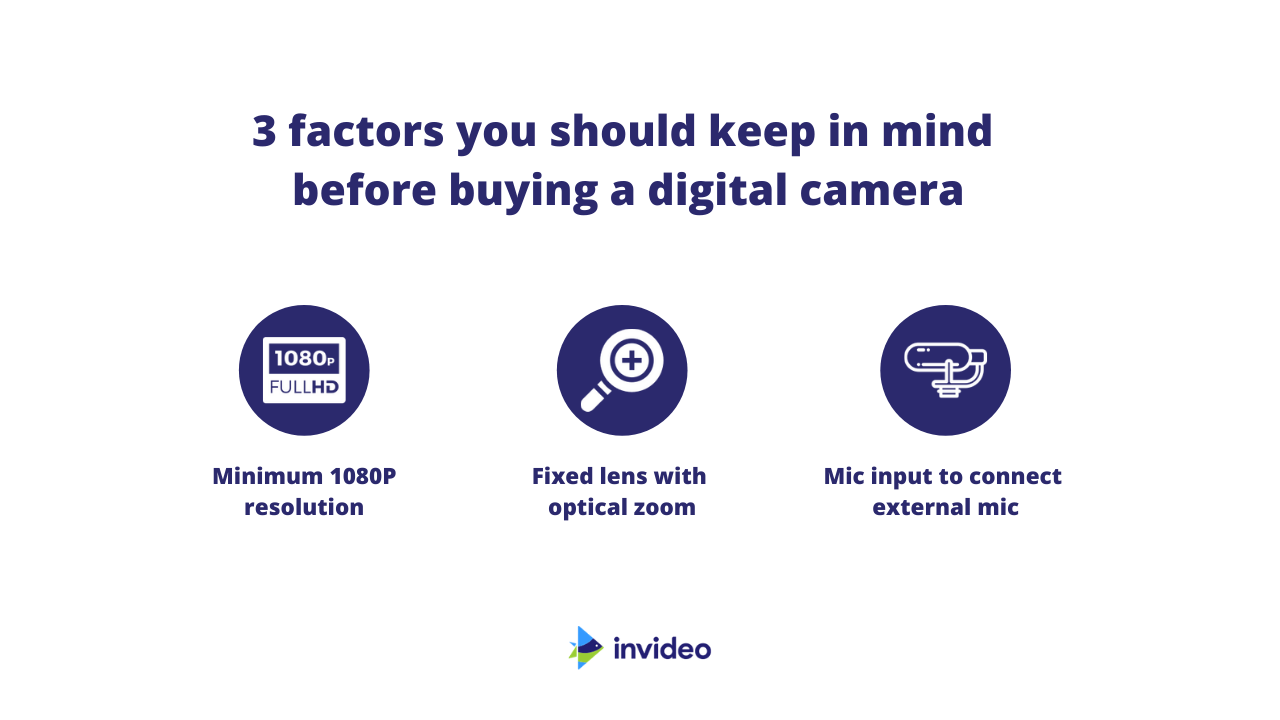
3 factors you should keep in mind before buying a Digital Camera:
a. Resolution/Megapixels - It is essential that your digital camera records at minimum 1080p resolution, however, digital cameras today like the Canon G7x Mark III shoots in 4K.
b. Mic input - This is absolutely essential for bloggers since you will need to connect an external mic for better sound quality.
c. Lens - All digital cameras come with a fixed lens – so be sure that the optical zoom and lens value work for the kind of videos you want to create.
We’ve listed 2 of the best digital cameras in the market for you to choose from.
1. Canon G7X Mark III ($649)
Specifically designed for vlogging, Canon’s G7X Mark III is a point and shoot that records videos in ultra high definition 4K. It comes with shooting presets like sports, landscape, scene intelligence, creative, and more to help you make the most of your surroundings. It comes with a 24-100mm fixed lens that takes care of both, wide and close-up shots. The aperture range of 1.8-2.8 allows you to shoot even in dimly lit conditions – making this one a great choice for YouTube camera equipment. You can also live stream using your Canon G7X Mark III by using the EOS Utility Webcam Beta Software or connect it to your system with an HDMI cable.
Check out this experiential video by Potato Jet where he talks about what a great fit the Canon G7X Mark III is for vlogging.
2. Sony RX-100 VII ($1298)
If you’re a travel vlogger, this has to be the camera you have been looking for. With a fixed lens of 24-200mm you’re free to shoot wide landscapes as well as extremely tight details and portraits. It also comes with a mic input, image stabilization and shoots in 4K ultra-high definition. The autofocus on this digital camera is absolutely unbelievable as it uses Ai based real-time tracking to ensure your subject is always in focus. Like the G7X Mark III, it also comes with a tilting touchscreen that allows you to set the frame for your vlog.
Watch this video of Brent Rose testing out the Sony RX-100 VII’s 4K footage.
II. DSLRs (under $1300)
If you’re passionate about telling visual stories, the DSLR is the perfect equipment for you. With everything in your hands, you can control the settings to great visually stunning effects using depth of field, motion blur, bokeh, and more. There is a lot you can also experiment with interchangeable lenses and create new effects. Most YouTubers who create premium quality content use a DSLR to record it. However, you don’t need to immediately invest in an expensive camera. There are many cameras in the market that are affordable and get the job done.
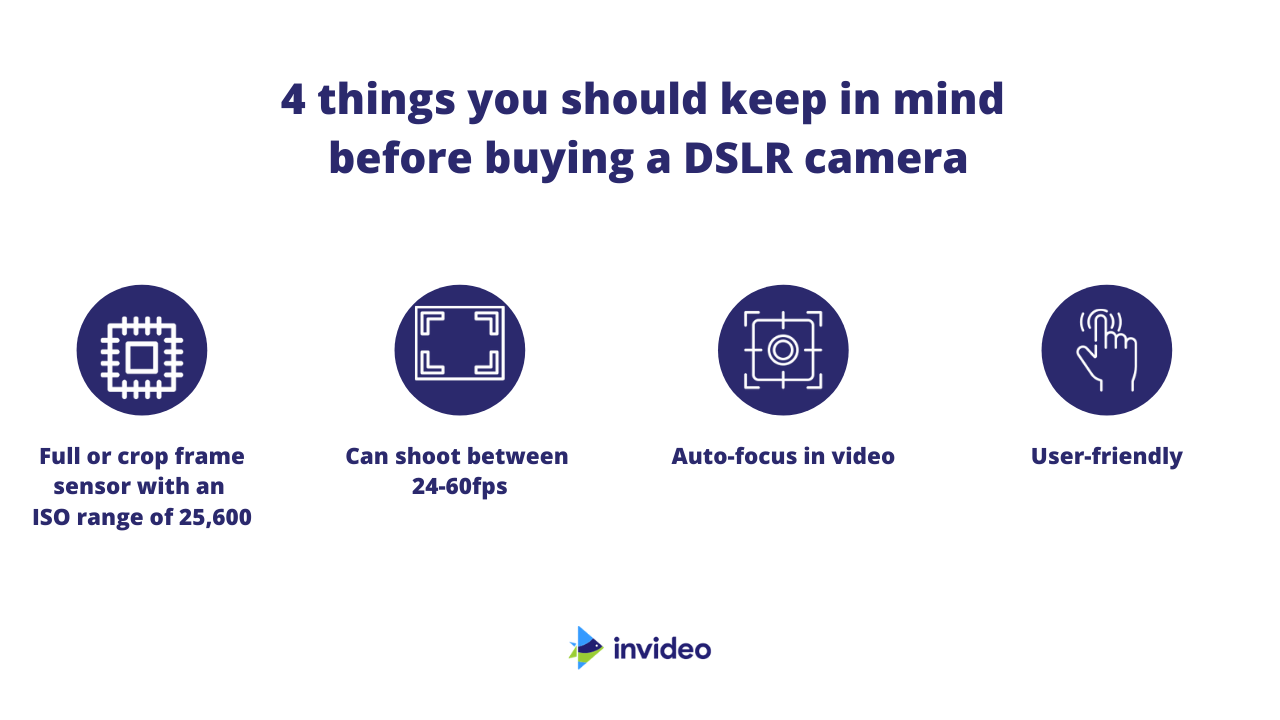
4 things you should keep in mind before buying a DSLR Camera:
a. Sensor and ISO - The sensor and the ISO determine how sensitive your camera is to light and can shoot in dim light settings without breaking into pixels. While the 35mm full-frame sensor is the gold standard, even a crop frame sensor works well. You must, however, check the ISO range of the camera which determines how it performs under low light circumstances. A good sensor will allow an ISO range of at least 25,600.
b. FPS - Most DSLRs come with FPS presets. Make sure you choose a DSLR that has a range from 24-60 FPS.
c. Auto-focus - The auto-focus feature of your DSLR allows your camera to focus on the subject even when it is in motion. This will make sure you always have sharp footage.
d. User-friendly - Not everyone is tech-savvy and understands the nitty-gritty of how a camera works. Choose a DSLR that has most of the settings on the camera body so it is easy to access.
Note: If you want to create live streams you may want to rethink a DSLR setup because you will need additional equipment to connect the live feed to the internet – like live streaming software, dual monitors, HDMI cable and adapters, DC coupler, mic, and more.
Here are 2 DSLR options for you to choose from:
(i) Canon 70D ($1200)
The Canon 70D is currently considered as the best equipment for YouTube videos. It comes with 19 cross-type autofocus points which ensure that your subject is always sharp and in focus. With 20.2MP and a dual pixel AF sensor, it allows you to shoot in ultra-high definition, giving you the best image quality at that price. With Bluetooth and WiFi, your camera can easily connect to your smartphone and you can set the frame, start recording, and even manage the settings at your fingertips.
Watch this short film by Collin Ausbury which is shot completely using the Canon 70D – to get an idea of the quality and colours you can expect from this camera.
(ii) Nikon D7500 ($1099)
The Nikon D7500 comes with a 51-point autofocus system that makes sure your subject is always in focus. Like the Canon 70D, it also comes with Bluetooth and WiFi allowing you to use your smartphone to manage settings and set the frame. It also records in ultra high definition (UHD) – 4K.
Watch this review by Joshua Roode in which he also shares the footage and his shooting experience with the Nikon D7500 in the outdoors.
If you want to know more about recording videos on DSLRs, you should watch this video on the best DSLR settings for video by Think Media.
Let’s talk lenses
When you purchase a DSLR, one of the most important things to keep in mind is what lenses you need in your kit. Let’s broadly look at the different types of lenses and what they are used for.
a. Wide-angle lens ($499 onwards)
The most staple lens and a must-have for every kind of YouTuber is a wide-angle lens. You can pick up the favourites, like 18-135mm or the 24-105mm or you can pick up lenses that are more suited to your style. For example, if you’re going to create video content with shots that show interiors, architecture, or massive landscapes, you could also choose an extreme wide-angle lens to make sure you get all of it in the frame, like the 16-50mm lens (essential if you want to shoot architecture and interiors) or the 10-24mm lens (best for shooting landscapes and nature).
Watch the video below for a detailed review of the Canon 18-135mm lens and you can also see the output quality that this lens gives you both indoors and outdoors.
b. Prime lens ($159 onwards)
Prime lenses unlike other lenses have a fixed focal length and maximum aperture, like the 35mm, 50mm, and 85mm. This makes them a great choice for shooting close-up videos, interviews, especially in low or dim light conditions. Owing to their maximum aperture, they can create blur and bokeh effects, allowing you to use these tricks to tell vivid stories.
Check out this video by Matti Happoja where he shows you the difference in output from a wide-angle lens – 24mm and a prime lens – 85mm.
c. Telephoto lens ($1299 onwards)
Telephoto lenses increase the focal length and allow you to shoot subjects that are far away from you. These are great for travel and wildlife videographers who may not be able to go close to their subjects at all times. You can use a medium telephoto lens like the 70-200mm and 100-400mm or even opt for super-telephoto lenses that are longer than 300mm. These lenses are heavy and often need a stand of their own for weight support.
Watch this video to understand how telephoto lenses (specifically the 100-400mm) are great for creating videos.
d. Macro lens ($499 onwards)
If you want to go extremely close to a subject and get in all the details of it – you need a macro lens. These lenses are very popular with videographers who like to capture nature and small wildlife. However, these lenses can create stunning shots for food and fashion where you show your viewers the layers and intricate details of your subject.
Watch this 2-minute video where Peter McKinnon will show you why you need to have a macro lens in your kit.
e. Creative lenses ($1200 onwards)
We’re putting fisheye, tilt-shift, and Lensbaby under creative lenses because of the creative visuals they can create when used for shooting videos.
– Fisheye lenses have a focal length of less than 12mm and allows you to view the world with the bulbous eye of a fish. Check out this video by Meike Global
– Tilt-shift lenses manipulate optics and perception to create dramatic shots, like this amazing miniature timelapse by Little Big World.
– Lensbaby are camera lenses that when combined with a simple lens add special effects to the videography. These lenses are usually used to create selective focus and bokeh effects. Check out this video – a Lensbaby reel.
III. Action cameras ($350 onwards)
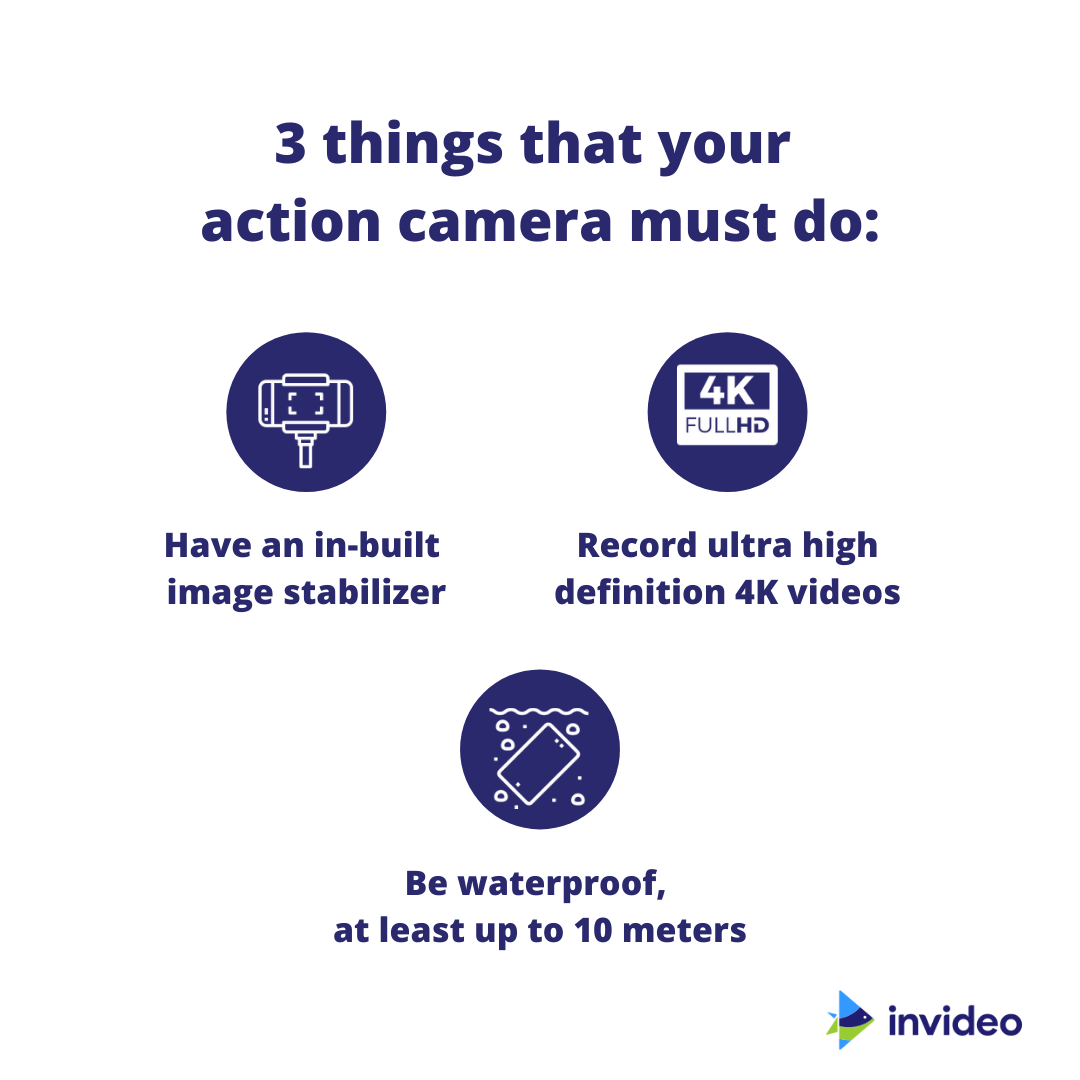
If you want a versatile camera that fits right into your pocket and allows you to shoot ultra high definition 4K videos, an action camera is perfect for you. Action cameras are best suited for YouTubers who want to show their POV or are into travelling and adventure sports. These compact cameras produce 4K videos at 60fps and are waterproof (up to 10 meters). It comes with an in-built image stabilization but you can also additionally purchase its holders, body belts, and stands to give you better stabilization. Unlike the DSLR, you cannot manually integrate all settings. However, these cameras come with their own settings and preset for you to create unique shooting styles.
The current market favourite for action cameras is GoPro. These cameras allow you to create gold-standard videos by recording in ultra-high definition. They’re portable, affordable, and easy-to-handle. Their most recent model is the GoPro Hero 9 which is for $400, accessories sold separately.
Check out this video in which Peter McKinnon breaks down the features of the GoPro Hero 9 and you can also see its output in terms of stability, colours, and quality.
(C) Professional ($1500-$3000)
Ready to level up? These cameras are in a league of their own. With the ability to record in ultra high definition on a full-frame sensor, the latest mirrorless cameras are truly a class apart. They share all the features of a DSLR but have a lighter body and better output quality.
(i) Canon EOS R ($1600)
Canon’s first full frame camera is one of the best choices for YouTube equipment. It comes with an in-camera digital lens optimizer for vivid colours, 5 stops image stabilization for crisp and clear imaging and shoots 4K UHD videos. Canon Log gives a rich gradation output, allowing you to work on the footage in post-production, without hampering the image quality. It also has the fastest autofocus system yet which detects the subject in 0.05 seconds, making sure that every movement recorded is sharp and clear.
Watch Team Supertramps’s review of the Canon EOS R where they also share test footage and tell you what made them switch to this mirrorless camera.
(ii) Sony Alpha A7 RIV ($2998)
This 61MP mirrorless camera by Sony is nothing short of the quality of a medium format camera (which is used to shoot movies). It comes with a mix of fast hybrid and contrasts autofocus systems to ensure that you get the sharpest moving images. It shoots in ultra high definition 4K and with Sony’s BIONZ X processor, you won’t miss out on a single detail.
Watch Tutto Digitale’s extensive 4K video test and review of the Sony Alpha A7 RIV before you think of buying this camera.
Next, let’s look at external stabilizers to add to your YouTube equipment kit.
2. External stabilizers
Everyone likes sharp images and while cameras come with in-built stabilizers, having an external stabilizer ensures smooth movement and sharper videos. Every use-case will need different stabilizers and your choice will depend on where you are shooting and how much movement you need.
To help you choose external stabilizers better, we have segregated them based on their use case, so that you can choose the best-suited stabilizer for the kind of videos that you want to shoot.
(A) Still-Frame Videos
Think interviews, over-the-desk, and tutorial videos – all of these videos have a still frame, in which the subject interacts with the audience. These simple videos are fairly easy to shoot and don’t need high-end video stabilizers. If you plan to shoot these kinds of videos, here’s a list of equipment – both basic and advanced that are great options to shoot still-frame videos.
I. BASIC
(i) Simple 3-legged tripod
A simple tripod is a 3-legged stand that can hold your phone or camera in place while you’re shooting the video. These are great if you have a single frame set-up. All you have to do is fix your camera on the tripod, press the record button and you’re good to go. You will find tripods of different heights, folds, and portability – pick the one that best suits your shooting needs. For example, if you plan on shooting tutorial videos at home, you should buy a simple 5ft tripod with 2 folds.
a. Mactrem PT55 lightweight tripod ($39.99)
This lightweight aluminum tripod by Mactrem is compatible with Sony, Nikon, and Canon cameras and can hold up to 11lbs (5kgs) weight. It has a 3-way pan that allows you to take simple movement shots – from top to bottom, right to left, and portrait tilt, with the help of a 360-degree handle. It is a 3-fold tripod extendable to 56 inches – perfect for tabletop, long, and wide shots.
Here’s a detailed look at the Mactrem PT55 tripod. Check out MikeTheMathMan’s review of whether or not it is the best YouTube tripod for under $50 below:
b. Edurax 66” Tripod ($36.99)
This 66” portable tripod is a great option if you switch between your cell-phone and camera. It comes with a universal phone mount and carry bag. It is suited for all cameras and is lightweight. It also comes with a pan head which allows you to shoot vertically, horizontally, and with a tilt.
(ii) Cell-phone stand
If you’re shooting with your cell-phone cameras, you must invest in a phone stand or tripod. Similar to camera tripods, phone stands allow you to fix your phone in place and continue shooting.
a. Manfrotto PIXI Mini Tripod ($17.82)
This mini tripod by Manfrotto is perfect for compact cameras and cell-phones. You can either place it on a surface or move it around with your camera – giving it a gimbal-like movement. It is super portable and a must-have for vloggers.
Watch BVC Co.’s review of the Manfrotto PIXI tripod before you decide to buy it.
b. Gooseneck phone holder ($21.99)
Got a desk set up where you plan to shoot most of your videos? This gooseneck phone holder will fit right onto the side of your table and you can adjust it as you wish. You can shoot tutorials with a top shot of what you’re making as well as shots of you explaining the process.
c. Arkon gorilla tripod ($19.95)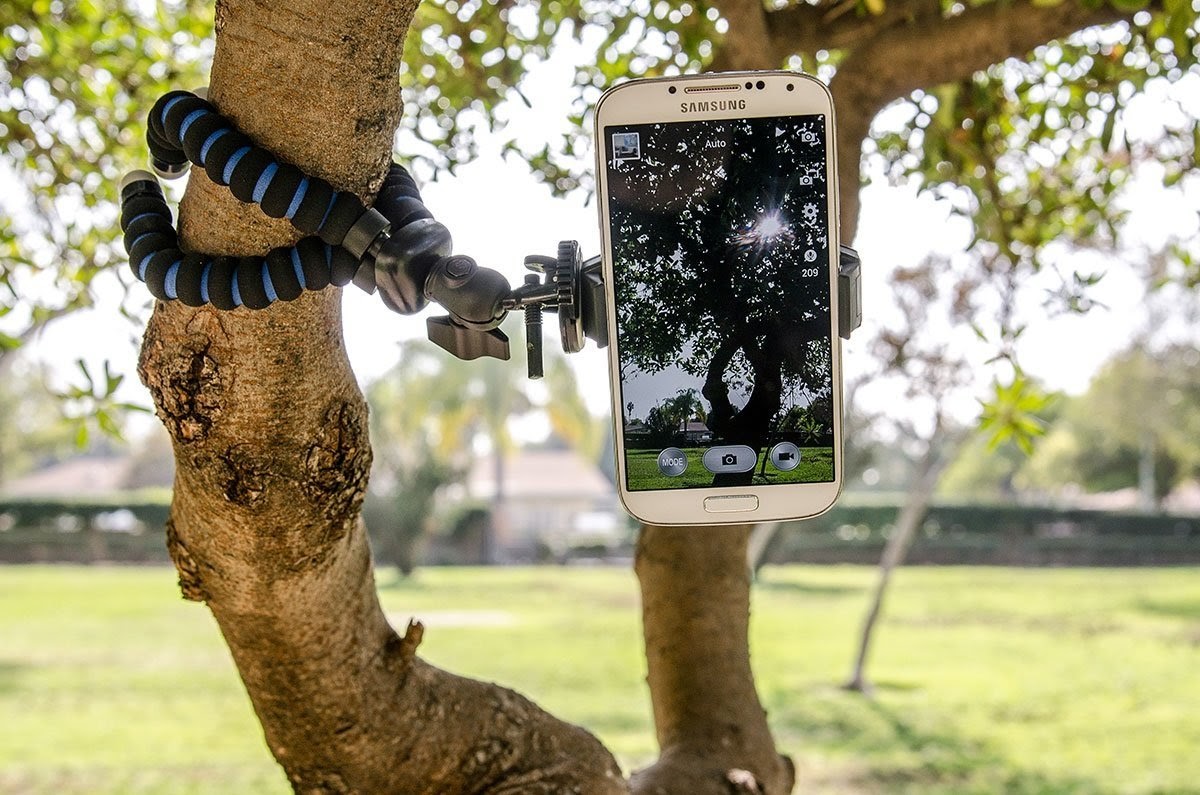
Need a flexible tripod that can mount your phone or compact camera anywhere? This gorilla tripod by Arkon will let you do just that. All three legs are flexible and can be wrapped around all kinds of surfaces to make sure you take creative shots from different perspectives.
Watch this video by Think Media where they discuss the best phone tripods and why Arkon’s gorilla tripod has made that list.
d. Tripod + ring light stand ($39.99)
A perfect fit for vloggers and makeup artists who create content on YouTube – this tripod comes with a ring light stand. It is also a great setup if you regularly go live on YouTube. It is only compatible with your cell-phone and comes with 3 light modes (warm, cool, and daylight). If you’re just starting on YouTube and plan to shoot videos from your desk or go live often, this is a great investment where you get your stand and light sorted.
Watch Geeky Nerdy Techy unbox, assemble, use, and review this tripod+ring light stand.
II. Advanced
(i) Tripod
Remember to upgrade your basic tripod to an advanced one as you grow in your YouTube journey. These advanced tripods come with fluid heads that allow you to take motion shots like pans and tilts to create interesting videos. We’ve listed 2 of the best tripods available in the market for you to choose from.
a. Manfrotto compact action ($69.88)
There are multiple advanced options for you to choose from in this compact action tripod by Manfrotto. It is compatible with all DSLR and mirrorless cameras. You can choose advanced fittings like a ball head, phone clamp, 3-way head, and hybrid head.
Check out this detailed review of the Manfrotto Compact Action by Mamo Air.
b. Mactrem 80” tripod ($76.99)
This 18-80 inch tripod comes with a swivel 360 degrees ball head. It has 4 legs, 1 of which can be converted into a monopod. You can also use the upside-down central column (which can be elongated) for macro photography – to get closer to the subject. The tripod comes with leg angles that can be adjusted according to the surface conditions, so you can shoot on any kind of surface which need not be flat.
(ii) Gorilla tripod
Compatible with DSLRs and mirrorless cameras, the JOBY Gorilla 5K kit is a must-have for content creators who love shooting outdoors. The wrappable legs allow you to grip it, wrap it, and stand it, and it can hold up to 5kgs of weight. It can also do 360-degree pans and the hub adapter will allow you to mount GoPro, flash clips, lighting, and microphones.
Watch Ramon review the Joby gorilla 5K kit and tell you why it makes for the best portable tripod.
III. Pro-level- Tripods
a. Vanguard Alta Pro ($145 onwards)
Great for taking low angle shots, this flexible tripod allows fluid movement. It is compatible with both DSLRs and mirrorless cameras. You can choose from different tripod head types – like the pistol grip, pan-head, and ball head.
Check out this hands-on review of the Vanguard Alta Pro where you can also see the fluid movement and low angle shots it can take.
b. Coman fluid head tripod ($129.99)
This fluid head tripod has a 360-degree ball head that allows you to do all kinds of tilt and pan shots. It is also portable and the separated foot tube when combined with the center shaft becomes a monopod. This tripod can be used for extremely low angle shots and macro videography. It also comes with a limited 730-day warranty.
Watch this detailed review of the Coman tripod where you can also see how the 360-degree fluid head works.
(B) Videos with simple movements
If you plan to have simple movements in your video like shooting while walking or following your subject, you will need something more stable and light-weight than a tripod.
I. Basic
Simple monopod
As the name suggests, a monopod has only one leg to support your camera or cell-phone. These are a great fit if you want to walk around the city with your camera or switch between taking handheld and monopod shots. Here’s a review of the Manfrotto Compact Extreme monopod ($20.50) by Think Media and video journalist Juliana Broste.
II. Advanced
Monopod (under $170)
Ready to upgrade your simple monopod? You can make the switch to these monopods that come with different heads for increased movement and fluidity. Some of them also come with a claw end for a better surface grip.
Here are 2 monopods for you to pick from when you decide to upgrade.
a. Manfrotto Xpro 4/5 section ($161.53)
You can choose 3 different options of video heads – a 2-way video head, 577 head, and a fluid video head. Each of these helps you create a different kind of movement that can be used to create a variety of shots. Watch this video by Henry Ortlip to see how these video heads work.
b. Coman monopod ($129.98)
This lightweight telescopic monopod comes with a tilt-pan fluid head that allows you to take creative panning and tilting shots. It also has a claw end at the bottom that allows the monopod to stand and have a grip if kept on a flat surface. Check out this video review by Louis Aragon where he talks about why the Coman monopod is his favorite.
(C) Videos with complex movements
Want to shoot videos with complex movements like in a mysterious chase scene or a complicated long shot? You will need a gimbal or Steadicam to ensure you get smooth camera movement and transitions. You can start off with basic gimbals that can achieve smooth pan, tilt, and follow shots. For complicated shots, you will need advanced gimbals which come with more modes and grip movements or you can upgrade to a vest or Steadicam.
I. Basic
(i) Phone Gimbal
a. MOZA Mini-MI Stabilizer ($89)
This phone gimbal is packed with features that allow you to create stunning videos with your smartphone. It can take 300 gms of weight – so you can also attach a mic or light on the gimbal along with your phone. This gimbal lets you do a full 360-degree movement – which can help you create full circle time-lapses and amazing 360 pans. It can be charged using a wireless charger which allows you to keep shooting without having to worry about the battery draining out. The pro features in this gimbal allow you to change shutter speed, aperture, ISO, and focus points. You can also experiment with modes like the inception mode for creative videos.
Watch this video where Sean Cannell talks to Eddie Melendez of EMT Films to understand what makes the Moza Mini-MI one of the best smartphone gimbals in the market.
b. Zhiyun Smooth 4 ($89)
Zhiyun is the best budget smartphone gimbal in the market today. This gimbal can shoot in both portrait and landscape mode so you can create amazing content for your YouTube videos and then shoot great promotional videos for Facebook and Instagram stories. You don’t need to keep adjusting the setting on your phone, instead, the gimbal hardware itself has many control options that allow you to start and stop recording, zooming in, focus pulling, etc. If you’re looking to take to your videography to the next level, the Zhiyun is a great investment.
Check out this video by Think Media where they do a first look and test of the Zhiyun Smooth 4.
c. DJI Osmo Mobile 2 ($89.90)
The DJI Osmo Mobile 2 comes with a 3-axis stabilizer to ensure that your video footage is stable and removes any shakes. It has a joystick that allows you to direct your camera and you can create time-lapses, panoramas and also control zooming in on the gimbal itself. You can shoot in both portrait and landscape mode for up to 15 hours when fully charged. The gimbal comes with an in-built battery and can also be used as a power bank if your phone’s battery is draining.
Watch this video by DigitalRev TV where they not only review the DJI Osmo Mobile 2 but also teach you some cinematic gimbal tricks.
(ii) Camera Gimbal
Zhiyun Weebal Lab ($599)
If you’re looking for a compact travel gimbal – this is the one. This lightweight gimbal is easy to carry around and you can easily switch between a simple, dual, and underslung mode (great for low-angle shots). It is not suitable for DSLRs and lenses that will weigh over 6.6 pounds and is designed for smaller cameras. You can do all kinds of smooth movements with these gimbal-like pans, tilts, rolls, locks, and vortex. Watch this video by Potato Jet if you plan on buying the Zhiyun Weebal Lab.
Watch Potato Jet review the Zhiyun Weebal Lab as he takes it for a spin, allowing you to hands-on see how this gimbal works.
II. Advanced
a. Ikan MS Pro Beholder ($560)
The Ikan MS Pro Beholder is a great 3-axis stabilizer to take the shake out of your footage and achieve cinematic videos. It is only compatible with compact and mirrorless cameras, smartphones, and action cameras. It comes with different preset modes (lock, pan and follow, follow and three-axis follow) and can be easily accessed on the OLED screen. There are side screws on the gimbal for you to attach accessories like mics, lights, etc. It also has an option to connect it to a tripod or monopod if you want to increase its height or you can invert it to take low angle shots.
Watch Think Media’s detailed review of Ikan MS Pro Beholder.
b. DJI Ronin S ($549)
The DJI Ronin S comes has an ergonomic design and can hold DSLRs, mirrorless, and some medium format cameras (under 8 pounds). This gimbal comes with claw-end tripod legs so it can be set down if you’re taking a still shot. It is one of the best YouTube equipment for professional content creators and filmmakers. You can use the different modes for easy shooting and the gimbal’s hardware also allows you to control the zoom and focus without you needing to change it on-camera.
Here’s a complete review (along with shot footage) of the DJI Ronin-S by Matti Haapoja.
III. Pro-level
(i) Vest stabilizer/Steadicam
a. Flycam Zest ($1183)
Traditional Steadicams don’t have any electronic stabilization at all, unlike a gimbal. Steadicams completely maintain their position by balancing the entire system on the center of gravity. The Flycam Zest comes with a whole set-up of a vest and an attached stabilizer which can carry a payload of 5-15 kgs. It comes with an HDMI Splitter, external weights for balance, and a monitor holder. Watch this video by Proaim Global to understand all the functionalities of the Flycam Zest.
b. Flycam 5000 ($184)
The Flycam 5000 is a lightweight stabilizer that is great for gliding shots. You can make fast and follow quick action movements without getting any shakes in the footage. It also comes with an attached handle grip which acts as a free-moving gimbal to create side-to-side and up and down movements freely. It also has 16 weight discs to balance the stabilizer systems for clean and balanced shots.
Watch Omar review and demonstrate how the Flycam 5000 works.
3. Lighting set-up
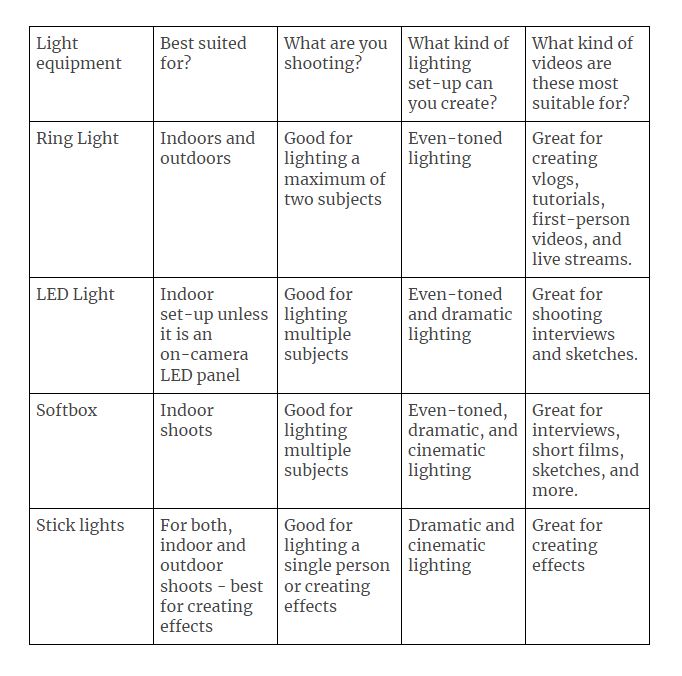
One of the most important pieces of YouTube equipment that can take your videos to the next level is a good lighting set-up. You can choose the lights depending on the type of videos you create. Lighting set-ups change based on where you’re shooting – indoors or outdoors, what you’re shooting – moving or still subject, and what kind of lighting set-up do you want – dramatic, even, or cinematic? Most of the lighting set-ups mentioned below fit in multiple categories, so to make things simpler, we’ll talk about the set-up and then put tags based on where you can use these lights.
(A) Ring lights
Ring lights have become a popular YouTube equipment for vloggers. They’re portable, super simple to use, and extremely handy lights. The main purpose of this ring light is to illuminate the face, reduce shadows, and minimize blemishes. These can come for as cheap as $20 like this Arkon LED rechargeable LED selfie ring light which clips on your smartphone or camera’s LCD screen and is great for vlogging and live streams.
If you’re looking for a bigger ring light for a larger set-up, check this 18” ring light by Prismatic ($140). It comes with an in-built dimmer that allows you to control the intensity of the 240 LED lights in its frame. It comes with a hot shoe so you can mount it on your camera or a light stand. It also comes with a cold-shoe mount which lets you put a compact camera or smartphone set-up within the light to make a quick set-up.
Where are you shooting?
Ring lights are great for shooting both indoor and outdoor
What are you shooting?
Usually, ring lights are used for shooting a single, still subject but if you have a portable one like the Arkon LED selfie ring light, you can use it while you’re vlogging on the go.
What kind of lighting set-up do you want?
Ring lights give you even-toned lighting. It is not good for dramatic or cinematic lighting.
Check out this video by Think Media on video lighting tips for your YouTube video using a ring light.
(B) LED Lights
LED light panels are another great option for YouTube equipment. These are simple to set up bi-color lights which come with a diffuser to soften the light and barn doors that can act as cutters if you want to block the light. Most LED panels will allow you to control the intensity and temperature of the light.
If you’re on a budget, go for the Neewer 660 LED Panel ($209) – it comes with the complete setup and variable white balance and colour temperature. On the other hand, if you want to upgrade or are looking for a more professional set up, check out this 900 LED Daylight Panel Kit by Fovitech ($450).
Looking for something below $30? Check out this on-camera 176 LED Panel by Neewer ($24.49). It is small, portable, and fits right on top of your camera – making it the perfect YouTube equipment for outdoor shoots.
You can also upgrade to continuous LED lights like the Godox SLB60W ($349). You can control the colour temperature and the brightness on this super portable light. However, you must use a softbox to diffuse the intensity of the light to avoid overexposure and deep shadows on the subject. These kinds of lights are great to create a dramatic and cinematic effect.
Where are you shooting?
LED lights are heavier and so are best for an indoor set-up, especially if you will be using additional diffusers like a softbox. However, you can use the portable on-camera LED lights for outdoor shoots as well.
What’re you shooting?
You can use LED lights to shoot multiple subjects, however, you will need to dedicate a minimum of one fill light per person or a central light per subject.
What kind of lighting set-up do you want?
LED lights to give an even tone set-up but you can create dramatic and cinematic looks with LED light panels.
Watch Sean Cannell discuss the best video lighting equipment for LED light panels in the video below.
(C) Softbox
Softbox lights are professional video set-ups like those you would see in television interviews. These usually come with high-intensity lights – like CFL or LED bulbs and a softbox that helps diffuse the light. For even toned lighting, you must have a softbox on either side of the subject to remove any shadows. You can pick up this pocket-friendly option by Fovitec ($176.70) which comes with a 2-1000W studio lighting kit or you can build your own kit by choosing advanced and high-quality continuous lights and softboxes from Godox ($99).
Where are you shooting?
Softboxes are heavy and can be tedious to set-up. These lights are best for an indoor set-up.
What’re you shooting?
Softboxes like LED panels can be set up for multiple subjects, however, you will have to have multiple keys and fill lights.
What kind of lighting set-up do you want?
Depending on how you set-up your softboxes, you can achieve all the 3 – even tone, cinematic, and dramatic lighting.
Here’s a review of the Godox Softbox by SMOHJOE14.
(D) Stick lights
These portable LED lights are extremely handy and make for the best YouTube equipment to shoot outdoors. You can adjust the colour temperature, the intensity of light and in some stick lights, like the Godox LC500R ($239) you can employ the RGB mode to choose from 360 selectable colours for a cinematic effect. It also has a creative music mode which allows light to change its color and brightness on the beat of the music, as it changes.
Where are you shooting?
Stick lights are great for shooting outdoors – they’re super portable and don’t need to be set-up like softboxes and LED lights.
What’re you shooting?
Stick lights are great for both still and moving subjects. However, you can only light one subject with a single stick light.
What kind of lighting set-up do you want?
These lights are best for creating dramatic and cinematic effects. They may not be the best choice if you want even-toned lighting.
Check out this detailed review and demonstration by Nemanja Sekulic of the Godox stick light.
4. All things audio
The sound in the video makes for half the experience. The quality and richness of the sound play a big role in engaging your audience with the scene. When the audio is not good, you end up skipping the content right away. Think about movies with exceptional background scores like Tenet (2020), Joker (2019), and Interstellar (2014) – the audio equally drives the story of these films.
The in-built sound systems in your camera or smartphone don’t record good quality audio. To make sure that you are giving your audience the best sound experience, it is important to invest in sound equipment like microphones, headphones, and sound cards. Most of these audio equipment fits in multiple categories, so to make things simpler, we’ll talk about the different kinds of YouTube recording equipment that are available and their use cases.
(A) Microphone
One of the first investments you should make for leveling up your audio game on YouTube is a microphone. Many microphones are suitable for recording crisp audio and we’re going to talk about the most popular ones used by YouTubers themselves.
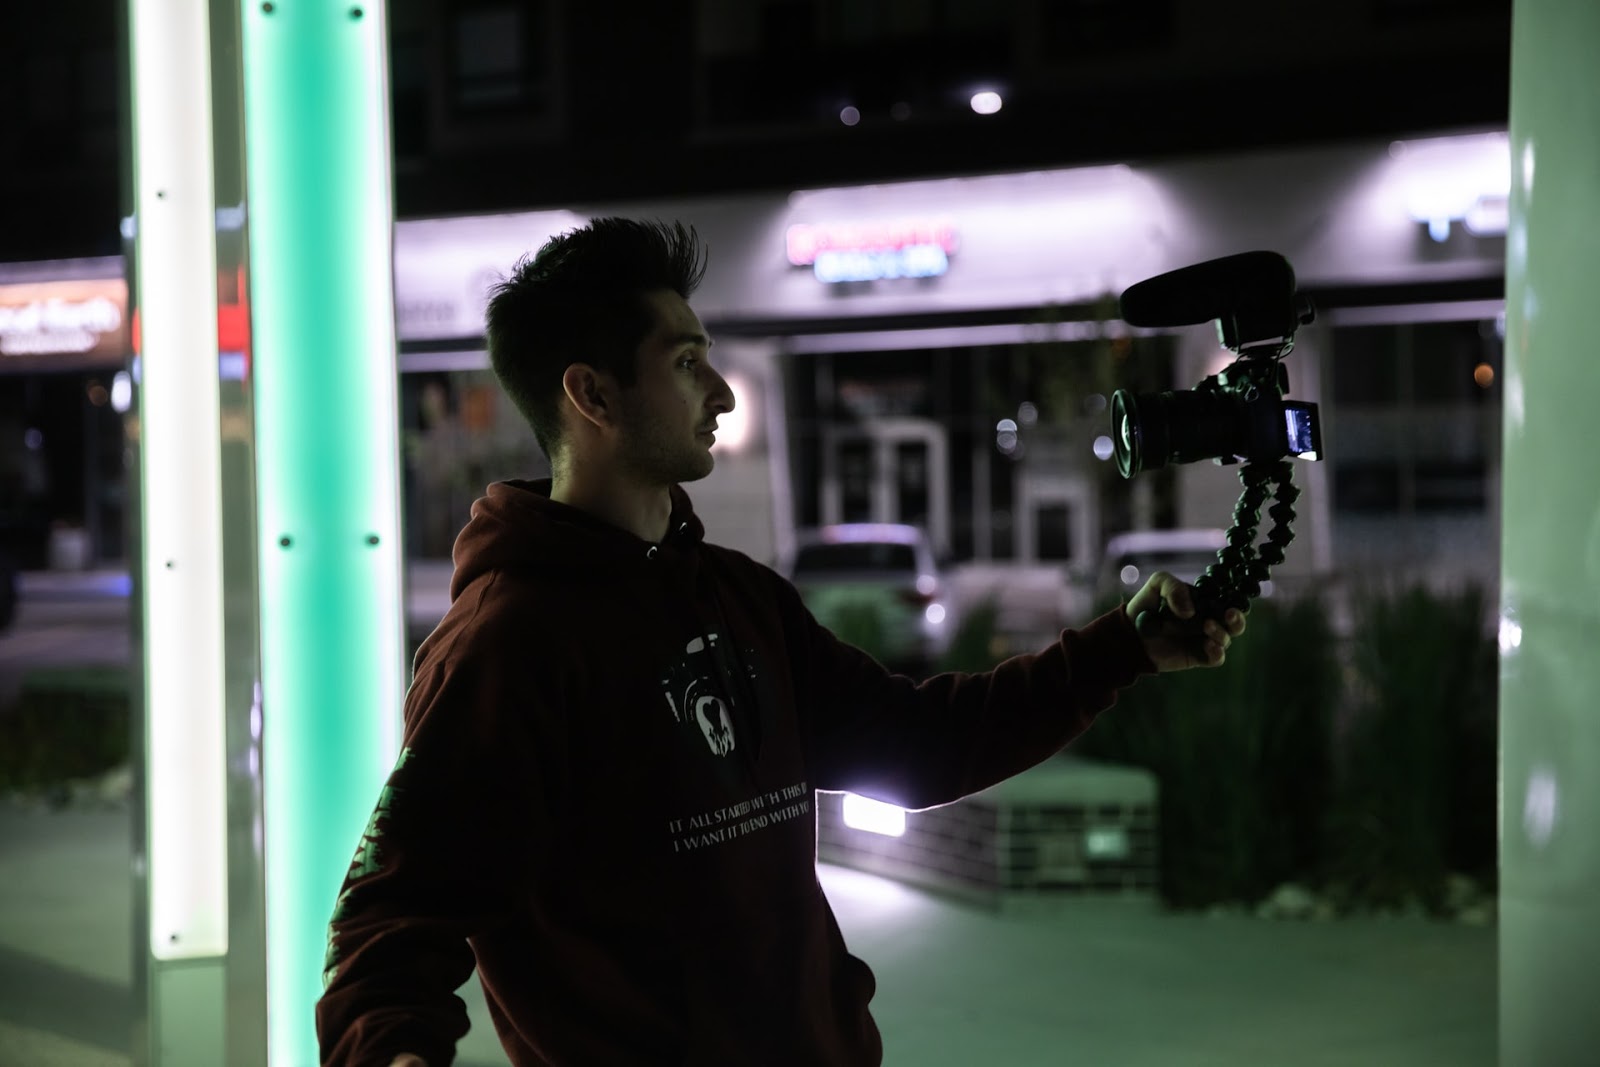
I. Shotgun microphone
Shotgun microphones or high-directionality microphones are the most sought after choice for audio amongst YouTubers. These cameras easily mount on your cameras and are great for vlogging and interviews – whether you’re shooting indoors or outdoors. It gives you the best quality when it is closest to the subject. One of the drawbacks of these shotgun mics is that the audio quality reduces as the distance between the mic and the subject increases. However, you can mount a shotgun mic on a boom pole and extend the wire to connect it to your camera – allowing you to record quality audio even from a distance. You can even buy a dead cat ($29.95) or fuzzy windjammer ($59) to cut down further on external disturbances.
Here is a list of shotgun microphones for you to choose from:
a. Best budget shotgun microphone – Takstar SGC-598 Shotgun Mic ($35)
Compatible with Canon, Nikon, and Sony cameras.
Watch Podcastage’s review of the Takstar SGC-598 Shotgun mic in which he also shares test audios for you to experience the quality of the output.
b. Best shotgun mic – Rode Video with Rycote Lyre shock mount ($229)
This shotgun mic by Rode comes with a Rycote Lyre shock mounting system that isolates the recorded audio from external factors.
Watch Sean Cannell review, test, and compare the RODE VideoMic to help you make a better purchase decision.
c. Best studio boom kit
II. Lapels (wired and wireless options)
Lapel mics are also a favourite among YouTubers. These small mics easily clip onto your shirt and plugs straight into your cell-phone or camera. These lapels are great if you create videos from your desk and they’re also good for conducting interviews and vlogging. We’ll be looking at both wired and wireless options in lapel mics below.
Here’s a list of lapel mics that you can choose from:
a. Best budget lapel – Deity V Lav Lavalier Lapel Mic ($49)
Watch this video to see how this mic performs in different shoot situations.
b. Best wireless lapel – RODE GO compact wireless microphone ($199)
This portable and wireless mic are a must-have for content creators on YouTube. Watch Think Media’s review to know why.
c. Best lapel system – Sennheiser EW100 G3 Wireless lapel system
If you want a lapel system that can give you top quality sound even from 100 meters away – then this is the system you are looking for. Sennheiser’s lapel system allows you to set frequencies based on where you’re shooting and allows you to manage any disturbances from external factors. Watch this video for a detailed review and sound test (up to 400 feet).
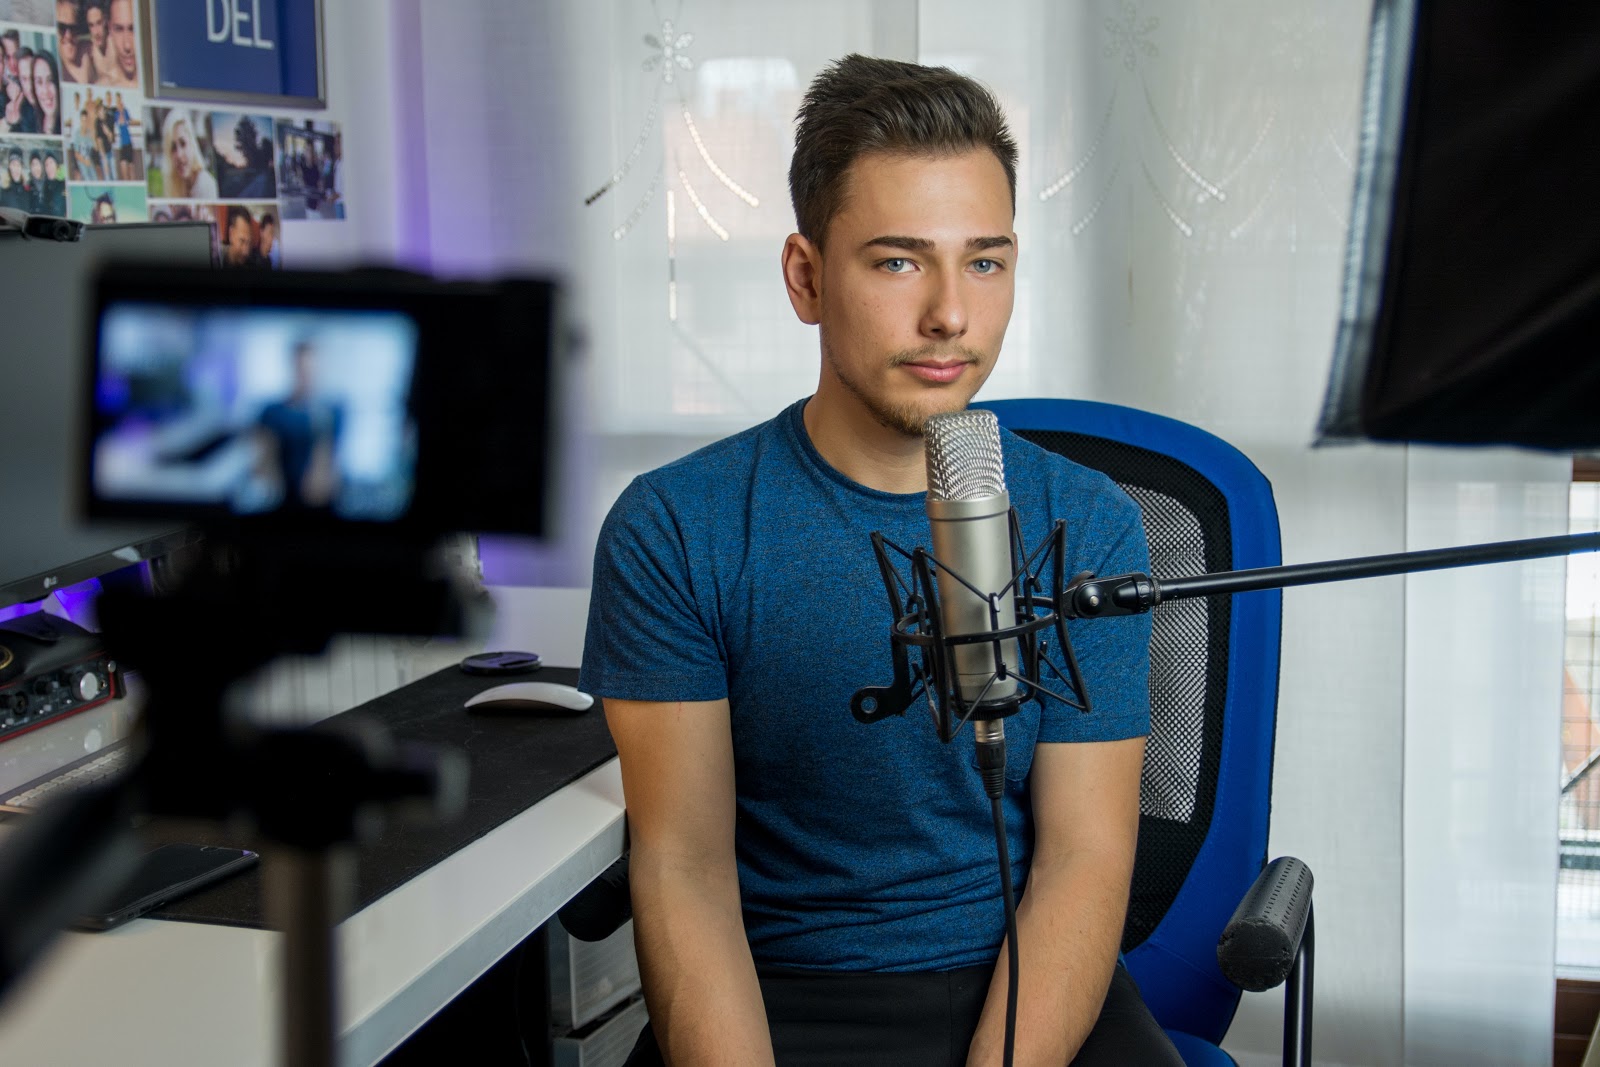
III. USB Microphones
If you’re looking to create live streams and screen-sharing tutorial videos, USB microphones make for the best YouTube equipment. These versatile mics directly connect to your system and give a clear audio output. These podcast mics are strictly indoor mics and can’t be used outdoors simply because they have to be connected to a PC system for it to record the audio.
We’ve listed top creator picks of USB microphones for you to choose from:
a. Blue Snowball mic ($59.95)
This versatile mic is great for live streaming and easily connects to your PC or Mac. It comes with an adjustable stand, is unidirectional (thus cuts out ambient sounds) and the cardioid condenser capsule gives you a crystal clear audio output. Watch this video to hear the audio tests and review by Jason R.
b. RODE NT-USB ($189.99)
The RODE NT-USB also comes with a cardioid condenser and gives a studio output. It can be connected via USB to your PC, camera, and tablet, making it a top choice for many creators on YouTube. Watch Podcastage review and test the RODE NT-USB below.
c. Maono USB Podcast mic AU-A04 ($64.99)
This podcast mic by Maono also comes with a cardioid condenser and is great for recording live streams, voice-overs, and ASMR videos on YouTube. It also comes with two microphone holders – one is short and portable, and the other one comes with an extendable arm. It also comes with a pop filter and foam mic windscreen. Check out these audio samples recorded using the Maona Podcast mic by Life Kommando.
d. Zoom ZDM-1 Podcast mic ($119.99)
The complete podcast bundle by Zoom comes with their ZDM-1 podcast mic – which gives broadcast quality sound, a foam mic windscreen, headphones, mic tripod, XLR cable, and headphones. This dynamic microphone has a super-cardioid polar pattern and can record up to 135dB. Watch this detailed review (with timestamps) and mic tests by Podcastage before you buy this mic.
Let’s check out some microphone accessories
The acoustic treatment maximizes audio quality by normalizing and reducing excessive reverberation, reflection, and resonance. This can be simply done by using foam covers, mufflers, and dead cats on the mic or foam boards in the room you are recording in.
Here are options for dead cats, mufflers, and foam boards for you to choose from:
a. RODE deluxe windshield dead cat
b. Movo WS-69 windscreen muff
c. Movo WS-G7 foam and muffler windscreen dead cat
d. Zoom WSS-6 foam windscreen
e. DEKIRU acoustic foam panels
f. BUBOS acoustic foam panels
(B) Headphones
If you’re a gamer, you definitely need headphones to create screen-share videos but you’ll also need them for editing your YouTube videos to ensure quality audio. While you can make do with the earphones you currently own, we’re listing headphones (which are top choices for YouTubers) for when you decide to upgrade.
Two things that you must keep in mind before choosing headphones:
(i) Comfort - You need earphones that are comfortable even after using them for a couple of hours.
(ii) Sound quality - Check for sound profiles that most suit the kind of sounds you will want to listen to. For example, gamers would love to have bass-heavy headphones.
Here are our best-recommended headphones for YouTube creators:
a. Audio Technica ATH M50X (wireless Bluetooth) headphones
b. Sony MDRXB950BT (wireless Bluetooth) headphones
c. Munitio PRO40 (wireless Bluetooth) headphones
You can also watch this video where tech and gaming YouTubers spill the beans on what their go-to headphones are.
5. PC
The next important piece of gear is your system on which you will be editing your YouTube videos. Whether you want something portable like a laptop or you want to fix up a computer piece by piece according to your needs – we’ve got you covered.
Pro tip: If you’re working with a cloud-based video editor like InVideo, you can pretty much work from any system as long as you have an internet connection.
Every piece in the chain could make your editing experience better. We’ve listed down the minimum specs that you need for a smooth editing experience on your system and we have also suggested upgrades that you can make depending on the kind of videos you will be editing. While trying to zero down on a PC, you primarily need to look at these 5 key specifications:
(A) Processor
If you’re going to be editing simple videos, sans external effects – you can start with the Intel i5-6600K, however, if you plan to create videos with created effects that will make for heavy file sizes, the Intel Core i7-4790K and the i7-6700K are standard for HD video editing. All of these are quad-core processors.
If you want to upgrade to a better processor and make your editing experience even smoother, especially if you’re working with 4K footage and heavy editing software like After Effects – then you should go for the Intel Xeon E5-1650v3. You can upgrade this further by 2X with the (2x) Intel Xeon E5-2660v3. Both of these are hexacore processors.
(B) Multi-drive workflow
One of the crucial things while editing a video is speed and a lag-free experience. To do this, you need a multi-drive workflow. While this may not affect HD video editing, it makes a big difference for 4K and keeps your files organized at all times.
What do you mean by a multi-drive workflow?
A multi-drive workflow in terms of your system is a storage solution that dedicates specific files to separate drives – to increase your system’s speed and also keep it organized.
1. Dedicate a 1 TB SSD to your operating systems and software. So all of your installation, upgrades, and ancillary files for all of your software will be here.
2. Dedicate another 1TB SSD for your data files – these are your project files (which you command your video editing software to save), footage, final files, etc.
3. The third one is a variable and important only if you plan to shoot and edit in 4K. These are an array of external drives that take the payload while you’re editing and can be externally connected to your PC.
If you’re just beginning, you can start with a multidrive workflow of one 256GB SSD and two 1TB HDD. You can then upgrade this multidrive workflow to one 500GB SSD and two 2TB HDDs.
Ready to upgrade to a professional 4K setup? You must then invest in one 1TB SSD and two 4TB HDDs.
(C) RAM
While your RAM does not affect video editing as much, it is crucial for the functioning of ancillary software like After Effects and Cinema 4D. The RAM is where your working files are stored while you’re working on projects, and so having a lot of RAM can support motion graphics editing and makes it easier to integrate these files in your video project. You must have a minimum of 16GB RAM but if you can go higher than that, it’s even better.
(D) Display
When we talk about the display of your monitor or laptop – we are looking at its resolution. If you plan to edit 4K videos – your PC display should have a full 4K screen which comes with a 3840×2160 pixel resolution. If you’re only creating HD resolution videos, you can choose an HD screen because you don’t necessarily need a 4K display.
Another crucial thing you want to check for when choosing your monitor is IPS which tells you the colour accuracy. As a visual creator, you want your monitor to be colour accurate so that you see the colours right and make your edits based on it. Otherwise, you’ll see the difference in colour tones when you render the project and view it on another screen.
(E) Graphics card
As a visual creator, the graphics card (also known as a video card) is one of the most important things you need to be looking at before choosing a PC. Previously, most of the heavy lifting of video editing was done by the processor but these days, graphic cards take on most of the load, making it faster and smoother to edit on software like Premiere Pro and After Effects. Graphics cards speed up editing and rendering and will enhance video editing performance.
You must look for NVIDIA Graphics Card and along with that, you should also check for CUDA cores. These graphics cards give a solid performance that also supports hardware acceleration – resulting in a high-performance video editing PC.
(F) USB Ports
It is important to check for how many USB 3.0 ports you have. This is important for video creators because you want to transfer your footage and data faster to your PC. The latest USB versions allow you to do it with Superspeed+ at 20Gbits/second. So when you pick out your PC, ensure that you have the latest USB port connectors to support all of your external systems and will work without compromising on speed.
USB 4.0 is the latest version which was released in 2019 and reads at 40Gbit/second and comes with Superspeed+ and Thunderbolt 3. You can also go for a USB 3.2 which reads at 20Gbits/second and comes with Superspeed+.
Based on the above-recommended specifications, here are our recommendations in terms of editing systems:
1. MacBook Pro ($1699)
Apple’s latest 13” MacBook Pro comes with a 10th generation Intel Core i5 Processor, 16GB RAM, and 512GB SSD Storage. Watch this review by Max Yuryev that also talks about 4K video editing on the new 13” MacBook Pro.
2. HP Envy 15 ($1903)
The HP Envy 15 Laptop comes with an Intel Core i7-10750H processor, an NVIDIA GeForce GTX 1650 Ti Graphics card, 16 GB RAM, and 512 GB SSD Storage. It has a 15.6” full HD touchscreen with a fingerprint reader and comes with Windows 10 installed.
Watch this detailed review by Just Josh where he reasons out why the HP Envy 15 is the best laptop for video editing out there.
3. iMac ($2199)
The latest BTO 27″ iMac comes with a 5K retina display and a 3.3GHz 6-Core Intel Core i5. It has 16GB RAM, 512GB SSD, and an AMD Radeon Pro 5300 4GB graphics card.
This insightful review video by Max Yuryev is specifically for video editors who are looking at purchasing an iMac this year.
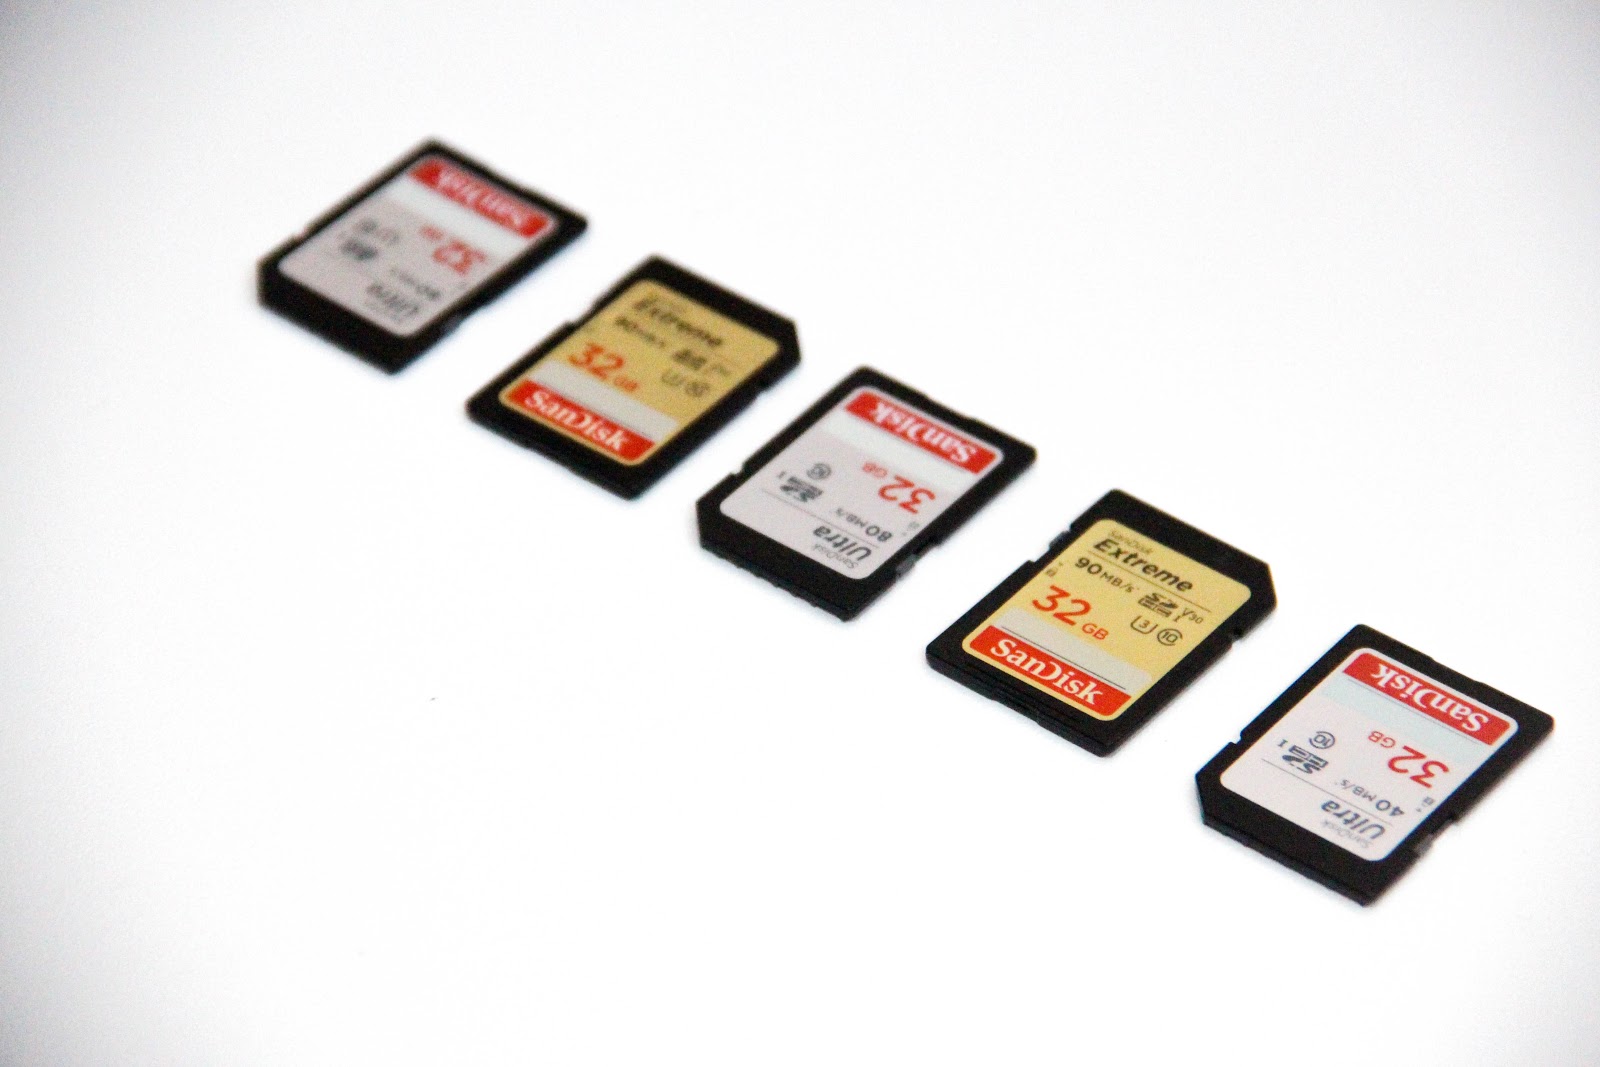
6. Memory cards
One of the most underrated YouTube equipment is the memory card. While it is absolutely necessary to have for recording videos, not many people understand how to pick up the best memory cards. We have broken down the 3 key things you should look for before purchasing a memory card.
Use-case for SD, MicroSD, Compact Flash, and CFast cards
SD cards and Micro SD cards are the same. SD cards are used in DSLR, compact, and mirrorless cameras, whereas micro SD cards are used in GoPros, cell phones, etc. Compact flashcards on the other hand are faster and are used in more expensive cameras like the Canon 7D, 5D Mark IV, and the CFast cards are used in high-end professional cameras like the Canon 1D and other cinema cameras.
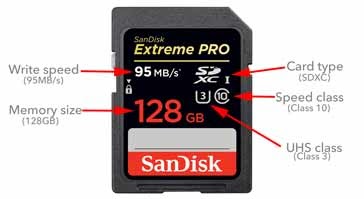
(A) Format
Most cameras today however use the SD card or micro SD card, so let’s take those as an example and understand how to pick out the right memory card. Micro SD and SD cards come in two formats – SDHC and SDXC but the main difference between these two cards is the filing systems which give you better memory capacities.
(B) Capacity
The next thing you need to look at is the memory capacity of the card – most cards come in 32GB, 64GB, 128GB, and 512GB. The memory capacity of your card depends on what you’re planning to shoot. For example, if you’re going to have long shoot days, you must choose a minimum of 128GB memory capacity. However, if you know that you have breaks in between your shoots or you won’t be shooting continuously, you can go for a 64GB memory capacity.

(C) Speed card rating
As a videographer, one of the most important things you must check for when choosing a memory card is the speed card rating. You’ll find this on the right-hand side of the card. If you see the letter C with numbers 2, 4, 6, 1o enclosed within it, the card has a minimum sustained write speed of 2 megabytes, 4 megabytes, 6 megabytes, and 1o megabytes respectively. This is important because if the sustained speed drops below the video bitrate, you’ll start seeing dropped frames in your video.
Next to this number, you will see a U with a 1 or 3 inside it. This also represents the minimum sustained write speed with U1 being 10 megabytes per second and U3 being not slower than 30 megabytes per second.
If you want to dive deeper into understanding SD cards and to understand the numbers represented on the hardware, watch this detailed video by Gerald Undone.
7. Software
Editing allows you to tell your story – by putting videos together, adding music, texts, and effects. Whether you’re making YouTube videos for fun or you are creating content for an audience, good editing can take your videos to another level. We’ve listed the most used software for editing YouTube videos and we’ve also listed screen-recording (for tutorials and how-to videos) and live streaming software. Let’s jump right in.
(A) Video Editing Software
If you’ve done your basic research about editing YouTube videos, you would have heard the names Premiere Pro, First Cut Pro (FCP), After Effects, and Cinema 4D. While we will be covering these, we’ve also added new editing software that lets you create videos hassle-free. We’ve segregated them based on how simple it is to use and what kind of editing they should be used for. Let’s jump right in.
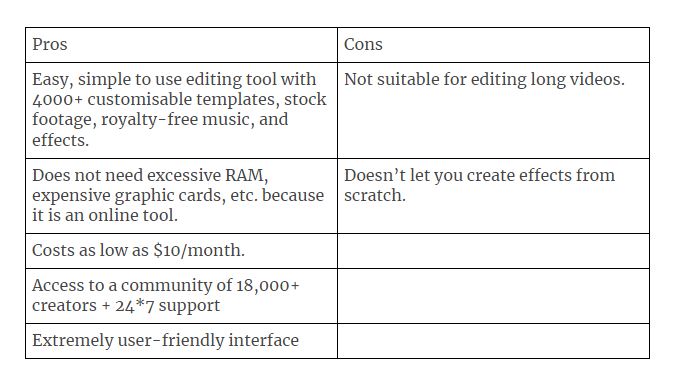
I. Easy- InVideo ($10/month)
If you want the editing of your video to be the least of your worries, InVideo would be your best bet. This hassle-free online editor allows you to get started immediately with pre-designed templates, stock footage (great if you don’t have the budget to shoot everything), and royalty-free music. With InVideo, you’ll be able to choose from 4000+ templates, an inbuilt library of 1 million+ premium photos and videos from Shutterstock to create visually stunning YouTube videos. You can complete your video by adding music, animated text, stickers, and effects, all of which can be added by a simple click and drag.
Most importantly, if you’re just starting and don’t know much about editing videos, IVA, the world’s first intelligent video assistant will help you make your videos seamless and perfect. You don’t need to install InVideo on your PC – it is available online and you can upgrade to the paid version of this tool for as low as $10/month. The pro version gives you access to stock footage, watermark-free templates and you will also have 24*7 support from their team.
The best part of using InVideo is access to their community of 18,0000+ creators. It is a great space for you to discuss, share ideas and solutions, get answers, and engage with people who are creating video content, just like you.
Here’s a quick tutorial on how you can leverage InVideo’s pre-made templates and create a thumb-stopping video in minutes (even if you’ve never edited a video before).
II. Advanced
Adobe Premiere Pro & Final Cut Pro (FCP) ($19.99/month onwards)
Both these softwares are popular choices amongst filmmakers, content creators, and YouTubers for editing videos. It is the best option for people who have a basic understanding of film creation and want to create video content at a professional level. They edit and render in HD and 4K, and you can choose different formats to export your video (like 1080p HD for YouTube and BlueRay for films).
Both Premiere Pro and FCB require you to start at ground zero and build your video up. You have access to tools that let you do more than just basic video editing and allows you to adjust sound, colour, and more. These software have a dearth of functions, creative tools, and presets to aid you but you’ll need to have a basic technical knowledge of transitions, colours, and design for you to make the best editing choices. There are tonnes of tutorials on YouTube but it still can be very intimidating for someone who is just starting on their YouTube journey.
Check out this Final Cut Pro Vs Premiere Pro video by Tyler Stalman where he discussed how professionals choose the software they want to edit on.

III. Pro-level
Adobe After Effects ($20.99/month onwards)
If you want to create digital effects to add to your YouTube video (like this video by Roy Aldin) After Effects is the best place to make it. After Effects can be used for keying, tracking, transitions, and adding motion graphics and animation to your YouTube videos. Like Premiere Pro, this software too requires technical know-how and lets you create effects from scratch. If you’re creatively inclined to try new things and create new visuals for your YouTube videos, there is no better playground than After Effects.

(B) Screen-recording software
Want to show your audience how you do something – like in a tutorial or a gaming video? You’ll need a screen recording software that will record everything you do on your screen, so you can share it with your audience. We’ll be looking at options for both your desktop and mobile. Let’s dive right in.
I. Camtasia ($249.99 one-time fee + yearly renewal after the first annum)
Camtasia is not only a screen recorder but also a video editor – which means that you can edit the recorded footage on there itself before you move it to your final editor. It allows you to zoom in and out, highlight your cursor, blur or highlight objects and a lot more – making it a favorite amongst YouTubers. It also comes as a smartphone app that allows you to record your phone screen.
Watch this video for a full review and demo of Camtasia before you make a purchase decision.
II. OBS (free)
The OBS screen recorder is very basic but does the job. It will record everything on your screen but you won’t be able to zoom in and out, use a highlighted cursor or do any other extra effects. The upside of OBS is that it is also a live stream encoder that helps you compress and convert your audio and video into a digital format for a smooth streaming experience on YouTube.
Watch this video where Kevin Stratvert breaks down how you can use OBS to do screen recording on your PC for free.
III. DU screen recorder (free)
This robust screen recorder is the most reliable for android users. It is a simple screen recorder and does not crash or break when it’s recording. It also comes with a video editor that lets you work on the recording in the app itself and add background music. It also allows you to adjust the video quality by setting the frames per second (up to 60FPS) and output (1080p).
(C) Live-streaming software
Live streaming software helps you convert your content (video, audio, presentations, etc.) files into a suitable format for streaming on the internet. These software also helps you switch between multiple cameras, cards, application windows, and more, to make broadcasting live simple. We’re looking at 3 options (web and app-based) which are favoured by most YouTubers when they stream live.
I. StreamYard ($20/month onwards)
StreamYard is a web-based live streaming tool that is a great option for you if this is your first time streaming live. It does not matter what PC or laptop you have because it is web-based, which also means that it doesn’t depend on your system’s resources. One of the things that makes it a go-to streaming option is because it is a simple click and go once you log in, making it extremely user-friendly.
Watch this review by Justin Brown where he talks about the benefits and limitations of StreamYard, pricing, and why you should choose it.
II. Be.Live ($24.99/month onwards)
Be.Live is one of the fastest and easiest platforms on the web to go live. It is packed with features that will help you take your live stream to the next level – like adding scrolling texts or bullet points and feature live comments on the screen. It supports multiple cameras and allows you to switch between them, and you can even share your screen if you want to show your audience what you’re working on. You can also host up to 10 guests on a live stream, with 4 guests on the screen at once while the others can wait in the waiting room. It also has an app, letting mobile users join your live stream and you, the host, control the live stream from your smartphone.
One of the best features of Be. Live is Live Shopping which lets you put up links of products that your users can click on to buy immediately. You can also interact with your audience with live polls and you can download a high-res version of your live stream.
Watch this detailed review by Buildapreneur where he also shares his screen and does a walkthrough of Be. Live.
III. Ecamm Live ($16/month onwards)
This powerful live-streaming app is built for Mac systems and lets you stream in HD and 4K with one click. It allows you to connect external visual and audio capturing devices – like a microphone, DSLR, and webcam for better quality. It comes with built-in support for all the major platforms including YouTube and also lets you multicast using platforms like Restream and Switchboard. With RTMP support, you can broadcast from anywhere and it also lets you completely customize the toolbars in the app according to what you’ll be using during the live.
You can play videos and presentations during your live streams by just dragging and dropping them on the screen and you can easily switch between screen shares, multiple cameras, and guest video. This feature-rich app lets you create your own custom animations and you can also add a ticker text on the screen. You can invite multiple guests on your live, with 4 sharing the screen at one time.
To know more about Ecamm, check out this detailed review by Justin Brown – Primal Video where he discussed Ecamm Live’s features and also teaches you how to make an animated intro for your live stream using the app.
IV. Switcher Studio ($20/month onwards)
If you go live from your smartphone or tablet, Switcher Studio is a must-have app for you. It allows you to use one tablet or phone as a control center and then you can wirelessly connect multiple phones to do a full production Multicam live stream setup. Switcher Studio allows you to create pro-level production wherever you go, without having to carry bulky equipment.
Here are Sean Cannell’s first look and review of the Switcher App where he shows you how the setup and app works.
V. Restream Studio ($16/month onwards)
Hosting live shows on social media is on-trend and is used as a marketing technique to reach more people. Studio, presented by Restream is a great tool that can make this happen with just a few clicks. This cloud-based tool offers you several platforms like Facebook, Instagram, Twitter, Snapchat, and more, where you can invite your guests and broadcast your own show. The best part is, you can broadcast the same stream on multiple platforms at the same time. Studio by Restream is your way to achieve mass outreach for your online live streaming shows.
We’ve covered everything you will need equipment-wise for creating stunning YouTube videos, but that’s not all. One of the biggest hurdles for content creators is what their videos should be about. Whether you’re wondering what your first YouTube video should be or you are looking for fresh ideas – this exhaustive list of YouTube video ideas will make sure you never run out of great content.
Still not sure what is the best equipment for shooting YouTube videos?
You can simply check out our snapshot recommendations where we have put together our best bets for every kind of video – first-person, live streams, vlogs, and more.
Snapshots: Equipment list for different types of videos
(A) First-person videos
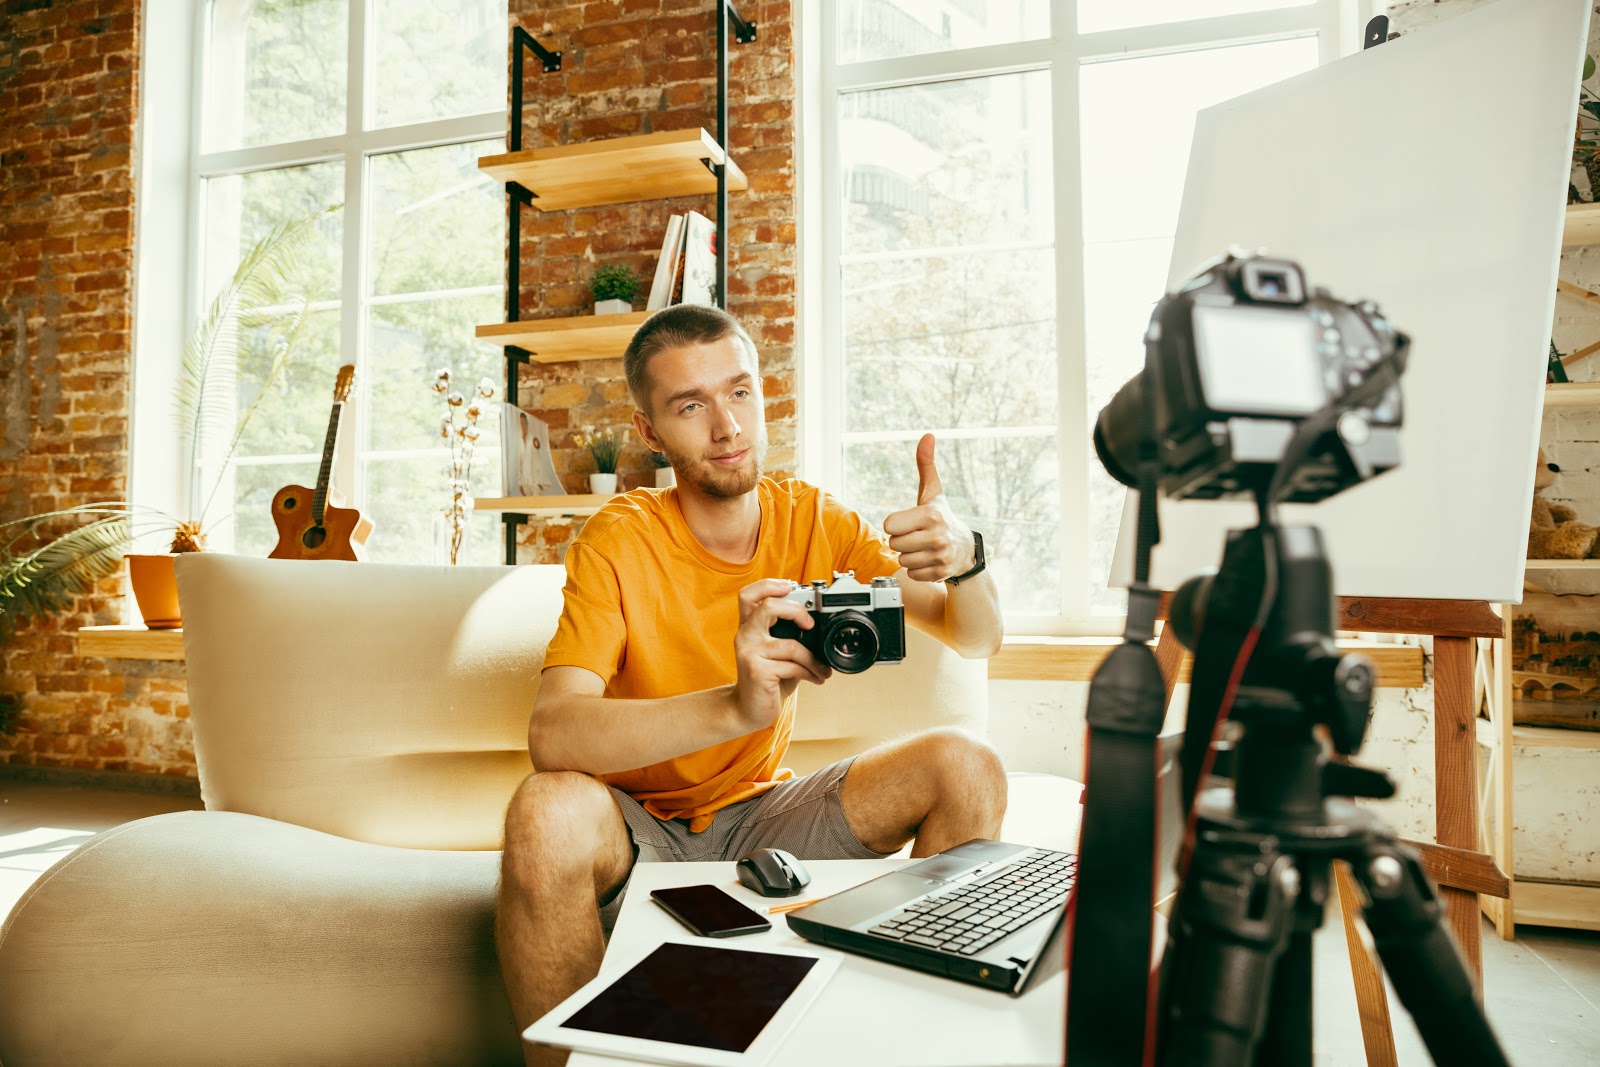
First-person videos are where you set up the camera on your desk and just talk into it, so it appears like you are having a direct conversation with your audience. These are simple to shoot and you don’t require a lot of equipment.
Here’s all the gear you’ll need with our recommended best buy for each piece of equipment
Camera: Webcam if you have a PC and want to record your videos from there itself, camcorder, or smartphone if you will be changing your set up or moving around in your videos.
Stabilizer: Manfrotto PIXI or any simple 3-legged tripod that will support your camcorder or smartphone.
Light: Ring lights are the best option for lighting up a single person in the video.
Audio: Opt for the Takstar SGC-598 Shotgun microphone that will connect to your compact camera or choose the Deity V Lav Lavalier Lapel Mic if you’re recording your videos from your smartphone. Blue Snowball mic is a great option if you will be recording your videos directly on your PC.
Memory card: A standard 64GB SDXC card should suffice for shooting first-person videos.
PC: Any PC with a minimum of 12GB RAM if you plan to edit your videos on Premiere Pro or FCP. If you don’t want to upgrade your PC yet, choose to edit online with InVideo.
Softwares: InVideo for editing videos (lets you also add stock footage and animation, if needed), Premiere Pro for advanced editing (in case you’re making long videos), StreamYard, or Switcher Studio for live streaming, and OBS for screen recording.
(B) Product showcases like phone, unboxing, etc.
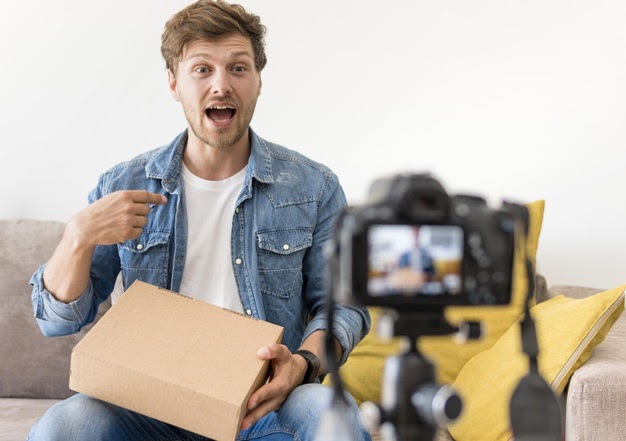
Creating unboxing videos, tests, and doing reviews are also simple set-up YouTube videos. However, you will need equipment that can easily move around so that you can show your audience different angles.
Here’s all the gear you’ll need with our recommended best buy for each piece of equipment
Camera: If you’re just starting, you can use a camcorder or a smartphone (minimum 12MP camera) to record your video but if you want to upgrade, you can choose between a compact camera like the Canon G7X Mark III or a DSLR – Canon 70D.
Stabilizer: You’ll need a stabilizer with a fluid head for easy pan and tilt movements to show your audience the unboxing and products, like the Manfrotto Compact Action tripod. You can also upgrade to the Vanguard Alta Pro.
Light: You can choose between an 18” Ring light, LED panels, or a softbox depending on how big your set-up is.
Audio: You can use a shotgun mic – RODE Video or even a lapel – RODE Go Compact Wireless to record your audio. Some YouTubers also prefer a podcast mic like the Maona USB Podcast Mic.
Memory card: A standard 64GB SDXC card should suffice for shooting product reviews and unboxing videos.
PC: Any PC with a minimum of 12GB RAM if you plan to edit your videos on Premiere Pro or FCP. If you don’t want to upgrade your PC yet, you should consider editing online with InVideo.
Softwares: InVideo for editing videos (lets you also add stock footage and animation, if needed), Premiere Pro for advanced editing (in case you’re making long videos), StreamYard, or Switcher Studio for live streaming, and OBS for screen recording.
(C) Performance art
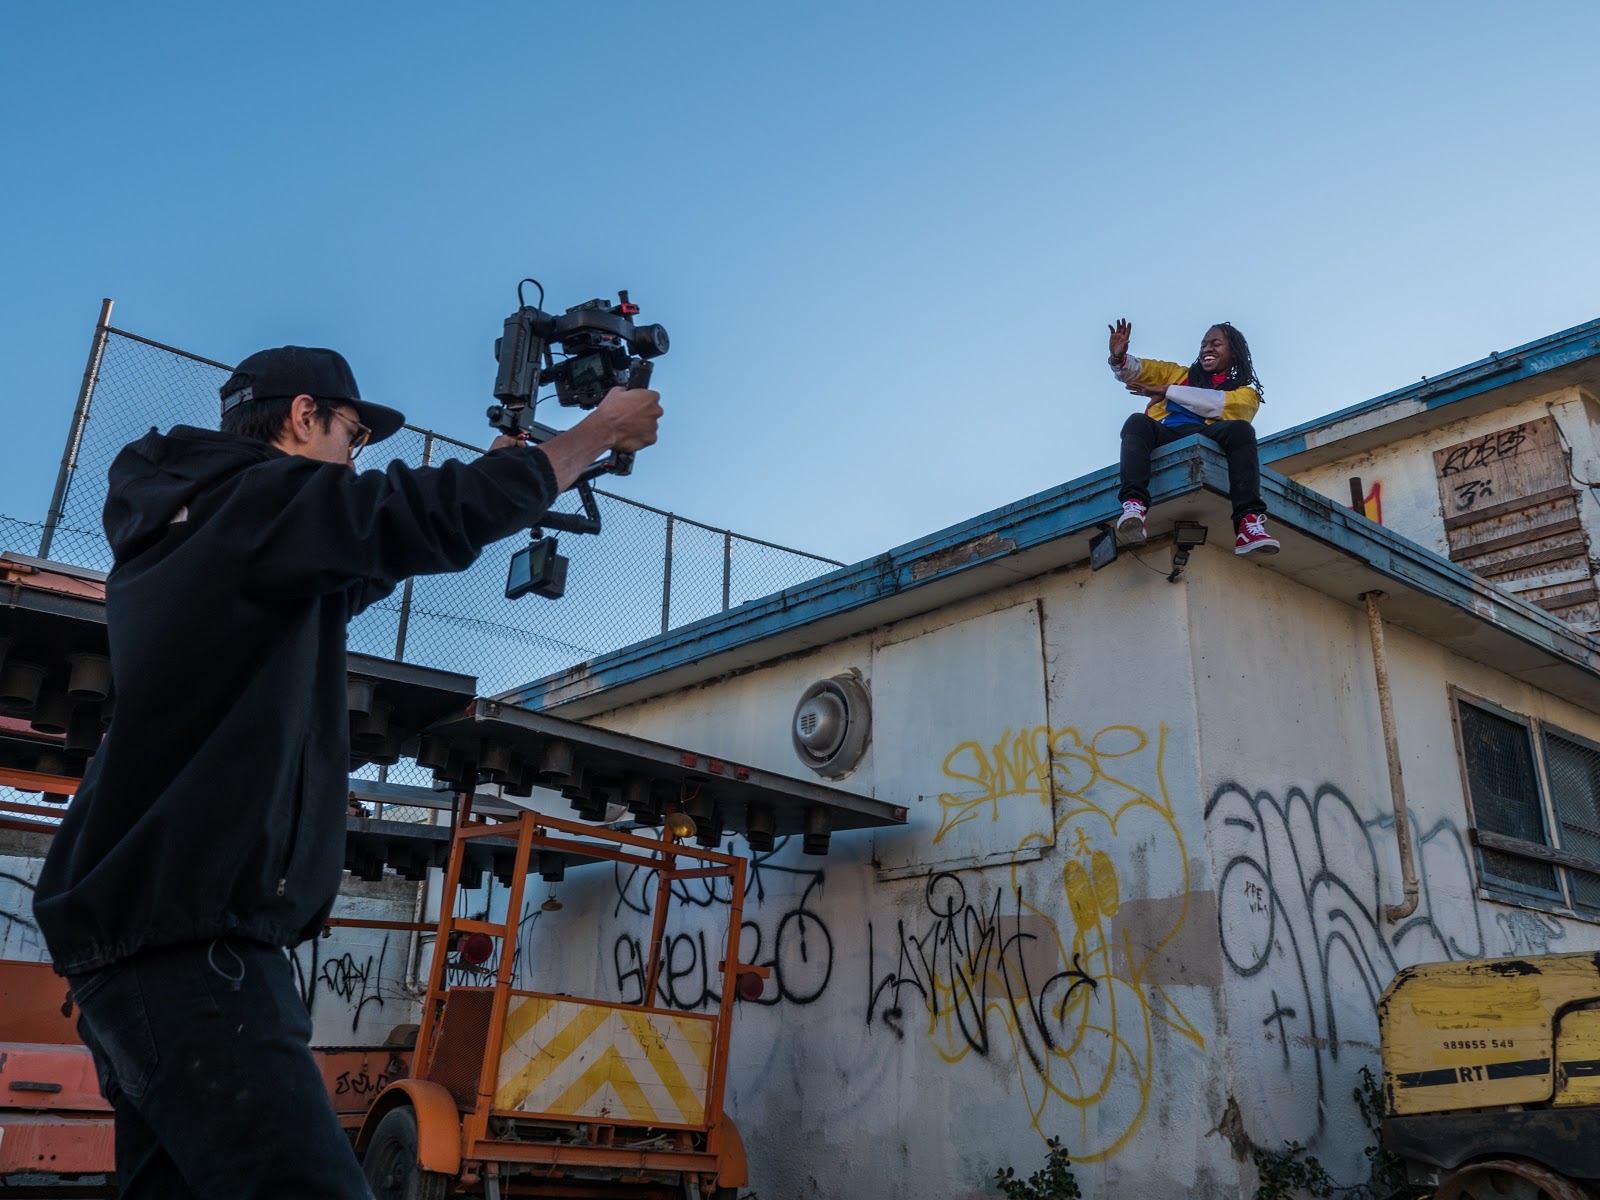
Whether you’re shooting a dance performance or a band – having the right equipment will allow you to capture the movement and emotion of it.
Here’s all the gear you’ll need with our recommended best buy for each piece of equipment
Camera: Based on your budget, you can choose to shoot with a smartphone, compact camera, or DSLR. If you wish to upgrade, you must go for a mirrorless camera, like the Canon EOS R that records on a 35mm sensor – giving you more vivid colours.
Stabilizer: To capture smooth and fluid movements you must use a gimbal. If you’re shooting with a smartphone, the DJI Osmo Mobile 2 and the Moza Mini MI are both great options. If you’re using a DSLR – go for the DJI Ronin-S or the Zhiyun Weebal Lab.
Light: If you’re going to be moving with the subject and want the light to follow that movement, you can use an on-camera LED light panel. However, you can also use this LED panel kit by Fovitech if you want to light up a small room or stage. This stick light by Godox can be used to add colours, drama, or a cinematic feel to the performance.
Audio: Use a shotgun mic like the RODE Video with a dead cat to capture the audio (to match it to the original during edit) but you should put in the original track during the edit of the video.
Memory card: A standard 128GB SDXC card should suffice for shooting long performances but you should keep a backup card, just in case this one gets full.
PC: Any PC with a minimum of 12GB RAM if you plan to edit your videos on Premiere Pro or FCP. If you don’t want to upgrade your PC yet, choose to edit online with InVideo.
Software: You should use Premiere Pro for editing the video and you can use InVideo to create an animated intro-text, StreamYard or Switcher Studio for live streaming, and OBS for screen recording.
(D) Vlogs and outdoor videos
If you’re going to be shooting outdoors, you want to have steady but portable equipment. More importantly, you want to make sure that all of your footage is recorded smoothly, with no audio or visual disturbances.
Here’s all the gear you’ll need with our recommended best buy for each piece of equipment
Camera: You can shoot vlogs and outdoor videos on your smartphone or you can use the Canon G7X Mark III which is known as the vloggers’ camera. You can also choose to upgrade to a DSLR like the Canon 70D or a mirrorless camera like the Sony A7 RIV.
Stabilizer: For ultimate stabilization, especially because you will always be on the go – choose the Moza Mini-MI or the DJI Osmo Mobile 2 for your smartphone or you can use the DJI Ronin-S or the Ikan MS Pro Beholder.
Light: You will mostly choose to shoot when there is good natural light outdoors. However, this portable ring light, on-camera LED panel, or Godox stick light should do the trick, if you happen to need external lights.
Audio: You will want a portable mic set up that should easily sit on your camera. Go for the RODE Video with a dead cat or the RODE Go Compact Wireless to record your audio.
Memory card: Pick two SDXC cards – 64GB and 128GB.
PC: Any PC with a minimum of 12GB RAM if you plan to edit your videos on Premiere Pro or FCP. If you don’t want to upgrade your PC yet, choose to edit online with InVideo.
Softwares: InVideo for editing videos (lets you also add stock footage and animation, if needed), Premiere Pro for advanced editing (in case you’re making long videos), StreamYard, or Switcher Studio for live streaming, and OBS for screen recording.
(E) Live streaming
Live streaming on YouTube needs some extra equipment – like a live stream encoder and podcast mic. Don’t worry, we’ve got you covered.
Here’s all the gear you’ll need with our recommended best buy for each piece of equipment
Camera: If you’re live streaming from your desk, the best option for you is the Logitech Brio webcam but if you’re traveling or are outdoors – you can also go live from your smartphone. Many YouTubers also use a DSLR and convert the footage using live stream software – especially for interviews and podcasts.
Stabilizer: If you’re not moving around during your live stream, you can set up a simple 3-legged tripod. However, if you are walking around with your equipment to show your audience where you are and what you’re up to – we’d suggest either an advanced monopod like this one by Manfrotto or a basic gimbal – like the Moza Mini-MI or DJI Ronin-S.
Light: You will need a light that can sit on your desk while you comfortably go live like this 18” ring light or something that moves around with you – like an on-camera LED panel.
Audio: The best audio option to go for during your live stream is a podcast mic like the RODE NT-USB or Maono USB Podcast mic AU-A04, however, if you’re going live outdoors, you must choose the RODE GO compact wireless microphone.
Memory card: A 128GB SDXC card should suffice for live streaming only if you are using a DSLR or compact camera.
PC: You can use any system or laptop to go live as long as you have an external mic and camera that covers your audio and video quality.
Software: Use InVideo to create the promo and intro of your live stream. You can then choose between StreamYard, vMix, and Streamlabs OBS to go live. If you are using your smartphone – go for Switcher Studio.
(F) Screen-recording tutorials
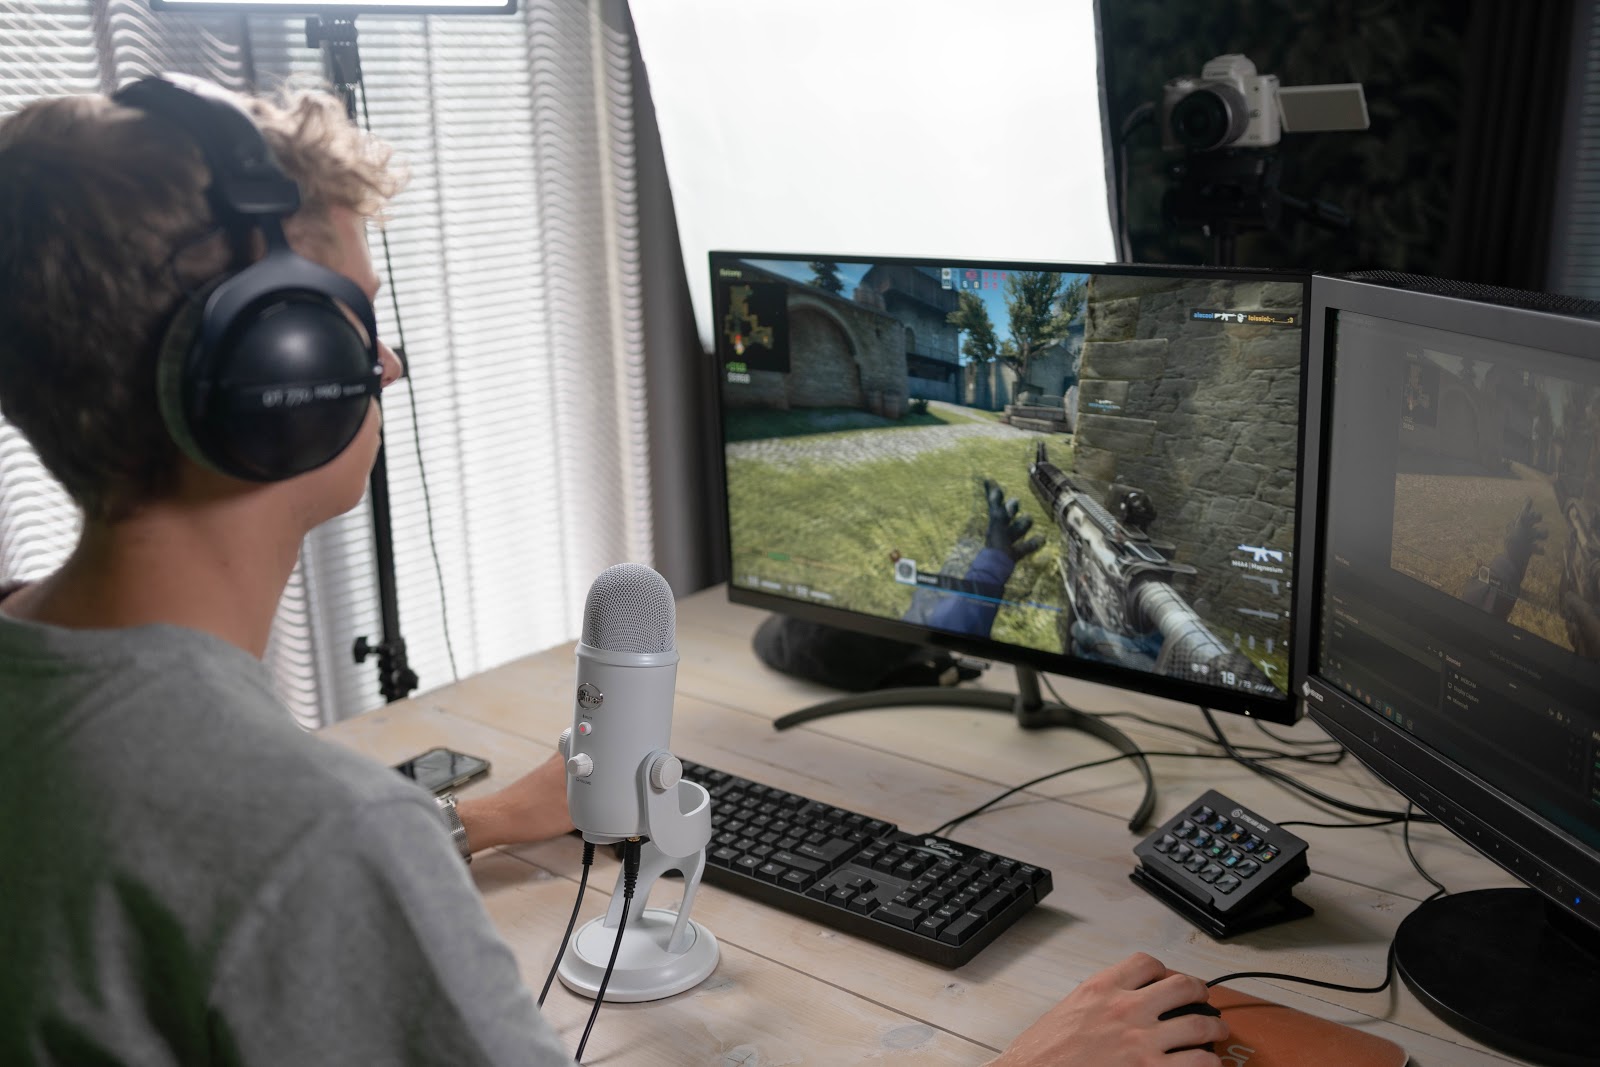
Want to show your audience how you get something done – like how you play a game or create something on Adobe Illustrator? You’ll need a screen recorder to capture all your activity which will help you guide your audience through a step-by-step tutorial.
Here’s all the gear you’ll need with our recommended best buy for each piece of equipment:
Camera: You must use a webcam to record yourself doing the activity – like creating a graphic on Illustrator so that the audience can understand your thought process too. You could also use your smartphone or a compact camera to shoot it.
Stabilizer: You’ll need a simple tripod like the Manfrotto PIXI to mount the compact camera or smartphone.
Light: You don’t need a fancy light for a screen-recording tutorial. A simple ring light will do the trick.
Audio: You can choose between a podcast mic, a lavalier, or even a shotgun mic depending on your budget.
Memory card: A standard 64GB SDXC card should suffice for shooting a tutorial.
PC: Any PC with a minimum of 12GB RAM if you plan to edit your videos on Premiere Pro or FCP. If you don’t want to upgrade your PC yet, choose to edit online with InVideo.
Software: You should use Premiere Pro for editing your tutorial and create a stunning intro on InVideo. You can choose between OBS, DU screen recorder, and Camtasia for screen recording.
(G) Animation / stock footage based videos
Got a great idea but don’t have the budget to shoot it? That shouldn’t stop you from creating a great YouTube video.
Here’s all the gear you’ll need with our recommended best buy for each piece of equipment:
PC: Any PC with a minimum of 12GB RAM if you plan to edit your videos on Premiere Pro or FCP. If you don’t want to upgrade your PC yet, choose to edit online with InVideo.
Softwares: InVideo lets you add stock footage and animation from Shutterstock and you can edit your YouTube video on the online editor itself. If you have bought or sourced stock footage from elsewhere, you can edit it in Premiere Pro and FCP.
Wrapping up
We’ve listed the best of YouTube equipment for every budget and use case. The only thing left to do is start working on your YouTube channel. If you’re looking for YouTube video ideas – we’ve covered that too, so don’t forget to check it out.
Want to be a part of a community of creators, just like yourself, and discuss YouTube video ideas, strategies, and of course, inspire each other? Join the InVideo community – a place for you to connect and learn from 25,000+ other video creators like yourself.