


Plenty of people say that you shouldn’t judge a book by its cover, but when you’re shopping for something new to read, what is going to grab your attention first? It’s more likely going to be a novel with a captivatingly designed cover that gives you an idea of what you can expect.
The situation is similar when it comes to YouTube video thumbnails. Someone can make an amazing video, but when you’re browsing through your feed, you’re probably going to click on the one that looks promising based on what you can see right away. If the video uses an engaging image and a text overlay that let you know that you’re about to watch something that interests you, you’re more likely to open it than, say, a clip with a vague shot of a street with no information on where it is and why you should care.
There are several ways that you can add a thumbnail to your YouTube video. Your choice depends on the kind of content your channel is based on. Sometimes, an eye-catching screenshot from the video can be enough. If your channel focuses on a specific type of educational or entertaining content, such as tutorial videos or highlight videos, you’ll probably want to go the extra mile for a custom thumbnail.

How YouTube creates thumbnails
If you don’t feel like making a video thumbnail yourself, YouTube makes the job easy for you. When you upload a video, the platform takes three screenshots from your footage automatically and suggests them as thumbnails.
Depending on the type of video, the chances are that at least one of the suggested thumbnails will work just fine. The problem is that if your video has plenty of movement, the screenshots might end up blurry and look unprofessional. Even if you’ve recorded yourself talking to the camera, YouTube might have captured you making funny or awkward facial expressions that you probably don’t want to represent your video.
To avoid using a default thumbnail that is unappealing, you’ll want to come up with alternative solutions. Before we get to what you can do about it, let’s take a look at the technical side of adding a thumbnail to your YouTube video.
How to change the thumbnail of a YouTube video
There are two ways for you to add a thumbnail to your YouTube video. You can do so:
1. While uploading the video
2. When the video is published
1. How to add a thumbnail when uploading the video
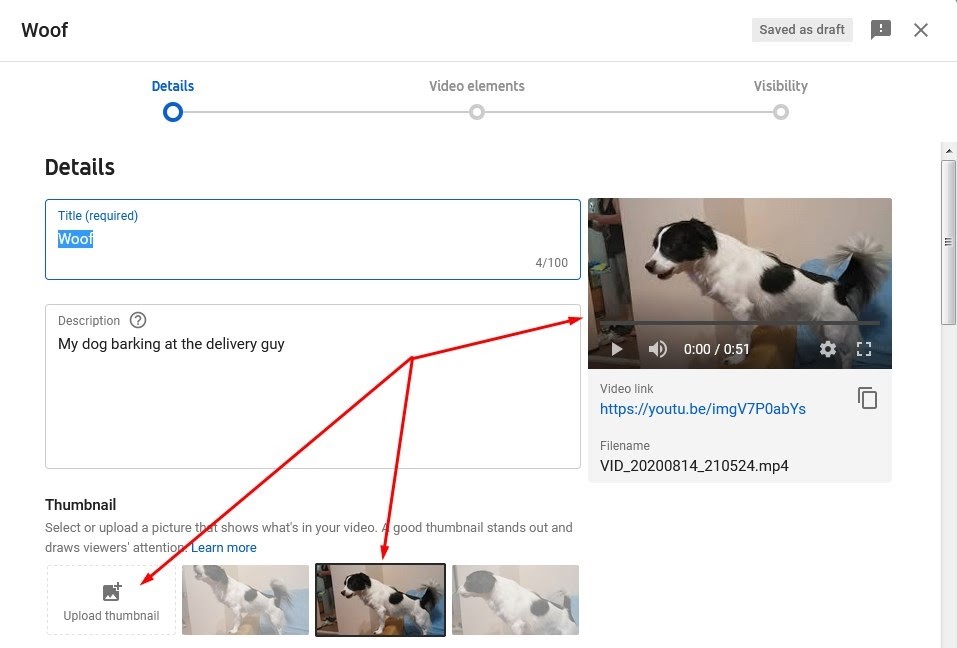
You can add a thumbnail when you upload a video to YouTube. When the platform is done processing your video, don’t click on Publish just yet.
Under the Title and Description fields, you can find the three suggested thumbnails that YouTube generated automatically. The middle option is selected by default, but you can click on one of the other two to change it. You can preview them in a slightly bigger size on the right and determine if they suit the video. If none of the options looks appealing, click on Upload thumbnail to import your own.
2. How to change the thumbnail when the video is uploaded
Regardless of if you’ve chosen or imported a thumbnail when uploading the video, you can change it afterward using YouTube Studio. To do so, you need to:
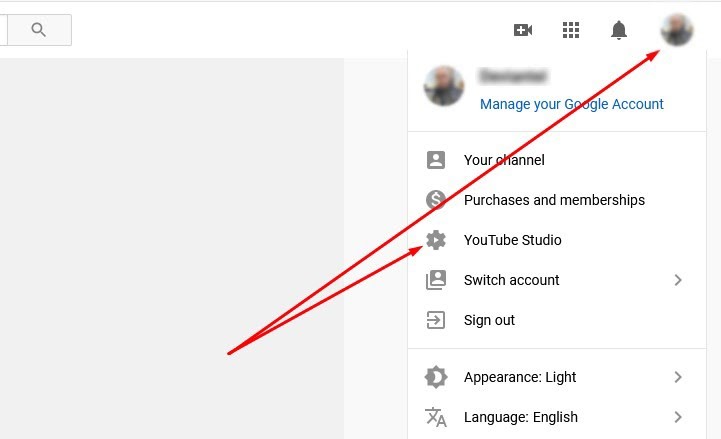
1. Log in to your YouTube account
2. Click on your profile icon in the top-right corner
3. Choose YouTube Studio from the drop-down menu
Doing so will take you to YouTube Studio’s dashboard.
Next, you need to find the video you want to change the thumbnail for and enter its settings.
To do so, you should:
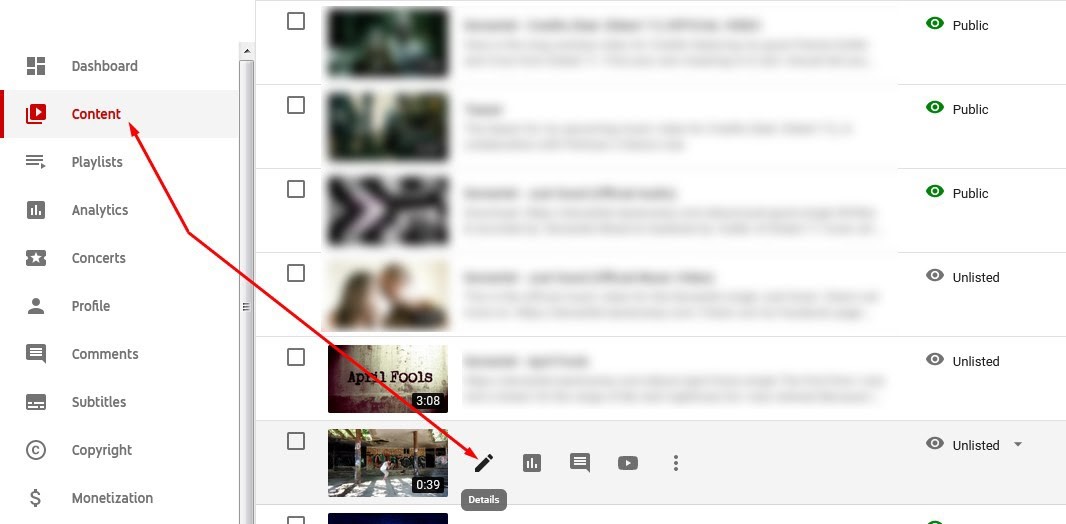
1. Open the Content tab in the menu on the left
2. Look for the video on the list of your uploaded content
3. Open the contextual menu by hovering your mouse over the video
4. Click on the Details icon that looks like a pen
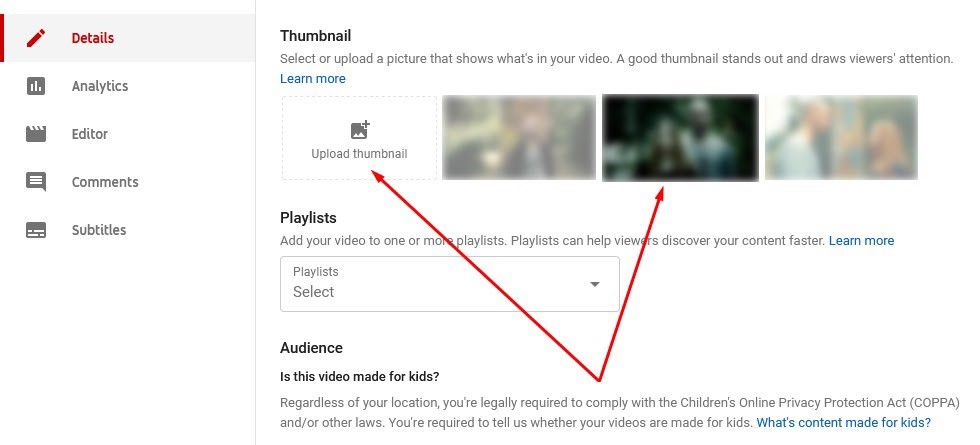
When you open the settings for the video, scroll down until you find the Thumbnail section. Pick the thumbnail that you want to use instead of the current one, or add a new image with the Upload thumbnail button.
How to ensure that you can add a custom thumbnail to your YouTube video
If you can’t find the option to add a custom thumbnail to your YouTube video, it means that your account isn’t verified. Only users with verified accounts have the option to:
- Upload custom thumbnails
- Post videos longer than 15 minutes
- Livestream to their audience
- Appeal Content ID claims
To verify your YouTube account, you first need to:
1. Click on your profile icon
2. Choose Settings from the drop-down menu
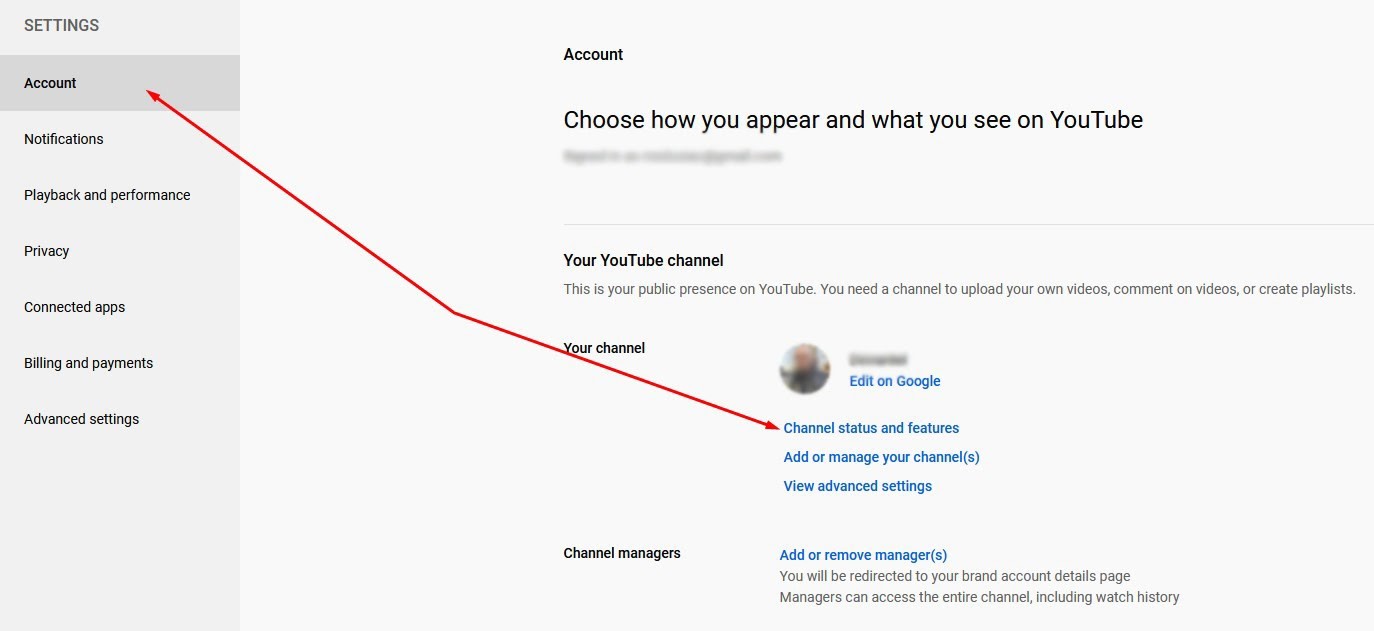
Open the Account tab from the menu on the left. Look for the Your channel section, where you can see your profile image and several links for different settings. Click on Channel status and features.
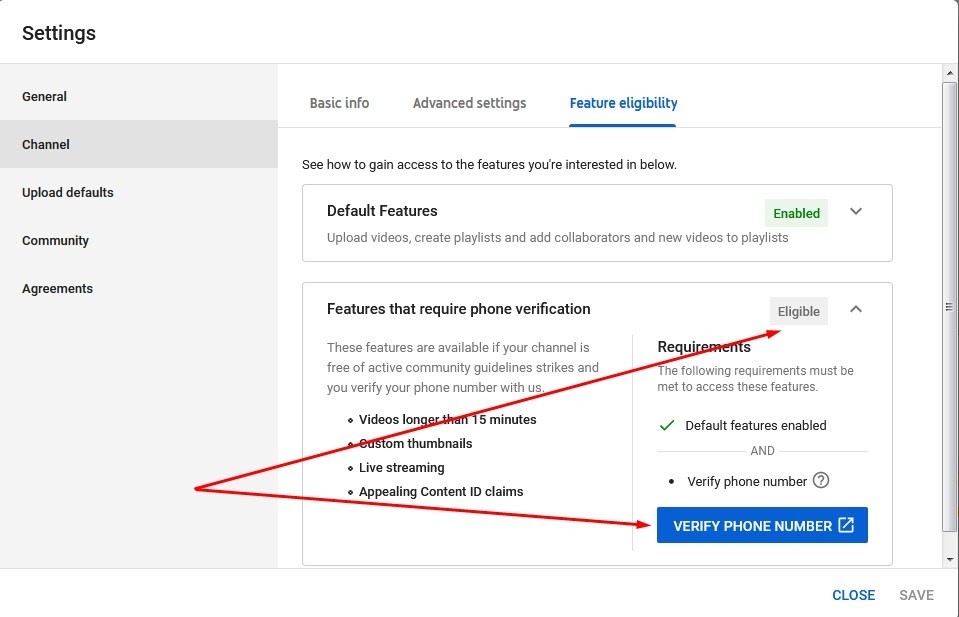
The Settings pop-up menu for your channel’s status and features will open. Click on the Channel tab, and go to Feature eligibility. Here, you’ll be able to see your default features and the ones that you need to activate by verifying your account. The good news is that you don’t need to have a specific number of views or followers to do so. Click on the Verify phone number button to continue to the next screen.
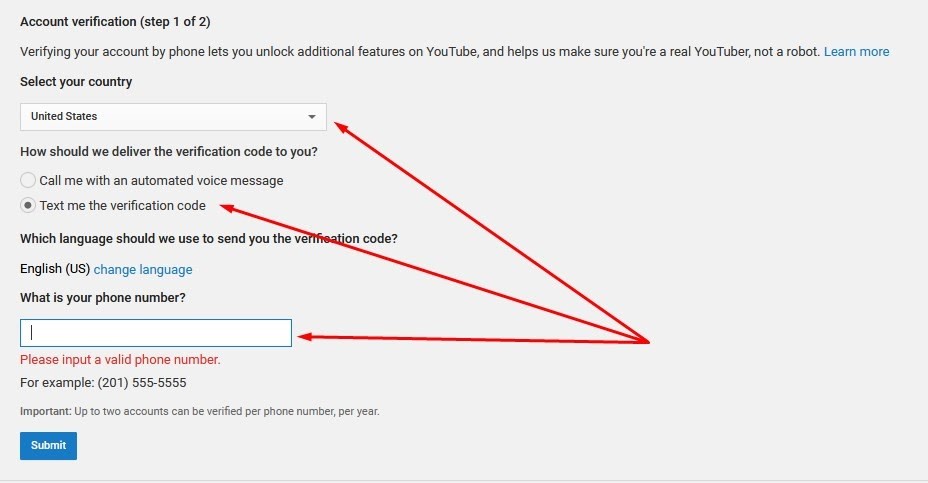
The account verification process consists of two steps. First, you need to:
1. Select your country from the drop-down menu
2. Choose how you want to receive the verification code
3. Enter your phone number
If needed, you can change the language that you want to receive the message with the verification code in. When you’re done setting up the necessary information, click on Submit.
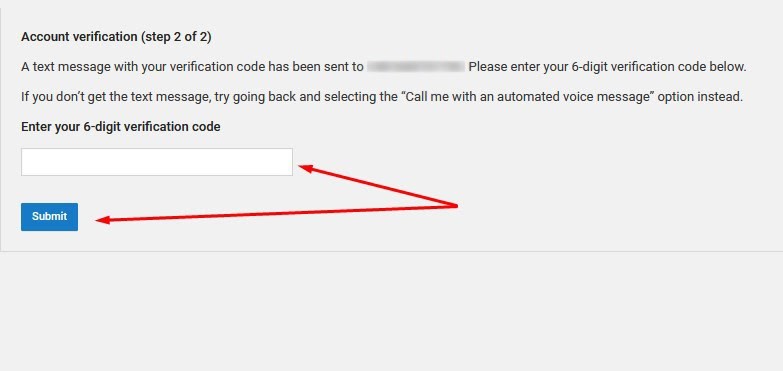
Next, YouTube will inform you that it has sent the verification code to your phone number. When you receive it, type it into the designated field and click on Submit.
Now that you’ve verified your account, you can add custom thumbnails to your videos. You also have the ability to livestream to your audience, for which you should consider uploading an appropriate thumbnail as well.
How to add a thumbnail to a YouTube video when live streaming
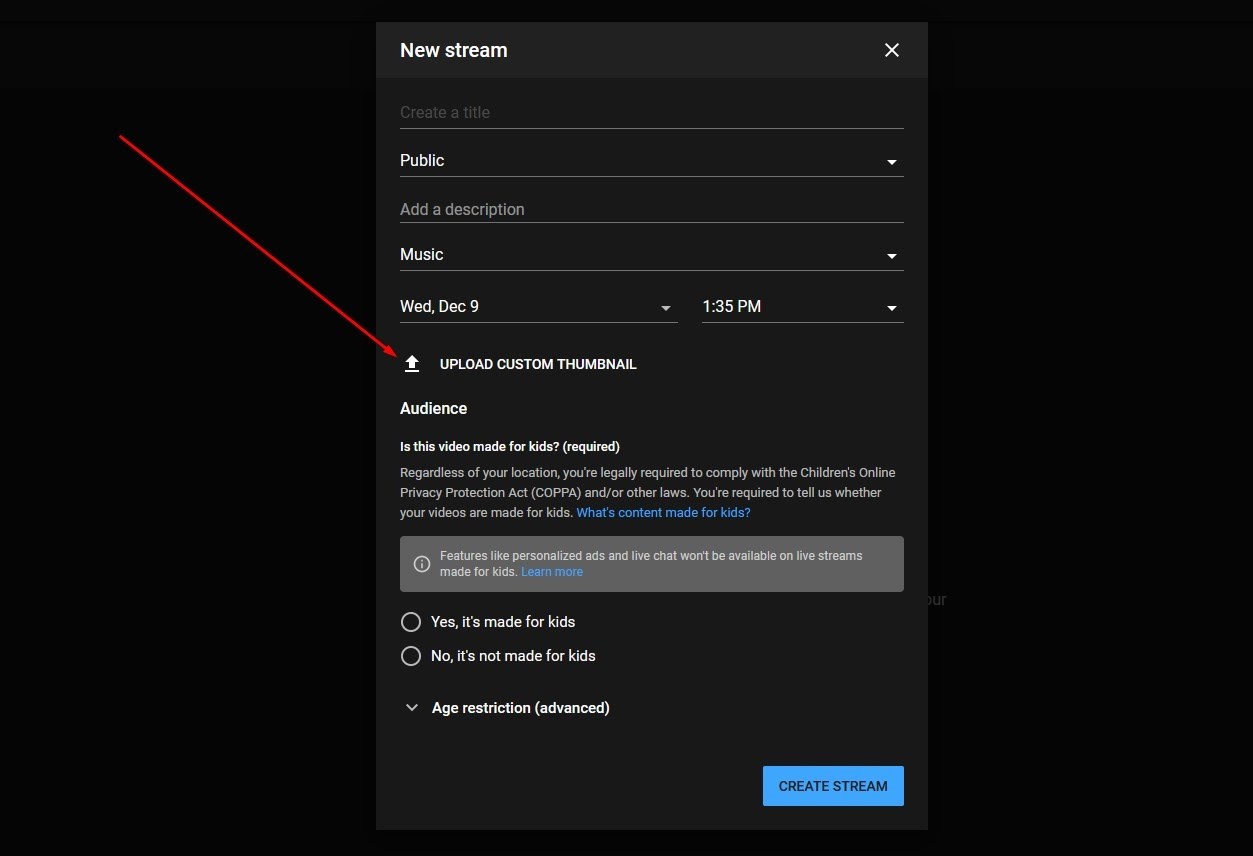
When you’re livestreaming, your audience will see your video with a default thumbnail. Before you create a new stream, you can schedule it and set up a variety of options, such as:
- Title
- Privacy
- Music
- Audience
To add a thumbnail that is going to grab your audience’s attention, click on Upload custom thumbnail and import an image you’ve created.
How to make an attention-grabbing YouTube video thumbnail
If you’re not satisfied with the thumbnails that YouTube created for your video, you can take a screenshot that you think best represents what the content is all about. If you’re a Windows user, you can use the default Snipping Tool. Mac users can rely on the Command+Shift+4 shortcut to select a part of the video that they want to capture. If you’re looking for a solution with additional options, you can get a free screenshot tool such as Lightshot.
Creating a thumbnail that is more than a screenshot
For most content creators with a significant number of followers, a simple screenshot isn’t enough. You want your videos to stand out from the crowd.
If the video focuses on a particular subject, you should enhance the message by overlaying engaging textual and visual elements on top of your image. This way, a person browsing YouTube for relevant videos is more likely to spot yours. Open Canva or Photoshop and get creative with your thumbnail.
Take a look at the following examples:
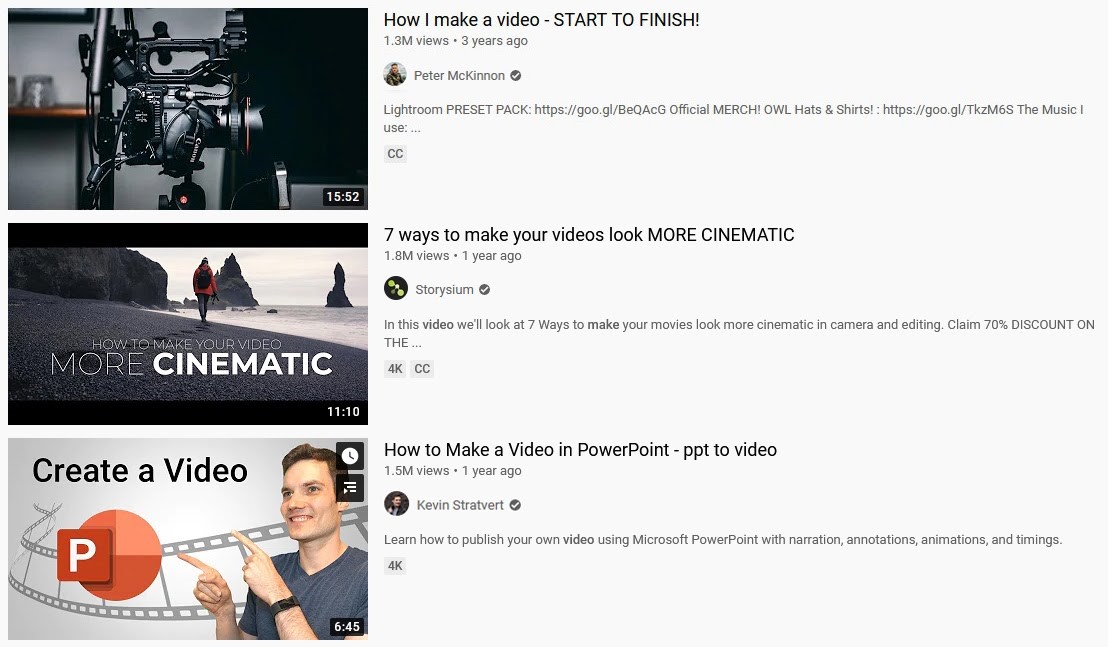
The first thumbnail uses a generic photo of a camera that the author is using to make videos. While it vaguely represents what the video is about, it doesn’t grab the user’s attention, and it might as well be a video about something else, such as the best cameras in the industry. The second thumbnail uses a screenshot that is as cinematic as the title suggests and overlays it with engaging text that catches the eye right away.
The third thumbnail relies on a solution that plenty of content creators use—cutting out a screenshot of themselves and using it as an overlay for the background that consists of elements relevant to the video. You can combine a variety of elements from different images to create an engaging thumbnail that tells a story. What’s important is that you don’t overdo it and end up with a confusing mess.
Bonus tips for creating a captivating thumbnail
When creating a thumbnail for your video, you should keep in mind the following tips:
Tip #1 - Consider the size
The size of your thumbnail matters for several technical reasons. You should check the optimal YouTube video thumbnail size to ensure that it shows on different devices properly. If the thumbnail is too small, it will appear blurry to some users, making them assume that the video is poorly made as well.
You should also be careful about what the thumbnail looks like in YouTube’s feed and video suggestions. While the elements you’ve put together may look amazing on a full-size image in Photoshop, it doesn’t mean that they will be as clear when the thumbnail is considerably smaller.
Tip #2 - Make it consistent
Every thumbnail that you make needs to represent your brand, which means that they should be as consistent as possible. If the majority of your thumbnails use the same font and an image of you as an overlay, that is what your audience will expect from your future videos as well.
Even if you decide to make something different for the video to have a particular effect, you should stick to some of the familiar, identifying elements, such as your logo.
Tip #3 - Don’t oversell the content
You need to ensure that the thumbnail is in line with what the video has to offer. It’s similar to a movie poster—if the film doesn’t look as good and isn’t as engaging, the viewers will be disappointed.
The video’s thumbnail should portray the content accurately. If it doesn’t, your viewers will see it as clickbait and most likely avoid your videos in your future.
Tip #4 - Keep the text concise
While text is one of the best ways to grab the viewer’s attention by explaining what the video is about, it doesn’t mean that you should overdo it. Keep it short and straightforward, and highlight the keywords to make it scannable. The person that is browsing YouTube for engaging content doesn’t care about reading compound sentences on video thumbnails.
InVideo—The best solution for making your video content as awesome as the thumbnail
Now that you’ve got an eye-catching thumbnail, you’ll want to ensure that your video content is as professional-looking as your audience would expect. InVideo—our powerful video editor—can help you improve your videos by adding a variety of fantastic features.
Our easy-to-use platform was made to enable even those that have never edited a video before to come up with stunning results in no time. InVideo’s user-friendly interface allows you to make different kinds of videos with little effort and amaze your audience with them. This includes:
- Lyric videos
- Music videos
- Stop-motion videos
- Eye-catching video loops
- Picture and music collage videos
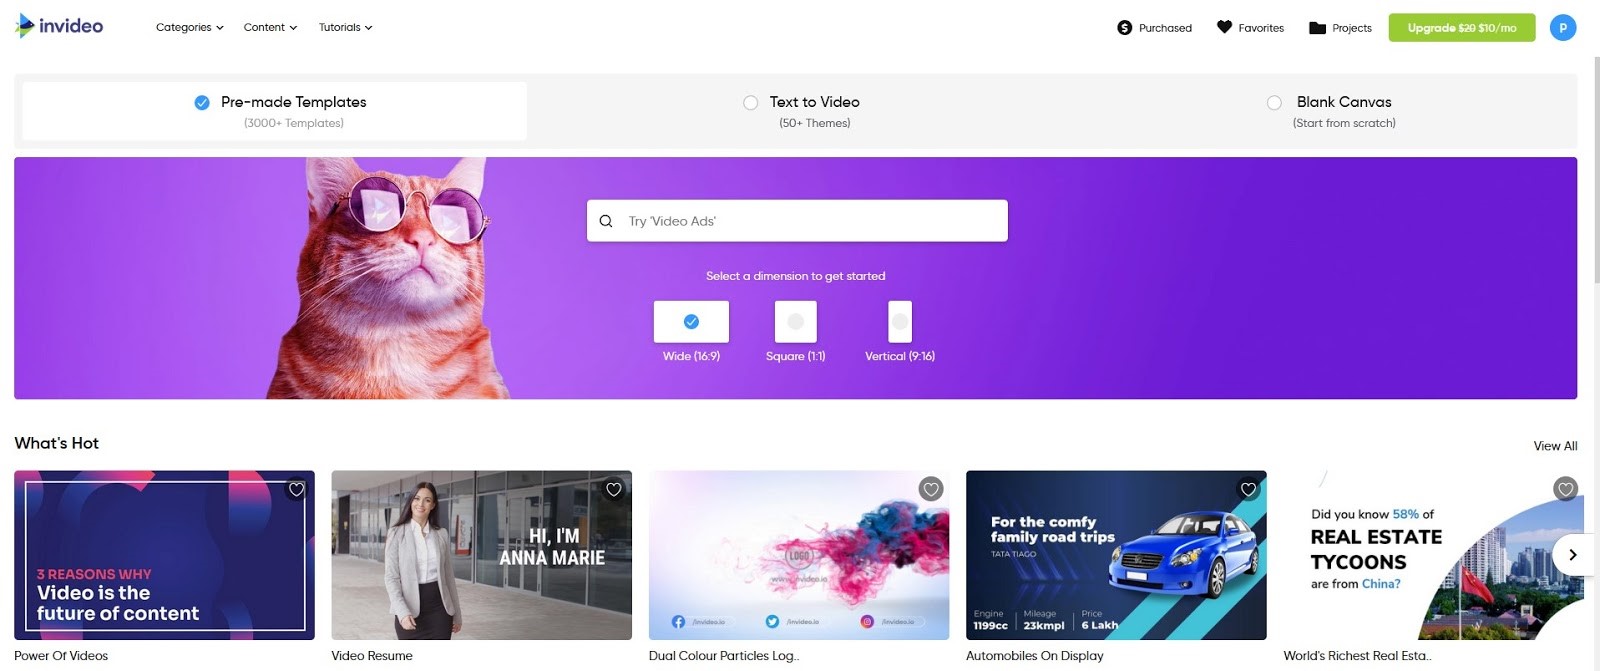
We’ve designed our platform to accommodate different kinds of approaches when it comes to video editing. When you open InVideo, you can choose between three editing methods:
|
InVideo Video Editing Methods |
|
|
Premade Templates |
Choose a professional-looking template for a specific type of video and customize it to your liking |
|
Blank Canvas |
Start making a video from scratch with a stripped-down template that you can add any features to |
|
Text-To-Video |
Turn a text, link, or selection of video files into a series of scenes that you can work on in Storyboard and Advanced Editor modes |
When it comes to templates, InVideo contains a library of over 5000 high-quality solutions for all kinds of videos. You can browse our categories or use the search bar to look up a particular theme. We’ve got themes made specifically for YouTube videos, such as:
- Intro
- Recommended Video
- End Screen
- Live Show
To start editing the template of your choice, all you need to do is:
1. Click on the template
2. Preview it to see if it fits your concept
3. Click on Use this template
How InVideo can improve your videos
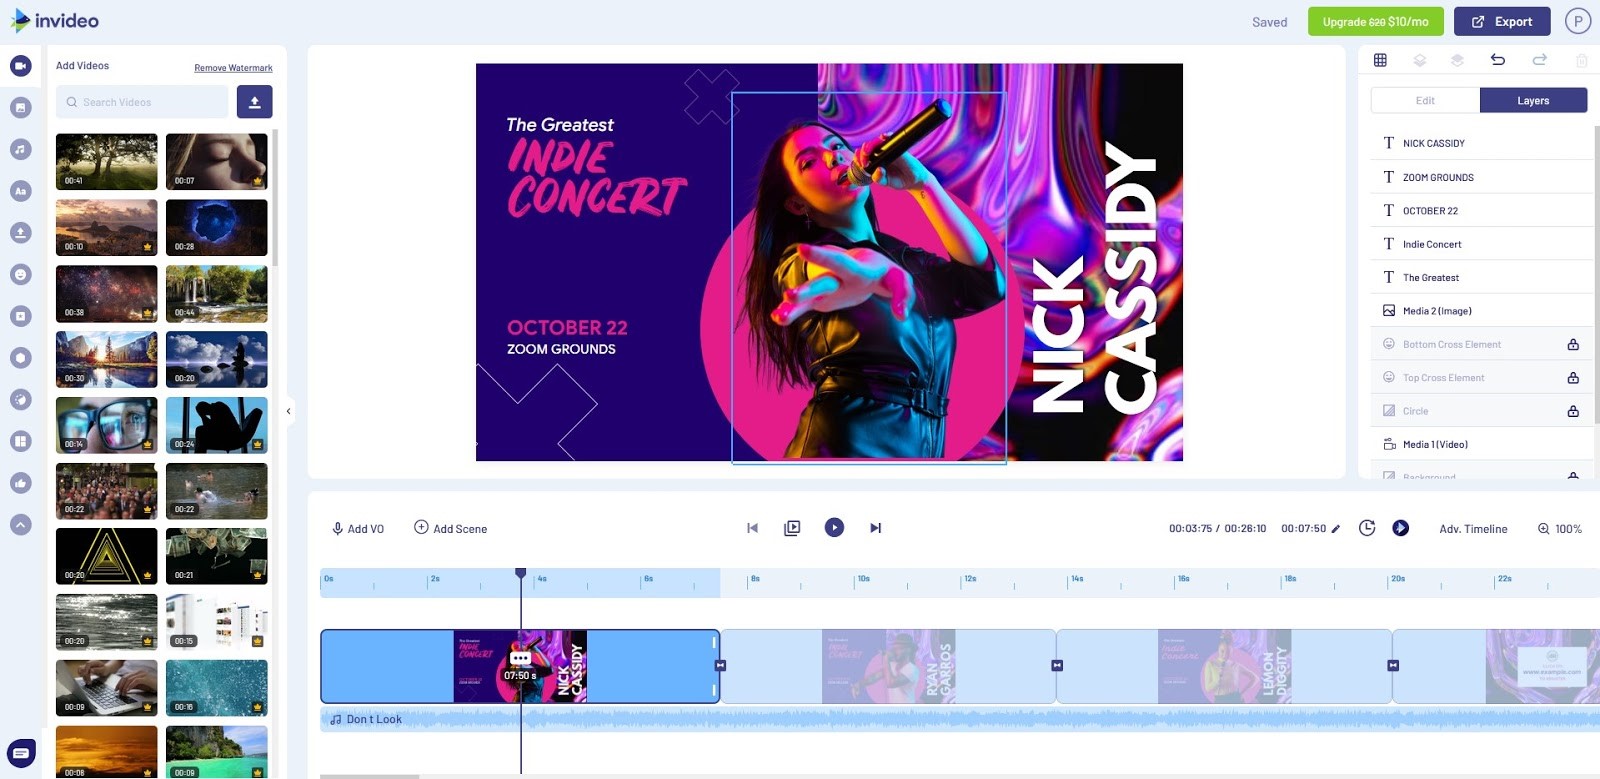
InVideo offers a variety of features that can boost your video’s visual appeal and make it more engaging. You can find most of the feature categories in the menu on the left.
When you open the Stickers tab, you can find plenty of solutions that can make particular sections of your video more actionable, such as CTAs and social media icons. You can also incorporate Twitter and Instagram links via the Social Posts tab.
If you want to add special effects on top of your scenes, such as snow, smoke, confetti, or explosions, you can find them by opening the Overlays tab.
InVideo provides a variety of premade text elements, such as title cards and speech bubbles, that you can animate and customize. You can add captions to YouTube videos to make them more engaging to your viewers.
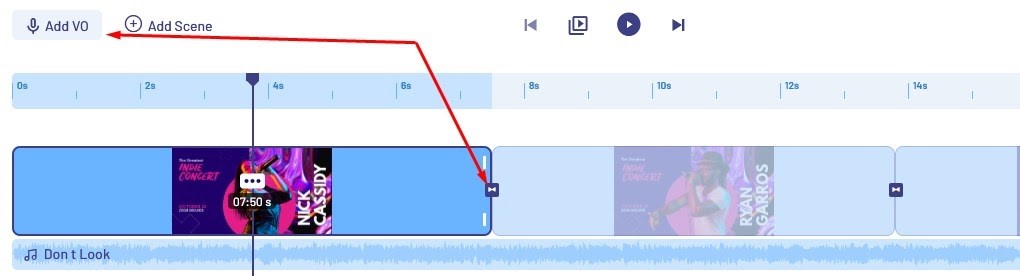
Using the timeline, you can add various types of transition effects between your scenes. Click on the connecting arrows to open the menu with the effect categories. This includes options such as:
- Animations
- Overlays
- Shutters
- Glitches
- Light leaks
- Brushes
You can add an engaging voice-over to your video by clicking on the Add VO button in the top-left corner of the timeline. This option enables you to:
- Record your voice within the editor
- Import a recording you’ve made in another program
- Generate a voice-over using the text-to-speech feature
InVideo provides an extensive library of over a million royalty-free tunes, videos, and pictures that you can add to your project.
InVideo pricing
Want to try InVideo before you decide to spend any money? We provide a free plan with no time limit. The free version of InVideo allows you to export up to 60 videos per month with a watermark. You can also use no more than 300 of the premium media files from our library.
If you decide that you like our platform, you can choose between two paid plans:
|
Business Plan |
Unlimited Plan |
|
|
Ready to start making stunning YouTube videos that will amaze your viewers and boost your audience? Sign up for InVideo today!