What is the best post-production workflow for AI-generated short films?
Last updated July 10, 2026
The best post-production workflow for AI short films runs in five steps: select the usable seconds from each generated clip, stitch composite shots where no single generation works, upscale with Topaz Astra before any color work, add light blur, grain, and a grade to counter the over-sharp AI look, then feed the rough cut back to an AI agent for a pacing and sound review.
Start by selecting, not assembling — treat each generated clip as raw coverage, not a finished shot. Each 15-second AI clip typically contains 4–7 usable shot candidates; in one documented production, an average of only 5 seconds per 15-second clip made the cut, and 41 of 164 generated clips (about 25%) survived editorial selection to build a 3-minute episode. Plan for an average of 3 generations per usable shot, and budget overgeneration deliberately rather than treating it as waste.
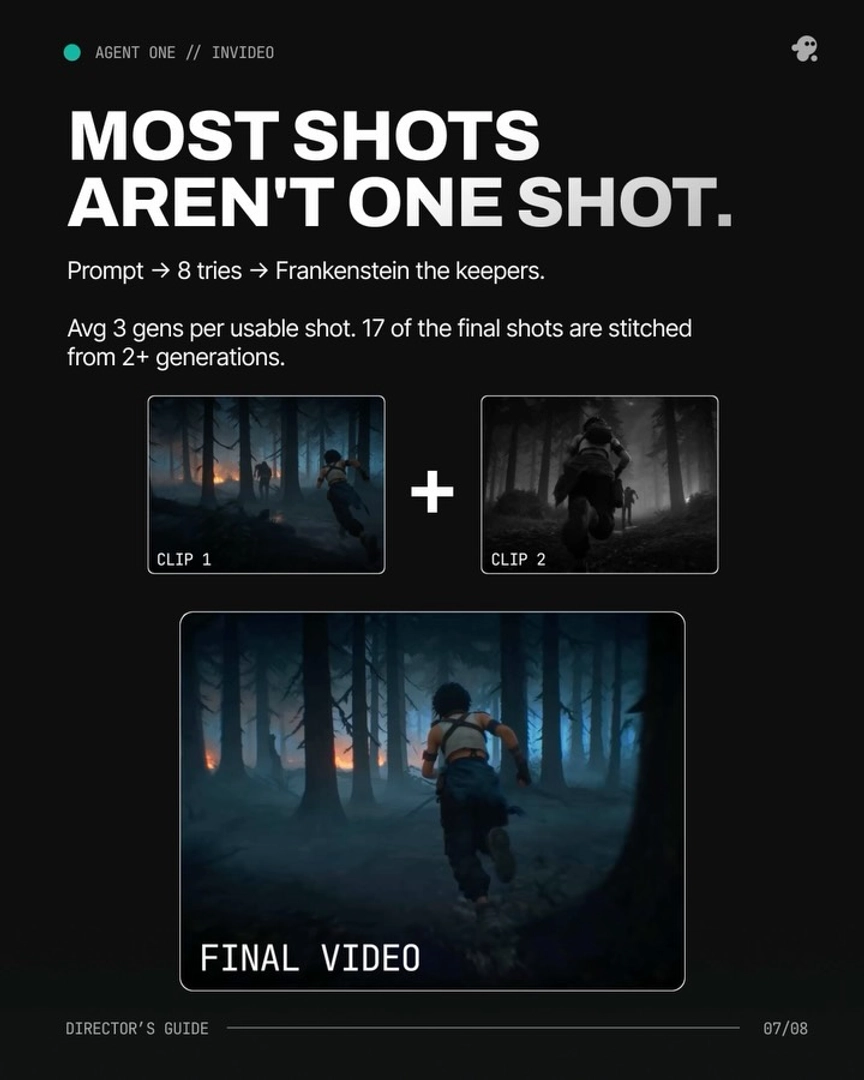
Next, build Frankenstein shots where no single generation is complete: stitch the strongest seconds from two or more generations of the same prompt into one composite shot. This is the default, not the exception — in that same production, 17 of the final shots (over 40%) were composited from multiple generations. Do this assembly in your NLE — Adobe Premiere Pro or DaVinci Resolve are the standard choices for cutting AI clips into a film.
Third, upscale before any color work. Run Topaz Astra on invideo as the first processing step on your selected footage — upscaling first means your grade is applied to the final pixel resolution rather than being degraded by a later upscale pass. invideo is an agentic video creation tool with the current generation models and upscalers built in, so you can batch this instead of processing clips one by one: spin up a sub-agent inside the invideo agent named for the job — an upscale artist — and hand it the footage for automated batch upscaling.
Fourth, run the realism pass. AI-generated footage, especially Seedance 2.0 output, comes back with an ultra-sharp, plasticky skin quality, and the fix is the opposite of what most graders default to: add a small amount of blur on top of the scene, layer in grain, then push the color grade until the footage reads as live-action film. The blur and grain are not stylistic flourishes — they directly counteract the over-sharpness that signals AI generation.
Finally, run an AI maker-checker pass before you call the cut finished — skipping the cut review is the most common mistake in AI filmmaking workflows. Upload your rough cut to the invideo agent with an open-ended "what's working, what's not" prompt and let it check pacing, editorial timing, and sound design. In one ~90-second production, this pass caught that a key reveal shot was running at the wrong emotional register — a structural error the director had missed. Sound notes from this pass matter as much as picture notes: what the audience hears before what they see carries a large share of a film's effect, so act on the SFX and audio-timing feedback, not just the visual notes. Then export at your delivery format and resolution.
Watch some of these to see what works for you:
What we tend to do is put a tiny bit of blur on top of the scene, add a bunch of grain and then play with the grade till it comes closer to live action film.
— invideo's creative team