
With over two billion active monthly users, YouTube has become a giant in the world of media. Being the name of the game, the platform has a plethora of creators that strive to be among the 16,000 channels that have more than one million subscribers.
The competition is dense among the YouTube peers, though not everyone wants to utilize the platform for direct monetary success. In fact, businesses are taking an interest in YouTube because of how easy it is to advertise products and how large the audience pool is. We could consider this a more ‘indirect’ way of increasing your revenue.
The reach you can achieve through this channel goes beyond what you imagine, and that’s why eight out of ten marketers believe that YouTube is the most effective marketing platform.
For YouTube to be fertile ground for your advertising efforts, you need to post professional-looking videos that grab the viewer’s attention. You don’t need to be a pro editor per se—which we will get to—but you have to understand the basics of YouTube videos from the technical side.
For starters, you should know what the ideal YouTube video size is.
What Is the Best Size for a YouTube Video?
Although you can upload videos of various dimensions, there is only one aspect ratio that is ideal, and that’s 16:9. YouTube generally recommends seven different dimensions:
- 3840×2160
- 2560×1440
- 1920×1080
- 1280×720
- 854×480
- 640×360
- 426×240
As far as the overall specs are concerned, you should rely on the ones listed here:
|
Video Length |
Max File Size | Aspect Ratio | Min Dimension | Max Dimension |
| Up to 12 hours | 128GB | 16:9 | 426×240 |
3840×2160 |
Keep in mind that if your video’s aspect ratio is 4:3, YouTube will add pillarboxing automatically, placing black bars on the sides of the footage to fill out the screen. This is going to be repelling to the viewer, so try to keep your videos at the 16:9 aspect ratio for optimal user experience.
If you want to advertise on YouTube, there are some specs that you should pay close attention to. Let’s see the differences in them between:
- Display ads
- Video ads
Display Ads
Display ads usually appear in the upper right corner of your screen when you start watching a YouTube video. If you’re looking to invest in display ads on YouTube, you should keep the following specs in mind:
- Dimensions for a static image—300×60 for smaller side view and 300×250 for the larger
- Video dimensions—You can use any of the above-listed
- Max file size—128GB
- Aspect ratio—16:9
- Video formats—You can use any of the below-listed
Video Ads
If you’re looking into video ads, you should know which types of YouTube video ads exist in the first place:
|
Ad Type |
How It Works |
|
Bumper ads |
|
|
Mid-roll ads |
Mid-roll ads show up where the name says they will—in the middle of the video. You can introduce these ads only to videos longer than ten minutes |
|
Non-skippable ads |
|
|
Skippable ads |
Viewers can skip these ads after watching them for five seconds. Advertisers can monetize these ads from any viewing device |
Which Video Formats Does YouTube Support?
Unlike Facebook that supports plenty of video formats, YouTube allows only a few. If you want to upload a video on YouTube, you need to ensure that your video is one of the following formats:
- WMV
- AVI
- MP4
- MPEG4
- MOV
- WebM
- FLV
- 3GPP
- MPEGPS
- FLV
What Is the YouTube Video Player Size?
The YouTube video player size is, by default, 320×240 pixels. Sometimes, you might find videos that have a size of 480×360 pixels as well.
Now that you know everything about the ideal specs and sizes that YouTube ads and videos should have, it’s time to get to the nitty-gritty. Applying all of these technical ‘rules’ to your videos is simple, though that doesn’t mean your content will blow up in an instant.
If you advertise your business and grow your channel more quickly and efficiently, you will have to learn some basic editing. The problem with this is that most video editing programs and platforms require intermediate knowledge—they aren’t particularly user and beginner-friendly.
If you aren’t planning on becoming a professional video editor, you should look into InVideo.
Why You Should Use InVideo To Edit Your YouTube Videos
Did you know that creating a 1–15-minute video takes about seven hours on average? Depending on the video’s length and complexity, it can take anywhere from two to 300 hours to film and edit a video for YouTube. With that in mind, it doesn’t come as a surprise that barely anyone wants to fuss with video editing.
Understanding the main issue—time—surrounding YouTube video editing, we’ve created a platform that makes editing a breeze.

InVideo Logo
InVideo is one of the most advanced video editing platforms for beginners and businessmen who don’t want to invest in expensive, overly complicated programs. Everything about InVideo was made easy for anyone who wants to create a professional-looking video.
Just because the platform is beginner-friendly doesn’t mean that it doesn’t have enough features for someone who has advanced editing knowledge—it’s quite the opposite. The whole point of InVideo is that it was created to be as intuitive as possible so that anyone can use it, no matter their background or job title.
With our cloud-based platform, you don’t need to worry about your device’s compatibility—you can use it on any PC or laptop, in any web browser. Being as flexible as it is, InVideo makes it simple for you to edit your videos to perfection under any circumstances.
Despite the platform being intuitive, we still want to ensure that everyone truly gets it, which is why we have plenty of tutorials that will help you get the hang of all of the options and features.
We also have an amazing customer support team that is at your disposal round the clock. If you need help with InVideo at 4 a.m. on a Saturday, our incredible team will provide it in an instant.
The best part is that InVideo comes at a cost-effective price of $10 per month. If you want to access all of the platform’s features and astounding capabilities, you only have to pay $30 per month for an unlimited plan.
InVideo Key Features
InVideo comes with tons of features that you can utilize to make your YouTube videos stand out from the rest. People usually get startled when they hear that a platform comes with many options because they tend to overcomplicate everything.
InVideo is nothing like that. The cloud-based, AI-powered platform is one of the most intuitive video editors you can find. To make it clearer how InVideo strives to simplify your editing efforts, let’s take a look at our platform’s crucial features:
- 24/7 live support
- Intelligent Virtual Assistant (IVA)
- Voice-overs
- Text-to-speech technology
- Template library
If you want to edit your videos to perfection to expand your customer pool quickly and effectively, let’s take a look at how you can create a YouTube intro with InVideo.
How To Create a YouTube Intro With InVideo
The InVideo Intro Maker is the best tool for the creation of a neat, professional-looking introduction to your business. The whole process is as simple as can be.
First, log into your InVideo account, or sign up if you don’t have one—it’s quick, easy, and free.
Next, navigate to the Categories drop-down menu and click on View all.

InVideo Categories
Find the Intro/Outro category, click on View All, and pick one of our pre-designed templates.
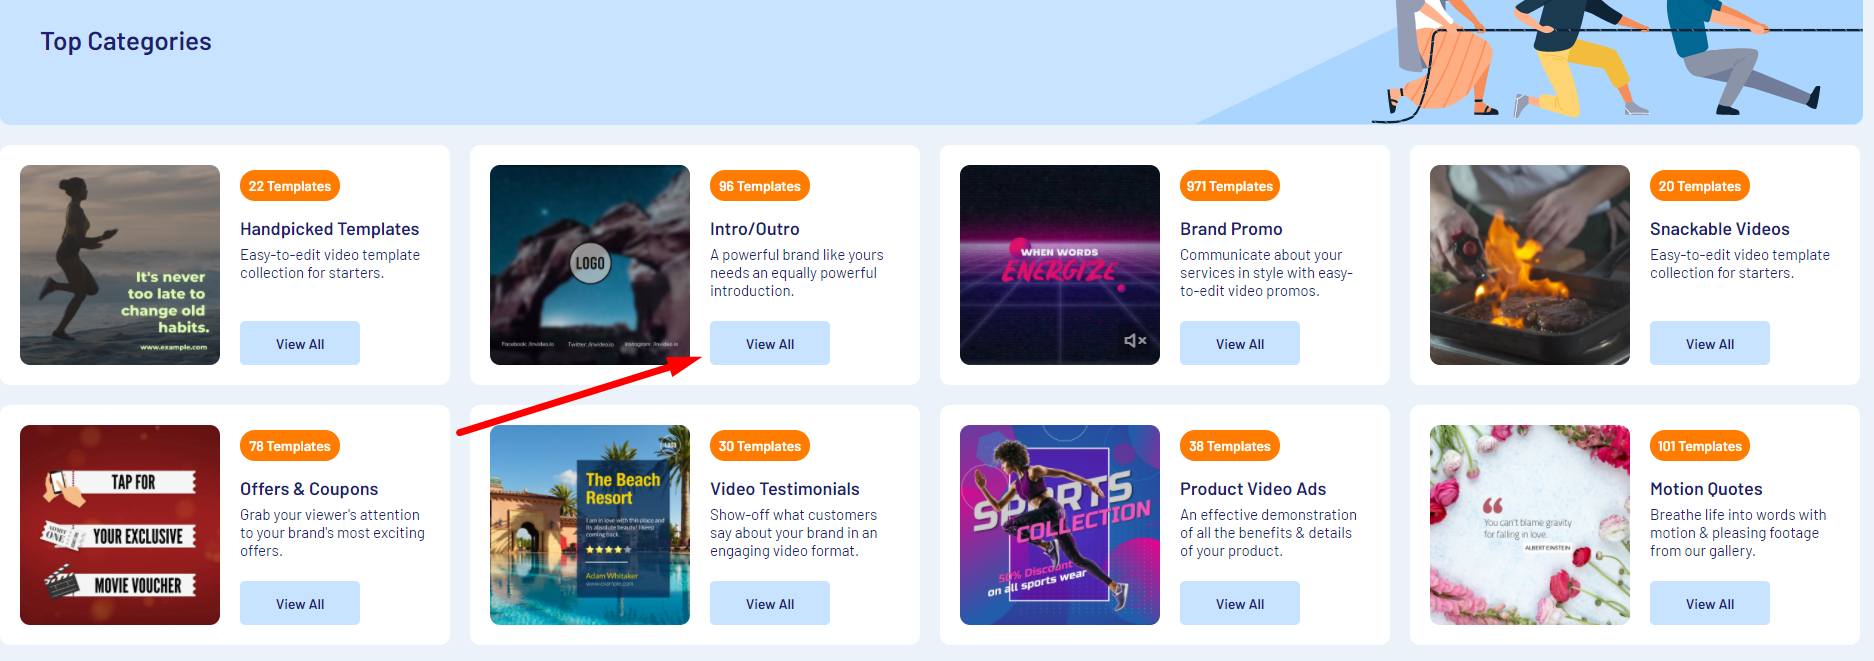
Intro/Outro Category
Once you find a template you like, select the aspect ratio for your video and click on Use this template to start creating your YouTube intro.
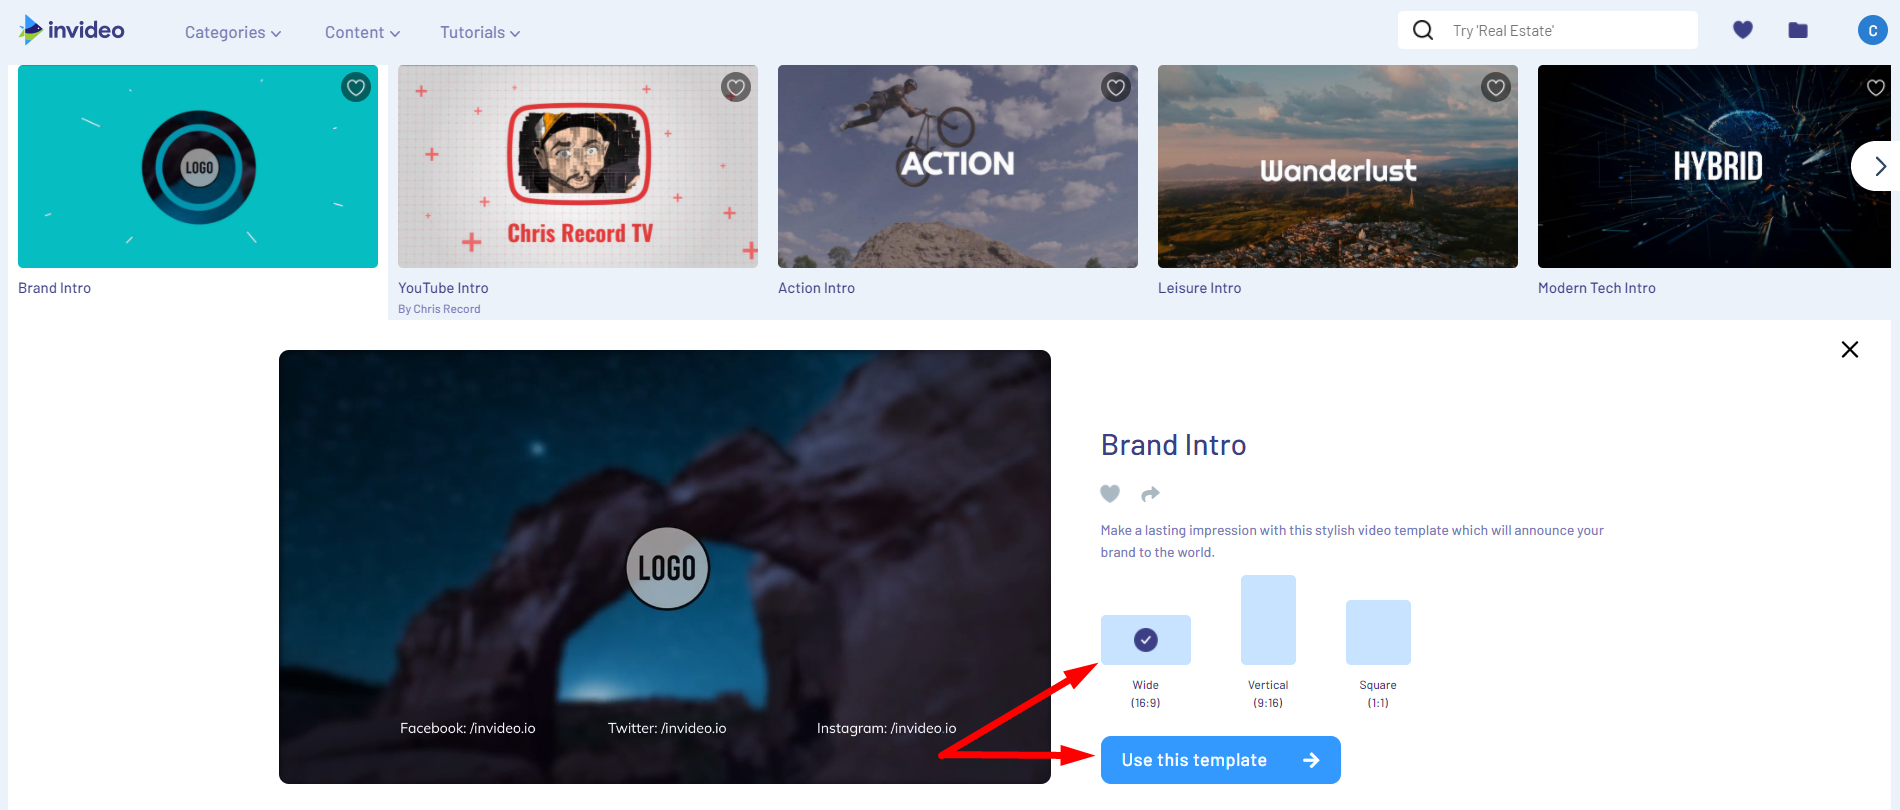
Getting Started With InVideo Templates
After a brief loading screen, you will be inside the InVideo editor. We will ask you to upload your logo first before you can move on to the rest of the process. You don’t have to insert it immediately, though—you can skip the step and add it later.
This is what you will see:

InVideo Intro/Outro Maker
In the left-hand menu, you will be presented with a bunch of different options that you can utilize to your liking. This includes:
- Text
- Media
- Music
- Enhancers
- Effects
- Stickers
- Shapes
- Uploads
You can click through all of them to check out what our platform offers for each category. For the sake of showing you how easy the process is, we will add some text to the intro by clicking on Text and choosing H1. It looks like this:
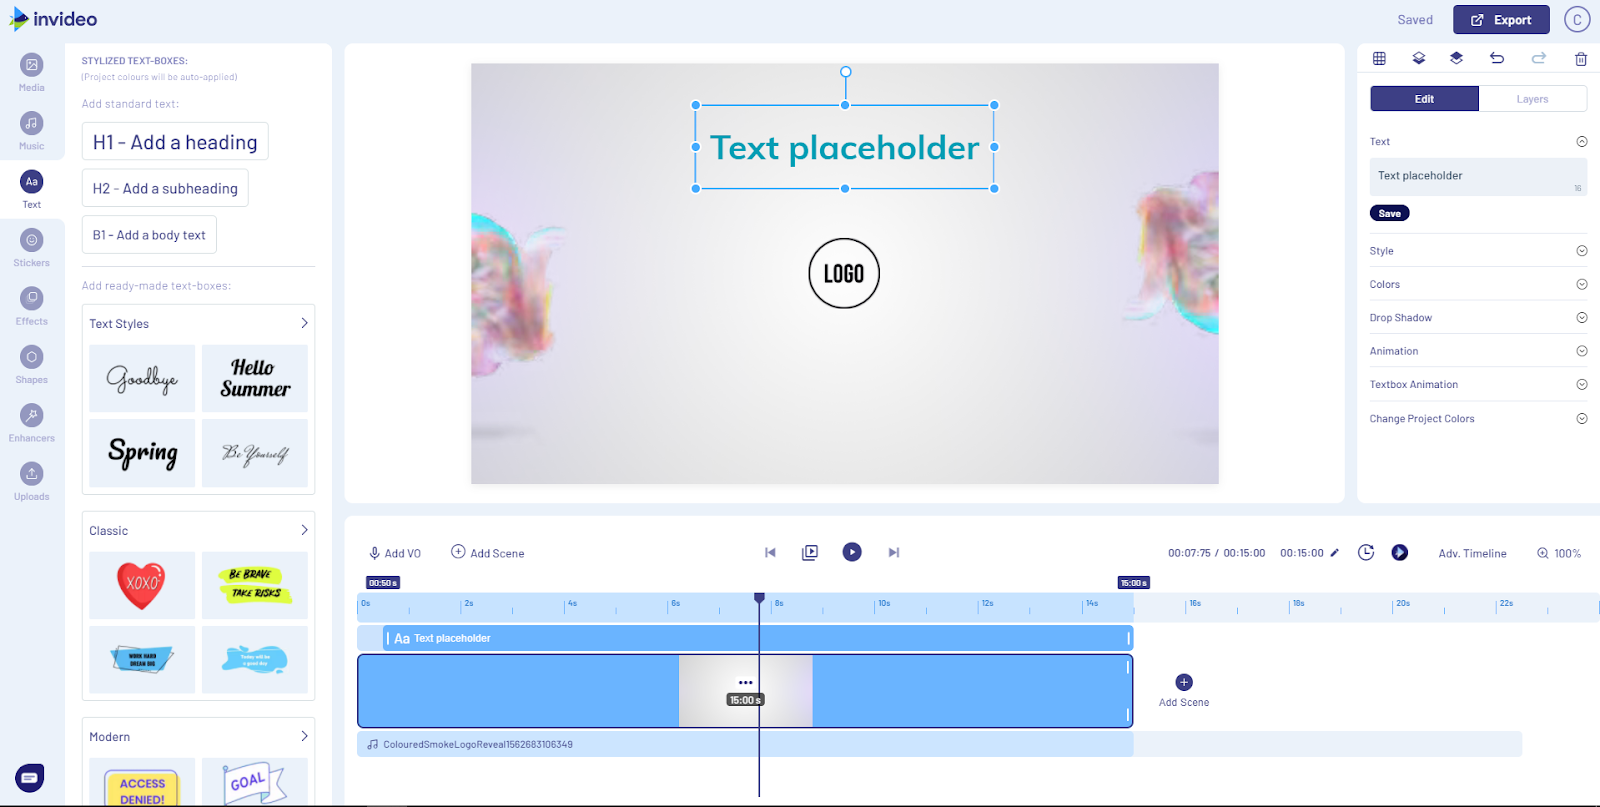
InVideo Intro/Outro Maker
We will enter some text to show you all of the options you’ll get for it:
InVideo Intro/Outro Maker
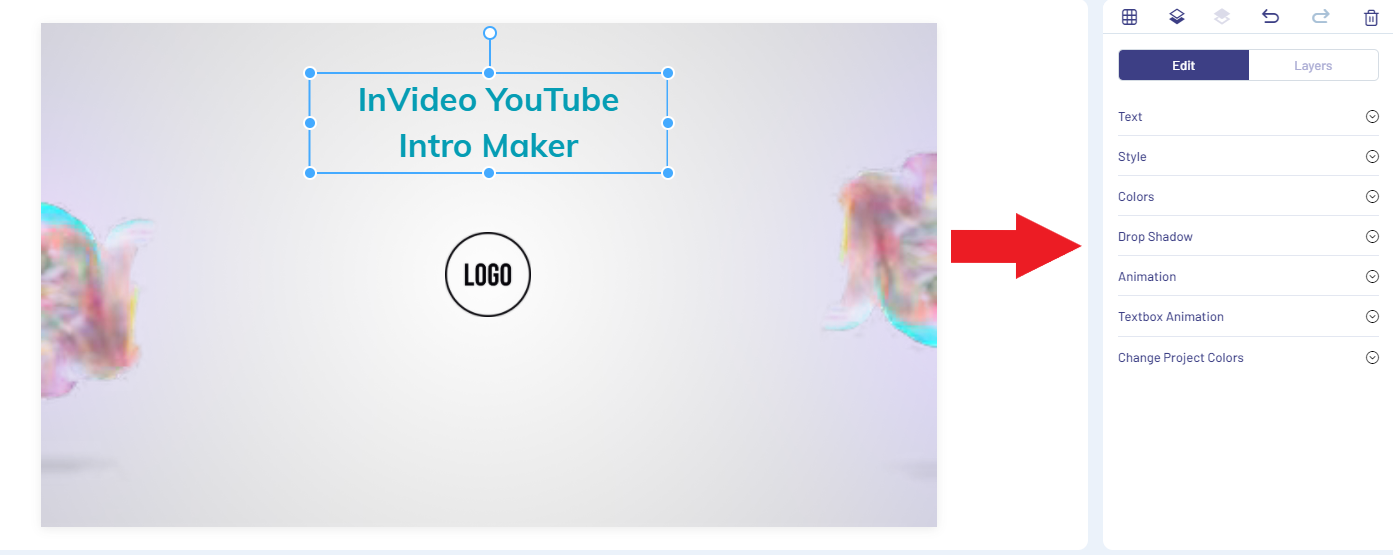
On the right side of your screen, you will be offered to change the style and color, add some animations, or insert a shadow drop.
As you can see, each detail is highly customizable and makes the whole editing experience a piece of cake.
We will also add a sticker from the CTA category. You can choose from thousands of them, and searching for a particular-looking one is easy because they’re all categorized.
To add anything to your video, you just need to click on it:
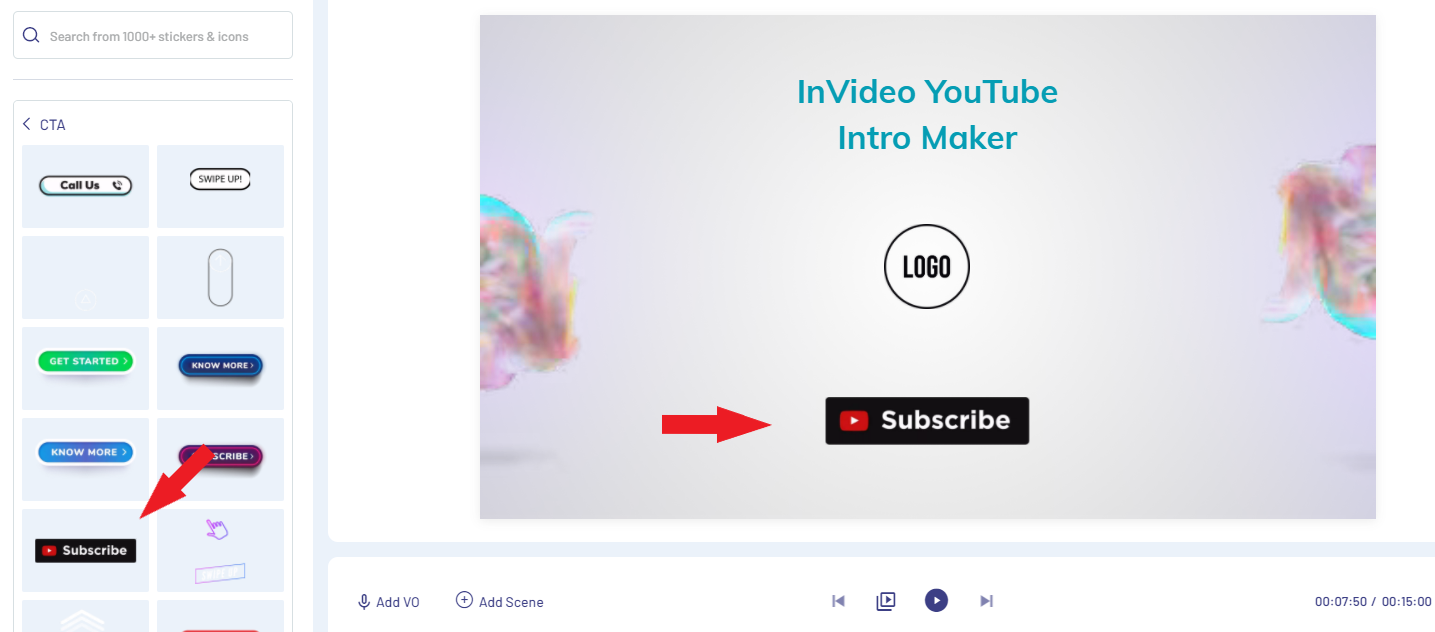
InVideo Intro/Outro Maker
Let’s say that we’re satisfied with how our intro is looking and we want to export it. Since InVideo will auto-save all of the changes you make, you don’t have to worry about losing your entire progress—feel free to click on Export in the upper right corner once you’re done with your video:
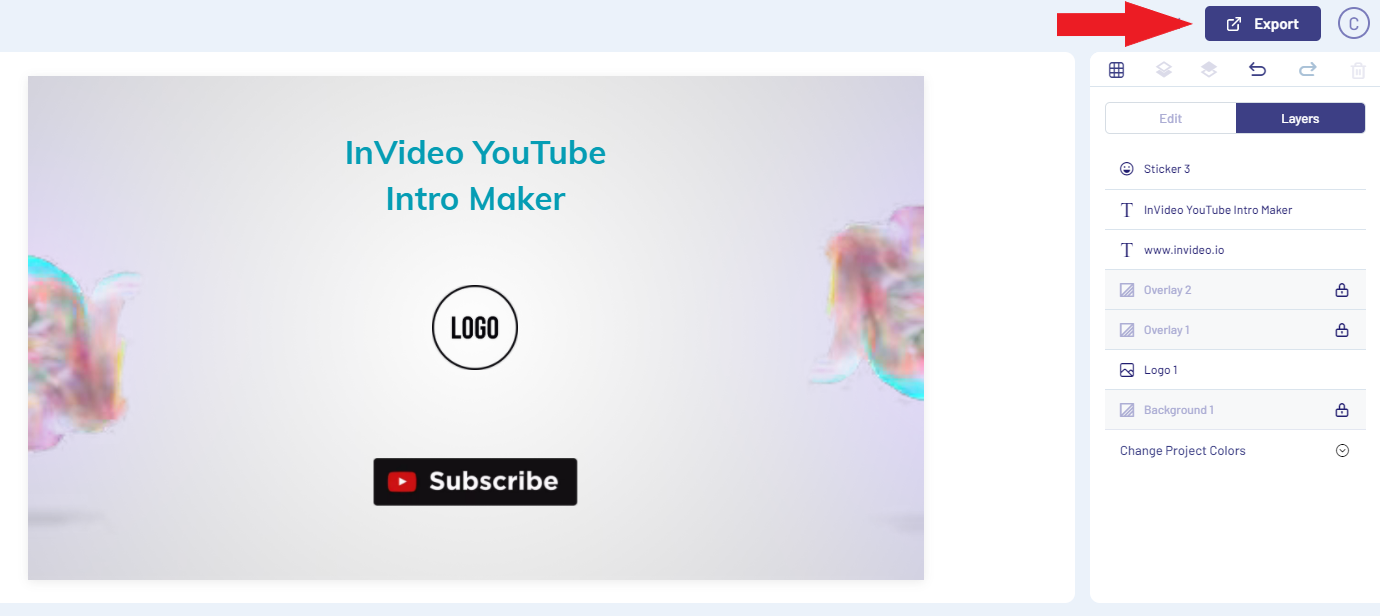
InVideo Intro/Outro Maker
Now that we’ve created a bold, stunning YouTube intro, we should move on to the video itself.
How To Utilize InVideo’s Video Editor Efficiently
Our video editor allows you to create the best-looking, eye-capturing videos that will peak your target audience’s interest in a heartbeat. As soon as you create your YouTube intro using our Intro/Outro Maker, you will be ready to start working on your video.
With InVideo, you can choose to create a video in three different ways: You can do it using:
- Pre-made templates
- Text-to-video
- Blank templates
For a YouTube video, it would make the most sense to use a blank template.
To start, you need to:
- Log in to your account
- Press the Create button in the right corner of your screen
- Select Blank Template
- Choose a dimension that suits your needs
- Click on the Start Editing button
Since the best-working YouTube video size is 16:9, we suggest that you go for that option. If you choose some other option, YouTube will add pillarboxing, which isn’t pleasing to the eye.
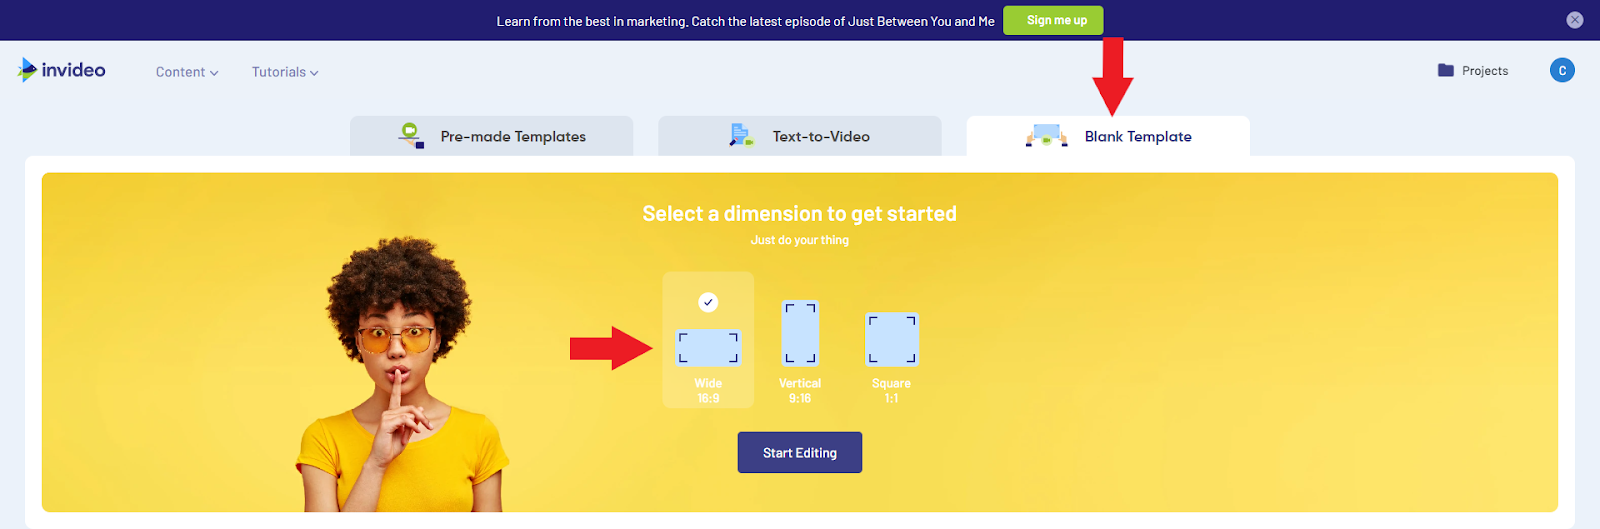
InVideo Templates
Once you click on the Start Editing button, InVideo will open the YouTube video editor. You can upload your pre-filmed video to start the editing process.
Just like with the Intro/Outro Maker, you will get the option to add text, music, images, effects stickers, enhancers, etc.
One of our most used features for YouTube videos is voice-over. You don’t need to pre-record VOs—InVideo will allow you to record from within the editor itself. Of course, if you want to upload a pre-recorded VO, you can do that as well.
We also have a text-to-speech feature that works like a charm if you want to convert articles into videos or if you’re creating an explainer video. Having someone narrate the video will give your target audience a much better watching experience—reading text with some music in the background can get boring relatively quickly.
If you’re also wondering how to add captions to YouTube videos, check out our article!
Need To Scan Your Video for Improvements? Use InVideo’s Intelligent Video Assistant
One of InVideo’s best features is its Intelligent Video Assistant (IVA). The option was created to help you ensure that your videos are tweaked to perfection each time you edit them.

InVideo Intelligent Video Assistant (IVA)
Powered by artificial intelligence, IVA can help you figure out whether your video has consistent quality in each segment. Errors—such as adding white text on top of a nearly white background—are a frequent occurrence, and they usually go unnoticed, especially if they’re minor. With IVA’s assistance, such mishaps will become a thing of the past.
You don’t even need to think about which animation will align with the rest of your video the best—IVA will do the job in your stead. The Assistant’s goal is to help you avoid overly aggressive, non-aligning effects so that they work together in harmony.
IVA can also resize all of the added text boxes and move certain elements around in an effort to make your video as visually appealing as possible.
If you want your target audience to be impressed by your YouTube videos, having an assistant such as IVA is beyond useful. The Assistant will ensure smoothness and seamless transitions to prevent the repelling abrupt cuts.
One of the best parts about IVA is that it will suggest changes to your in-video text. The point of this is to avoid long, tedious sentences that may disinterest the viewer and to ensure that your audience has enough time to read through everything without being disrupted.
Use InVideo for Free
If you don’t want to invest in our platform right away, you can sign up for the free plan. That’s right—it’s a plan, not a trial, meaning that there are no limits in terms of longevity.
You can use InVideo completely cost-free for as long as you wish, and the only restrictions are that you can export up to 60 videos per month and that there will be an InVideo watermark in them.
We don’t impose any feature limitations—you can use all of them if you sign up for the free plan.
If you decide that our platform is worth $10 a month—$20 if you want to be billed monthly—you can sign up for one of the two paid plans we offer any time.
What Else You Can Use InVideo For
InVideo offers plenty of options—you can use its Ad Maker, Facebook Ad Template, Promo Video Maker, or Instagram Video Editor among others. No matter what kind of video you need to create, InVideo can make it happen in a matter of minutes.
Being the most cost-effective solution on the market that boasts plenty of features, InVideo is undoubtedly the best video editing platform you can find.
With over 2,000 templates to choose from, you will be able to find whatever suits your needs best. Some of the most popular template categories are:
If you’re curious about what else you can use our platform for besides YouTube videos, check out the list:
- Snapchat stories
- Twitter timeline
- Facebook newsfeed
- LinkedIn newsfeed
- Instagram post
- Facebook ads
- Instagram ads
- Facebook stories
- Instagram stories
No matter what kind of video you need, InVideo will provide you with the best and fastest editing experience ever.
Sign up to browse through our extensive media library and create the best, revenue-generating YouTube videos!