
You have a state-of-the-art camera and an amazing story to tell. You’re on your way to share your memories with your friends on social media or generate leads for your product or service with an enthralling video ad. The only challenge remaining is making the raw footage into a stellar video that your target audience won’t be able to resist checking out.
Looking at the entire process of video making—coming up with the idea, writing a script, taking photos, filming your scenes—the most complicated part seems to be editing. Video editing doesn’t have to be such a monster if you use the right software for it. InVideo is an innovative tool for editing videos quickly and efficiently, even if you have never done it before.
The best part is that you don’t even need any footage prepared in advance. Our library is equipped with 5000+ templates for your video storyboards and even more royalty-free music and images.
Let’s get into our tutorial and see how video editing is made easy, quick, and efficient with InVideo.

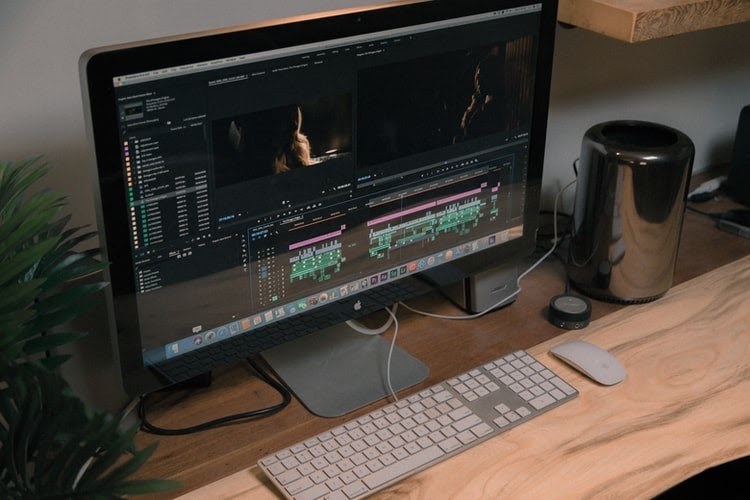
Credit: Denise Jans
The best way to learn Video Editing—Using the right software
The first point to go over in any video editing tutorial is the software you’re going to use. A part of the reason why editing is considered difficult is that most software out there makes it complicated to master.
Another difficulty is that the tutorials themselves are rarely accessible and usually difficult to grasp, while the simple truth is you don’t have to spend hours and days learning how to make a good video.
InVideo software makes all these problems go away.

InVideo is not only the easiest video editing software you can use on all browsers and operating systems—Mac, Windows, and Linux—but it’s also the most affordable. Our video editing software also solves the problem of time efficiency and complex tutorials easily. You don’t need to spend more than ten minutes polishing your video. If you’re in any doubt about how to do it, you can check out many of our quick and straightforward tutorials.
InVideo Overview—Features
Let’s take a look at the reasons why you want to start editing your videos with InVideo today:
|
InVideo Feature |
What it does |
|
Customizable templates |
Whether you need to edit a video for your business or personal life, our templates are perfect for all use cases |
|
Text-to-video |
You can copy-paste your prepared script, and our text-to-video feature will do its magic of transforming your text to speech in no time |
|
The intuitive AI tools, IVA, is there to guide you through the editing process and provide suggestions along the way |
|
|
Video making tutorials |
If you want to become a pro video maker, our comprehensive tutorials are available entirely for free |
|
Customer support |
Our customer support is there to answer all doubts or questions you might have 24/7 |
InVideo Overview—Pricing
When deciding which software you’ll use for editing videos, one of the factors you are certainly considering right away is the pricing. The excellent news is that InVideo has a free plan, which means that you can edit your videos using our innovative features for however long you want! You’ll have access to all the video editing features, with the only limitation being that you can export up to 60 videos per month.
If you want to remove the InVideo watermark and export as many videos as your heart desires, you can always opt for a paid subscription. Our paid plan could not be more on budget. With only $10 or $30 a month—depending on which of our two plans you subscribe to.
Video Editing 101—Getting Started
Now that you have decided which software you’ll be using to edit your videos to the point of perfection without having pre-established expertise or needing days to do it, it’s time to get down to business.
Video editing falls under a post-production process of video making and includes:
- Adding footage
- Removing footage
- Rearranging footage
- Adding special effects like stickers, pictures, music, or speech
- Making scene transitions
When you’re done editing, all the aspects of your video should be improved and polished so that your video is ready for output or upload.
Before we go into the short and easy-to-understand tutorial for every aspect of video editing, you first need to familiarize yourself with how video editing software looks.
Video Editing Tutorials for beginners—How does a Video Editor look like?
Learning to edit videos in InVideo will take only minutes, even if you don’t have any prior experience. To get you started with editing videos like a pro, let’s first see how the inside of the video editor tool looks like.

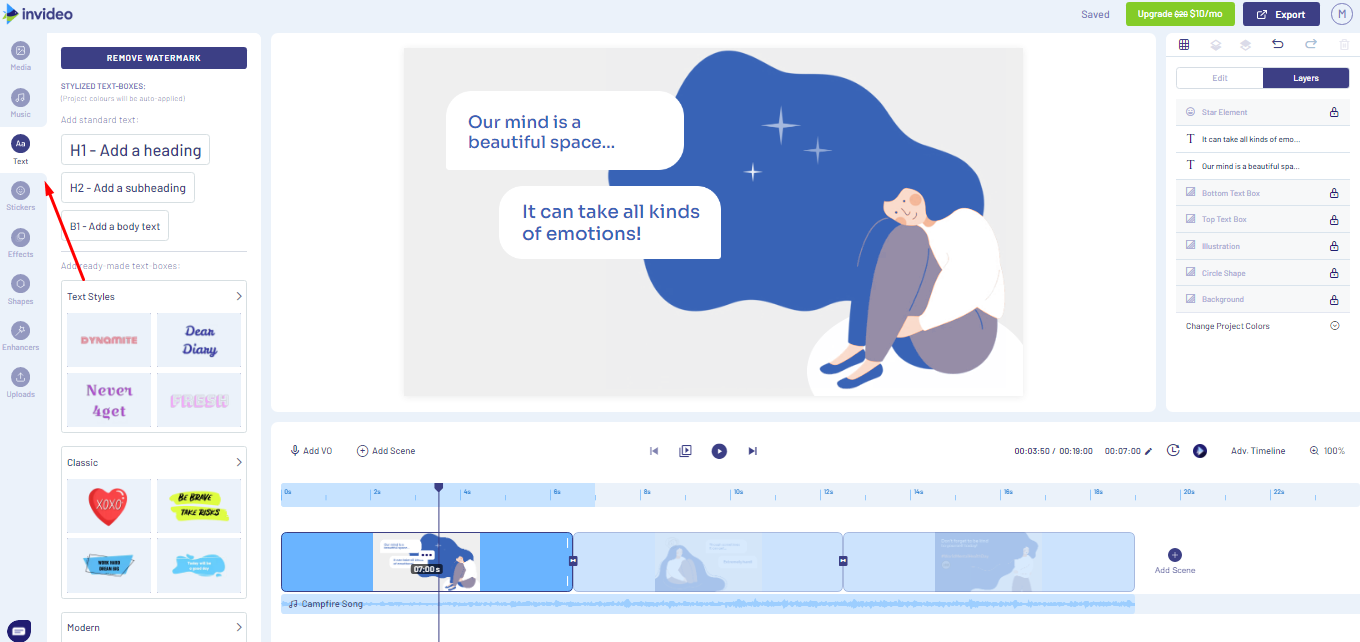
On this image, you can see that our video editor software has four main parts:
1) The left side of the screen—your asset library
Here, you can see and search for all the media you would like to add to your video during the editing process, including music, stickers, shapes, stylized text boxes, various visual effects, and so on
2) The bottom part of the screen—the timeline
At the bottom of the page, you have an overview of your project’s timeline. Here, you can control how long you want your scenes to last or if you wish to rearrange them. You can also control how long individual elements on your video—such as text or stickers—will last or when you want them to fade in and out
3) The center of the page—your canvas
In the center of the screen, you can see your project as it is in the editing process. You can tap on the individual elements of your video directly from the monitor to change them
4) The right side of the screen—your edit panel
On the top right, you can edit the media you added from your asset library further. For example, in InVideo, you might have chosen the Tutorial template—such as in the image above. You will certainly wish to change the title to fit your project. Once you’re done with that, you may want to change the text font or color. This is all accomplished through the options found on the right side of the screen
Learn how to edit videos—A step-by-step guide for every aspect of Video Editing
Credit: Jakob Owens
Since you now know what our video editor looks like—and where all the features you will need are on the InVideo editor page—it’s time to show you how you will actually edit your video.
As previously noted, many aspects go into the editing of your project. We’ll break down each for you, so you can go through this tutorial according to the exact element you want to change in your video.
Here are all the video editing aspects you’ll find in this tutorial:
1. Choosing a template
2. Adding text
3. Editing text
4. Adding and editing storyboards
5. Editing scenes
6. Trimming and editing the timeline
7. Transitioning
8. Adding music
9. Adding voice-over
10. Turning longer text into a video
1. Pick a template and learn to edit a video
One of the most amazing aspects of InVideo editing software is that you already have thousands of templates to choose from to get you started on editing your project. There are three main types of templates in our library:
|
InVideo Templates |
What They’re Perfect For |
|
Pre-made templates |
Our stunning collection of pre-made templates is an excellent choice if you don’t want to make videos from scratch. There is something for every niche and every use case |
|
Text-to-video templates |
Text-to-video templates are a perfect solution if you have a prepared script you would like to turn into a video. This can be anything from your latest movie review to the marketing idea for your newest product or service |
|
Blank templates |
You can pick blank templates if you already have some experience in video making and wish to start editing your video from scratch. It gives you total control over the process from start to finish |
Here’s the step-by-step guide to choosing a template in InVideo editing software:
1. Log in to your InVideo account
2. Pick which of the three types of templates you want to use
3. Type in any keyword in the search bar to faster locate the template that will fit your use case
4. Click on the template of your choosing
5. Choose the size of your video template. There is wide (16:9), square (1:1), and vertical (9:16)
6. Go to the Use this template option
Et voilà! You’re ready to proceed to the editing of your template and are one step closer to adding the finishing touches to your video!
2. How to add text to your video
Once on the video editor page, you may first wish to add text to your video. To do so:
1. Click on the text box provided by the template
2. Delete the existing text
3. Type the text you want in your video
You can do this in all the text boxes you find in the template, and you can also add your own by:
1. Going to the Text option on the left side of the screen, i.e., your asset library
2. Adding the text box you want
In the InVideo standardized text box, you can add - Headings, Subheadings and Body text.
3. How to edit the text in your video?
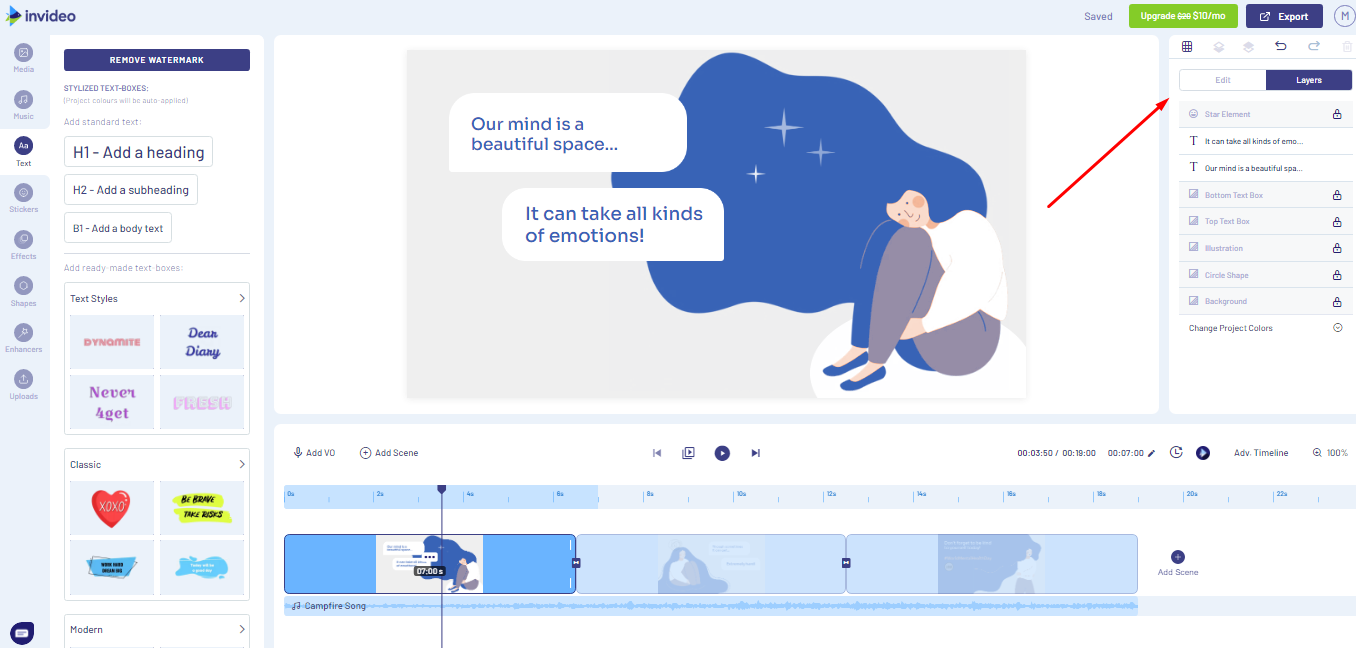
Of course, merely adding words to your template will not be enough. You want to style your text to fit the vision you have for your project. To edit the text you added, you will want to:
1. Click on the text box in your canvas
2. Pick any of the categories you want to edit in the top right corner of the InVideo editor page
3. Choose the desired font, size, and color of your text.
In the InVideo editing software, you can also play around with your text’s:
- Animation
- Drop shadow
- Text box animation
4. How to edit your template’s storyboard?

If you’re not satisfied with your scene’s background, i.e., your chosen template’s storyboard, you can change it, and we’ll show you just how. Here are the easy steps to take:
1. Select the scene you want to edit by moving the slider on the timeline
2. Click the background on your storyboard
3. From the right-hand side menu, select Video Edit to crop, trim, and loop your video
4. Move on to Playback speed, Video animation, or any other aspect you want to change
5. How to add, remove, and rearrange your scenes?
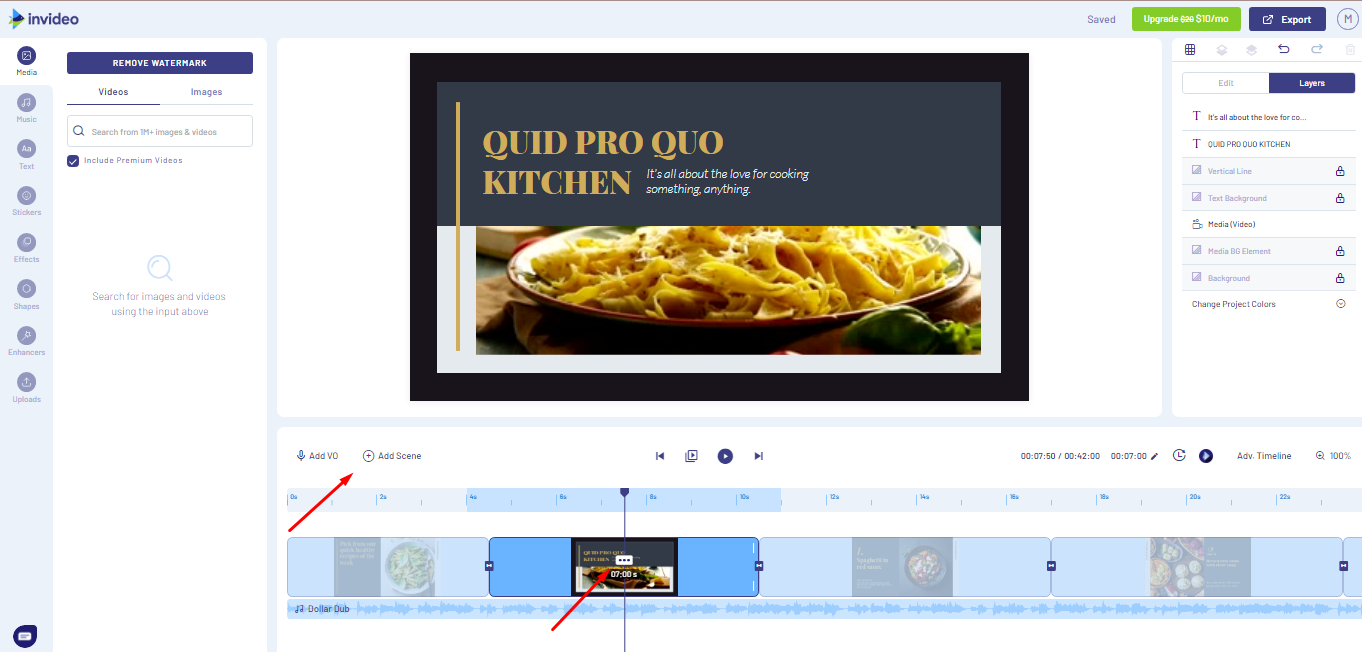
One of the crucial parts of any video editing process is the rearrangement of your scenes, and this can include adding, removing, and changing the timeline of your scenes.
When using InVideo to style your project to the envisioned result, this part could not have been made simpler. For example:
- To add scenes, click on the Add scene in the timeline part of the editor page and add your own scene or choose from our extensive library
- To remove scenes, select the particular scene (shown as a box in the timeline section), click on the three dots that will appear in the middle of the box, and choose the Delete option
- To rearrange scenes, you only need to click on the scene you want to rearrange and slide it into the order you want it to appear in
6. How to change your scenes’ timeline?

When you have polished your scenes to the point of perfection, you will probably want to control their duration. Here’s how it’s done in InVideo:
1. Slide your cursor to the default timeline in the InVideo editor software
2. Go to the right side of your scene box
3. Align your cursor to the little white lines around your scene
4. Left-click on the white line and move your cursor left or right to shorten or lengthen the duration of your scene
7. How to edit your scenes’ transition?
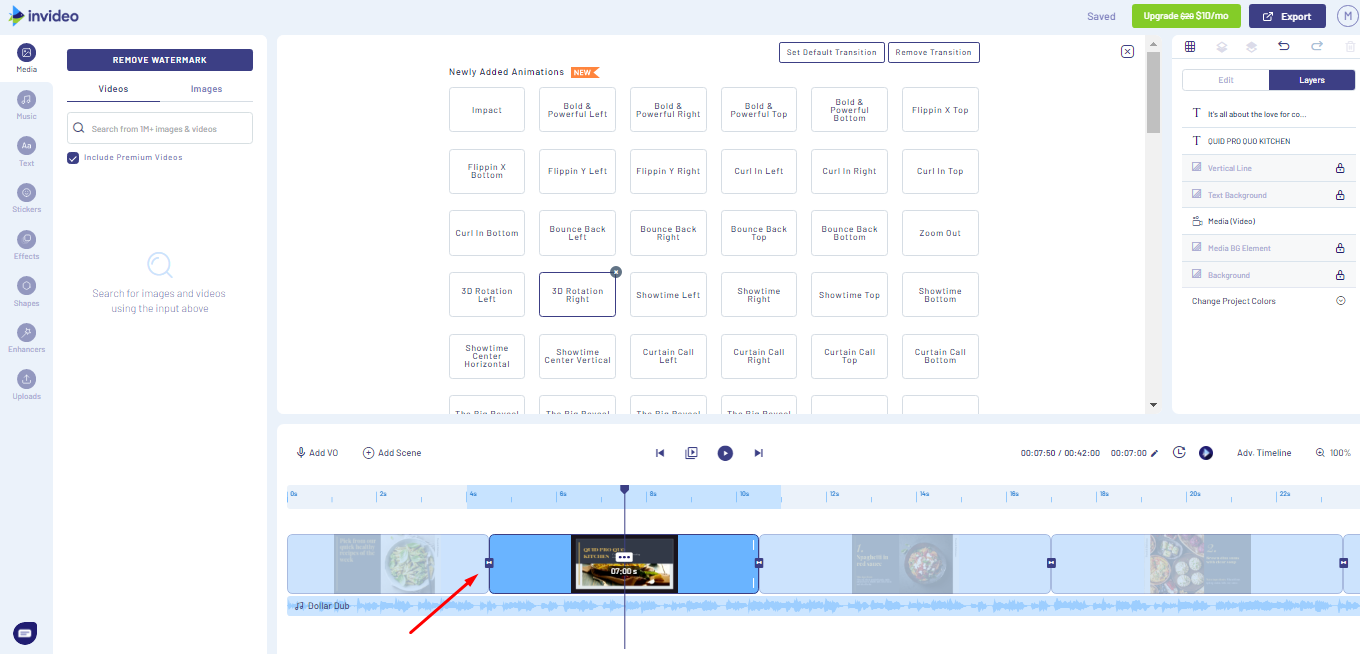
Another delicious feature of the InVideo editing tool is that you can choose countless different transitions for your scenes. How your scenes change from one to the next will have a significant impact on the outcome of your project, so the transition is the part you will want to pay attention to. To pick a transition for any individual scene in your video:
1. Click on the Curtain Call Top option on the right or left side of your scene box
2. Explore and pick various innovative transition effects in your storyboard screen
Other neat features of the InVideo timeline are that you can:
- Duplicate your scenes
- Zoom in and out your scenes to have a better hang on editing each aspect of them
- Use the advanced timeline feature if you’re more comfortable with a traditional approach to editing videos
8. How to add and edit your music?

An unmissable part of editing your video is adding some music to it. After all, it is what differentiates video from static visual forms of media, like text images or photography. The background music you put into your video can also affect the tone of the message you want to get across.
To add music to your project using the InVideo software, you only need to:
1. Select the Music option in your asset library, i.e., the left side of the InVideo editor page
2. Choose to add a piece from our massive library or add one from your own collection
3. Click on the bar for the music that appeared in your timeline to edit it to your liking
Using InVideo, you can also add music to your YouTube or Instagram video. If you have a more serious project in mind, check out how to make a music video with the help of our video editing software.
9. How to add voice-overs to your video?
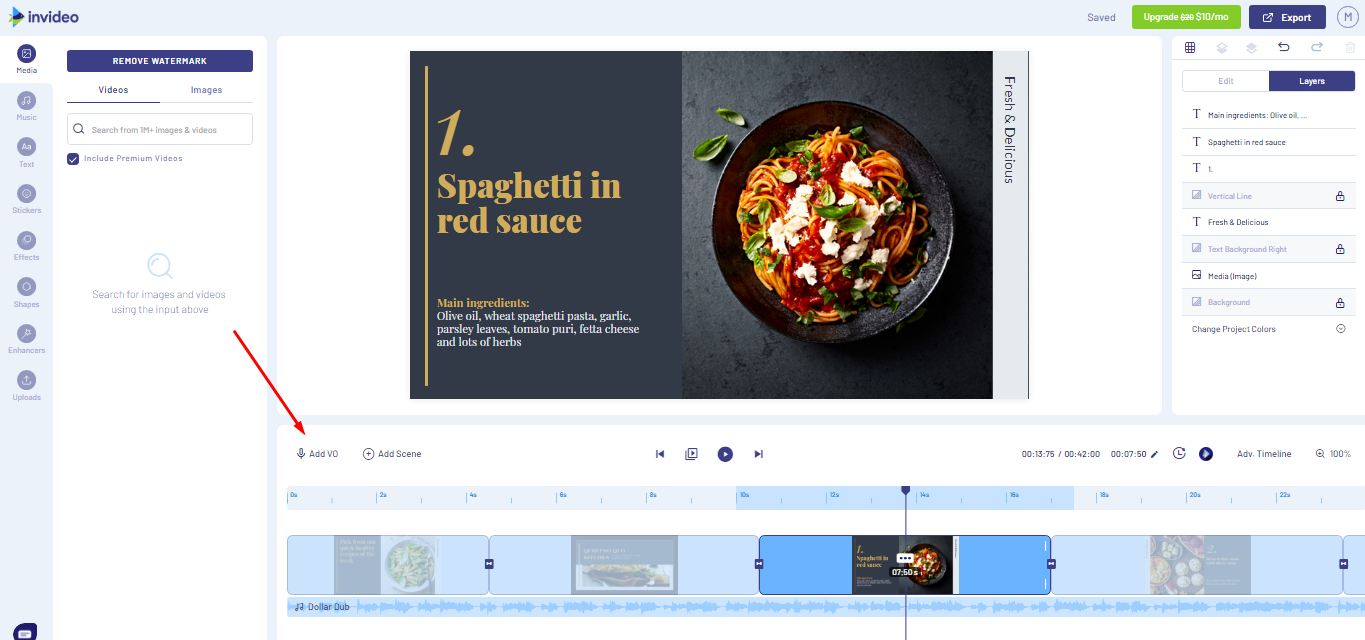
More often than not, your video will need authentic speech in it. With InVideo by your side, you have more than one option to add sound to your video.
Here’s how it works:
1. Click on the Add VO option at the bottom of the InVideo editor page
2. Choose whether you want to turn text into speech, record your speech on the spot, or upload it from your personal library
3. Follow the prompts according to the option you picked
Two features that will blow your mind are the ability to choose among various world languages for your voice-over and pick among three different voices you want to deliver the speech in your video.
10. How to turn text into video?
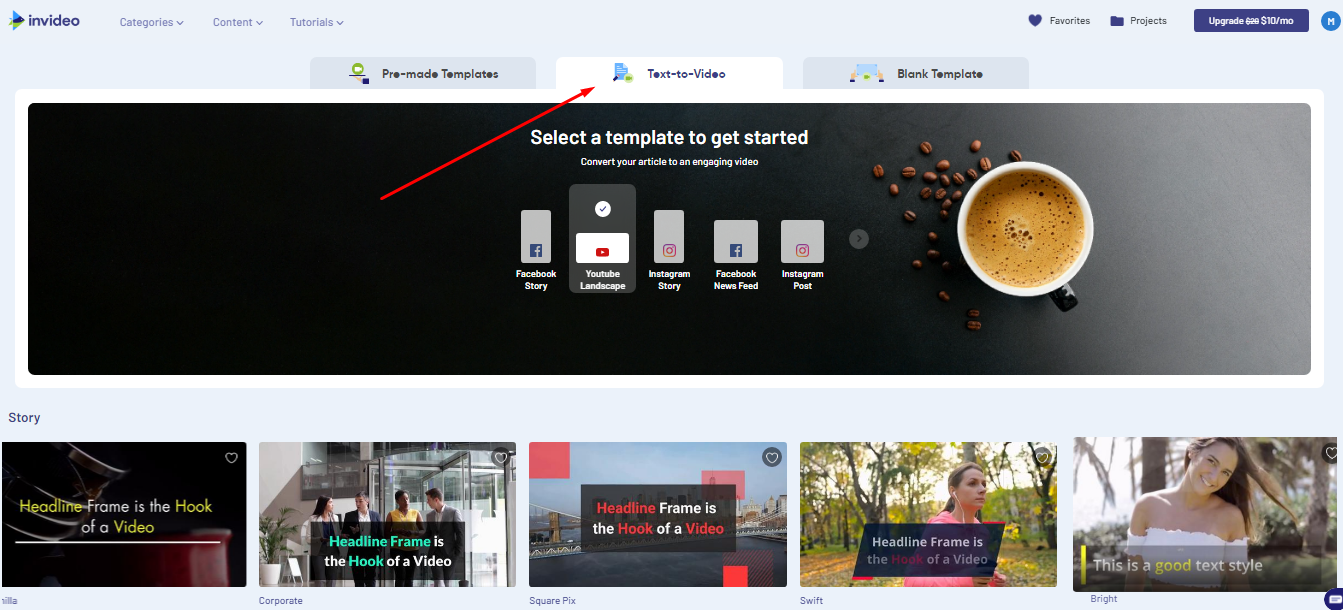
If you’re converting a larger piece of text into a video, you should:
1. Go to the InVideo homepage
2. Select the Text-To-Video template type
3. Pick the template you want to use
4. Type in the text you want to turn to video, copy-paste it, or provide your article’s URL if you have it
5. Click on Next
6. Choose the storyboards you want your text to appear in
7. Change the scenes according to your desired vision
Sign up for InVideo for more Video Editing Tutorials
Hopefully, you’ve got the hang of video editing by now, and you have had a chance to see just how effortless and innovative the entire process is when you’re doing it through our InVideo editing software.
InVideo also makes it super easy for you to create and edit videos that fit specific goals and social media platforms, such as:
- App marketing videos
- Restaurant & home delivery ads
- Instagram marketing videos
- Facebook ads
- Thanksgiving promo videos
As you can see, whether you want to post a stunning Instagram story or make an ad for your business’s Facebook page, InVideo’s got your back. Start today for free and explore the world of possibilities with our platform that makes editing videos quick and effortless.