
More than 500 hours of video are uploaded to YouTube every minute. However, it’s just 10% of the most viewed YouTube videos that draw in 79% of all views.
So how do you make sure you check all the boxes to create a video that performs well?
We’ve done all the legwork and put together this definitive, step-by-step guide on how to make a good video for YouTube to save you the time and effort of figuring everything on your own.
We’ve covered everything- from defining your YouTube strategy to selecting the right equipment to recording and editing your videos for which you can simply use InVideo’s online video editor. You can read along or jump to a section that you are super interested in.
Let’s get started!
(1) How to Create a YouTube Strategy
(2) Getting the Right YouTube Equipment
(3) How to Create Good YouTube Videos on Your Phone
(6) How To Edit A YouTube Video
(7) Uploading Your Video to YouTube
(8) Optimising for YouTube SEO
(9) Promoting Your YouTube Videos
(1) How to Create a YouTube Strategy

Putting together an effective YouTube strategy involves 4 key pillars:
(A) Identify Your Audience
To kick things off, way before you hit record you want to be able to answer the following questions:
- Who do I want to make my videos for?
- What value do I want to add to their lives?
For content creators who are starting out, this is a key step to be able to identify their audience; for brands, it’s absolutely critical.
If you are a brand who wants to understand how to make a YouTube video, it is likely that you already know who your target audience is; but you also need to find out what gets their attention on YouTube specifically, what they are searching for, and the kind of value your content can bring to them.
It helps if you break it down —
Create a persona based on the problem statement, age, and location (and profession, if applicable) — this will help you to understand your audience better, and enable you to create content that is exactly what they are looking for.
For example, let’s say you’re an animator who is creating tutorials mainly for hobbyists and design students located in the US, in the age group of 15-30. You can flesh out this persona further in terms of what the target audience could be looking for and that can be where you come up with video ideas.
(B) Find the Right Keywords
The idea is to find relevant keywords that have sizable search volume. The best place to start would be the platform you’re going to be interacting with them on — YouTube.
-
YouTube’s Auto-Recommendation Engine
YouTube’s auto-recommend search bar will tell you the most popular topics that people search for in and around your subject matter, and what kind of videos are ranking for them.
For example, when you type ‘photography’ in the search box, you get the following popular results:
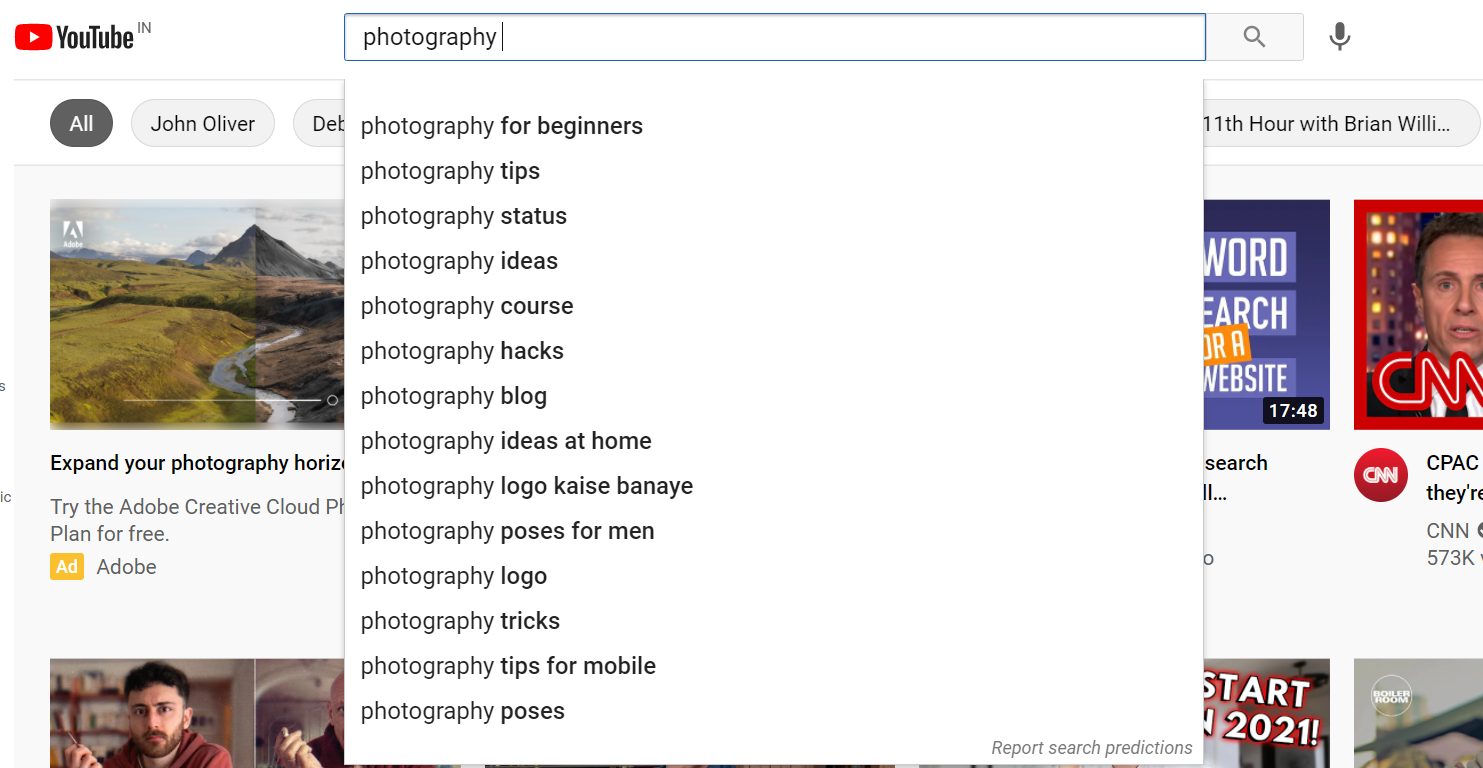
As you’ll keep adding more words to your search query, you’ll keep getting more relevant search intents that can help you derive video ideas.
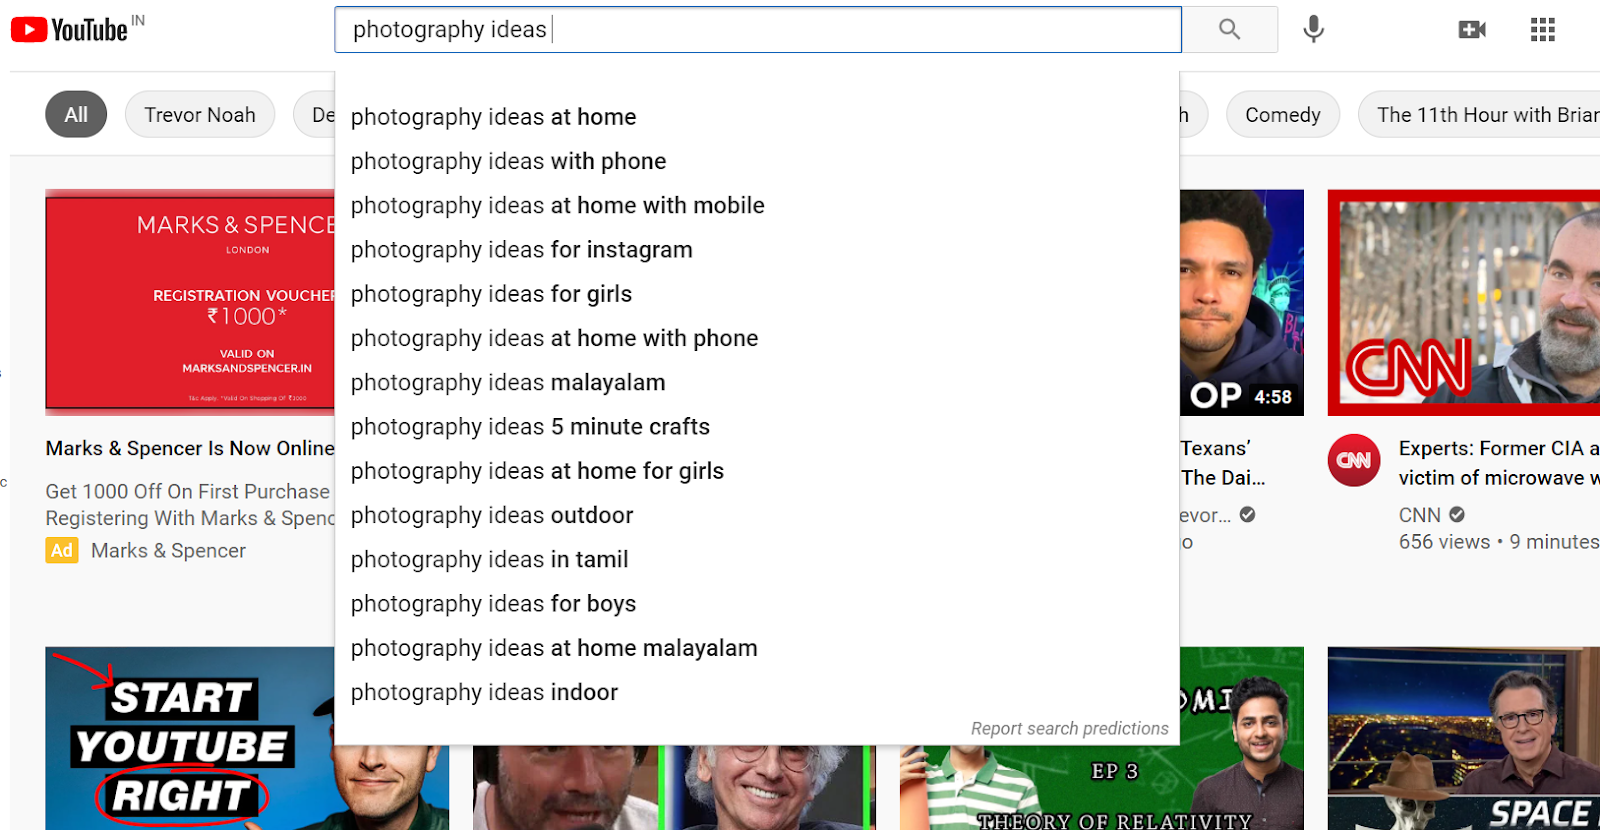
You can go one step ahead by clicking on any one of the results and check out the videos that have ranked for it.
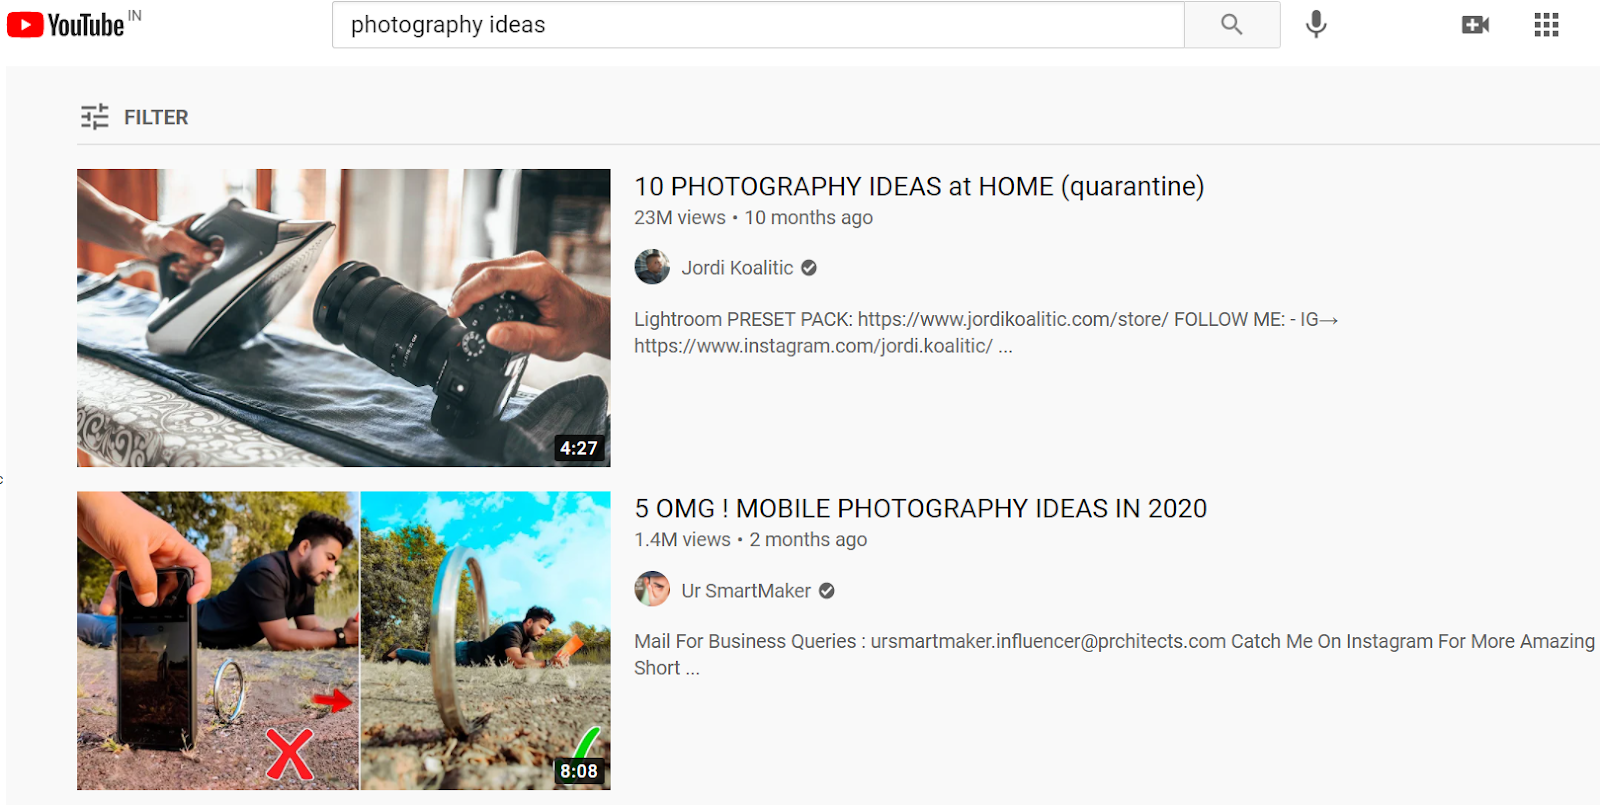
You can also use filters to check the most recently posted videos and sort them by type, duration, features, view count, rating, and duration.
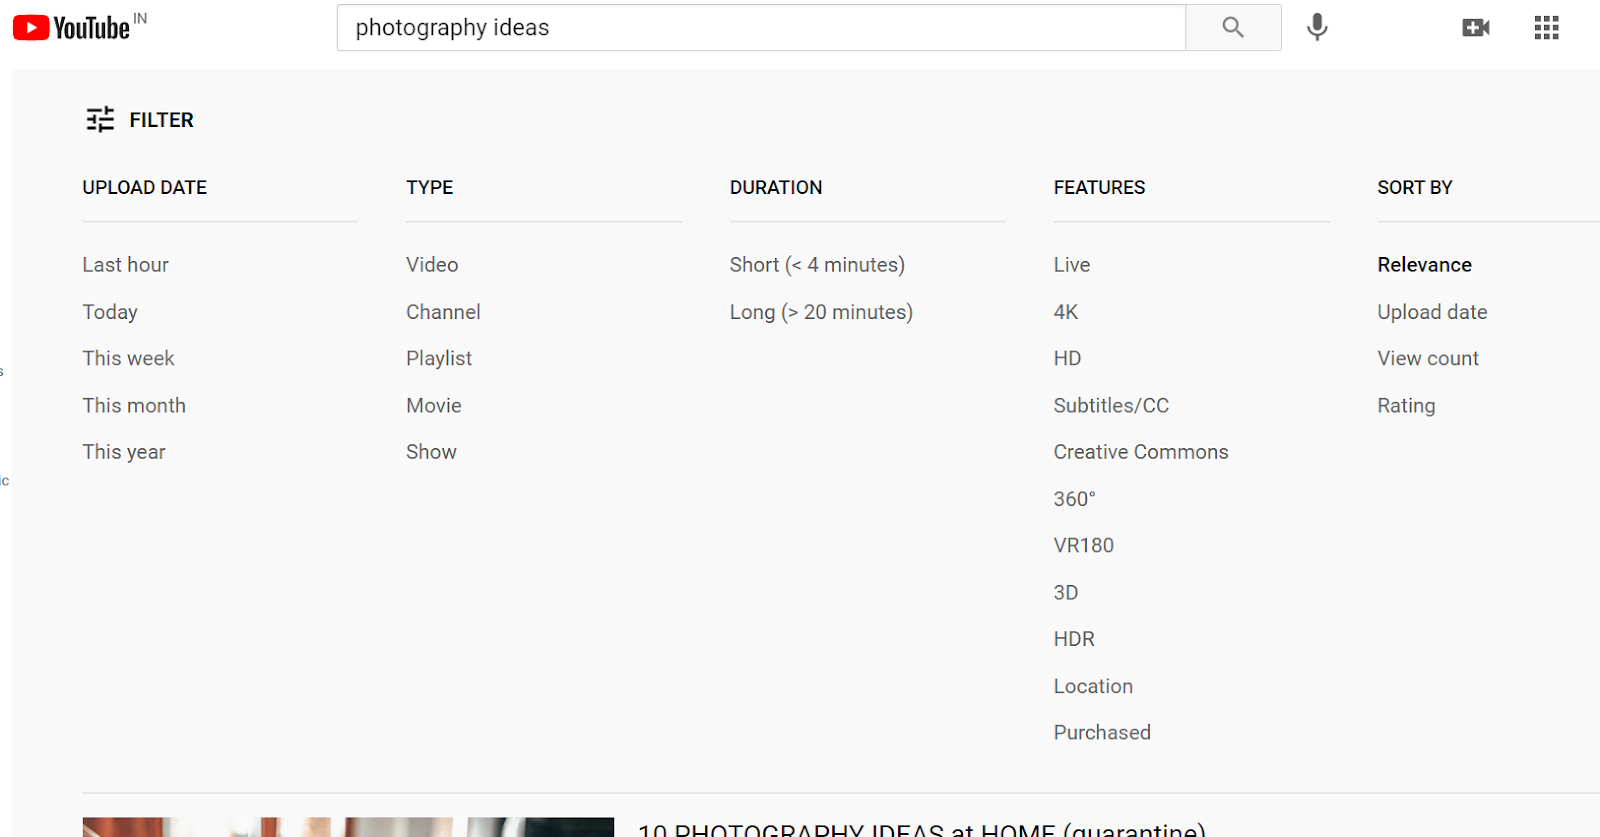
You’ll notice that many titles have similar words – like ‘trending photo ideas’, ‘home photography’, and ‘photo hacks’. These are keywords and we’ll get into keyword research further in the next part, so make a note!
The top videos will also tell you what kind of content format works the best for that topic – like listicles, how-to guides, etc.
More importantly, you must watch the top relevant videos for your search query to pinpoint any content gaps that you can fill in your video — but we will circle back to that in the next section.

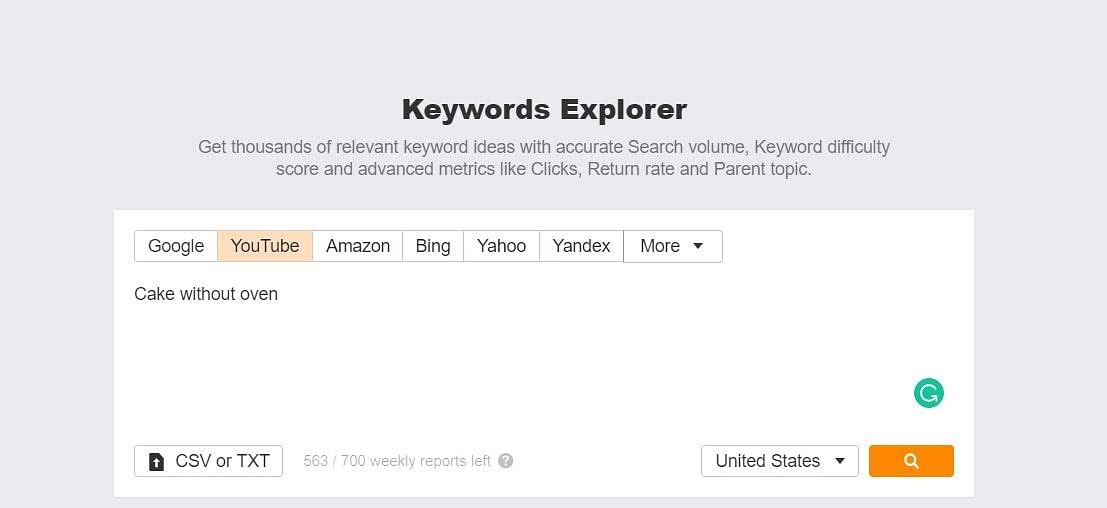
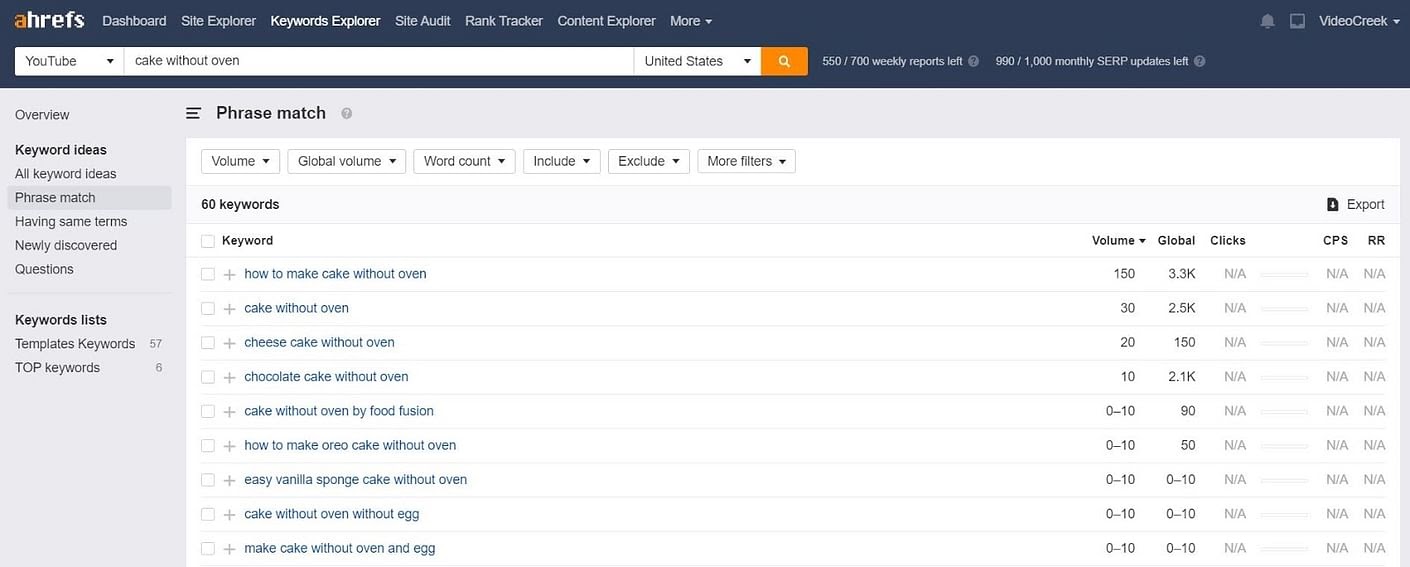
Keyword research tools are a great way to really delve into what people are searching for and find out what the kind of videos that show up in the top results are. While YouTube does not have its own keyword search tool, third-party websites like Ahrefs let you find top-ranking keywords around a specific topic.
The best place to start is by typing in the keyword you got from Youtube’s recommendations, change the preference to YouTube as a platform, and hit search.
For example — let’s say you’re looking to make a video about how to bake a cake without an oven.
Ahrefs Keyword Explorer will give you the global and country-wise search volume for your keyword as well as suggest some other popular keyword ideas that you can analyse before zeroing down on the final topic for your video.
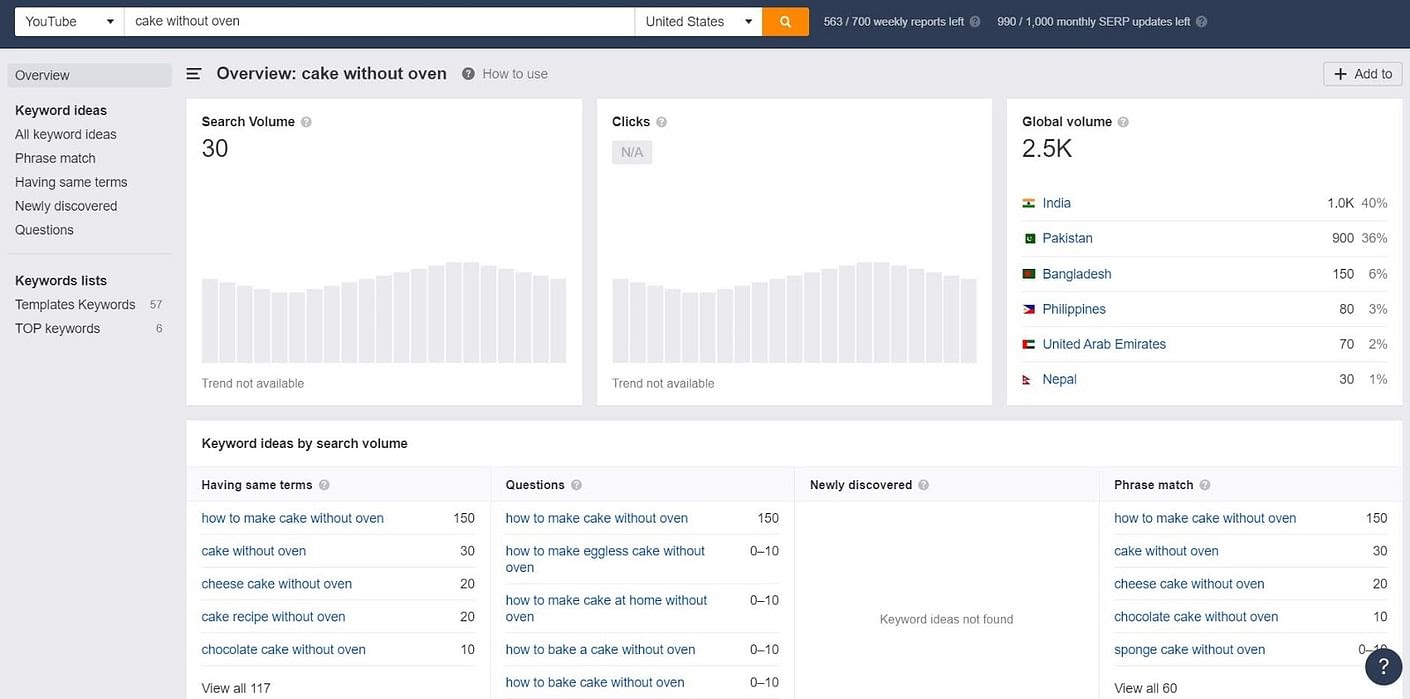
There’s more — you can also dig deep into hundreds of keyword ideas around your main search term by toggling to ‘All Keyword Ideas’.
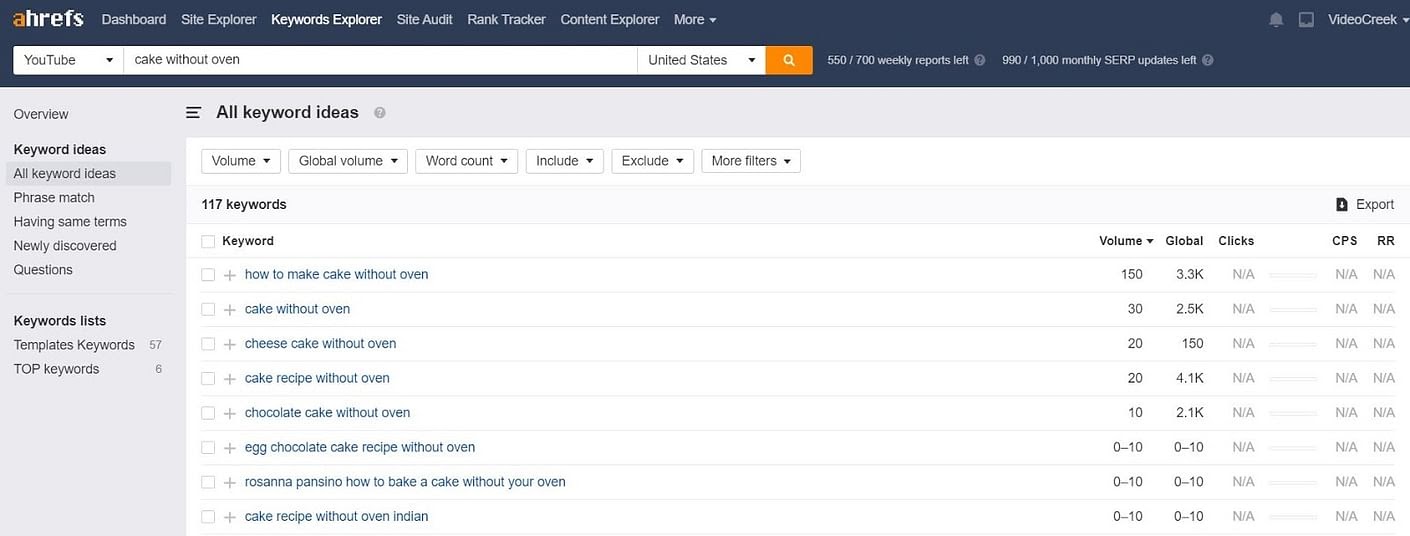
If you more specifically want recommendations on keywords that include your main search term by default you can use the ‘Phrase Match’/ ‘Having Same Terms’ options.
Congratulations! You have now found the keywords that are going to be the building blocks of your title.
(C) Identify Search Intent
If you want to understand how to make a YouTube video that works, you need to understand your viewers’ search intent — why a user looks for a video on YouTube. Here’s a step-by-step breakdown:
Step 1: Before creating your video, run an actual search on YouTube for the keywords that you think will be relevant to your upcoming video.
Step 2: Just as you did to identify your audience, take a look at the first three to five results and analyse their content properly.
Step 3: Think about the intent that YouTube is trying to meet by showing these top-ranking videos. Are all of the videos addressing the question from the same angle? If not, what are the unique questions that YouTube is trying to deliver answers to?
For instance, if we continue the example of photography ideas from above —
Are people looking for wildlife and nature photography ideas or ideas they can explore at home? From the image above, it is clear that it’s the latter.
When you run yourself through this process, you can understand a lot about what your potential audience is looking for, from how your competitor packages their videos.
Once you’ve analyzed your competitors’ videos, list down topics you want to go after — these can also act as your titles when you take the video live.
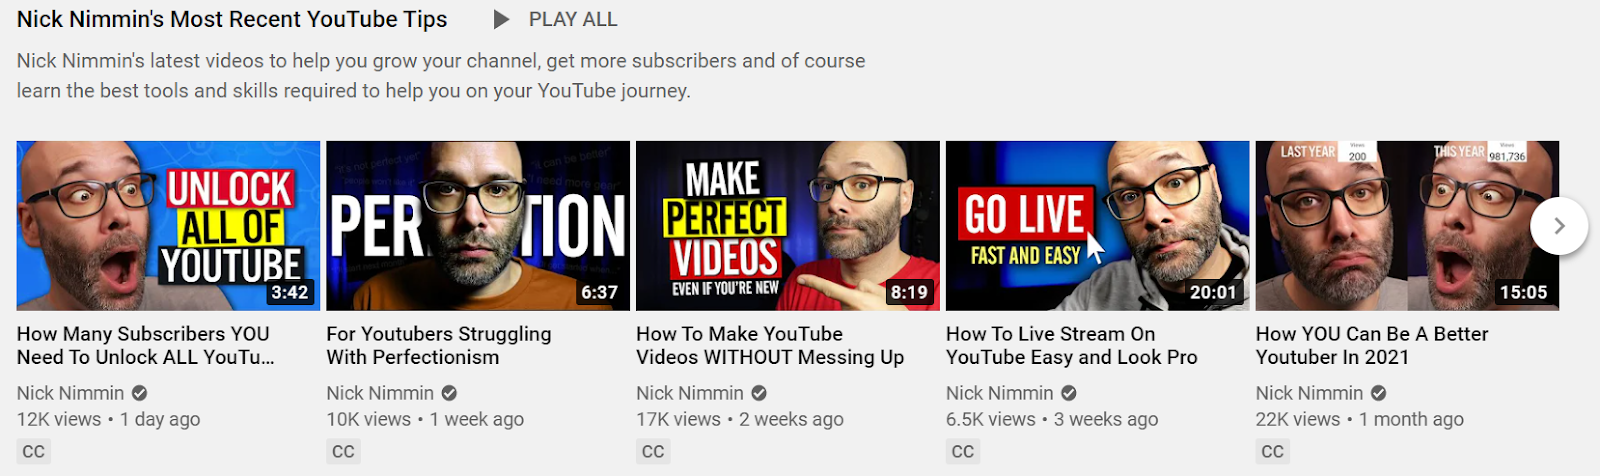
Some of the best YouTubers like Nick Nimmin set their titles before they even begin to script the video! This is most definitely one of the crucial steps to creating search-friendly titles and getting more views.
By doing this, you’re ensuring that you satisfy the search intent (or intents) with a video that’s going to be watched, liked, and shared!
(D) Ideas
Coming up with ideas for your Youtube channel regularly over a long period of time can be quite a daunting task. It’s more of an ongoing process, really.
We’ve put together this exhaustive list of YouTube video ideas covering more than 22 categories that you can refer to for inspiration.
For beginners, we suggest the easiest way for you to create high-quality videos is to tell your audience more about you and your story.
Introduce yourself, introduce a series of videos or do a ‘Day in the life’ video by filming yourself going about your daily routine in a video to let your audience get a peek into your life.
Here are a few ideas to get you started! And once you have your idea in place you can use over 5,000 templates on InVideo to bring your video to life.
Now that we’ve covered our bases to do with how to create a YouTube strategy, let’s move on to talking about equipment.
(2) Getting the Right YouTube Equipment
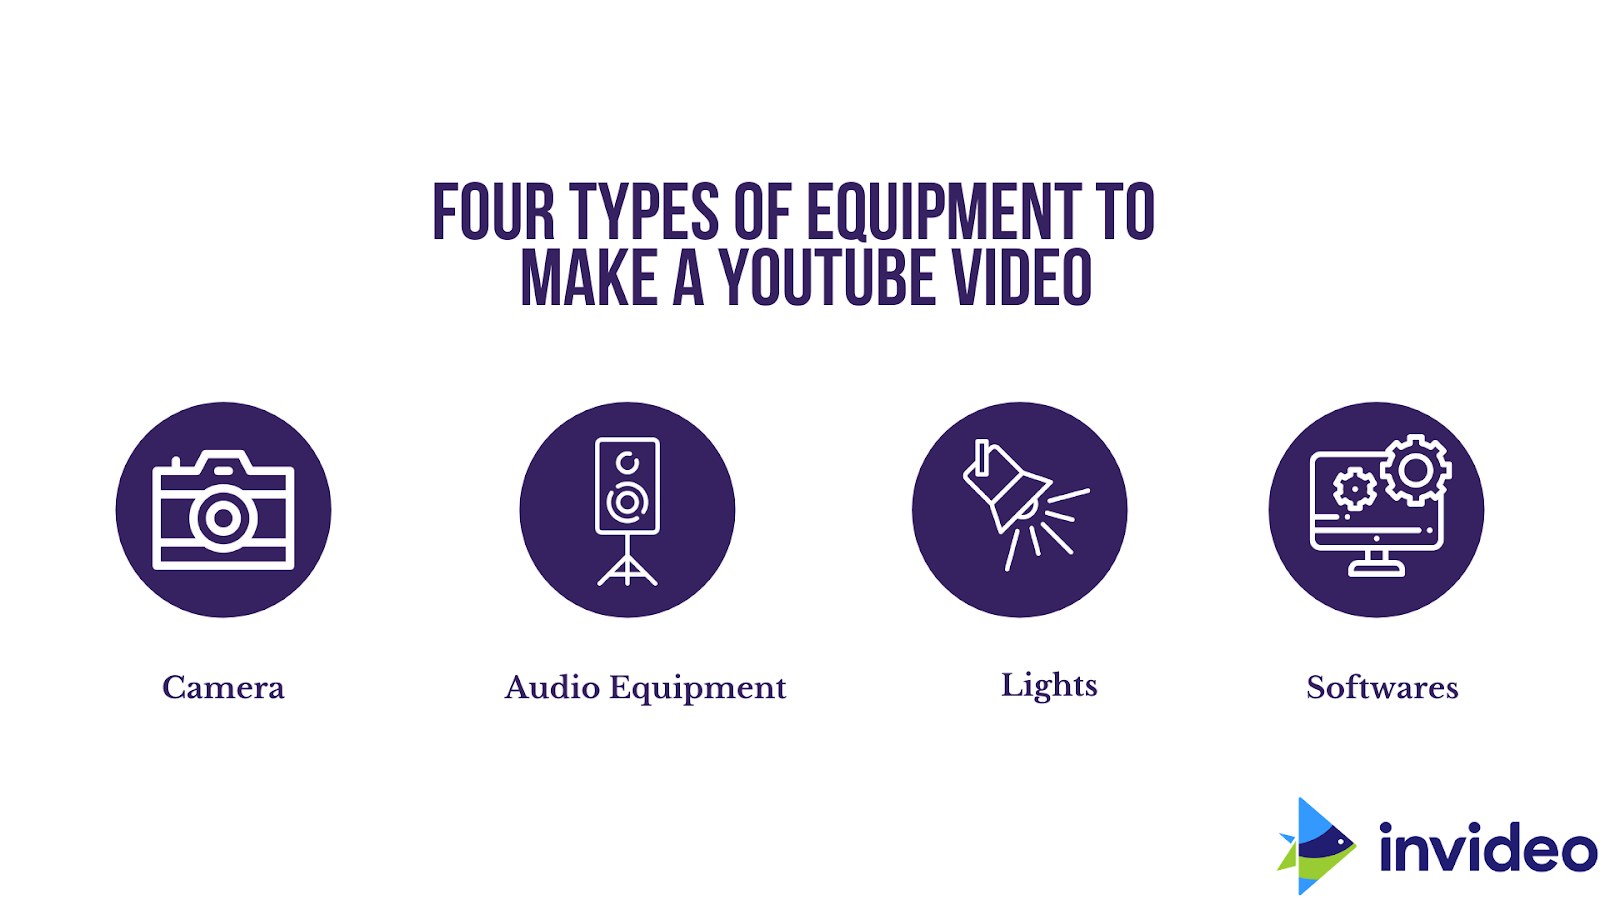
Broadly speaking, here are the different types of equipment that you are going to need to make YouTube videos:
1. Cameras
2. Audio Equipment
3. Lighting Set-up
4. Softwares
The real question is — what kind of video are you trying to make?
Much of how you approach the four factors above depends on the type of video you’re shooting.
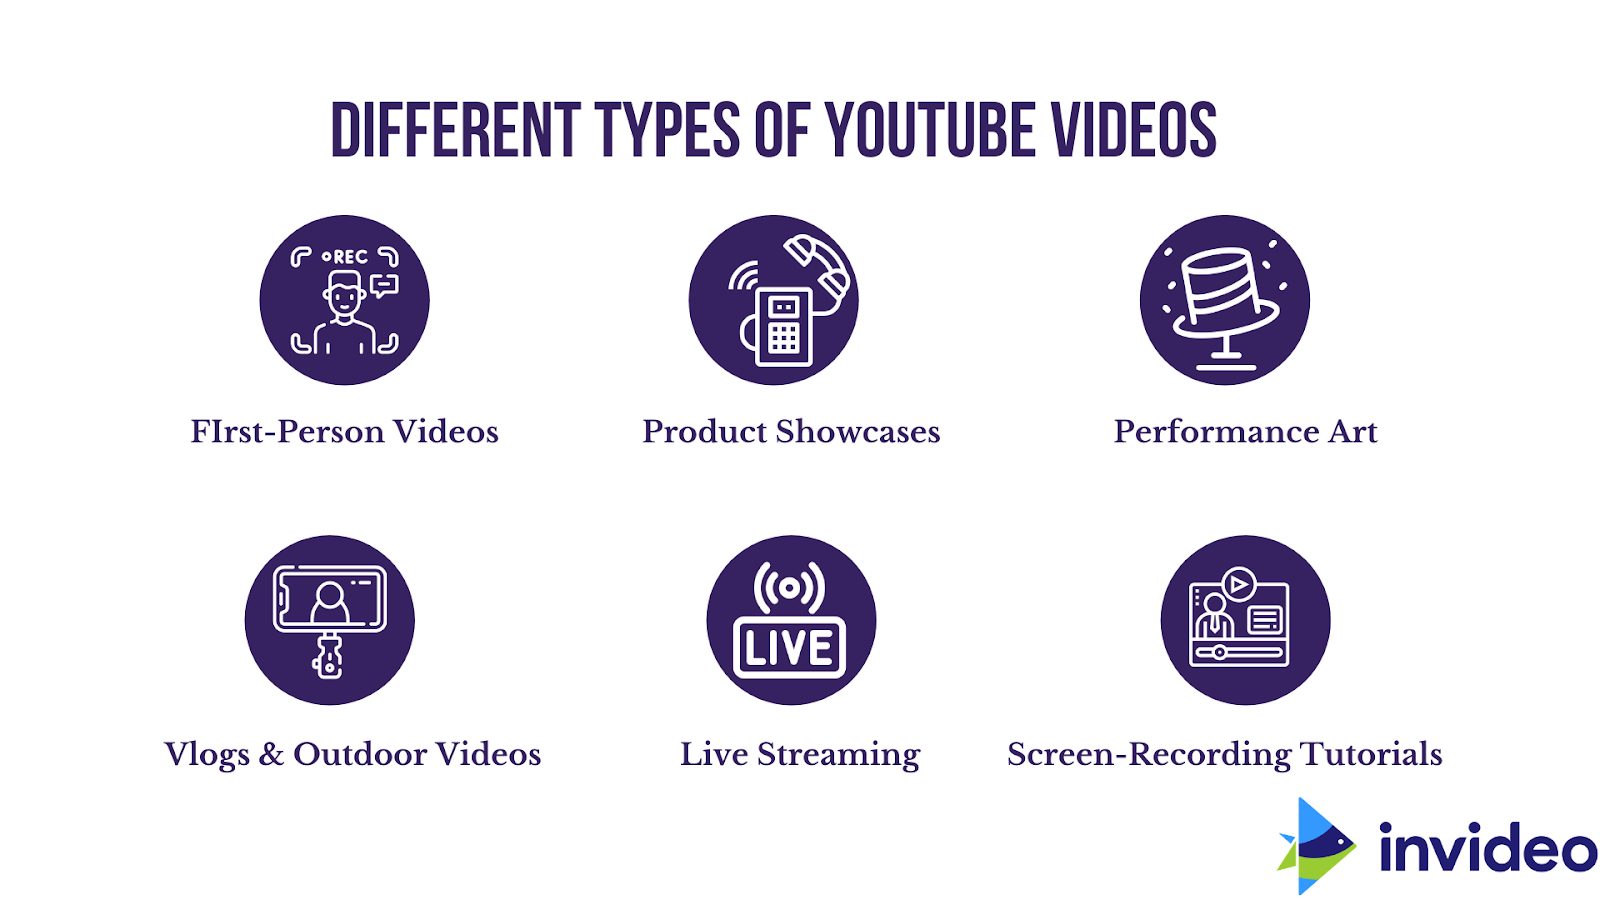
We’d love to give you a head-start on how to create a YouTube video so here are the types of YouTube videos and our recommendations on the gear that’s best suited to them:
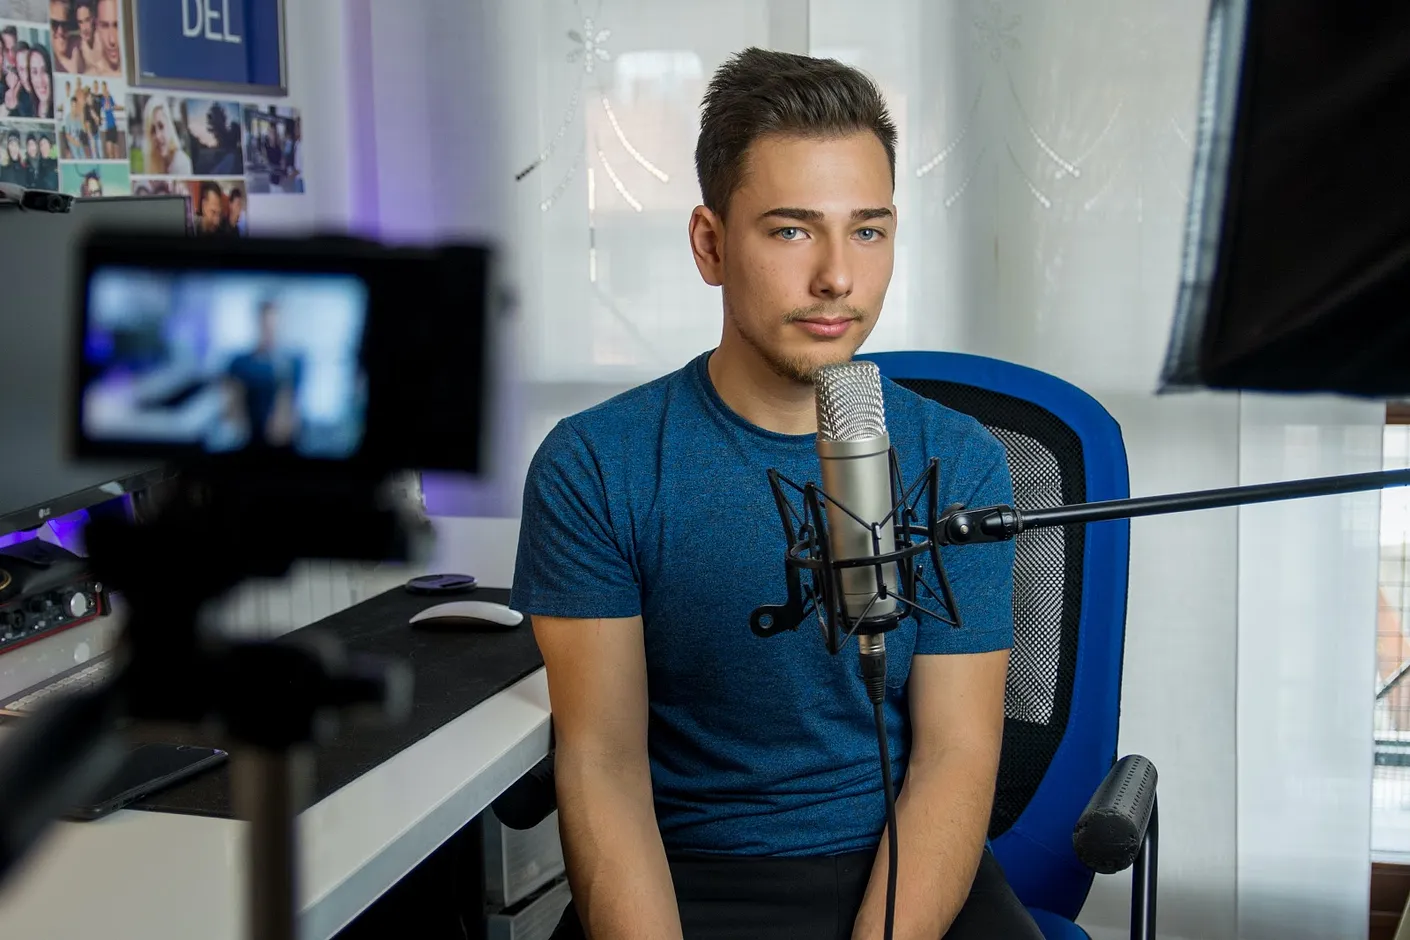
1. First-Person Videos
These are simple and self-explanatory: you set up the camera and just talk directly into it; it’s like having a one-on-one conversation with your viewers.
Here’s all the gear you’ll need with our recommended best buy for each piece of equipment:
Camera
- Webcam ($89.99) — if you have a PC and want to record your videos from there itself,
- Camcorder ($228), or,
- Smartphone ($181.50) — You can use one of these two options if you will be changing your set-up or moving around in your videos.
Light
Ring lights are the best option for lighting up a single person in the video.
Audio
- Opt for the Deity V Lav Lavalier Lapel Mic ($49.99) if you’re recording your videos from your smartphone, or,
- Blue Snowball mic ($ 65.99) is a great option if you will be recording your videos directly on your PC.
Softwares
(a) InVideo is your best bet if you are looking for a free editor that’s completely on the web and comes packed with free stock footage and ready-to-use templates.
(b) Premier Pro will be a great fit if you are an advanced editor looking to make long-form videos.
(c) Be.live and Ecamm will be great fits if you are looking to Livestream on Facebook, Youtube, or other social media platforms.
(d) Camtasia will be a great fit for screen recording.
2. Product Showcases Like Phone Unboxing Videos
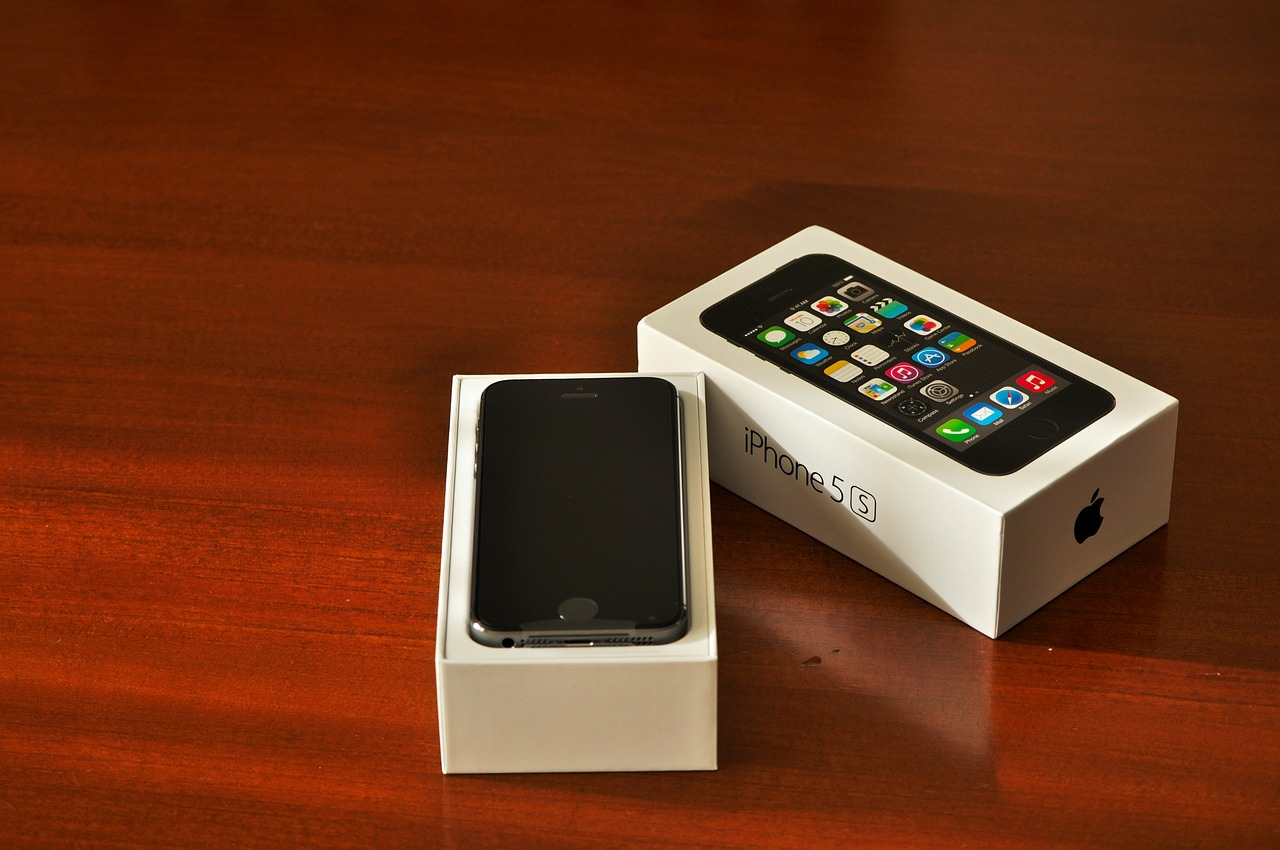
Source: Pixabay
For product showcases or reviews, the set-up is still relatively simple but you want to opt for equipment that can move around so you can explore different angles while shooting.
Here’s all the gear you’ll need with our recommended best buy for each piece of equipment:
Camera
- DSLR ($1199) if you want to shoot in high quality or,
- Camcorder ($228) or,
- A smartphone ($259) — with a minimum 12MP camera to record your video to start off with.
Light
LED panels ($24.99) are the most budget-friendly option.
Audio
You can use:
- A lapel mic like the RODE Go Compact Wireless ($199) or,
- A podcast mic like the Maona USB Podcast Mic ($64.99).
Softwares
(a) InVideo for editing videos (lets you also add stock footage and animation, if needed),
(b) Premiere Pro for advanced editing (in case you’re making long videos),
(c) Be.live and Ecamm will be great fits if you are looking to Livestream on Facebook, Youtube, or other social media platforms.
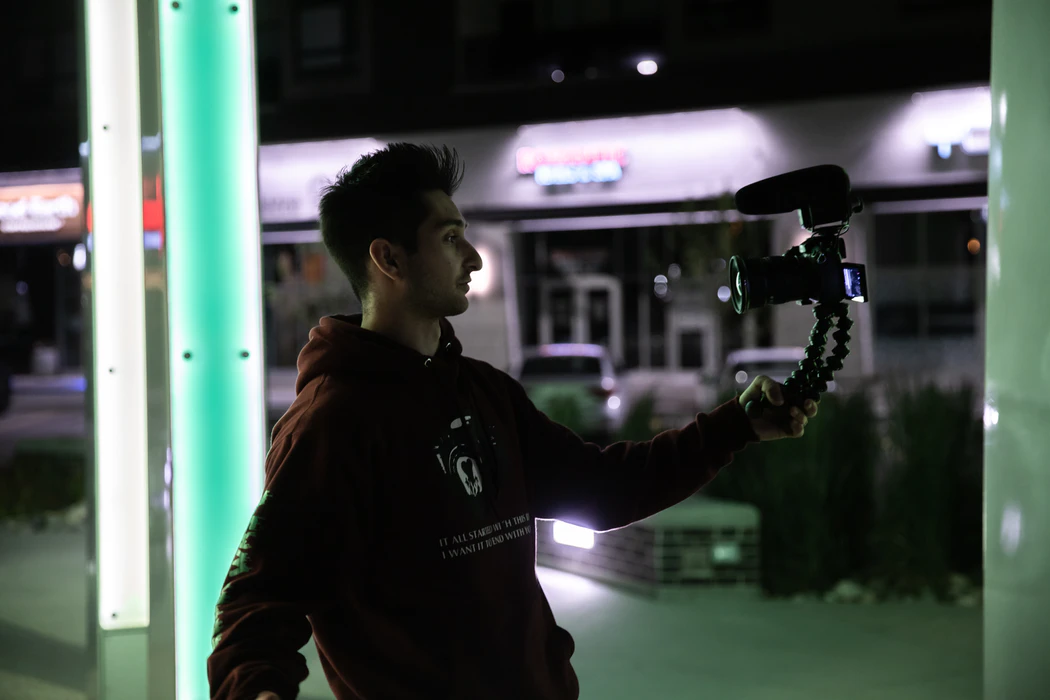
3. Performance Art

Source: Pixabay
For this particular category, your equipment setup needs to be portable so that you can move around with the performer if required.
Here’s all the gear you’ll need with our recommended best buy for each piece of equipment:
Camera
- Shoot with a smartphone ($259) that will be readily available, or,
- A professional camera; this is the best fit, and gives you more vivid colours.
Light
- If you want the light to follow you as you move with the subject, you can use an on-camera LED light panel ($24.99).
- This stick light by Godox ($239) can be used to add colours or a cinematic feel to the performance.
Audio:
We suggest using:
- A shotgun mic like the RODE Video ($229), along with
- A dead cat ($29.95) to capture the audio clearly.
Designed for outdoor use, dead cats provide an extra layer of protection from wind noise and other sounds.
Softwares:
- InVideo, if the video is under 15 minutes long and doesn’t require heavy editing.
- Premiere Pro for super-detailed control while editing the video.
- Be.live and Ecamm will be great fits if you are looking to Livestream on Facebook, Youtube, or other social media platforms.
4. Vlogs And Outdoor Videos
Source: Unsplash
When it comes to this category, steady but portable equipment is where it’s at.
Here’s all the gear you’ll need with our recommended best buy for each piece of equipment:
Camera:
You can shoot vlogs and outdoor videos on
- Your smartphone, or,
- You can use the Canon G7X Mark III ($749.99) which is known as the ‘vloggers’ camera’.
Light
- You will mostly choose to shoot when there is good natural light outdoors.
- If you need external lights, this on-camera LED panel ($24.99) should get the job done.
Audio
You will want a portable mic set up that should easily sit on your camera. Go for the RODE Go Compact Wireless ($199) to record your audio.
Softwares
- Use InVideo for editing vlogs under 15 minutes; it can also be used to superimpose text, add stock footage, and animate, if necessary.
- Premiere Pro is your best bet for longer vlogs as they are heavy files.
- Be.live and Ecamm will be great fits if you are looking to Livestream on Facebook, Youtube, or other social media platforms.
- Camtasia for screen recording.
![]()
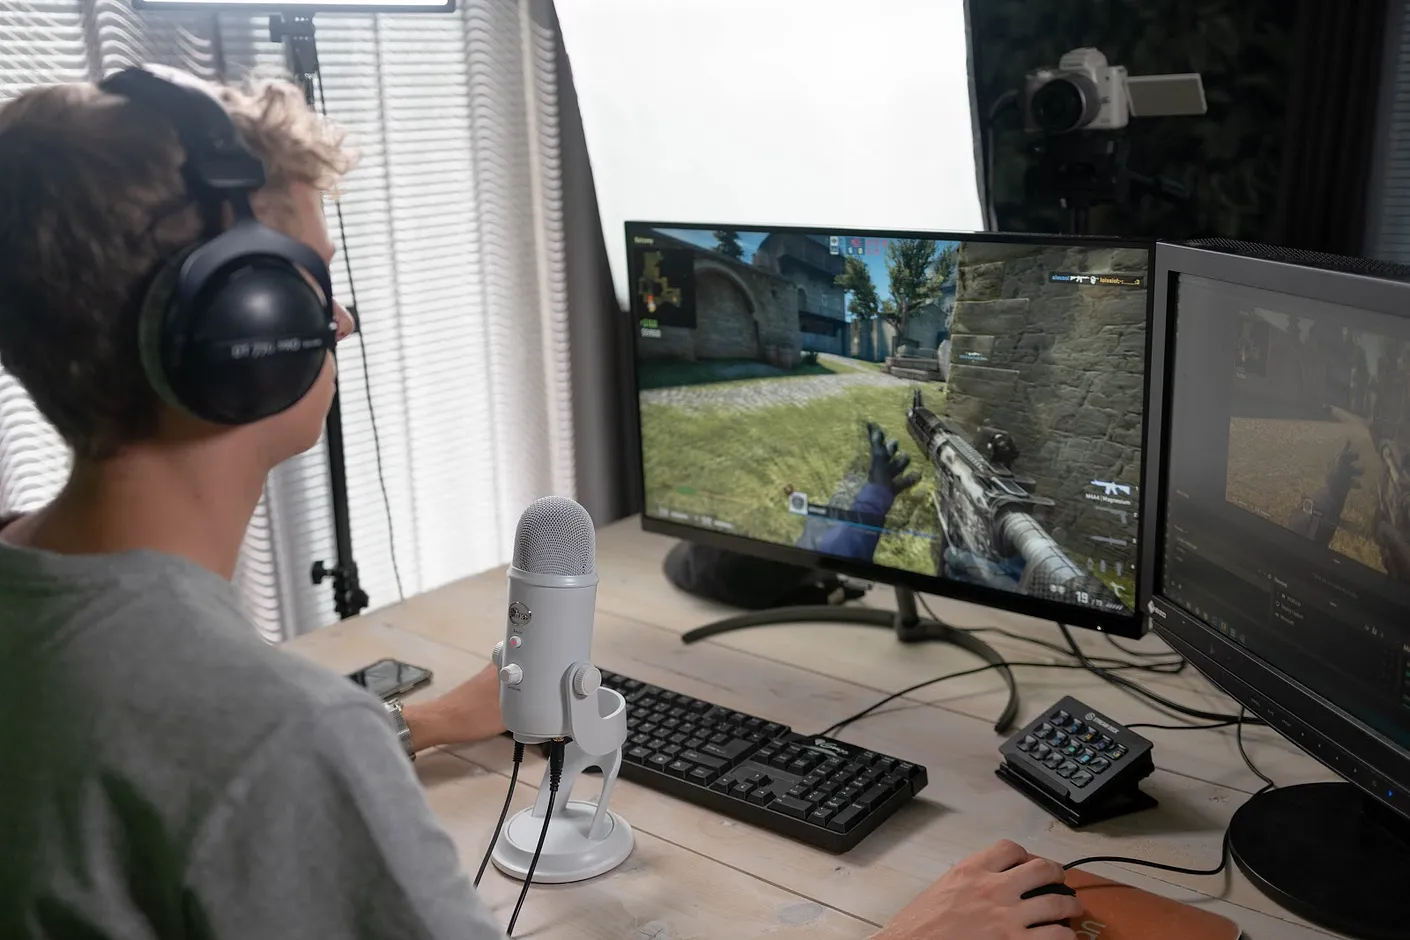
5. Live Streaming
For Live Streaming, you will be either recording from your desk or you might choose to go live outdoors; so, again, you need steady but portable equipment.
Here’s all the gear you’ll need with our recommended best buy for each piece of equipment:
Camera
- For live streaming from home, the best option for you is the Logitech Brio webcam ($194.99),
- If you’re traveling, you can also go live from your smartphone.
Light:
- You will need a light that can sit on your desk while you comfortably go live like this 18” ring light ($139) or,
- Something that moves around with you – like an on-camera LED panel ($24.99).
Audio
- Our top recommendation for your live stream is a podcast mic like the Maono USB Podcast mic AU-A04 ($64.99)
- If you’re going live outdoors, go with the RODE GO compact wireless microphone.
Softwares:
- You can choose between StreamYard, vMix, and Streamlabs OBS to go live.
- If you are using your smartphone — go for Switcher Studio.
- Use InVideo to create the promotions of your live stream, such as Instagram story posts to put the word out on social media.
6. Screen-Recording Tutorials
You’ll need a screen recorder which will take your audience through a step-by-step tutorial plus your thought process.
Here’s all the gear you’ll need with our recommended best buy for each piece of equipment:
Camera
Use a webcam ($94.95) or your smartphone ($250) to record yourself.
Light
A simplering light will do the trick.
Audio:
Opt for a podcast mic or a lavalier mic.
Softwares:
- You can choose between OBS, DU screen recorder, and Camtasia for screen recording.
- You can use Premiere Pro for editing your tutorial.
We realise this is just a brief glimpse of the kind of equipment you will need of how to make a YouTube video.
If you want to dig deeper into all the equipment options available for you to choose from, you can check out this super-detailed guide on all things YouTube equipment.
(3) How to Create Good YouTube Videos on Your Phone
Even though we have shared the exact gear you may need for each type of video, if you are just starting out, you can use whatever equipment you already have — especially if you don’t want to invest in a lot of equipment up front. A lot of YouTubers start their channels with only their smartphones.
So we’ve put together this step-by-step guide on how to make a YouTube video with the phone you already have, whether it’s an iPhone or an Android.
Read on to find out how to make a YouTube video without a camera.
What equipment do you need for making good YouTube videos on your phone?
So the thing is — you can just start off by putting your phone on a windowsill or a bookshelf and use your inbuilt microphone for sound.
But there’s some basic gear that we recommend that’ll help you take your smartphone content to the next level.
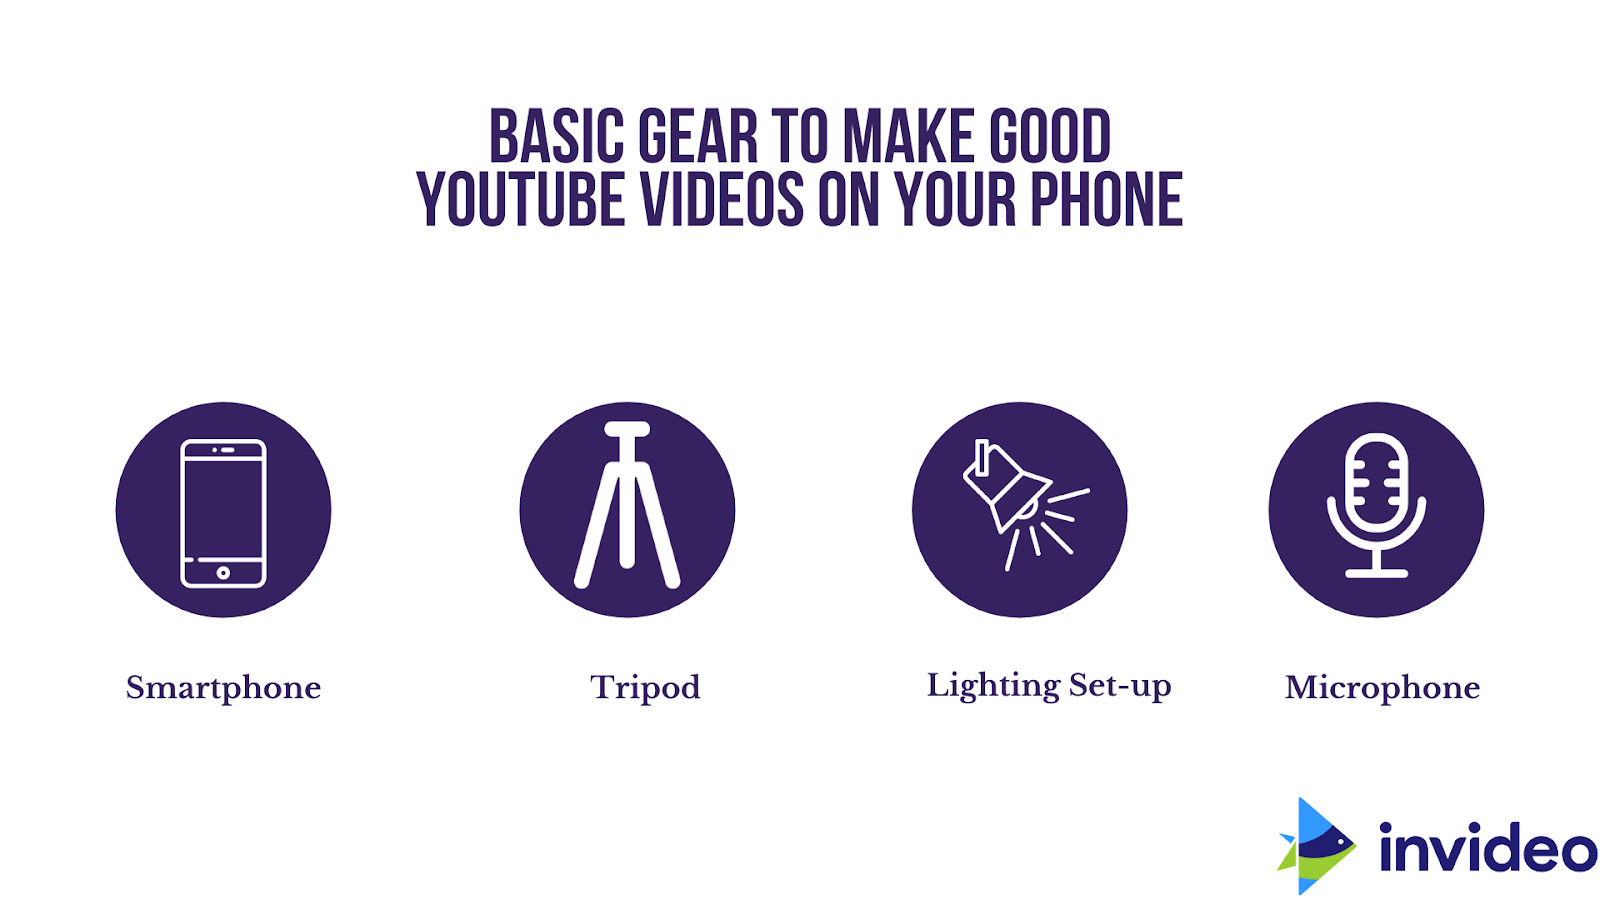
1. Smartphone
You can start with whichever smartphone you are using. The cameras of most smartphones will give you an output of 1080p footage; if you can shoot in 4k, you should definitely go with that.
In case you are open to upgrading your phone, these could be your best bets for creating high-quality YouTube videos: Sony Xperia 1 II ($1,198), Google Pixel 4 ($751), or the iPhone 12 Pro Max ($ 1,199).
2. Tripod and smartphone mount
As much as it is important that you have a good smartphone, it is equally important to have the supporting equipment which will lend your video a professional look.
Here’s why you need a smartphone mount and a tripod to shoot on a smartphone:
- They provide stability
Handheld videos are shaky and wobbly, which is the easiest way to put your viewer off and have them navigate away from your video. With a tripod and a smartphone mount, your videos look more stable, professional, and sharp.
- To film yourself
Using a tripod essentially frees your hands up, so you can capture yourself at whatever distance from the camera you want. You can even take a group photo and be in it, too!
This also means you can interact with your surroundings and experiment with creative shots. To take photos of yourself, you’ll need to set the timer in the settings; some tripods even come with wireless remote controls that let you activate the shutter from a distance.
- Essential for time-lapses
Whenever you create time-lapse videos, it should always be with a tripod because it requires the camera to be stable for an extended period of time.
This is because time-lapses are created by editing together a sequence of shots that are captured after certain intervals of seconds, minutes, or hours; these are then combined into a short video clip. For the best results, it is essential to keep the shot steady throughout.
- Perfect for landscape panoramas
A series of shots that are stitched together to create one, long image, either in-camera or in editing, panoramic shots are often taken in landscape mode.
Since you are going to be holding up your camera and shooting for a long while, a tripod and smartphone mount can help you keep your shots stable and make sure that the frames match each other; this way, the process of “stitching” the shots together is also made easier.
Opt for the Ravelli APLT4 Lightweight Aluminum Tripod, which is great value-for-money. It comes with a carry bag for easy portability as well as a universal smartphone mount, making it compatible with whichever smartphone you have.
3. Microphone and its compatible phone adapter
You’re going to need an adapter that plugs your microphone into your smartphone; here’s a TRS to TRRS adapter that will do the trick; watch the video below to see how this works.
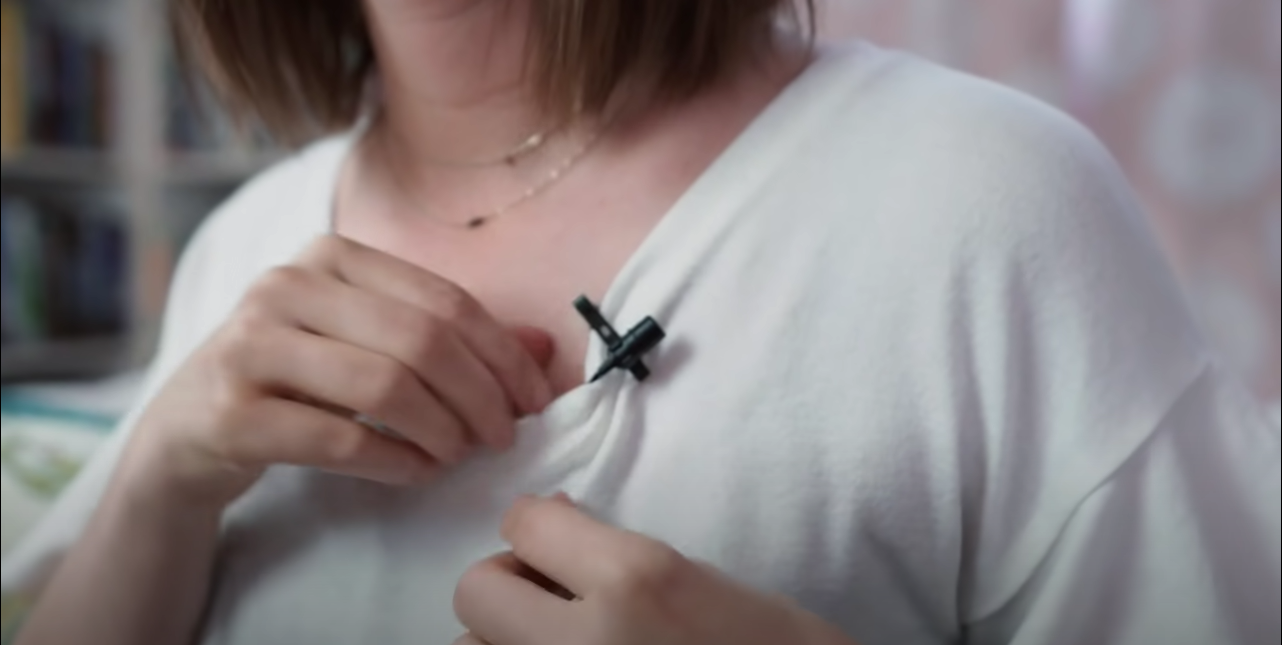
You can use a lavalier mic (a small microphone used in order to allow for hands-free operation, commonly provided with small clips for attaching to collars, ties, or other clothing) and clip it onto your shirt.
We suggest the BOYA BY-M1 3.5mm Electret Condenser Microphone with 1/4″ adapter for Smartphones iPhone DSLR Cameras PC, which comes in at just under $20!This affordable option makes sure you capture your voice clearly and the audio sounds on point, while the microphone itself remains unobtrusive and is hands-free; perfect for creating videos on your phone.
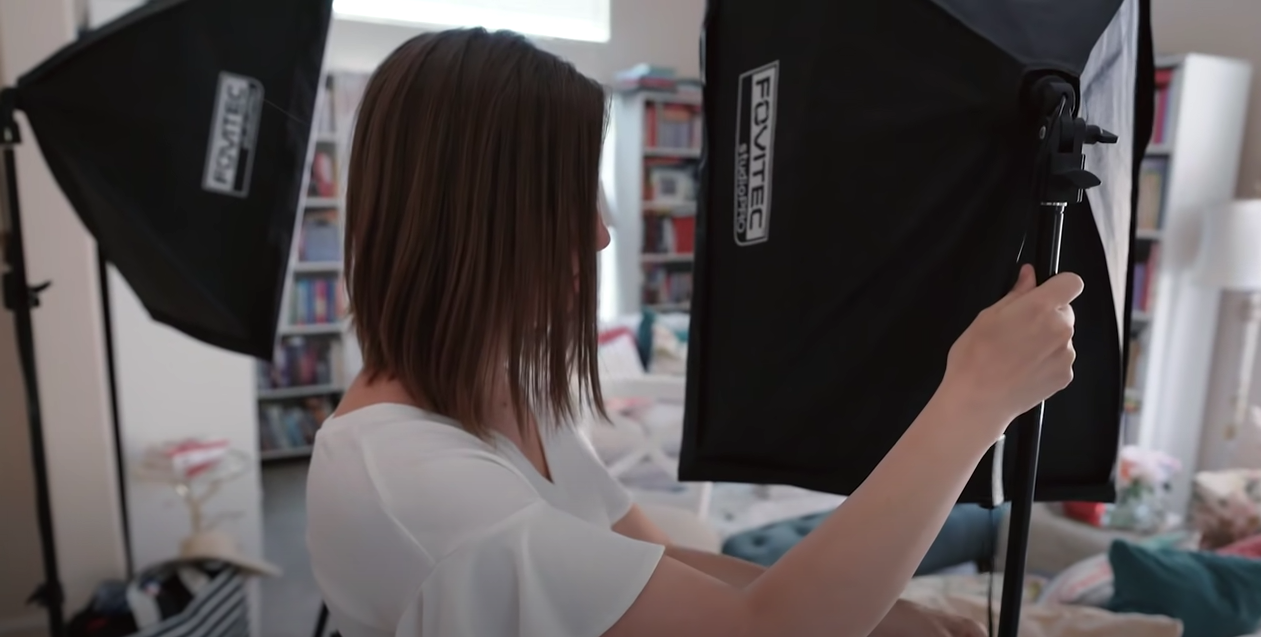
4. Lighting Kit
We suggest going with the Fovitec 2-Light 1000W Fluorescent Studio Lighting Kit, 20″x20″ Softboxes, with Bulbs and Light Stands for Portrait Photography and Video Production for $99.95.
This is a lighting kit that is simple to learn for all skill levels; it is also versatile, as you can create a variety of looks simply by changing the positions of the two lights.
All of these (besides the smartphone) come in at under $150 and are optional.
Now that you’ve got your equipment covered, you can simply follow these steps to start making YouTube videos on your phone:
Step 1: Find the best looking camera angle
First off — before you lock down your shot and set up any gear, put your phone in selfie mode and get a feel for the room.
Walk around and see what the background looks like with you in the frame.
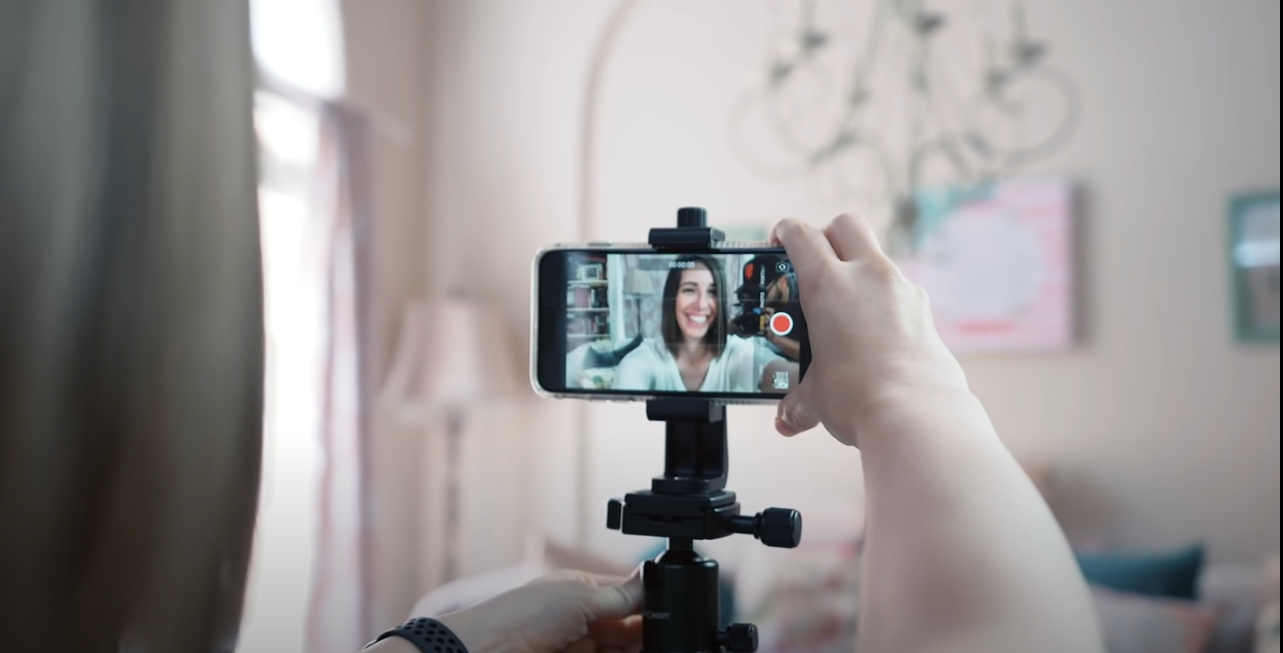
Image source: Think Media
How far away do you want the tripod and phone camera to be from you? Is the background too busy for your liking?
Make sure you run yourself through questions like these to lock down the perfect shot for your YouTube video.
Step 2: Set up your video gear and accessories
This one is pretty self-explanatory.
You’re going to want to play around with your equipment a little and figure out what works best for you, in terms of sound and lighting.
Mount your phone and adjust the angle and height.
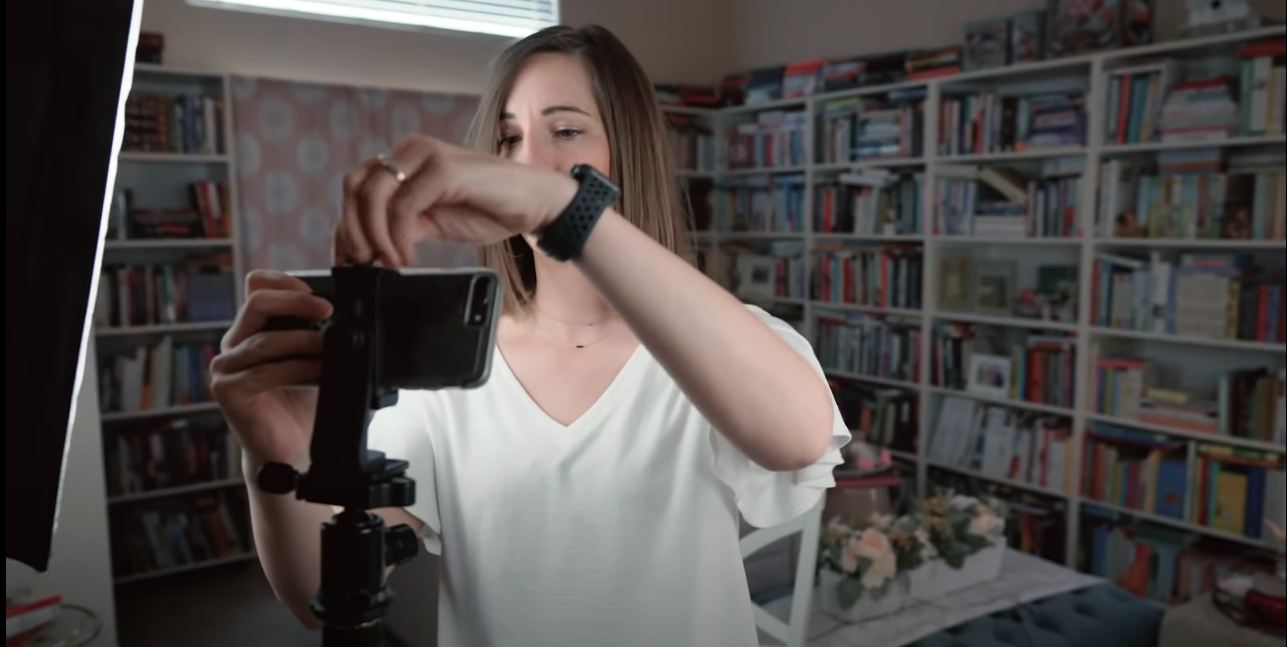
Set up your lighting kit.
Plugin the adapter to your phone so you can attach the microphone to it:
And clip on the lavalier mic:
Ready for the next step?
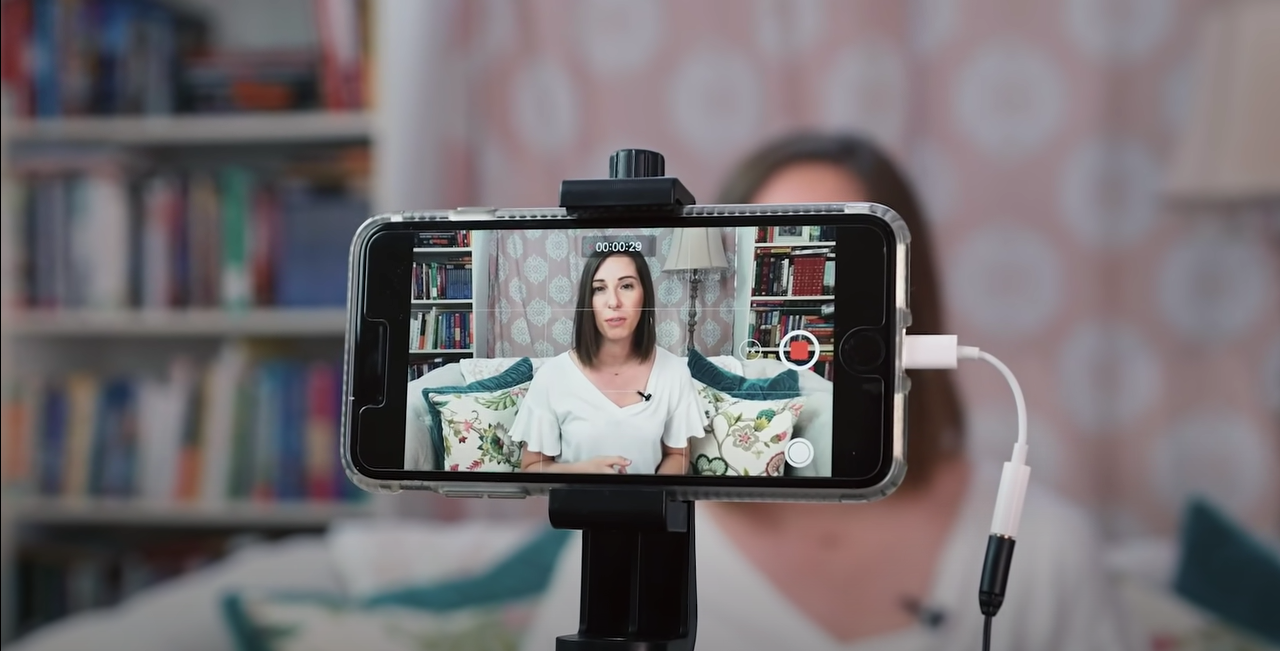
Step 3: Lockdown your shot
Once you’ve gotten a feel of the room and the background you want, we suggest you put the phone back off selfie mode — and shoot with the normal camera, as the normal camera in most phones gives a superior-quality output compared to the selfie camera.
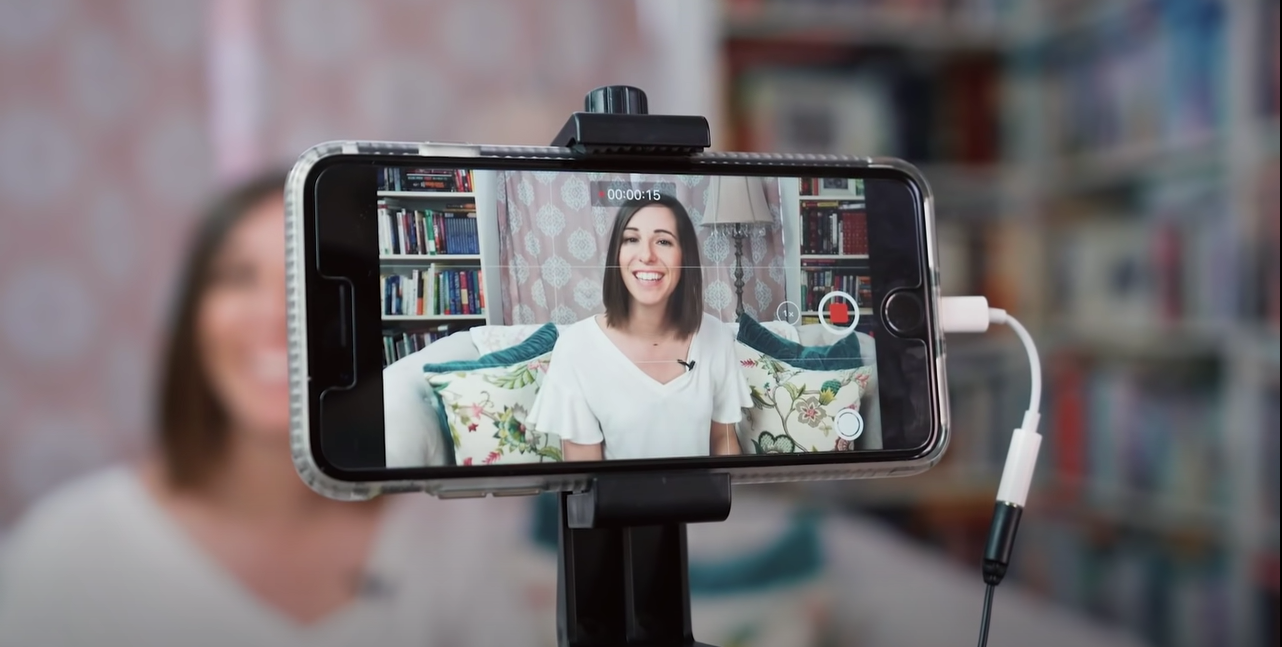
We know that this might alarm you because well, you can’t see yourself! But do a test shot; sit down and record yourself saying something. This way, you can catch your audio and check its clarity as well as ensure that your background is aesthetically how you want it to be.
Power tip: If you still do choose to use the selfie camera, avoid this common mistake: do your best to look into the camera lens while shooting, not at yourself.
This way, you’ll be making eye contact with the viewer.
Step 4: Select the video settings on your smartphone before you start to shoot
Most cameras on phones do have the option of using a quality 1080p, which is great — but if you can do 4k, choose 4k.
Now you’re all set to deliver your content!
Step 5: Deliver your content
Your moment to shine is here! Congratulations! You now know everything you need on how to make a YouTube video on your phone.
(4) Planning Your Shoots
A lot of careful planning goes into planning a shoot to create a successful YouTube video. Way before the camera starts rolling, you need to plan some basics first.
Here’s how you go about planning your shoots:
(A) Scripting and storyboarding
A script ensures that you deliver your message correctly, and in order so that it’s easier to edit it later. It also means you don’t have to memorise everything you have to say, and can still convey your message efficiently.
Here’s a popular video framework you can use: the H.I.C.C. formula.

The abbreviation stands for:
- Hook
How do you catch and keep a viewer’s attention?
Here are some tips and formats you can use to frame it right:
-A summary of what they will learn
-A catchy headline
-A striking visual
-A teaser
- Introduction
Introduce the topic; keep it brief and insightful.
- Content
This is the actual topic of your video, where you will expand upon the body of your content.
- Call to action
Suggest to your viewers that they engage with you with likes, comments, subscriptions or watch another video / follow you on social media
For example, let’s take Ethan Chlebowski’s well-segmented video on ‘How to Make Proper Hoagie Rolls at Home’. He crisply uses the HICC formula to explain his process.
In the hook, Ethan engages the viewers immediately by showing the completed recipe and points out how there’s very less online content related to it.
In the introduction part, he introduces himself, explains what he’s making, and highlights that he is going to share better ways to cook with the viewers.
Content — in this part, he explains all the ingredients, mentions the special ingredients and their brands, techniques, and expands on the recipe itself.
At the very end of the video, there are call-to-actions asking viewers to subscribe, check out his website, and the Instagram handle.
We can see exactly how effective the HICC formula is, in this example, we have outlined.
A storyboard, on the other hand, is nothing but a combination of the script and corresponding visuals for each scene. Here’s a simple storyboard template we have put together that you can use.
(B) Finding the right location
Unless you’re filming in a studio, you’re going to want to figure this out beforehand.
Scout out a few locations and do a recce with your team. Figure out whether you need permissions to shoot, and whether there are certain hours the spot is inaccessible.
Make sure you include travel and equipment transportation costs as well as account for the chance of unpredictable weather.
Power tip: Regardless of whether you are shooting in a studio or on location, visit the location on the day before the shoot to get a sense of the space.
This way, you can even do some test shots in terms of your planned frames or lighting.
(C) Make a shot list and a production schedule
What scenes are you filming, and at what time?
A shot list is the shot-by-shot breakdown of each scene; it includes specific details of each shot and is an essential step in pre-production planning, especially if there are a lot of variables.
A basic shot list should include:
- Scene number
- Shot number
- Location (indoors or outdoors)
- Shot description
- Camera angle, framing, and camera movement
- Action/dialogue
- Subjects/ actors in the scene
- Props needed
- Description of the shot and extra notes
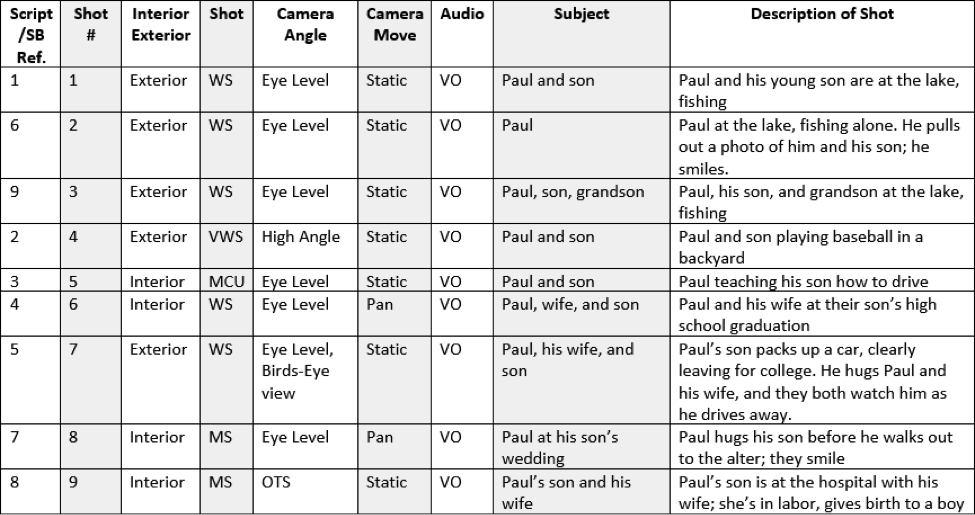
Here’s a Shot List template you can download and use for your own video.
Now that your other fundamentals are planned, you need to plan your production or shooting schedule. This is a crucial tool in managing the expectations of your cast and crew with respect to the time needed.
Your video production schedule should include:
- Location
- Scene/shot
- Equipment
- People needed
- Contact info
- Date and time
This document should be updated regularly and shared with the entire team. Here’s a look at a sample production schedule:
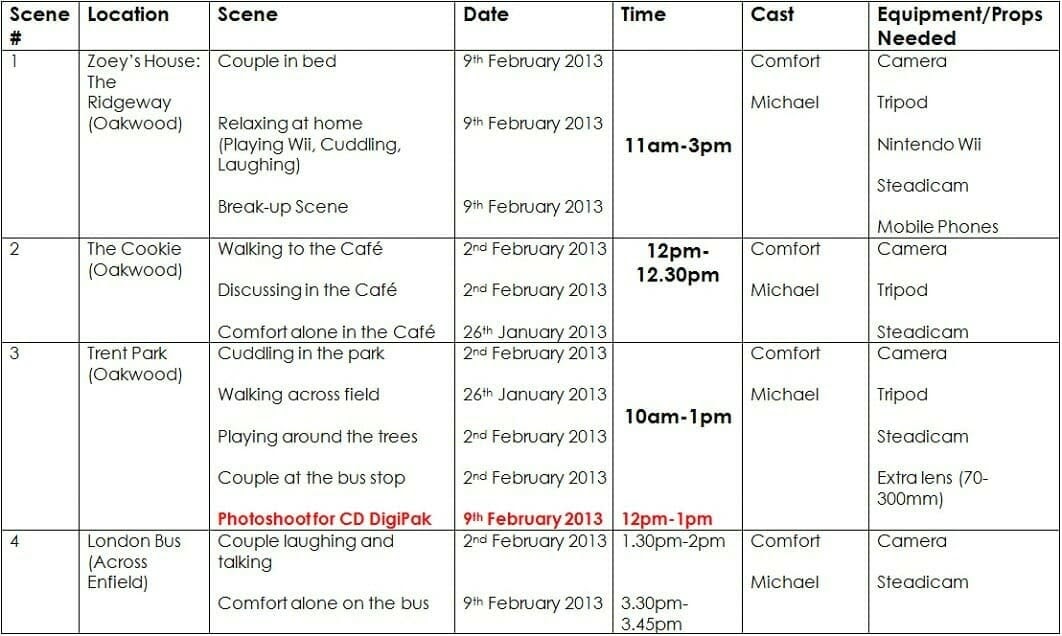
Source: Valoso
Here’s a Production Schedule template you can download and use for your own video.
(5) Recording Your Video
Now that we’ve covered the pre-production phase, it’s time to get the camera rolling. Here are a few tips to keep in mind when you start shooting:
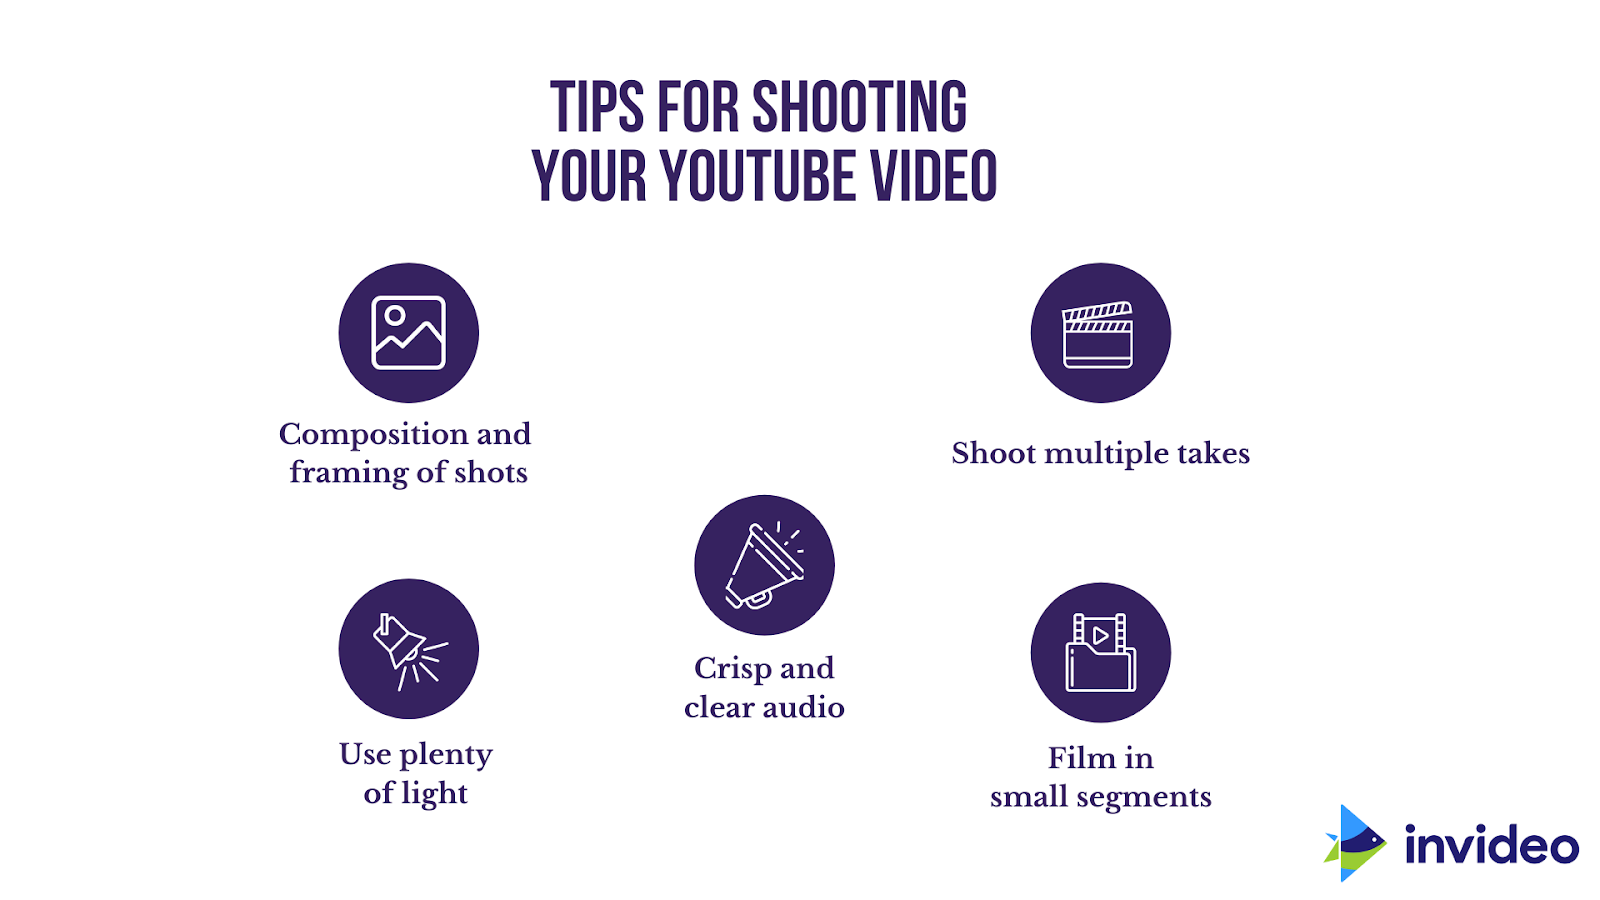
(A) Composition and Framing of Shots
How you compose your frame is a massive part of how you tell your story! The frame composition combines all the elements of the shots, including its lighting, actions, and dialogue, to portray the story and evoke emotion.
The three main types of shots used in YouTube videos are:
- Wide-angle shots — these add context to the shot by emphasising on the location or background of the video.
- Medium shots —these are great for connecting one part of your footage to another.
- Close-up shots — these are useful for emphasising certain elements you want to highlight and clearly communicate a point
Here’s a video that will take you through the basic camera angles:
We’ve put together a few tips to best film these shots from expert filmmakers. Here’s what they suggest:
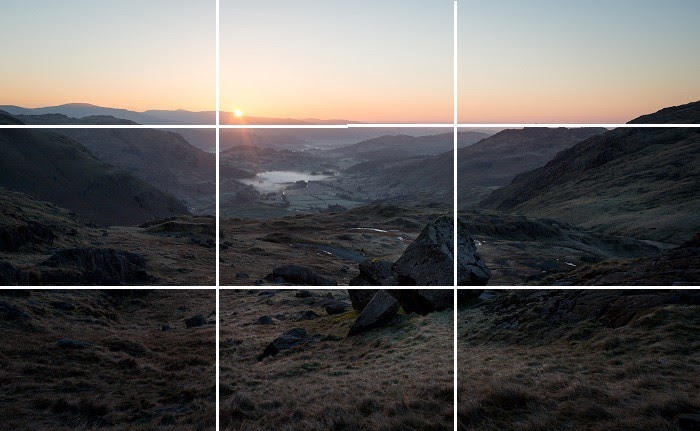
- Use the Rule of Thirds
This means dividing your frame into thirds both vertically and horizontally and putting your subject on one of the intersections. This helps balance your image for an interesting composition.
- Create Depth in the Frame
Set the focus off-center in the shot, and away from the background. This will create depth in the frame.
Using different lens focuses and positioning objects at different lengths from the camera will make the scene look bigger and make for a more interesting frame.
- Observe the Location
This is something that you should ideally start doing in the pre-production phase when you go location scouting. By observing the location carefully and pinpointing what you want to highlight, you ensure your shot has sound aesthetics which are in line with your content.
(B) Plenty of Light
Even if your video is great in every other way, if your lighting is too dark, too bright, or looks amateurish, it’s going to put viewers off; so don’t depend on just “fixing it in post”.
Lighting makes a big difference to the quality of your YouTube video, so prioritise your planning lighting during pre-production and executing it properly when you’re filming.
Here’s a breakdown of the types of lighting, their respective sources, advantages, and disadvantages:
|
Type of Lighting |
Source |
Advantages |
Disadvantages |
|
Natural Lighting |
Outdoors (the sky, the sun, or the moon) and can be used with diffusers and reflectors |
|
|
|
Artificial Lighting |
Usually indoors (Direct lighting from electric bulbs) |
|
|
Power tip: Regardless of where you’re shooting, make sure that your primary light source is even and consistent.
If you are using natural lighting —
- Try and film in the morning or evening, when the light is flattering, and not as harsh as it is midday.
- You can use diffusers and reflectors to soften the lighting and shadows.
- If you do have to shoot midday, try and choose a day when it is cloudy or find an area with shade.
If you are using artificial lighting —
- Avoid ‘spotlighting’ your subject in direct pools of light. Avoid overhead lighting as well as it causes unflattering shadows.
- Using little or no shadows is best for marketing videos, and it creates a more open and approachable vibe.
- Below, you’ll find a few techniques which can be used to achieve specific effects. For marketing videos, we suggest you go with the far-right option.
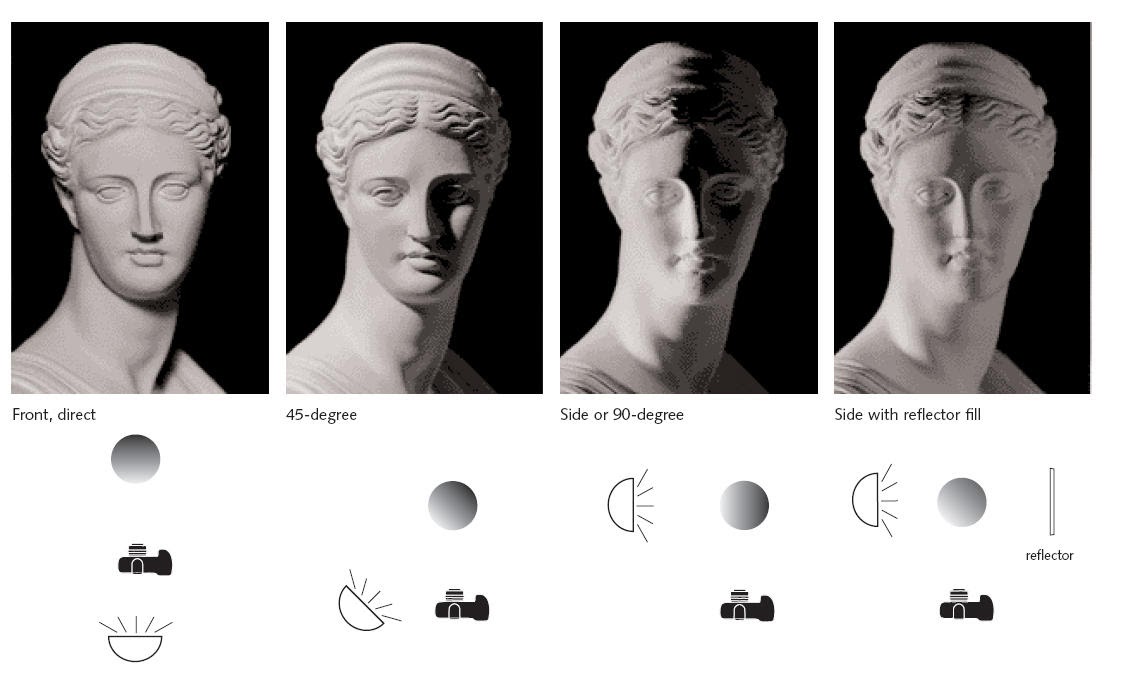
Source: Wordstream
- Here’s a YouTube Creator Academy video on effective lighting for a high-quality video:
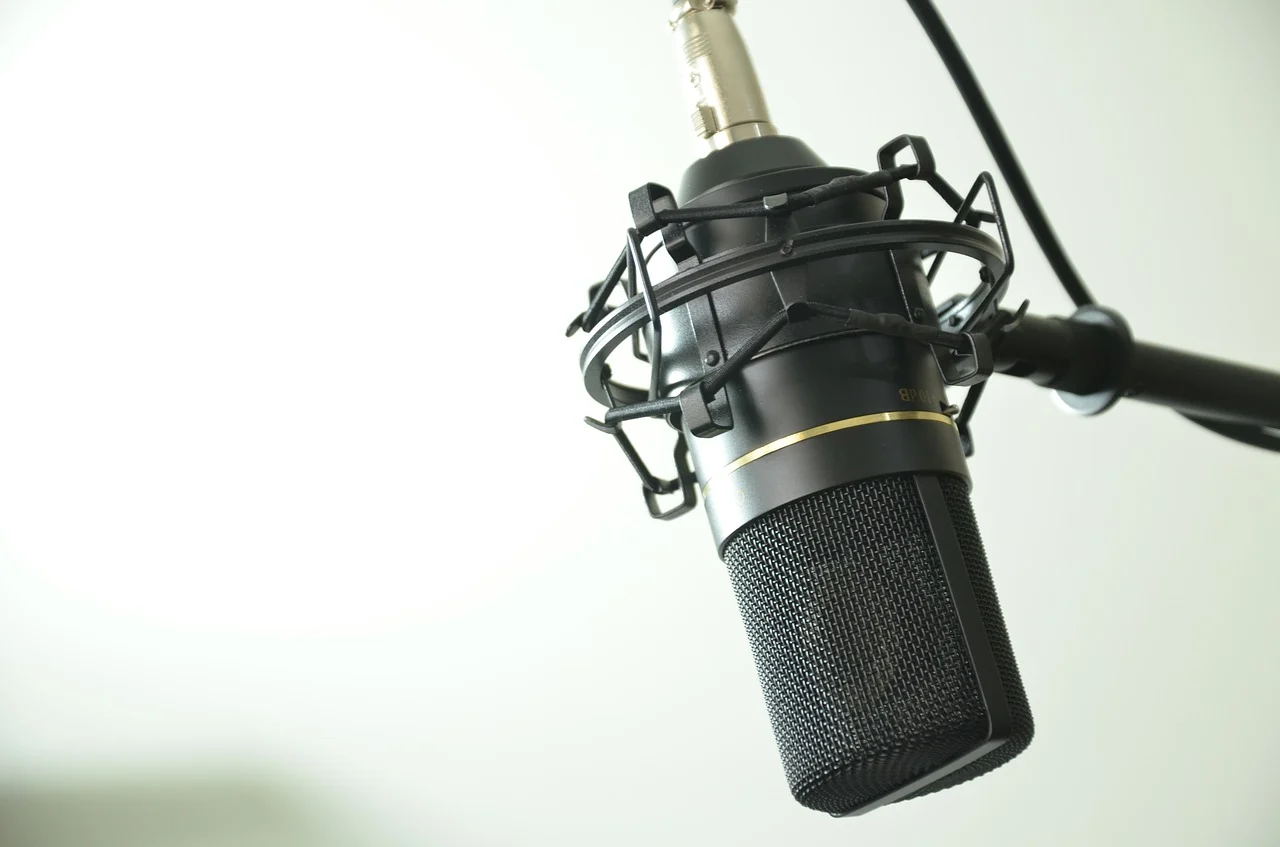
(C) Crisp and Clear Audio
One of the easiest ways to lose viewers by having them hit the ‘back’ button? Low-quality audio.
Again, don’t depend on fixing everything in post-production; here are some pre-emptive steps you can take for crisp and clear audio output that can take your video to the next level:
Avoid Using your Camera Mic
Make Sure You Invest in a Good Microphone
We understand that YouTubers you are just starting out might not be able to invest a lot in equipment right away.
So we’ve done the legwork here, and put together a few budget options:
(i) The Fifine condenser K669B USB microphone at under $40. We suggest you pair this mic mount with it for stability.
(ii) The SGC-598 Photography Interview Shotgun MIC Microphone for Nikon Canon DSLR Camera for under $40.
(iii) The compact and easy-to-use Blue Yeti USB Microphone for under $150.
(iv) The handy and portable Zoom H1n Digital Recorder for under $150.
Source: Pixabay
-
Check the Acoustics of the Shoot Location
Before the camera starts rolling, check the acoustics of the location. Check if there is an echo; and if there is, try and shoot somewhere else. Be aware of any background noise that your microphone might be picking up, too.
A lot of audio issues can indeed be fixed in post-production, but they can be difficult to get rid of completely.
So make sure you bear the acoustics of your location in mind when you’re scouting for places, regardless of whether they are indoors or outdoors. It will save a lot of time and effort later.
-
Position your Audio Equipment Properly
Make sure you put your microphone as close to the subject as possible so that your audio is crisp and clear. Consider using a pop filter to get rid of crackles and blips on the recording.
(D) Film in Small Segments
Segmenting your script into smaller takes will make your job much easier both while shooting, as well as during editing. It also lends a certain level of flexibility to post-production with easy-to-use clips.
-
Shoot Multiple Takes
Even the best of filmmakers mess up sometimes, so make sure you take multiple takes of each scene to give yourself more shot options in the editing process. Even if your first take seems to have gone perfectly, get another one, just in case.
-
Shoot from a Variety of Angles
Try and get shots from a variety of angles so you can choose the shots you think work best in the post-production phase.
-
Shoot B-roll Footage
B Roll or background footage is a great way to make your video more interesting and add a variety of visuals. If you plan when you’re going to use B rolls in advance, you’ll be doing yourself a favour by saving a lot of time later on.
(6) How To Edit A YouTube Video
If you’re looking to create videos of up to 15 mins, the easiest option at your disposal is InVideo — a one-stop shop for video creators. It comes with:
– 4000+ pre-built templates that you can readily use or you can start with a blank canvas.
– An in-built media library of 8M+ royalty-free video clips, images, and music from premium sources like iStock and Shutterstock.
– A super intuitive and easy to use video editor that’ll allow you to edit your videos in mins even if you’ve never edited a video before
– 24*7 live chat support so you can always ask for help
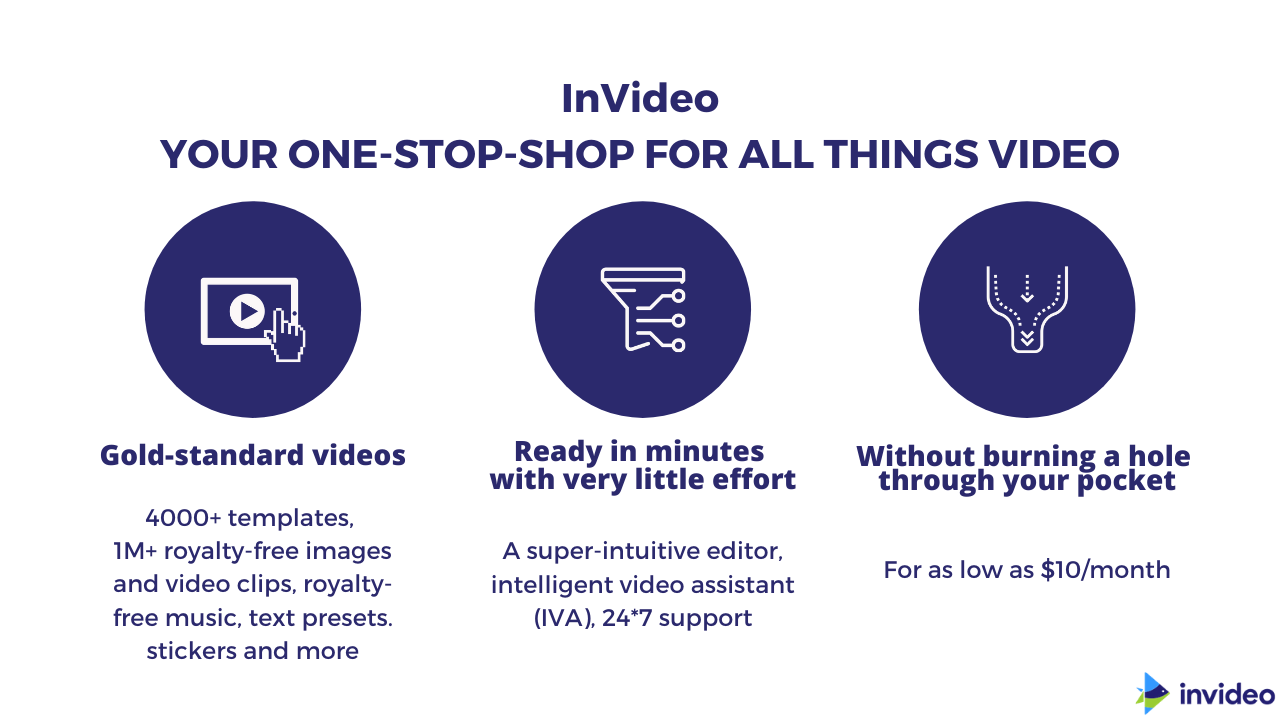
The best part — it’s completely free for you to start with and you can create as many videos as you’d like with your own brand logo/watermark and export them in 720p. And If you’d like to get your videos out in 1080p, as well as get access to the premium media library, it’ll just set you back by $20/month or $120/year.
If you want to know more about how to use InVideo and get started today, check out this tutorial.
If you are looking to create videos that are longer such as vlogs, you’d be much better off using a traditional editor like Adobe Premiere Pro. Here’s a tutorial that’ll help you get started on the basics of Premiere Pro.
(7) Uploading Your Video to YouTube
You can either upload a YouTube video from your web browser on your desktop/laptop, or from the YouTube app on your Android/iOS device.
You can follow the simple steps in this article to get upload your video and running on YouTube.
(8) Optimising for YouTube SEO
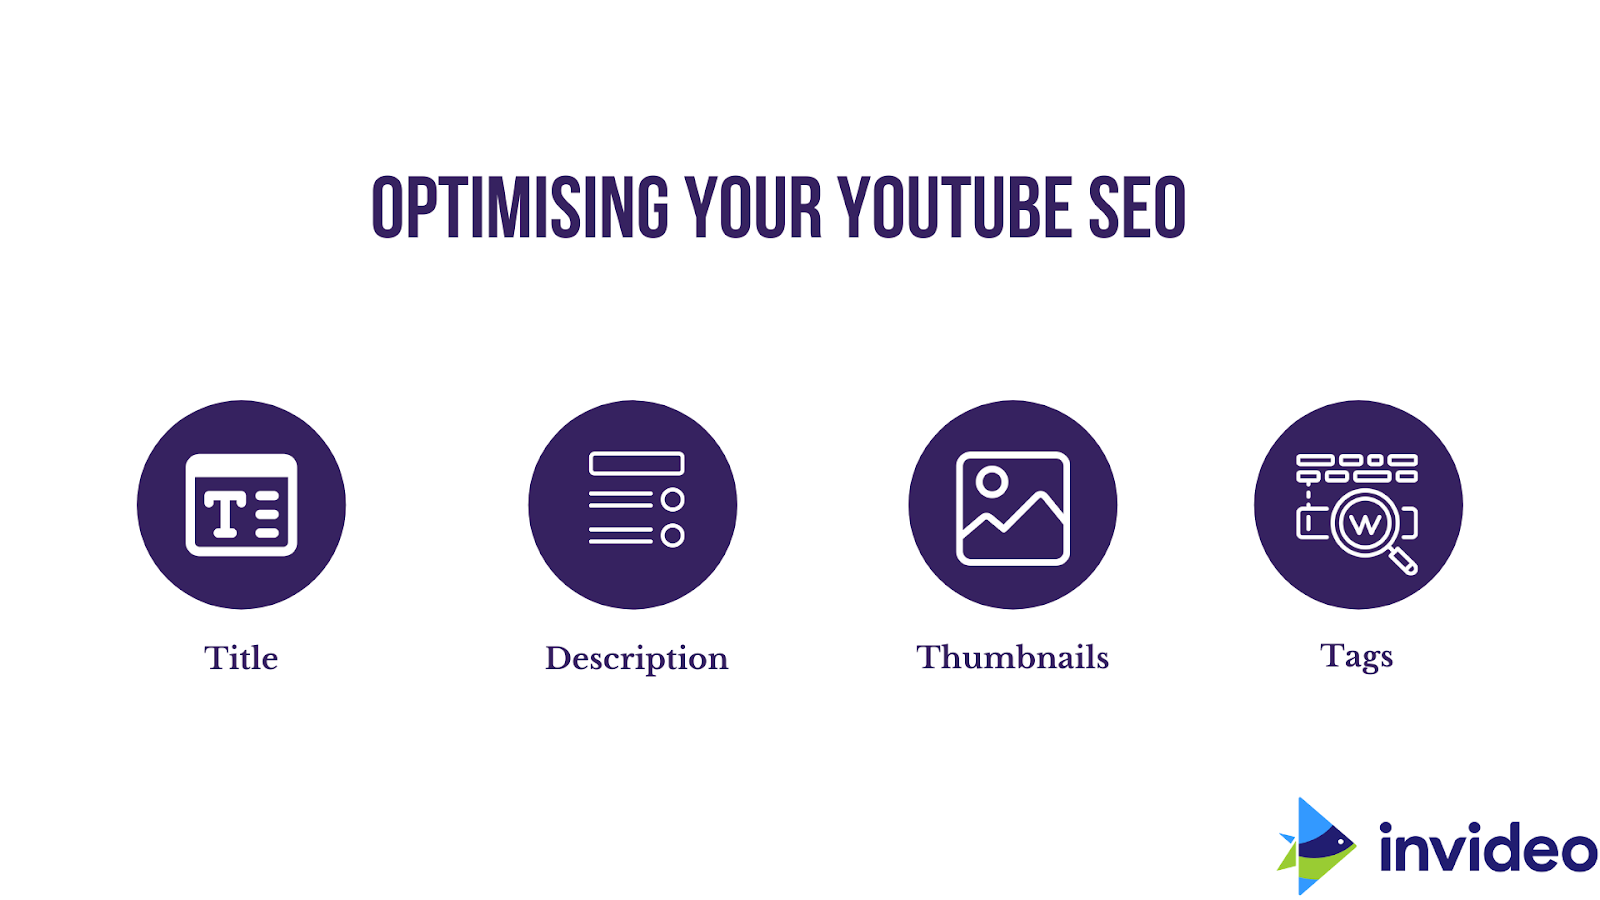
Here are the best YouTube SEO practices that you can follow to work with the YouTube algorithm and generate more views and subscribers for your channel:
(A) Title
Here are a few steps to craft searchable and clickable video titles, according to YouTube:
SEO Tip 1: Keep your titles under 60 characters
YouTube suggests that you keep your titles concise and that you front-load the most important information. Titles of a certain character limit also ensure that your title isn’t cut off.
Why is this a benchmark practice? A title that’s truncated or cut off would lead to your intended audience simply scrolling past the video after just reading the part of the title that’s visible on their feed.
Power tip: If there’s absolutely no way to shorten your titles to anything less than 70 characters, ensure that the most interesting or compelling part of your title fits in the bit that’s visible; the part that is shortened should be essentially harmless to your SEO appeal.
You’ll see what we mean in the video below:
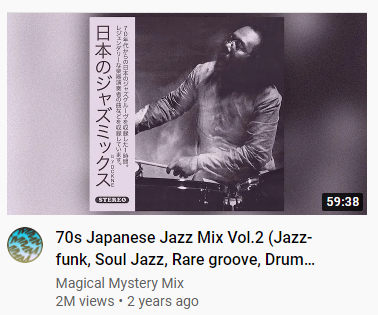
You would ideally still go for this video since the compelling aspect of the video (i.e the genres of music that are included) is made amply clear to the user.
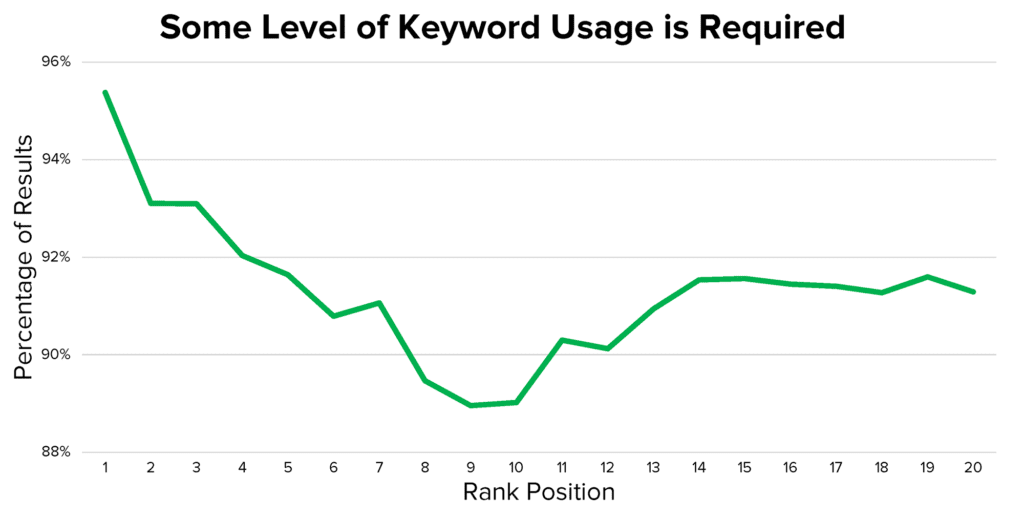
SEO Tip 2: Use your keyword in the title
YouTube’s advice to do with keywords is to use the most relevant search terms in your titles and descriptions— provided they’re accurate.
Briggsby’s study confirms the benefit of having your target keyword in your title; it found that more than 90% of top-ranking videos at least partially include a target keyword in their title.
SEO Tip 3: Write catchy titles that highlight a benefit
If you were to create a tutorial on origami, a keyword-rich title might be, “how to fold paper for dummies.” But that’s boring, isn’t it?
There are better approaches you could take that evoke curiosity:
- How to make origami with recycled paper
- How to make origami birds with high speeds
- My 6‑year-old niece teaches you how to make an origami bird
The point is that titles that directly offer the viewers the benefits that they can get from watching the video are more likely to stand out in a competitive landscape.
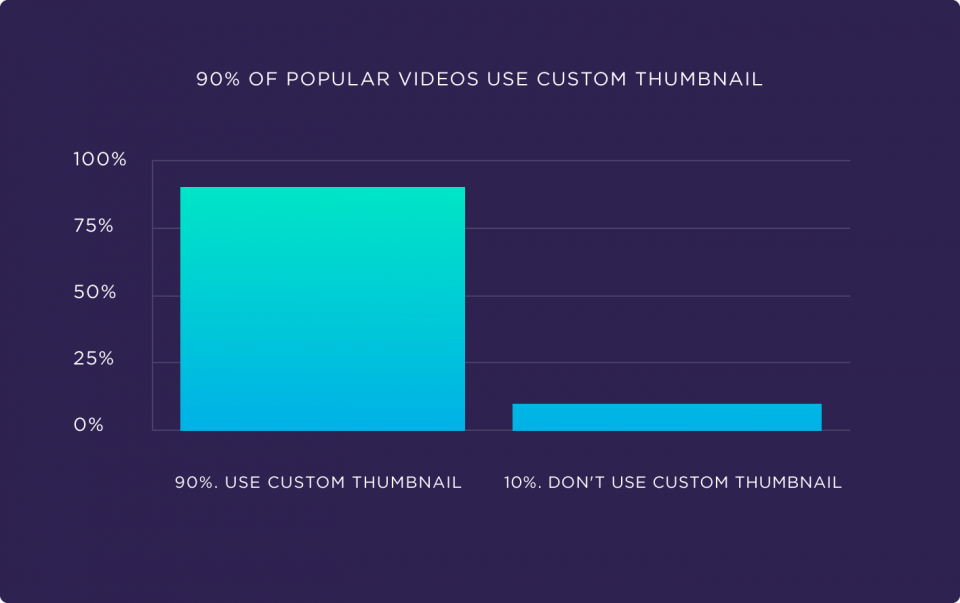
SEO Tip 4: Create a thumbnail that complements your title
Thumbnails are usually the first thing the viewer looks at before clicking through to a video. If you ask us, this is the hardest bit to get right consistently.
More on this coming up shortly in the next few subsections, but this is a great opportunity to get creative.
You can use your imagination and speak power to the truth. Here’s a thumbnail from a video, “How long does it take to rank on Google:”

And if you’re stuck, try and get ideas from Google images or stock photos. A search on Adobe Stock for the word, “system,” shows these photos.
SEO Tip 5: Use Title Ideas That Work
There are certain tried-and-tested key title styles which you can use as a content creator that can help your video go viral.
Some of the most-used title styles are:
- The ‘Vs.’ Title
A comparison of two or more products, ideas, etc. Some examples of this type of video include: iPhone 11 Vs. iPhone 12, Canon Vs. Sony and Trump’s immigration policy Vs. Biden’s immigration policy.
- ‘How to’ Titles
Almost 65% of people on Youtube last year used it to search for solutions. The ‘How to’ titles can be used for any of the videos that helps people find solutions — such as ‘how to change a tyre’ and ‘how to make cream cheese’.
- Mistakes Title Formula
‘Mistakes to avoid’ videos are among the most popular on Youtube; examples include ‘5 mistakes people make while tying a tie’, ‘5 mistakes to avoid while changing a tyre’, and ‘Mistakes to avoid while making cream cheese’.
The most successful YouTube content creators use a combination of the most popular title formulae to ensure that their videos continue to get views and appear in searches long after they have been uploaded.
(B) Description
Now that you have your title for the video, let us explore some of the best practices around crafting your YouTube video descriptions.
-
Find related keywords
You can do this via TubeBuddy’s Chrome extension. Here’s how:
-
Use a keyword research tool
You can use an external tool like Ahrefs as well. Here’s how:
Coming up next — we have thumbnails!
(C) Thumbnail
Think of thumbnails as your digital billboard for your video — they are the first thing viewers will notice and need to convey key information about the video to get more views on YouTube.
Let’s cut to the fundamentals of optimising your video thumbnails to increase YouTube views:
- Specifications: 1280 x 720 pixels
- Aspect Ratio: 16:9 ratio
- Format: .JPG, .GIF, .BMP, or .PNG.
- Size: Under 2MB limit
Here are a few best practices you can follow to grow your YouTube channel:
1. Use a hi-resolution, professionally edited image for the thumbnail that’s clear and eye-catching — don’t settle just for a still from the video itself. Trust us — this is not worth skimping on!
Consider increasing the brightness, saturation, and contrast of the image to make it stand out amongst other thumbnails, and make sure you zoom in and out of it to make sure it looks good in all sizes.
Coming to the colours you can use to make your thumbnail pop…
2. Use BOGY thumbnails
BOGY thumbnails use these colours:
- Blue
- Orange
- Green
- Yellow
As you know, YouTube’s colours are red, black, and white. So what happens when you use the same three colours in your video thumbnails?

Source: Backlinko
You got it: they blend right in! Notice how your eye just glides over the image?
On the other hand, when you use BOGY colours:
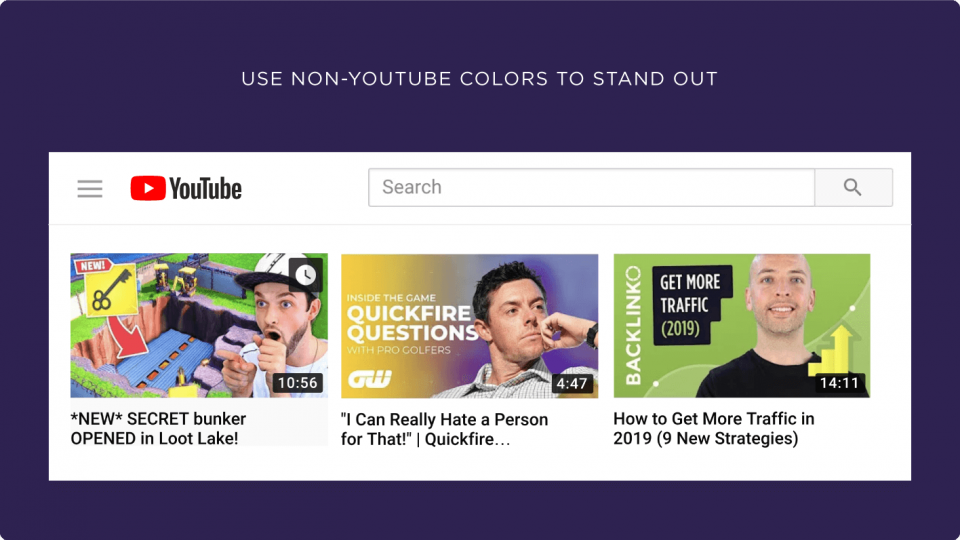
Source: Backlinko
It’s easy to see why viewers or potential viewers would be more likely to click on these, right?
Here’s another example:
The Bright Side Channel — which boasts on 30 million subscribers — mostly uses blue, orange, yellow, and purple in their thumbnails.
Of course, you can use red, black, and white occasionally; just make sure BOGY thumbnails dominate your feed for the most part!
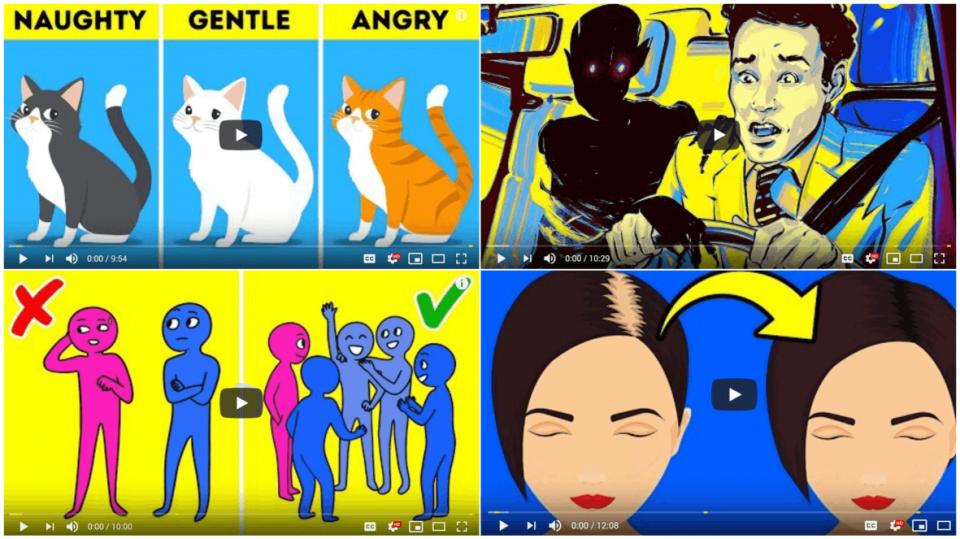
3. The Human Element
Thumbnails that clearly show people’s faces receive a higher click-through rate on average than those that do not.
Try to feature a human face in your thumbnails, and make sure they are big enough and clear enough to convey a story or emotion.
This brings us to the 3E’s —
Eyes
Make sure you are making eye contact with the camera/ By making that virtual eye contact with your audience, you’ll be best placed to catch their eye and get their attention.
Emotions
For someone scrolling through a feed, something that shows or even evokes emotion is the one that makes them stop scrolling.

Your expressions need to be loud, the other visuals should be kept simple with minimum content on the thumbnail (not more than 2-3 words, ideally).
Excitement
If you look excited in your thumbnail, it’s more likely that you will evoke excitement in your viewer!
Don’t be afraid to get whacky with your expressions — in fact, it’s an inside joke that that’s exactly what successful YouTubers do to stand out.
4. Choose Your Font Carefully
If you’re using a font for the text, make sure it’s clear and easy to read, even from afar. It’s also worth checking whether the style of the font matches with the query you’re trying to address in the video.
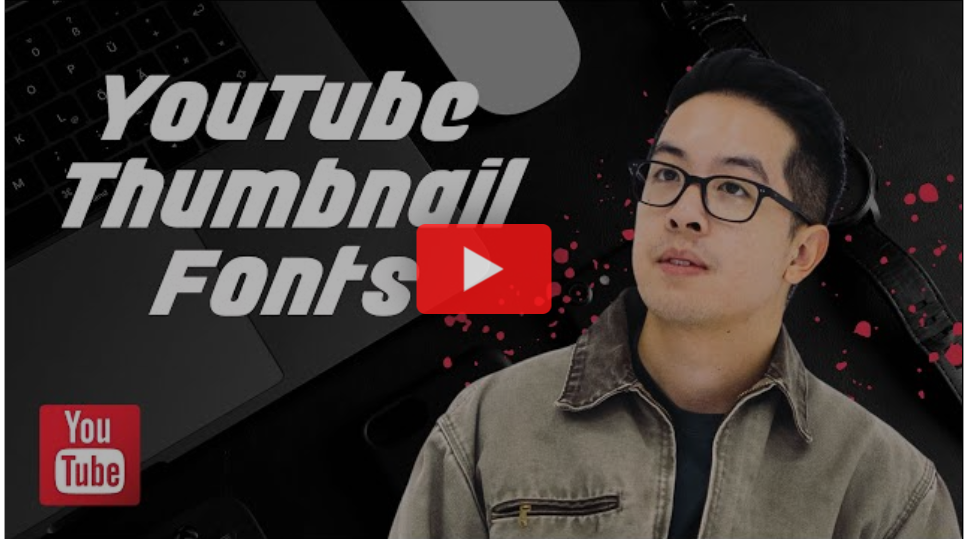
You can use Snappa to access a library of YouTube fonts for free and create great thumbnails with pre-designed templates!
Try not to put more than 2-3 words in the thumbnail — this content should function as the perfect teaser to draw the audience in.
Power tip — address the community that is your target audience. For example, if you’re making it for new mothers, use ‘new moms’ in the text in the thumbnail. Nick Nimmin, for instance, oftens refers to his viewer as ‘YouTubers’ — it’s a smart way to both identify and reach out to your audience.
Lastly, remember to keep it simple and don’t stress about it too much!
To create quick and easy thumbnails without using complicated applications like photoshop, you can use the thumbnail generator on TubeBuddy or VidiQ. Their thumbnail generators let you choose a still from the video or upload an image, to which you can add text, your logo, and other images.
(D) Tags
The only thing that is left now for us to cover to do with optimisation is adding relevant tags which include keywords to your video while uploading. Tags let people discover your content on YouTube; they are the best way to let search engines know what your content provides, so it can match it to the viewer’s expectations.
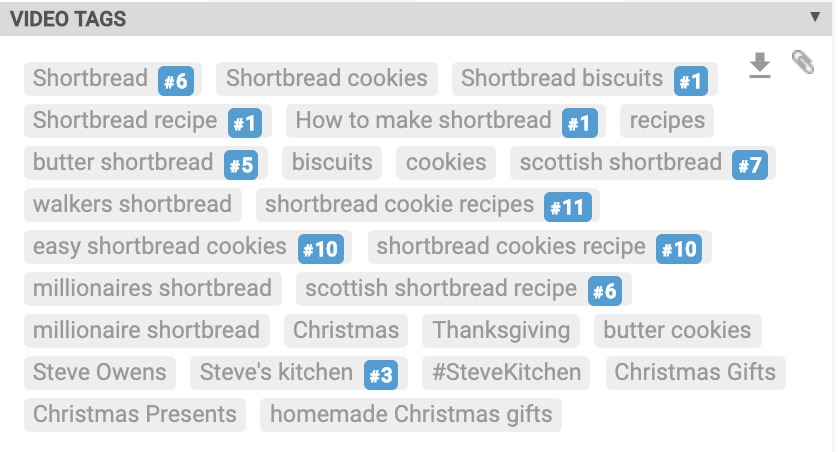
Source: ahrefs
While YouTube does not have its keyword search tool, there are many third-party tools like VIDIQ, TubeBuddy, Ahrefs Keyword Explorer that can help you identify the right tags and keywords for your video. You can also make a note of relevant tags that you come across while searching for keywords to add to your title.
You can use the same keywords you found out for the description as tags.
Congratulations! You have now learnt how to make a YouTube video as well as how to upload and optimise it. It’s now time to put the word out about it.
(9) Promoting Your YouTube Videos
After having optimised the title, thumbnail, and description to boost views for your video, you need to amplify your video’s discoverability.
Here are ten ways to promote your videos outside the platform:

(A) Add Transcripts Or Closed Captions
YouTube does have an option to generate automatic captions but they are not generally very accurate. However, you can upload your own transcript.
Here’s how to add subtitles to YouTube videos:
Remember we mentioned YouTube Studio is a great way to generate traffic?
YouTube SEO gurus often advise that closed captions work best for boosting your video’s SEO rankings and traffic as they are crawlable by search engines. They also help make your videos more accessible,
(B) Add Cards
YouTube cards are interactive elements that you can place during or at the end of your YouTube video. These cards appear as a notification on the top right-hand corner of the screen while your video is streaming.

You can place these cards to appear at any given point in time during the video. When your audience clicks on the card, it will expand on the video’s right-hand side to showcase links to other videos, webpages, or playlists.
The card will disappear after a few seconds if the user does not click on it. These interactive cards work on both computers and mobile devices and are used to redirect your viewer to other content on your channel or an associated channel, call out to subscribe, or even conduct a poll. You can have up to 5 cards per video and there are a variety of card types like merchandise, fundraising, video, etc.
Check out this article to find out the exact steps you can follow to add YouTube cards for your videos.
(C) Add An End Screen
End screens are used to direct viewers to more content on your channel by placing a clickable card at the end of your videos (usually the last 5-10 seconds). This not only increases your channel’s watch-time but is also known to be a great way to cash in on new subscribers.
End screens can be viewed on both the desktop and mobile and you can add up to four elements. You can direct viewers to another relevant video, a playlist, an associated channel, and even call out for a subscription to your channel.

We’ve done you a solid and put together all the guidelines for making a YouTube end screen right here:
|
Parameter |
Guideline |
|
Length |
25 Seconds |
|
Screen Dimension |
1280 x 720 |
|
End Screen Length |
5 – 20 Seconds |
|
Subscribe Button Dimension |
294 x 294 |
|
Video/Playlist Space |
615 x 345 |
|
Link Square |
294 x 294 |
|
Elements Per Screen |
4 Elements |
Here’s an article that is a one-stop-shop for all things to do with YouTube end screens.
(D) Create Playlists
A playlist is a set of videos that are organised by topic or theme and show up in the videos section of YouTube. It makes it easier for businesses to club relevant content together for easy consumption and it also makes it easier for viewers to find the right content for them on new channels.
Playlists are also a great way to increase watch-time because when you click on the playlist, it will automatically play the consecutive videos on the list. They also rank for SEO if you use the right keywords.

For example, if you made a video about speed reading. When tagged alone, this will only show up as a result of its keyword. However, if it is clubbed in a playlist called ‘Productivity Hacks’ it will rank for multiple keywords and will give YouTube a better understanding of your video.
You can follow these steps to create a playlist:
- Find a video you want in the playlist.
- Under the video, click Save.
- Select a playlist such as Watch later, or a playlist you’ve already created, or click Create a new playlist.
- If you create a playlist, enter a playlist name.
- Use the drop-down box to select your playlist’s privacy setting. If it’s private, only you can view the playlist.
- Click Create.
(E) Encourage Conversations In The Comments Sections
What is a better way to show YouTube that your audience is engaged than having them connect with you in the comments section?

If viewers are responding to the video with likes and comments, YouTube is more likely to promote it.
Here’s a simple trick to increase engagement and keep the conversation going. When you receive a comment saying “great stuff. Really helpful!”, don’t reply with a simple, conversation-killing thank you. Instead, engage in a conversation with the viewer. You can ask him what was the most useful insight he got from the video or if he would like to recommend a topic for the next video; this keeps the conversation going and increases engagement and ranking.
Pinned Comments are another way to interact with your viewer. You can redirect them to another video on your channel or ask them a question to drive engagement.
(F) Redirect Traffic From Other Channels
YouTube will prioritise content that gets views from other channels onto its channel. When it sees traffic coming from your social media pages, website, or other channels on the internet, it adds credibility to the video and increases engagement.
Here’s how you can redirect traffic from other channels to YouTube:
Step 1: Create Backlinks
In simple terms, backlinks are just links from a page on one website to another. If another website links to your video, then you have a backlink from them.
Backlinking can add to the credibility and value of your content in three ways:
- Rankings — The more links your videos have, the more likely they are to rank in search engines for relevant search queries.
- Discoverability — Since search engines find new content by revisiting pages to check for new links — especially the popular ones — they might discover your content faster if you get backlinks from popular pages.
To increase backlinks and add to your amplifying efforts, make sure you post on multiple platforms which can include your website, blog, Reddit, Quora, and even guest posting on other blogs that your video can add value to. The more backlinks you are able to create, the better your SEO for YouTube
Step 2: Promote On Social Media
You can leverage your community on social media as well as find many existing communities on social media sites like Facebook groups, Reddit, Twitter, and Instagram that match your interests. When people feel a sense of belonging, they engage with the content more; this results in getting more views on YouTube.
The reason YouTube rewards traffic from social media is simple — because you are bringing people from other social media platforms to YouTube.
Take time to interact with other members of the community, and make sure you write a simple 2-line description of why the fellow members might find that video interesting.
We understand that not everyone has 100K+ followers on Facebook or a verified Instagram, but there are ways to promote your YouTube videos even if you don’t have an audience yet.
(G) How to Promote Your YouTube Videos If You Don’t Have An Audience Yet

Step 1: Leverage communities on Quora and Reddit
The process is simple. Find a pre-existing thread where someone has asked a question or started a discussion most relevant to your video. Type in the best answer you can give and then link your YouTube video at the end to support your answer.

Step 2: Collaborate and interact with other YouTubers
Collaborating with other channels and creators regardless of the channel size can really be useful for putting yourself out there. If your content is on five other channels, that’s five other channels’ viewership that’s going to watch your content.
All you have to do is take that first step to reach out to other YouTubers that you want to collaborate with.
It’s also no secret that influencer marketing has been blowing up in recent times. The audiences that these influencers, with a large following, have are exposed to a brand’s content the minute they share them, making it possible for that content to even go viral — a content creator’s dream come true!
Just one share by the right influencer can change the game and generate a lot of views — Unamo Social Media is a great place to identify influencers within your sphere of interest and reach out to them to promote your YouTube content.
You can also pitch ideas to a brand, influencers, or a business that manufacturers ancillary products and create content with them to reach out to a larger audience.
Step 3: Pay for YouTube Ads
If you want to reach more people on YouTube, you can pay for it with YouTube ads. YouTube ads let you target keywords, interest and you can create custom audiences too.
Before you launch your ad campaign, it’s important to define the audience you want to reach. You have four main spheres of targeting options:
- Who. Try choosing specific or niche audiences based on demographics, language, and interests. For example, you could target 18-34-year-old female “cooking enthusiasts” who subscribe to food channels and watch culinary videos.
- What. It can help to select from topics that are most relevant to your channel. You can use contextual targeting to reach viewers searching for specific content. Or choose the video or channel on which you want your ads to be shown.
- Where. Define the location of your audience—country, region, city, or postal code. You can even define a custom location by radius or place of interest.
- When. Decide how often your ads are shown and on which devices. If you have a limited budget, you can pace the delivery of your ads throughout the day.
You should set up search ads based on your main keyword with the intent to get the paid viewers to subscribe to your channel. Your new subscribers will be notified every time you put up content, without having you pay for it again.
(H) Leverage YouTube’s Analytics
Nothing like creating relevant and high-quality content for your audience to make your YouTube channel grow faster.
To do this, it is essential to pay attention to YouTube’s analytics and identify what content resonates with your audience. The insights you can draw from studying the watch-time, CTRs, how many followers you gained per video, etc. can help you understand what kind of content works, and what doesn’t.
You can also go through the comments of your YouTube video where you will get insights into the need-gaps of your audience and how you can create content that brings them value and helps them.

Read our guide to understand YouTube metrics for beginners.
(I) Use the Right Tools to Create Valuable Content
As a content creator and YouTuber, you need to be in the know about tools so you can stay at the top of your game.
There are many third-party tools that have cropped up to help creators manoeuvre day-to-day tasks like creating thumbnails, finding keywords, and studying analytics. We’ve listed down some of the best tools we know of that are used by popular creators in the industry to help you get started today.
Youtube Essentials — The Complete Toolkit
(J) Repurpose Your YouTube Videos and Promote Them Across Social Media Channels
Get this: A single 10 minute YouTube video can produce at least 3 snackable videos, a promo, and a blog post, which can help you catch eyeballs across platforms and redirect them to the main video.
Most social media platforms let you share videos and some of them like Instagram and Twitter are now also becoming hotspots for viewing this form of content. You can also embed your video on your websites and drive traffic from online communities.
Many content creators aren’t aware of how to go about this process. What if we told you that — in just a matter of minutes — you could repurpose your YouTube video to create snackable videos and promos, without burning a hole in your pocket?

Use InVideo, the online video editing tool that is slowly becoming a favorite amongst marketers, to repurpose your YouTube video into clickable and easy-to-consume content for social media.
Here’s how:
-
Create Promos
Create a teaser or a sneak peek into your YouTube video that can be shared on social media as well as on your YouTube channel to create a buzz about an upcoming release.
Use this template to create your own video
-
Create Snackable Videos
Create simple and engaging snackable videos that are not only easy to consume — but also gives the viewer quick and actionable insights. You can also use these videos to pique the audience’s interest and redirect to watch the full video on YouTube.

Use this template to create your own video
-
Create Quote Videos
Choose an interesting quote from the video and turn it into an interactive video to share with your audience.

Use this template for your video
Conclusion
You’re all set to plan for, shoot and edit a high-quality YouTube video! Plus now you have all the actionable insights and information you need to promote it, as well.
We’d love to help you with your questions, so drop them in the comments below. Also, if you did find this guide helpful, please feel free to share them with your friends who are also looking to create YouTube videos.